版本记录
| 版本号 | 时间 |
|---|---|
| V1.0 | 2018.10.01 星期一 |
前言
AVFoundation框架是ios中很重要的框架,所有与视频音频相关的软硬件控制都在这个框架里面,接下来这几篇就主要对这个框架进行介绍和讲解。感兴趣的可以看我上几篇。
1. AVFoundation框架解析(一)—— 基本概览
2. AVFoundation框架解析(二)—— 实现视频预览录制保存到相册
3. AVFoundation框架解析(三)—— 几个关键问题之关于框架的深度概括
4. AVFoundation框架解析(四)—— 几个关键问题之AVFoundation探索(一)
5. AVFoundation框架解析(五)—— 几个关键问题之AVFoundation探索(二)
6. AVFoundation框架解析(六)—— 视频音频的合成(一)
7. AVFoundation框架解析(七)—— 视频组合和音频混合调试
8. AVFoundation框架解析(八)—— 优化用户的播放体验
9. AVFoundation框架解析(九)—— AVFoundation的变化(一)
10. AVFoundation框架解析(十)—— AVFoundation的变化(二)
11. AVFoundation框架解析(十一)—— AVFoundation的变化(三)
12. AVFoundation框架解析(十二)—— AVFoundation的变化(四)
13. AVFoundation框架解析(十三)—— 构建基本播放应用程序
14. AVFoundation框架解析(十四)—— VAssetWriter和AVAssetReader的Timecode支持(一)
15. AVFoundation框架解析(十五)—— VAssetWriter和AVAssetReader的Timecode支持(二)
16. AVFoundation框架解析(十六)—— 一个简单示例之播放、录制以及混合视频(一)
17. AVFoundation框架解析(十七)—— 一个简单示例之播放、录制以及混合视频之源码及效果展示(二)
18. AVFoundation框架解析(十八)—— AVAudioEngine之基本概览(一)
19. AVFoundation框架解析(十九)—— AVAudioEngine之详细说明和一个简单示例(二)
20. AVFoundation框架解析(二十)—— AVAudioEngine之详细说明和一个简单示例源码(三)
21. AVFoundation框架解析(二十一)—— 一个简单的视频流预览和播放示例之解析(一)
工程架构
首先我们看一下工程架构。
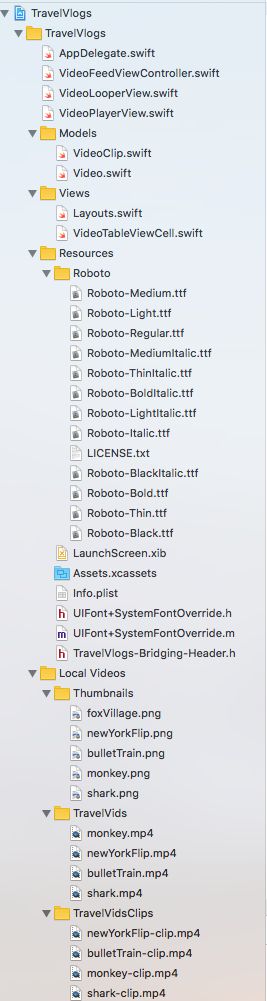
大家可以看到,工程里面除了逻辑实现的代码文件,很多的视频本地资源还有字体文件等。
源码
下面我们就一起看一下源码。
1. AppDelegate.swift
import UIKit
import AVFoundation

@UIApplicationMain
class AppDelegate: UIResponder, UIApplicationDelegate {

  var window: UIWindow?

  func application(_ application: UIApplication, didFinishLaunchingWithOptions launchOptions: [UIApplicationLaunchOptionsKey: Any]?) -> Bool {
    window = UIWindow(frame: UIScreen.main.bounds)

    // Allow other apps to play sound also
    try? AVAudioSession.sharedInstance().setCategory(AVAudioSessionCategoryAmbient,
                                                     mode: AVAudioSessionModeMoviePlayback,
                                                     options: [.mixWithOthers])

    let feed = VideoFeedViewController()
    feed.videos = Video.allVideos()
    feed.title = "Travel Vlogs"

    let nav = UINavigationController(rootViewController: feed)
    nav.navigationBar.titleTextAttributes = [NSAttributedStringKey.foregroundColor: UIColor.red,
                                             NSAttributedStringKey.font: UIFont(name: "Roboto-Bold", size: 21)!]


    window?.rootViewController = nav
    window?.makeKeyAndVisible()

    return true
  }
}
2. VideoFeedViewController.swift
import UIKit

//1 First, add the AVKit import
import AVKit

class VideoFeedViewController: UIViewController {
  var videos: [Video] = []

  let VideoCellReuseIdentifier = "VideoCell"
  let tableView = UITableView()

  //? Add the video looper view
  let videoPreviewLooper = VideoLooperView(clips: VideoClip.allClips())

  override func viewWillAppear(_ animated: Bool) {
    super.viewWillAppear(animated)

    //? Start the looping video player when the view appears
    videoPreviewLooper.play()
  }

  override func viewWillDisappear(_ animated: Bool) {
    super.viewWillDisappear(animated)

    //? Make sure it's paused when the user leaves this screen
    videoPreviewLooper.pause()
  }
}

extension VideoFeedViewController: UITableViewDelegate {
  func tableView(_ tableView: UITableView, cellForRowAt indexPath: IndexPath) -> UITableViewCell {
    guard let cell = tableView.dequeueReusableCell(withIdentifier: VideoCellReuseIdentifier, for: indexPath) as? VideoTableViewCell else {
      return VideoTableViewCell()
    }
    cell.video = videos[indexPath.row]
    return cell
  }

  func tableView(_ tableView: UITableView, heightForRowAt indexPath: IndexPath) -> CGFloat {
    let video = videos[indexPath.row]
    return VideoTableViewCell.height(for: video)
  }

func tableView(_ tableView: UITableView, didSelectRowAt indexPath: IndexPath) {
    //2 Create an AVPlayerViewController and present it when the user taps
    let video = videos[indexPath.row]

    let videoURL = video.url
    let player = AVPlayer(url: videoURL)
    let playerViewController = AVPlayerViewController()
    playerViewController.player = player

    present(playerViewController, animated: true) {
      player.play()
    }
  }
}

extension VideoFeedViewController: UITableViewDataSource {
  func tableView(_ tableView: UITableView, numberOfRowsInSection section: Int) -> Int {
    return videos.count
  }

  func numberOfSections(in tableView: UITableView) -> Int {
    return 1
  }
}
3. VideoLooperView.swift
import UIKit
import AVFoundation

class VideoLooperView: UIView {
  let clips: [VideoClip]
  let videoPlayerView = VideoPlayerView()

  // 9 Add player
  @objc private let player = AVQueuePlayer()
  private var token: NSKeyValueObservation?

  init(clips: [VideoClip]) {
    self.clips = clips

    super.init(frame: .zero)

    // 10 Set up the player
    initializePlayer()
    addGestureRecognizers()
  }

  // 10 Set up player
  private func initializePlayer() {
    videoPlayerView.player = player

    addAllVideosToPlayer()

    player.volume = 0.0
    player.play()

    token = player.observe(\.currentItem) { [weak self] player, _ in
      if player.items().count == 1 {
        self?.addAllVideosToPlayer()
      }
    }
  }

  // 11 Create player items from video URLs and insert them into the player's list
  private func addAllVideosToPlayer() {
    for video in clips {
      let asset = AVURLAsset(url: video.url)
      let item = AVPlayerItem(asset: asset)
      player.insert(item, after: player.items().last)
    }
  }

  // 12 Add methods to pause and play when the view leaves the screen
  func pause() {
    player.pause()
  }

  func play() {
    player.play()
  }

  // MARK - Gestures

  // 13 Add single and double tap gestures to the video looper
  func addGestureRecognizers() {
    // 1
    let tap = UITapGestureRecognizer(target: self, action: #selector(VideoLooperView.wasTapped))
    let doubleTap = UITapGestureRecognizer(target: self,
                                           action: #selector(VideoLooperView.wasDoubleTapped))
    doubleTap.numberOfTapsRequired = 2

    // 2
    tap.require(toFail: doubleTap)

    // 3
    addGestureRecognizer(tap)
    addGestureRecognizer(doubleTap)
  }

  // 13a Single tapping should toggle the volume
  @objc func wasTapped() {
    player.volume = player.volume == 1.0 ? 0.0 : 1.0
  }

  // 13b Double tapping should toggle the rate between 2x and 1x
  @objc func wasDoubleTapped() {
    player.rate = player.rate == 1.0 ? 2.0 : 1.0
  }

  // MARK - Unnecessary Code

  required init?(coder aDecoder: NSCoder) {
    fatalError("init(coder:) has not been implemented")
  }
}
4. VideoPlayerView.swift
import UIKit

//4 Add the AVFoundation import so we can use AVPlayerLayer and AVPlayer
import AVFoundation

class VideoPlayerView: UIView {
  // 7 Add player property so the video the layer shows can be updated
  var player: AVPlayer? {
    get {
      return playerLayer.player
    }

    set {
      playerLayer.player = newValue
    }
  }

  // 5 Override the layerClass
  override class var layerClass: AnyClass {
    return AVPlayerLayer.self
  }

  // 6 Add accessor for playerLayer so you don't need to
  var playerLayer: AVPlayerLayer {
    return layer as! AVPlayerLayer
  }
}
5. VideoClip.swift
import UIKit

class VideoClip: NSObject {
  let url: URL

  init(url: URL) {
    self.url = url
    super.init()
  }

  class func allClips() -> [VideoClip] {
    var clips: [VideoClip] = []

//    // Add HLS Stream to the beginning of clip show
//    if let url = URL(string: "https://wolverine.raywenderlich.com/content/ios/tutorials/video_streaming/foxVillage.m3u8") {
//      let remoteVideo = VideoClip(url: url)
//      clips.append(remoteVideo)
//    }

    let names = ["newYorkFlip-clip", "bulletTrain-clip", "monkey-clip", "shark-clip"]
    for name in names {
      let urlPath = Bundle.main.path(forResource: name, ofType: "mp4")!
      let url = URL(fileURLWithPath: urlPath)

      let clip = VideoClip(url: url)
      clips.append(clip)
    }

    return clips
  }
}
6. Video.swift
import UIKit

class Video: NSObject {
  let url: URL
  let thumbURL: URL
  let title: String
  let subtitle: String

  init(url: URL, thumbURL: URL, title: String, subtitle: String) {
    self.url = url
    self.thumbURL = thumbURL
    self.title = title
    self.subtitle = subtitle
    super.init()
  }

  class func localVideos() -> [Video] {
    var videos: [Video] = []
    let names = ["newYorkFlip", "bulletTrain", "monkey", "shark"]
    let titles = ["New York Flip", "Bullet Train Adventure", "Monkey Village", "Robot Battles"]
    let subtitles = ["Can this guys really flip all of his bros? You'll never believe what happens!",
                     "Enjoying the soothing view of passing towns in Japan",
                     "Watch as a roving gang of monkeys terrorizes the top of this mountain!",
                     "Have you ever seen a robot shark try to eat another robot?"]

    for (index, name) in names.enumerated() {
      let urlPath = Bundle.main.path(forResource: name, ofType: "mp4")!
      let url = URL(fileURLWithPath: urlPath)
      let thumbURLPath = Bundle.main.path(forResource: name, ofType: "png")!
      let thumbURL = URL(fileURLWithPath: thumbURLPath)

      let video = Video(url: url, thumbURL: thumbURL, title: titles[index], subtitle: subtitles[index])
      videos.append(video)
    }
    return videos
  }

  class func allVideos() -> [Video] {
    var videos = localVideos()

    // Add one remote video
    let videoURLString = "https://wolverine.raywenderlich.com/content/ios/tutorials/video_streaming/foxVillage.m3u8"
    if let url = URL(string: videoURLString) {
      let thumbURLPath = Bundle.main.path(forResource: "foxVillage", ofType: "png")!
      let thumbURL = URL(fileURLWithPath: thumbURLPath)
      let remoteVideo = Video(url: url, thumbURL: thumbURL, title: "キツネ村", subtitle: "Will we be mauled by vicious foxes? Tune in to find out!")
      videos.append(remoteVideo)
    }

    return videos
  }
}
7. Layouts.swift
import UIKit

extension VideoFeedViewController {
  override func viewDidLoad() {
    super.viewDidLoad()

    loadViews()
  }

  func loadViews() {
    view.backgroundColor = .white

    tableView.register(VideoTableViewCell.classForCoder(), forCellReuseIdentifier: VideoCellReuseIdentifier)
    tableView.delegate = self
    tableView.dataSource = self

    view.addSubview(tableView)
    view.addSubview(videoPreviewLooper)
  }
  override func viewWillLayoutSubviews() {
    super.viewWillLayoutSubviews()

    tableView.frame = view.bounds

    videoPreviewLooper.frame = CGRect(x: view.bounds.width - 150 - 16, y: view.bounds.height - 100 - 16, width: 150, height: 100)
    videoPreviewLooper.backgroundColor = .black
  }
}

extension VideoTableViewCell {
  func addSubviews() {
    previewImageView.contentMode = .scaleAspectFill
    previewImageView.clipsToBounds = true
    previewImageView.layer.cornerRadius = 4.0

    addSubview(titleLabel)
    addSubview(previewImageView)
    addSubview(subtitleLabel)
  }

  func updateViews() {
    titleLabel.text = video?.title
    titleLabel.font = UIFont.systemFont(ofSize: 24.0)

    let image = UIImage(named: (video?.thumbURL.path)!)
    previewImageView.image = image

    subtitleLabel.text = video?.subtitle
    subtitleLabel.font = UIFont.systemFont(ofSize: 14.0)
    subtitleLabel.numberOfLines = 0
  }

  override func layoutSubviews() {
    super.layoutSubviews()

    let previewHeight: CGFloat = 200
    let padding: CGFloat = 16

    let widthWithPadding = bounds.width - (2*padding)

    // Size
    let titleSize = titleLabel.sizeThatFits(CGSize(width: widthWithPadding, height: .infinity))
    titleLabel.bounds = CGRect(x: 0, y: 0, width: titleSize.width, height: titleSize.height)

    let subtitleSize = subtitleLabel.sizeThatFits(CGSize(width: widthWithPadding, height: .infinity))
    subtitleLabel.bounds = CGRect(x: 0, y: 0, width: subtitleSize.width, height: subtitleSize.height)

    previewImageView.bounds = CGRect(x: 0, y: 0, width: widthWithPadding, height: previewHeight)

    // Center
    titleLabel.center = CGPoint(x: titleLabel.bounds.width/2.0 + padding, y: padding + titleLabel.bounds.height/2.0)

    let imageYCenter = titleLabel.frame.origin.y + titleSize.height + padding + previewHeight/2.0
    previewImageView.center = CGPoint(x: bounds.width/2.0, y: imageYCenter)

    let subtitleYCenter = previewImageView.frame.origin.y + previewImageView.bounds.height + padding
    subtitleLabel.center = CGPoint(x: subtitleLabel.bounds.width/2.0 + padding, y: subtitleYCenter)
  }
}

extension VideoLooperView {
  override func layoutSubviews() {
    super.layoutSubviews()

    videoPlayerView.frame = bounds
    addSubview(videoPlayerView)
  }
}
8. VideoTableViewCell.swift
import UIKit

class VideoTableViewCell: UITableViewCell {
  let titleLabel = UILabel()
  let previewImageView = UIImageView()
  let subtitleLabel = UILabel()

  var video: Video? = nil {
    didSet {
      updateViews()
    }
  }

  // Sizing
  override func setSelected(_ selected: Bool, animated: Bool) {
    super.setSelected(false, animated: false)
  }

  // MARK - Table Cell Height

  class func height(for viewModel: Video) -> CGFloat {
    let previewHeight: CGFloat = 200
    let padding: CGFloat = 16

    let label = UILabel()
    label.font = UIFont.systemFont(ofSize: 24.0)
    label.text = viewModel.title
    let titleHeight = label.sizeThatFits(CGSize(width: UIScreen.main.bounds.width - 32, height: .infinity)).height

    label.text = viewModel.subtitle
    label.font = UIFont.systemFont(ofSize: 14.0)
    let subtitleHeight = label.sizeThatFits(CGSize(width: UIScreen.main.bounds.width - 32, height: .infinity)).height

    return padding + titleHeight + padding + previewHeight + padding + subtitleHeight + padding
  }

  // MARK - Obligatory Inits
  override init(style: UITableViewCellStyle, reuseIdentifier: String?) {
    super.init(style: style, reuseIdentifier: reuseIdentifier)

    addSubviews()
  }

  required init?(coder aDecoder: NSCoder) {
    super.init(coder: aDecoder)

    backgroundColor = .blue
  }
}
后记
本篇主要讲述了工程结构和源代码,感兴趣的给个赞或者关注~~~