1 Create user account
For all of the Zabbix daemon processes, an unprivileged user is required. If a Zabbix daemon is started from an unprivileged user account, it will run as that user.
on a RedHat-based system, run:
groupadd --system zabbix
useradd --system -g zabbix -d /usr/lib/zabbix -s /sbin/nologin -c "Zabbix Monitoring System" zabbix
Zabbix processes do not need a home directory, which is why we do not recommend creating it. However, if you are using some functionality that requires it (e. g. store MySQL credentials in
$HOME/.my.cnf
you are free to create it using the following commands.
On RedHat-based systems, run:
mkdir -m u=rwx,g=rwx,o= -p /usr/lib/zabbix
chown zabbix:zabbix /usr/lib/zabbix
a. Install Zabbix repository
# rpm -Uvh https://repo.zabbix.com/zabbix/4.0/rhel/7/x86_64/zabbix-release-4.0-1.el7.noarch.rpm # yum clean all
b. Install Zabbix server, frontend, agent
# yum -y install zabbix-server-mysql zabbix-web-mysql zabbix-agent
#  yum install -y mariadb-server
修改mariadb数据存放路径
CentOS7 中修改 Mariadb 数据库数据的存储路径 Mariadb 默认的数据存储目录为 /var/lib/mysql,要想改为指定目录,步骤如下。 1. 创建新目录 比如在根目录下创建一个 data 目录: # mkdir -p /data/mysql 给这个目录加上读写权限: # chmod -R 777 /data/mysql 2. 修改 /data/mysql 目录的拥有者 # chown -R mysql:mysql /data/mysql 3. 编辑 Mariadb 的配置文件 /etc/my.cnf 把[mysqld]下的配置项datadir和socket注释掉(以防有问题再改回来),新加行改为新的内容,如下: [mysqld] datadir=/data/mysql [client] default-character-set=utf8 socket=/var/lib/mysql/mysql.sock 注:如果文件中没有[client],需要手动加上。 保存文件退出。 4. 重新启动 Mariadb 服务 # systemctl start mariadb.service
c. Create initial database
# mysql -uroot -p
password
mysql> create database zabbix character set utf8 collate utf8_bin;
mysql> grant all privileges on zabbix.* to zabbix@localhost identified by 'zabbix';
mysql> quit;
Import initial schema and data. You will be prompted to enter your newly created password.
# zcat /usr/share/doc/zabbix-server-mysql*/create.sql.gz | mysql -uzabbix -p zabbix
d. Configure the database for Zabbix server
Edit file /etc/zabbix/zabbix_server.conf
DBPassword=zabbix
e. Configure PHP for Zabbix frontend
Edit file /etc/httpd/conf.d/zabbix.conf, uncomment and set the right timezone for you.
# php_value date.timezone Europe/Riga
f. Start Zabbix server and agent processes
Start Zabbix server and agent processes and make it start at system boot:
# systemctl restart zabbix-server zabbix-agent httpd
# systemctl enable zabbix-server zabbix-agent httpd
Now your Zabbix server is up and running!
Additionally, to use any other language than English, its locale should be installed on the web server. See the "See also" section in the “User profile” page to find out how to install it if required.
Since Zabbix 4.0.8, write permissions to the assets directory are required for the web server user.
Installing frontend
Step 1
In your browser, open Zabbix URL: http://
You should see the first screen of the frontend installation wizard.
Step 2
Make sure that all software prerequisites are met.
| Pre-requisite | Minimum value | Description |
|---|---|---|
| PHP version | 5.4.0 | |
| PHP memory_limit option | 128MB | In php.ini: memory_limit = 128M |
| PHP post_max_size option | 16MB | In php.ini: post_max_size = 16M |
| PHP upload_max_filesize option | 2MB | In php.ini: upload_max_filesize = 2M |
| PHP max_execution_time option | 300 seconds (values 0 and -1 are allowed) | In php.ini: max_execution_time = 300 |
| PHP max_input_time option | 300 seconds (values 0 and -1 are allowed) | In php.ini: max_input_time = 300 |
| PHP session.auto_start option | must be disabled | In php.ini: session.auto_start = 0 |
| Database support | One of: MySQL, Oracle, PostgreSQL, IBM DB2 | One of the following modules must be installed: mysql, oci8, pgsql, ibm_db2 |
| bcmath | php-bcmath | |
| mbstring | php-mbstring | |
| PHP mbstring.func_overload option | must be disabled | In php.ini: mbstring.func_overload = 0 |
| PHP always_populate_raw_post_data option | must be disabled | Required only for PHP versions 5.6.0 or newer. In php.ini: always_populate_raw_post_data = -1 |
| sockets | php-net-socket. Required for user script support. | |
| gd | 2.0 or higher | php-gd. PHP GD extension must support PNG images (--with-png-dir), JPEG (--with-jpeg-dir) images and FreeType 2 (--with-freetype-dir). |
| libxml | 2.6.15 | php-xml or php5-dom |
| xmlwriter | php-xmlwriter | |
| xmlreader | php-xmlreader | |
| ctype | php-ctype | |
| session | php-session | |
| gettext | php-gettext Since Zabbix 2.2.1, the PHP gettext extension is not a mandatory requirement for installing Zabbix. If gettext is not installed, the frontend will work as usual, however, the translations will not be available. |
Optional pre-requisites may also be present in the list. A failed optional prerequisite is displayed in orange and has a Warning status. With a failed optional pre-requisite, the setup may continue.
If there is a need to change the Apache user or user group, permissions to the session folder must be verified. Otherwise Zabbix setup may be unable to continue.
Step 3
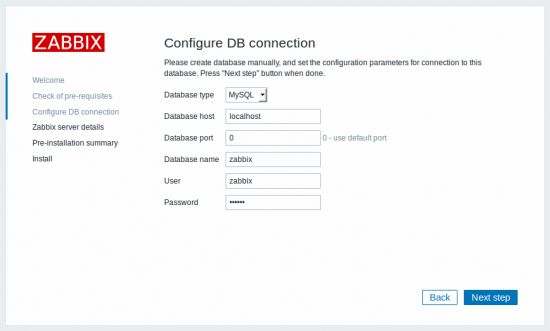
Enter details for connecting to the database. Zabbix database must already be created.
Step 4
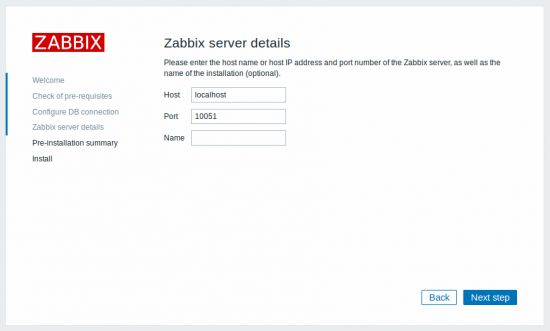
Enter Zabbix server details.
Entering a name for Zabbix server is optional, however, if submitted, it will be displayed in the menu bar and page titles.
Step 5
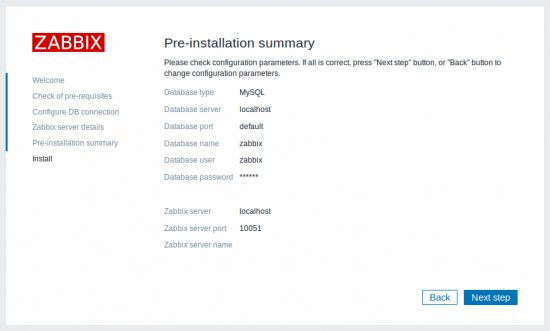
Review a summary of settings.
Step 6
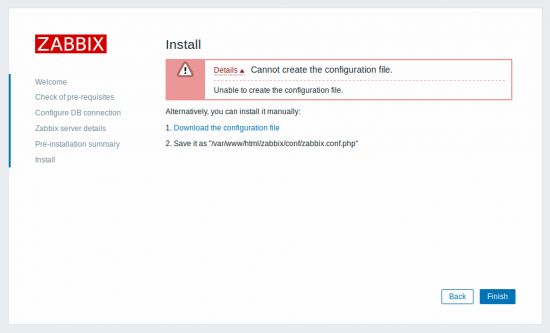
Download the configuration file and place it under conf/ in the webserver HTML documents subdirectory where you copied Zabbix PHP files to.
Providing the webserver user has write access to conf/ directory the configuration file would be saved automatically and it would be possible to proceed to the next step right away.
Step 7
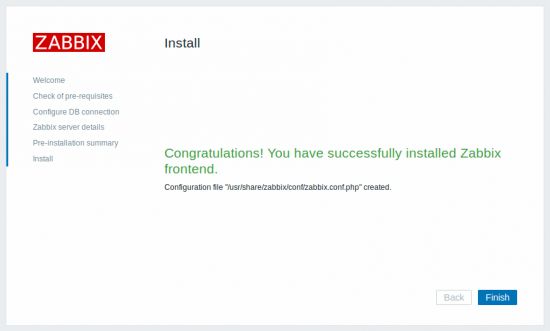
Finish the installation.
Step 8
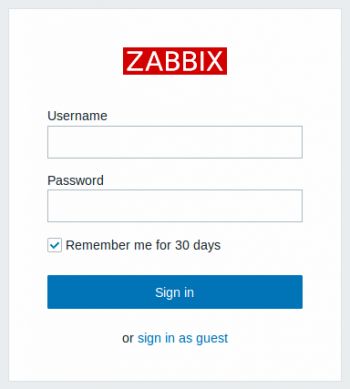
Zabbix frontend is ready! The default user name is Admin, password zabbix.
Proceed to getting started with Zabbix.
3 Installing Java gateway
It is required to install Java gateway only if you want to monitor JMX applications. Java gateway is lightweight and does not require a database.
To install from sources, first download and extract the source archive.
To compile Java gateway, run the ./configure script with --enable-java option. It is advisable that you specify the --prefix option to request installation path other than the default /usr/local, because installing Java gateway will create a whole directory tree, not just a single executable.
$ ./configure --enable-java --prefix=$PREFIX
To compile and package Java gateway into a JAR file, run make. Note that for this step you will need javac and jar executables in your path.
$ make
Now you have a zabbix-java-gateway-$VERSION.jar file in src/zabbix_java/bin. If you are comfortable with running Java gateway from src/zabbix_java in the distribution directory, then you can proceed to instructions for configuring and running Java gateway. Otherwise, make sure you have enough privileges and run make install.
$ make install
Proceed to setup for more details on configuring and running Java gateway.


