混合开发有一些使用场景:
- 在 Native 项目中加入 React Native 界面. 比如详情页采用 RN 实现.
- 在 React Native 项目中加入 Native 界面. 比如详情页采用 Native 实现.
- 在 Native 项目中加入 React Native 模块. 比如列表中某个 cell 采用 RN 模块实现.
- 在 React Native 项目中加入 Native 模块. 比如地图模块
在 Native 应用中添加 React Native 界面(模块)
主要步骤如下:
- 创建一个 React Native 的空项目(不包含 iOS 模块和 Android 模块).
- 为已存在的 iOS 项目配置 React Native 所需的依赖.
- 创建 index.js 文件, 并添加 React Native 代码. 用于 Native 应用加载 React Native 界面(模块).
- 通过 RCTRootView 作为容器, 加载 React Native 组件.
- 运行混编项目.
- 添加更多 React Native 的组件.
- 打包 iOS 项目.
1. 创建一个 React Native 的空项目
有两种方式
-
- 创建并配置 package.json 文件, 通过 yarn 安装 react-native, react 等依赖的方式创建项目
-
- 直接通过
react-native init ProjectName创建项目, 然后删除 iOS 和 Android 文件内容.
- 直接通过
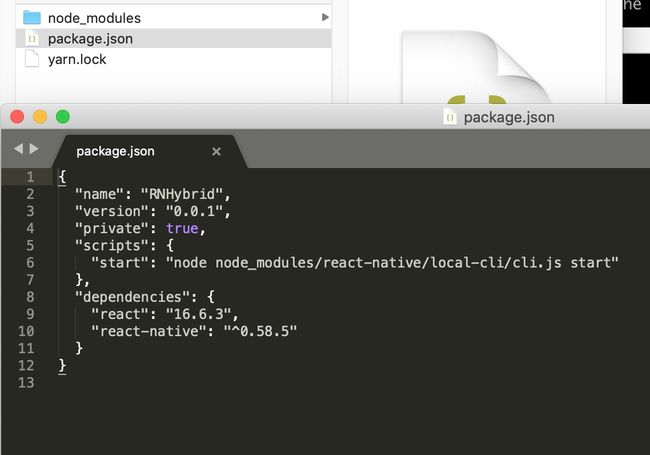
对于方式一, 我们需要创建一个空目录存放所有的项目文件, 然后创建并配置 package.json 文件, 内容如下:
{
  "name": "MyReactNativeApp",
  "version": "0.0.1",
  "private": true,
  "scripts": {
    "start": "node node_modules/react-native/local-cli/cli.js start"
  }
}
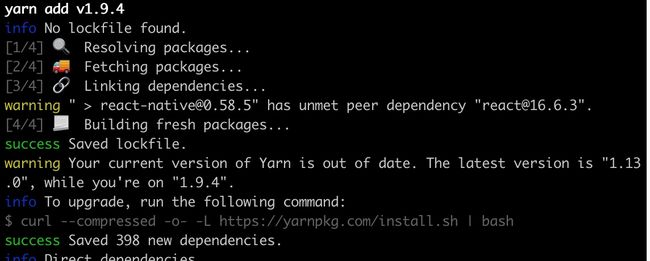
然后, 在项目根目录执行 yarn add react-native 添加模块.
此时会有警告信息, 需要我们安装对应版本的 React 模块
yarn add [email protected]
yarn 在添加依赖的时候都会将其安装到项目根目录下的 node_modules 文件夹中, 这个目录一般比较大.
我们应该将其添加到 .gitignore 文件中(如果有的话), 保证这个文件夹只保留在本地, 不上传到版本控制系统.
最后结果如下:
另外一种方式创建 React Native 项目, 就比较简单了. 通过如下创建
react-native init ProjectName
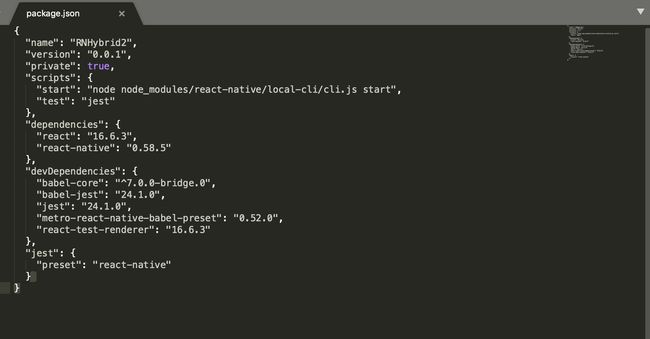
不过此方法会产生多余的文件, 需要删除. 下面是创建的 package.json 文件.
2. 为已存在的 iOS 项目配置 React Native 所需的依赖
这一步骤主要用来介绍如何将 React Native 项目与 Native 项目融合.
比如我们有一个 RNHybridiOS 项目, 我们直接将其复制到 RNHybrid 文件夹中, 现在项目的根目录中, 文件结构如下:
在 iOS 项目中我们一般使用 CocoaPods 来管理项目依赖.
在 RNHybridiOS 文件夹中创建 Podfile 文件
pod init
在 Podfile 文件中配置依赖
# 对于Swift应用来说下面两句是必须的
platform :ios, '9.0'
use_frameworks!

# target的名字一般与你的项目名字相同
target 'RNHybridiOS' do

  # 'node_modules'目录一般位于根目录中
  # 但是如果你的结构不同,那你就要根据实际路径修改下面的`:path`
  pod 'React', :path => '../node_modules/react-native', :subspecs => [
    'Core',
    'CxxBridge', # 如果RN版本 >= 0.47则加入此行
    'DevSupport', # 如果RN版本 >= 0.43,则需要加入此行才能开启开发者菜单
    'RCTText',
    'RCTNetwork',
    'RCTWebSocket', # 调试功能需要此模块
    'RCTAnimation', # FlatList和原生动画功能需要此模块
    # 在这里继续添加你所需要的其他RN模块
  ]
  # 如果你的RN版本 >= 0.42.0,则加入下面这行
  pod "yoga", :path => "../node_modules/react-native/ReactCommon/yoga"

  # 如果RN版本 >= 0.45则加入下面三个第三方编译依赖
  pod 'DoubleConversion', :podspec => '../node_modules/react-native/third-party-podspecs/DoubleConversion.podspec'
  pod 'glog', :podspec => '../node_modules/react-native/third-party-podspecs/glog.podspec'
  pod 'Folly', :podspec => '../node_modules/react-native/third-party-podspecs/Folly.podspec'

end
依赖的内容参考自官方文档
这里简单讲一下 Podfile 文件中这些代码的意思. 后续可能会做源码分析.
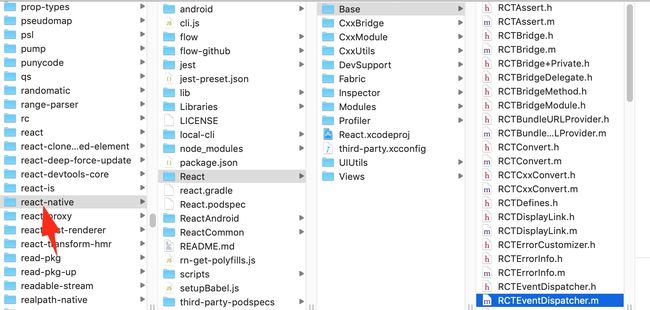
- React Native 框架整体是作为 node 模块安装到项目中的, 我们能在 /node_modules/react-native 目录中找到.
- Podfile 里面关于 React 库这一部分的操作主要就是将相关的库文件的 引用 添加到 React 目录下(原始文件还是在 /node_modules/react-native 目录下). 以供使用
接下来在 iOS 项目根目录执行以下命令, 安装 CocoaPods 依赖.
pod install
安装完依赖, 就需要创建 React Native 代码以供 iOS 项目使用.
3. 创建 index.js 文件, 并添加 React Native 代码
在 RNHybrid 目录下创建一个 index.js 文件并添加如下代码:
import { AppRegistry } from 'react-native';
import App from './App';

AppRegistry.registerComponent('Welcome', () => App);
向 React Native 注册一个名为 Welcome 的组件.
上述代码引入了一个 App.js 文件. 内容可以如下:
import React, {Component} from 'react';
import {Platform, StyleSheet, Text, View, Button} from 'react-native';

const instructions = Platform.select({
  ios: 'Press Cmd+R to reload,\n' + 'Cmd+D or shake for dev menu',
  android:
    'Double tap R on your keyboard to reload,\n' +
    'Shake or press menu button for dev menu',
});

export default class App extends Component {
  constructor(props) {
    super(props);
  }

  render() {
    return (

        Welcome to React Native!
        To get started, edit App.js
        {instructions}


    );
  }
}

const styles = StyleSheet.create({
  container: {
    flex: 1,
    justifyContent: 'center',
    alignItems: 'center',
    backgroundColor: '#F5FCFF',
  },
  welcome: {
    fontSize: 20,
    textAlign: 'center',
    margin: 10,
  },
  instructions: {
    textAlign: 'center',
    color: '#333333',
    marginBottom: 5,
  },
});
这是默认初始化项目的一个初始页面. 显示简单的文本数据.
4. 通过 RCTRootView 作为容器, 加载 React Native 组件.
在上面我们创建了一个 Welcome 组件, 接下来是如何使用这个组件.
class ViewController: UIViewController {

    override func viewDidLoad() {
        super.viewDidLoad()


        if let jsCodeLocation = RCTBundleURLProvider.sharedSettings()?.jsBundleURL(forBundleRoot: "index", fallbackResource: nil) {

            let welcomeView = RCTRootView(bundleURL: jsCodeLocation, moduleName: "Welcome", initialProperties: nil, launchOptions: nil)
            // 一定要设置 frame, 默认是 0
            welcomeView?.frame = view.bounds

            view.addSubview(welcomeView!)
        }
    }
}
有几点需要注意:
-
initWithBundleURL: 用于指示 js 代码位置, 在开发阶段可以使用RCTBundleURLProvider的形式生成jsCodeLocation, 也可以直接指定
let jsCodeLocation = URL(string: "http://localhost:8081/index.bundle?platform=ios")
在发布版本只会使用静态js bundle. 而不是像这样通过本地服务器加载.
-
moduleName: 用于指定 React Native 要加载的 JS 模块名, 也就是上文中所讲的在index.js中注册的模块名. -
launchOptions: 主要在 AppDelegate 加载 JS Bundle 时使用,这里传nil就行; -
initialProperties: 接受一个字典类型的参数来作为 RN 初始化时传递给 JS 的初始化数据.
5. 运行混编项目
在上一步中我们已经加载了在 JS 中注册的 React Native 组件. 下面我们需要启动开发服务器(即 Packager, 它负责实时监测 js 文件的变动并实时打包, 输出给客户端运行), 通过这加载 js 代码.
在混编项目的根目录执行以下命令
npm start
随即可以直接用 Xcode 运行项目, 或者在项目的根目录执行以下
react-native run-ios
第一次运行可能会遇到几个问题:
- 由于 React Native 部分的代码是通过本地服务器进行加载的, 并且它是 http 协议传输的, 为了能在 iOS 原生项目中能使用, 我们需要设置
App Transport Security Settings, 让其支持 http 传输.
在 iOS 项目根目录下, 找到info.plist文件.
NSAppTransportSecurity
// 这个是允许所有 http 格式加载
NSAllowsArbitraryLoads
NSExceptionDomains
localhost
NSTemporaryExceptionAllowsInsecureHTTPLoads
- 对于 iOS 项目中的
RCTRootView, 默认加载出来的视图控件的 frame 是 0, 所以我们需要为其设置大小, 否则将不会显示.
6. 添加更多 React Native 的组件
在 index.js 文件中, 我们可以添加多个组件以供 iOS 项目调用.
import {AppRegistry} from 'react-native';
import App from './App';
import App2 from './App2';
import App3 from './App3';

AppRegistry.registerComponent("Welcome", () => App);
AppRegistry.registerComponent("Welcome2", () => App2);
AppRegistry.registerComponent("Welcome3", () => App3);
在 iOS 项目中指定需要加载的组件名称即可.
7. 打包 iOS 项目.
对于发布版本我们不能使用本地服务器加载 js 代码, 所以我们需要将 js 代码打成 bundle, 在 iOS 项目中使用.
- 生成 js bundle
react-native bundle --entry-file index.js --platform ios --dev false --bundle-output release_ios/main.jsbundle --assets-dest release_ios/
说明一下:
react-native, 执行命令
参数以下
bundle, 命令类型
--entry-file 文件入口, 这里指定为 index.js
--platform, 平台, 这里指定 ios
--dev, 是否为开发版本, 这里指定 false
 --bundle-output, bundle 输出路径, 这里指定release_ios/main.jsbundle, 如果没有 release_ios 文件夹需要手动创建
 --assets-dest, 如果有图片资源, 也需要打包, 这里指定在 release_ios/ 文件夹中.
-
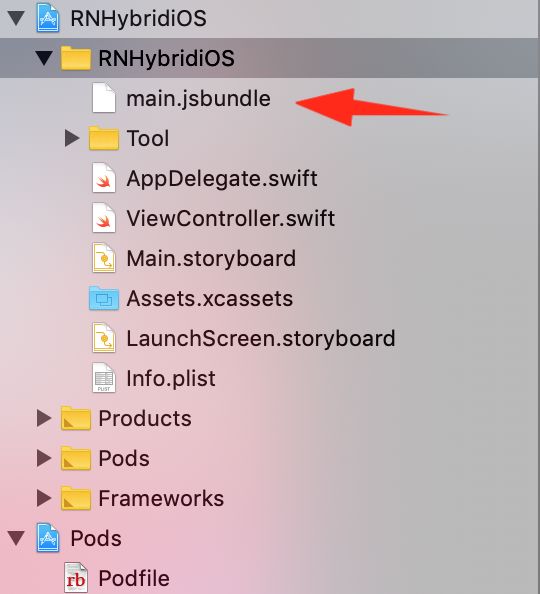
将 js bundle 和 assets 直接拖到项目根目录.
- 在 iOS 项目代码中, 指定 js code 路径.
在下面代码中, 我们获取到了 react native 界面, 将其用在 App 的根控制器中.
func application(_ application: UIApplication, didFinishLaunchingWithOptions launchOptions: [UIApplication.LaunchOptionsKey: Any]?) -> Bool {

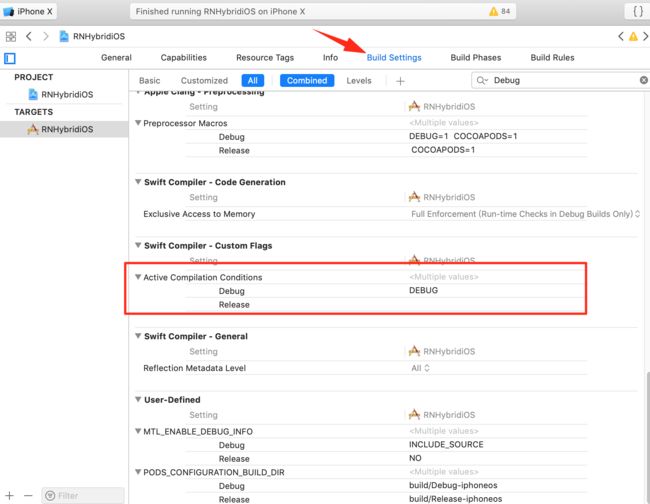
        #if DEBUG         // 调试版本

        let jsCodeLocation = RCTBundleURLProvider.sharedSettings()?.jsBundleURL(forBundleRoot: "index", fallbackResource: nil)

        #else             // 发布版本, 本地加载 js 代码

        let jsCodeLocation = Bundle.main.url(forResource: "main", withExtension: "jsbundle")

        #endif


        if let jsCodeLocation = jsCodeLocation {

            let rootView = RCTRootView(bundleURL: jsCodeLocation, moduleName: "NativeDemo_Swift", initialProperties: nil, launchOptions: launchOptions)

            window = UIWindow(frame: UIScreen.main.bounds)

            let rootVC = UIViewController()
            rootVC.view = rootView
            window?.rootViewController = rootVC
            window?.makeKeyAndVisible()
        }

        return true
}
代码里面的 DEBUG 它只是我们自定义的一个标记
我在测试的时候发现, 在项目中导入 main.jsbundle 后, 加载 js 代码的规律如下.
- 开发模式下, 如果未开启本地服务器, 那么它会默认先去找有没有 main.jsbundle 这个文件, 如果没有, 屏幕会直接黑屏. 即无法加载页面. 如果有, 会优先加载本地的 main.jsbundle 文件.
- 开发模式下, 本地服务器肯定没有开启, 规律和上面也一样.
在保证 main.jsbundle 文件存在的情况下, 我们可以偷懒, 不需要分两种版本. 直接按照 RCTBundleURLProvider.sharedSettings()?.jsBundleURL(forBundleRoot: "index", fallbackResource: nil) 这种来加载. 不过, 这种方式不推荐, 因为需要多做一次是否开服务器的判断, 性能有一点点损耗. 而且, 对于其他更复杂的情况, 我们可能需要 flag 来做判断.
对于 React Native 如何加载 iOS 模块, 在下一篇文章中讲解.
其实只要明白数据的流通原理, 都是一样的.
参考
React Native 中文网 - 在原生项目中集成 RN
