Android自定义View系列
- Android自定义View之Paint绘制文字和线
- Android自定义View注意事项
- Android自定义View之Canvas
- Android自定义View之图片外形特效——轻松实现圆角和圆形图片
- Android自定义View之invalidate方法和postInvalidate方法
- Android自定义View之双缓冲机制和SurfaceView
- Android自定义View之Window、ViewRootImpl和View的三大流程
- Android自定义View之事件分发机制总结
- Android自定义View之requestLayout方法和invalidate方法
Paint和Canvas为我们提供了丰富的API,使我们可以轻松的自己画一些图。除了可以绘制文字和简单的图形,Paint和Canvas还有一些高级的功能,比如改变图片的颜色和形状等。今天我们就来看看怎么利用Paint和Canvas改变图片的颜色。
改变图片的颜色
我们需要用到Paint和Canvas的新的API
- Paint设置颜色过滤
paint.setColorFilter(new ColorMatrixColorFilter(ColorMatrix matrix)
- Canvas绘制Bitmap
canvas.drawBitmap(@NonNull Bitmap bitmap, float left, float top, @Nullable Paint paint)
这里出现了一个新东西:ColorMatrix
ColorMatrix
ColorMatrix改变颜色的原理
- ColorMatrix:即色彩矩阵,是android.graphics包下的一个类,用来处理图片的色彩。
- 它是一个4*5的数字矩阵,用一个一维数组来保存存储矩阵中的值。
- 对于每一个像素点都有一个颜色分量矩阵用来保存颜色的RGBA值
颜色矩阵
A= \begin{bmatrix} a & b & c & d & e\\ f & g & h & i & j \\ k & l & m & n & o \\ p & q & r & s & t \end{bmatrix}
颜色分量矩阵,对应的是每个像素的RGBA值
C= \left[ \begin{matrix} R \\ G \\ B \\ A \\ 1 \end{matrix} \right]
将颜色矩阵作用于像素的颜色分量矩阵,也就是2个矩阵做乘法
R1 = a*R + b*G + c*B + d*A + e
G1 = f*R + g*G + h*B + i*A + j;
B1 = k*R + l*G + m*B + n*A + o;
A1 = p*R + q*G + r*B + s*A + t;
上面2个矩阵相乘以后得到的矩阵就是某个像素点对应的新的RGBA值,也就是变成了R1G1B1A1,这样我们只要改变颜色矩阵里元素的值就能改变像素的颜色值了。
特殊的是,当我们的颜色矩阵为:
A0= \begin{bmatrix} 1 & 0 & 0 & 0 & 0\\ 0 & 1 & 0 & 0 & 0 \\ 0 & 0 & 1 & 0 & 0 \\ 0 & 0 & 0 & 1 & 0 \end{bmatrix}
像素的RGBA值不变,因此矩阵A0通常作为初始的颜色矩阵。
ColorMatrix的常用API
一般我们都从色调、饱和度和亮度这三个方面来处理图像的色彩,Android系统中的ColorMatrix类已经为我们封装好了对应的API
- 改变色调:setRotate(int axis, float degrees)
//色调
ColorMatrix hueMatrix = new ColorMatrix();
//0表示对Red的处理
hueMatrix.setRotate(0, hue);
//1表示对Green的处理
hueMatrix.setRotate(1, hue);
//2表示对Blue的处理
hueMatrix.setRotate(2, hue);
- 改变饱和度:setSaturation(float sat)
//饱和度
ColorMatrix saturationMatrix = new ColorMatrix();
saturationMatrix.setSaturation(saturation);
- 改变亮度:setScale(float rScale, float gScale, float bScale,
float aScale)
//亮度
ColorMatrix lumMatrix = new ColorMatrix();
lumMatrix.setScale(lum, lum, lum, 1);
- 混合几个矩阵效果:postConcat(ColorMatrix postmatrix)
//组合效果
ColorMatrix bitmapMatrix = new ColorMatrix();
bitmapMatrix.postConcat(hueMatrix);
bitmapMatrix.postConcat(saturationMatrix);
bitmapMatrix.postConcat(lumMatrix);
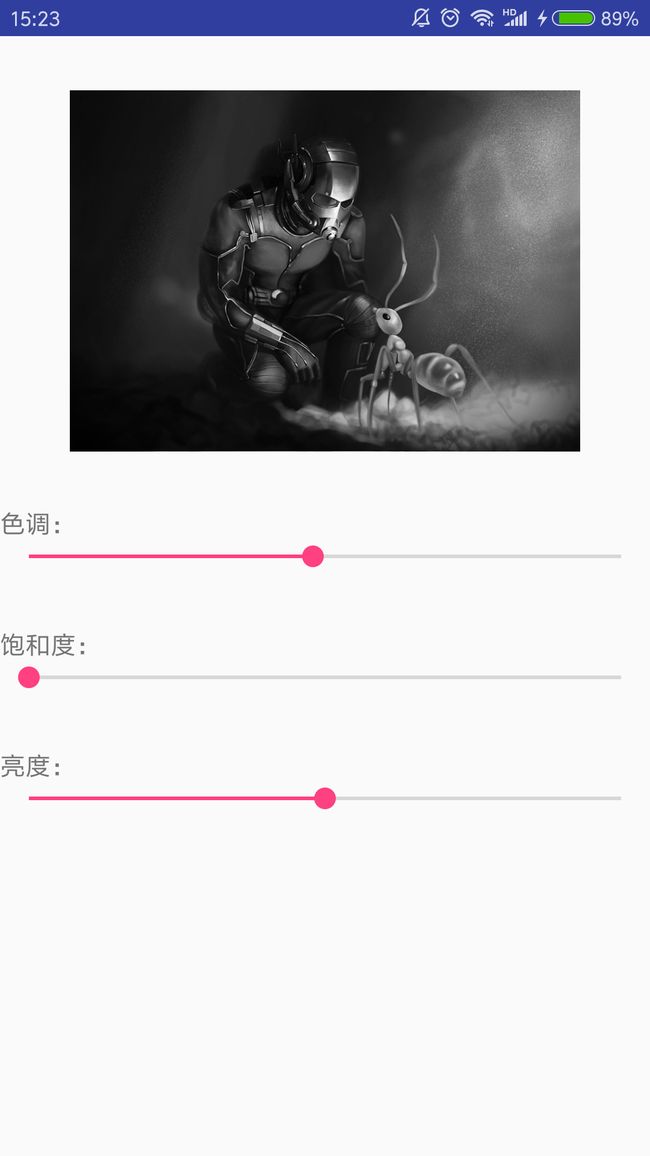
实战:获取灰度图片
日常开发中难免会用到灰度的图片,下面我们看看怎么用今天学的内容来实现。
灰度图片其实很简单,把图片的饱和度降为0就可以了。
(1)首先拿到图片
Bitmap bitmap = BitmapFactory.decodeResource(getResources(), R.drawable.ant);
(2)拿到图片以后我们就要进行灰度处理了,这里直接将饱和度降为0就行了
//饱和度
ColorMatrix saturationMatrix = new ColorMatrix();
saturationMatrix.setSaturation(0);
(3)然后调用Paint和Canvas重新绘图
Bitmap bitmap = Bitmap.createBitmap(bp.getWidth(), bp.getHeight(), Bitmap.Config.ARGB_8888);
Canvas canvas = new Canvas(bitmap);
Paint paint = new Paint();

paint.setColorFilter(new ColorMatrixColorFilter(saturationMatrix));
canvas.drawBitmap(bp, 0, 0, paint);
(4)最后将新得到的Bitmap设置给ImageView就可以了
imageView.setImageBitmap(bitmap);
当然,我们也可以直接利用一个长度为20的一维数组来创建颜色矩阵,通过改变一维数组的元素的值来更加细致的控制颜色
比如灰度图片的一维数组为:
private static final float[] GREY = {0.33f,0.59f,0.11f,0,0,0.33f,0.59f,0.11f,0,0,0.33f,0.59f,0.11f,0,0,0,0,0,1,0};
得到灰度图片的代码就变成如下
ColorMatrix bitmapMatrix = new ColorMatrix();
bitmapMatrix.set(GREY);

Bitmap bitmap = Bitmap.createBitmap(bp.getWidth(), bp.getHeight(), Bitmap.Config.ARGB_8888);
Canvas canvas = new Canvas(bitmap);
Paint paint = new Paint();

paint.setColorFilter(new ColorMatrixColorFilter(bitmapMatrix));
canvas.drawBitmap(bp, 0, 0, paint);
其实我们查看ColorMatrix的源码可以发现上述2种方式的原理是一样的,只不过ColorMatrix为我们提供了API方便我们使用,而不是每次都要去维护一个一维数组
//ColorMatrix.class
public void setSaturation(float sat) {
    reset();
    float[] m = mArray;

    final float invSat = 1 - sat;
    final float R = 0.213f * invSat;
    final float G = 0.715f * invSat;
    final float B = 0.072f * invSat;

    m[0] = R + sat; m[1] = G;       m[2] = B;
    m[5] = R;       m[6] = G + sat; m[7] = B;
    m[10] = R;      m[11] = G;      m[12] = B + sat;
}
需要注意的是,同样是灰度图片,灰度的程度也可以不一样,如果要求较高,可以精细地调一调,不过一般都不用。
其他特殊颜色效果处理
研究图像色彩处理的人通过不同的算法将颜色矩阵应用到原图像上,从而得到新的色彩的图像。这里介绍几个常见的颜色效果矩阵
(1)灰度效果
private static final float[] GREY = {0.33f,0.59f,0.11f,0,0,0.33f,0.59f,0.11f,0,0,0.33f,0.59f,0.11f,0,0,0,0,0,1,0};
(2)图像反转的效果
private static final float[] REVERSAL = {-1f,0f,0f,1,1,0f,-1f,0f,1,1,0f,0f,-1f,1,1,0,0,0,1,0};
(3)去色效果
private static final float[] DECOLORATION = {1.5f,1.5f,1.5f,0,-1,1.5f,1.5f,1.5f,0,-1,1.5f,1.5f,1.5f,0,-1,0,0,0,1,0};
总结
- Android中通过颜色矩阵ColorMatrix来控制图像的颜色,ColorMatrix则是通过作用于像素的RGBA来改变颜色
- ColorMatrix为我们提供了常用的API,包括色彩、饱和度和亮度的控制
- Android中不允许直接改变原图,所以我们需要通过原图片来创建新的Bitmap,并以新的Bitmap创建画布Canvas
- 通过Paint的setColorFilter方法,将颜色矩阵ColorMatrix作用于图像的绘制过程
- 最后通过Canvas的drawBitmap方法得到新的Bitmap,需要注意的是我们创建Canvas使用的是新Bitmap,而drawBitmap方法中传递的是原始的Bitmap对象,千万别搞错了
欢迎关注我的微信公众号,和我一起每天进步一点点!

