Spring Cloud Alibaba Nacos 0.9.0 最新实战教程(二)-- Nacos注册中心实战
前面一篇已经简单介绍Nacos: Spring Cloud Alibaba Nacos 0.9.0 最新实战教程(一)
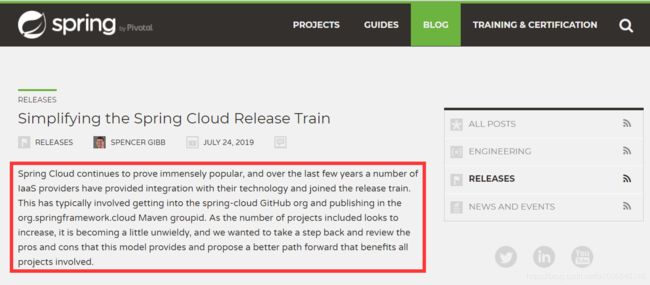
2019 年 7 月 24 日,Spring Cloud 官网发布公告:
-
Spring Cloud Alibaba仓库将迁移回Alibaba的官方仓库
-
Spring Cloud Alibaba 即将发布第一个版本(2019.7.30)
1. Nacos服务端安装
下载地址:https://github.com/alibaba/nacos/releases
本示例版本:1.0.1 for windows
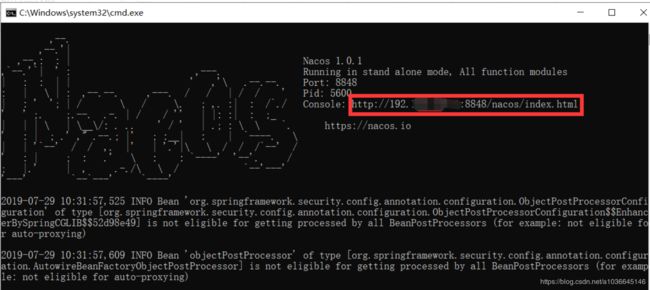
下载后解压,然后在/bin下,直接双击运行startup.cmd 即可默认启动单机版Nacos。
当然,你可以根据自己需要下载不同的平台系统,运行不同的命令,运行Nacos:
- Windows:
cmd startup.cmd -m standalone - Linux/Unix/Mac:
sh startup.sh -m standalone
启动成功后,浏览器访问:http://127.0.0.1:8848/nacos/ (nacos默认端口是8848,你也可以修改/conf/application.properties文件中的server.port=xxxx),可以进入Nacos服务端管理控制台,默认用户名与密码都是:nacos,具体如下:
登录成功后,可以看到简洁的配置管理界面,由于之前我新增了些配置,第一次运行时是没有这些的:
2. 构建微服务应用,注册到Nacos
2.1 服务提供者
2.1 .1 使用SpringBoot构建应用,应用命名:alibaba-nacos-discovery-server ,SpringBoot 版本 2.1.6.RELEASE
        org.springframework.boot
        spring-boot-starter-parent
        2.1.6.RELEASE
2.1.2 pom.xml 依赖如下:
    4.0.0

        org.springframework.boot
        spring-boot-starter-parent
        2.1.6.RELEASE


    com.stwen
    alibaba-nacos-discovery-server
    0.0.1-SNAPSHOT
    alibaba-nacos-discovery-server
    Demo project for Spring Boot


        1.8
        Greenwich.SR1


                org.springframework.cloud
                spring-cloud-dependencies
                ${spring-cloud.version}
                pom
                import


                org.springframework.cloud
                spring-cloud-alibaba-dependencies
                0.9.0.RELEASE
                pom
                import


            org.springframework.boot
            spring-boot-starter-web


            org.springframework.boot
            spring-boot-starter-test


            org.springframework.cloud
            spring-cloud-starter-alibaba-nacos-discovery


            org.projectlombok
            lombok
            1.18.2
            true


                org.springframework.boot
                spring-boot-maven-plugin
pom内容主要由几部分构成:
- parent:定义SpringBoot的版本
- dependencyManagement:spring cloud的版本以及spring cloud alibaba的版本,由于spring cloud alibaba还未纳入spring cloud的主版本管理中,所以需要另外加入。
- dependencies:当前应用要使用的依赖内容。这里主要新加入了Nacos的服务注册与发现模块:spring-cloud-starter-alibaba-nacos-discovery。由于在dependencyManagement中已经引入了版本,所以这里就不用指定具体版本了。
- build:构建插件,这里使用 spring-boot-maven-plugin。
2.1.3 启动类,增加服务发现注解:EnableDiscoveryClient 开启Spring Cloud的服务注册与发现,并编写一个测试接口:
package com.stwen.nacos;

import lombok.extern.slf4j.Slf4j;
import org.springframework.boot.SpringApplication;
import org.springframework.boot.autoconfigure.SpringBootApplication;
import org.springframework.cloud.client.discovery.EnableDiscoveryClient;
import org.springframework.web.bind.annotation.GetMapping;
import org.springframework.web.bind.annotation.RequestParam;
import org.springframework.web.bind.annotation.RestController;

@SpringBootApplication
@EnableDiscoveryClient
@Slf4j
public class AlibabaNacosDiscoveryServerApplication {

    public static void main(String[] args) {
        SpringApplication.run(AlibabaNacosDiscoveryServerApplication.class, args);
    }

    @RestController
    static class TestController {
        @GetMapping("/test")
        public String hello(@RequestParam String name) {
            log.info("invoked name = " + name);
            return "hello ," + name;
        }
    }

}
2.1.4 配置application.yml文件:
server:
  port: 9001

spring:
  application:
    name: alibaba-nacos-discovery-server
  #nacos注册中心地址
  cloud:
    nacos:
      discovery:
        server-addr: 127.0.0.1:8848
2.1.5 启动应用
如果需要启动多个实例,可以修改yml配置文件中的server.port为不同端口,并设置如下,启动
点击详情,可查看具体实例情况:
2.2 服务消费者
2.2.1 使用SpringBoot构建应用,应用命名:alibaba-nacos-discovery-client ,SpringBoot 版本 2.1.6.RELEASE
2.2.2 pom.xml依赖和服务提供者一样,如下:
    4.0.0

        org.springframework.boot
        spring-boot-starter-parent
        2.1.6.RELEASE


    com.stwen
    alibaba-nacos-discovery-client
    0.0.1-SNAPSHOT
    alibaba-nacos-discovery-client
    Demo project for Spring Boot


        1.8
        Greenwich.SR1


                org.springframework.cloud
                spring-cloud-dependencies
                ${spring-cloud.version}
                pom
                import


                org.springframework.cloud
                spring-cloud-alibaba-dependencies
                0.9.0.RELEASE
                pom
                import


            org.springframework.boot
            spring-boot-starter-web


            org.springframework.boot
            spring-boot-starter-test


            org.springframework.cloud
            spring-cloud-starter-alibaba-nacos-discovery


            org.projectlombok
            lombok
            1.18.2
            true


                org.springframework.boot
                spring-boot-maven-plugin
2.2.3 在启动类,增加服务发现注解:@EnableDiscoveryClient 开启Spring Cloud的服务注册与发现,并提供一个HTTP接口,在该接口方法中调用服务提供方的接口:
package com.stwen.nacos;

import lombok.extern.slf4j.Slf4j;
import org.springframework.beans.factory.annotation.Autowired;
import org.springframework.boot.SpringApplication;
import org.springframework.boot.autoconfigure.SpringBootApplication;
import org.springframework.cloud.client.ServiceInstance;
import org.springframework.cloud.client.discovery.EnableDiscoveryClient;
import org.springframework.cloud.client.loadbalancer.LoadBalancerClient;
import org.springframework.web.bind.annotation.GetMapping;
import org.springframework.web.bind.annotation.RestController;
import org.springframework.web.client.RestTemplate;

@SpringBootApplication
@EnableDiscoveryClient
public class AlibabaNacosDiscoveryClientCommonApplication {

    public static void main(String[] args) {
        SpringApplication.run(AlibabaNacosDiscoveryClientCommonApplication.class, args);
    }

    @Slf4j
    @RestController
    static class TestController {

        @Autowired
        LoadBalancerClient loadBalancerClient;

        @GetMapping("/test")
        public String test() {
            // 通过spring cloud common中的负载均衡接口选取服务提供节点实现接口调用
            ServiceInstance serviceInstance = loadBalancerClient.choose("alibaba-nacos-discovery-server");
            String url = serviceInstance.getUri() + "/hello?name=" + "stwen";
            RestTemplate restTemplate = new RestTemplate();
            String result = restTemplate.getForObject(url, String.class);
            return "Invoke : " + url + ", return : " + result;
        }
    }
}
2.2.4 配置文件如下:
server:
  port: 8001

spring:
  application:
    name: alibaba-nacos-discovery-client
  #nacos注册中心地址
  cloud:
    nacos:
      discovery:
        server-addr: 127.0.0.1:8848
2.2.5 启动消费端应用,访问:localhost:8001/test 即可:
需要源码的,请下方评论,看到会发你。
本文来自:CSDN 作者:stwen_gan https://blog.csdn.net/a1036645146/article/details/97625451
喜欢的请点个赞再走吧,转载请注明出处,谢谢。


