30分钟学习LaTeX (2)
原创 maimang1001 数据分析处理
原文
文章的序言
在上一个示例中,在 \begin {document} 命令之后输入文本。在此之前,.tex文件中的所有内容都称为序言(preamble.)。在序言中,您定义了要编写的文档的类型,要编写的语言,要使用的包(稍后会详细介绍)和其他几个元素。例如,普通文档的前言将如下所示:
\documentclass[12pt, letterpaper]{article}\usepackage[utf8]{inputenc}
下面是每行的详细说明:
\documentclass[12pt, letterpaper]{article}如前所述,这定义了文档的类型。方括号中包含了可以传递给命令的一些其他参数。这些参数必须用逗号分隔。在示例中,额外的参数设置字体大小(12pt)和纸张大小(letterpaper)。当然,可以使用其他字体大小(9pt,11pt,12pt),但是如果未指定,则默认大小为10pt。至于纸张尺寸,其他可能的值是a4paper和Legalpaper。请参阅有关页面大小和边距的文章,以获取有关此内容的更多详细信息。
页面大小和边距,请参考:
https://www.overleaf.com/learn/Page_size_and_margins
\usepackage[utf8]{inputenc}这是文档的编码。可以将其省略或更改为其他编码,但建议使用utf-8。除非您特别需要其他编码,或者如果你不确定,请将此行添加到序言中。
添加标题,作者和日期
要将标题,作者和日期添加到文档中,您必须在序言中添加三行(不是文档的主体)。这些行是
\title{First document}这是标题
\author{Hubert Farnsworth}在此处输入作者的姓名,作为可选的附加内容,可以在花括号中添加下一个命令:
\thanks{funded by the Overleaf team}可以在author命令的大括号内将其添加到作者的名字后面。它将在括号内使用文本添加上标和脚注。如果您需要在文章中感谢一个机构,该功能将非常有用。
\date{February 2014}您可以手动输入日期或使用 \today 命令,这样在编译文档时会自动更新日期现在的时间。
添加这些行后,您的序言应该看起来像这样:
\documentclass[12pt, letterpaper, twoside]{article}\usepackage[utf8]{inputenc}\title{First document}\author{Hubert Farnsworth \thanks{funded by the Overleaf team}}\date{February 2017}
现在,您已经为文档指定了标题,作者和日期,您可以使用 \maketitle 命令在文档上打印这些信息。该命令应该包含在您要打印标题的位置文档中。
\begin{document}\maketitleWe have now added a title, author and date to our first \LaTeX{} document!\end{document}
该例子的完整代码如下:
\documentclass[12pt, letterpaper, twoside]{article}\usepackage[utf8]{inputenc}\title{First document}\author{Hubert Farnsworth \thanks{funded by the ShareLaTeX team}}\date{February 2017}\begin{document}\maketitleWe have now added a title, author and date to our first \LaTeX{} document!\end{document}
编译后的文档效果如下:

Overleaf 例子工程:
https://www.sharelatex.com/project/new/template?zipUrl=/project/582dbeacf220531c2d4bdaaa/download/zip&templateName=Learn%20LaTeX%20in%2020%20minutes:%20Part%202&compiler=pdflatex
添加注释
与正在编写的任何代码一样,包含注释通常会很有用。注释是您可以包含在文档中的几段文字,这些文字不会被打印,也不会以任何方式影响文档格式。添加注释对于你的工作来讲,在调试时,阅读添加的说明笔记或注释行/节很有用。要在LATEX中添加注释,只需在该行的开头写一个%符号,如下所示:
\begin{document}\maketitleWe have now added a title, author and date to our first \LaTeX{} document!% This line here is a comment. It will not be printed in the document.\end{document}
编译后的文档和前面例子没有任何差异

粗体,斜体和下划线
现在,我们将看一些简单的文本格式命令。
-
粗体(Bold):LaTeX中的粗体文本使用 \textbf {...} 命令编写。
-
斜体(Italics):LaTeX中的斜体文本是使用 \textit {...} 命令编写的。
-
下划线(Underline):LaTeX中带下划线的文本是使用 \underline {...} 命令编写的。
下面显示了其中每个实例的示例:
Some of the \textbf{greatest}discoveries in \underline{science}were made by \textbf{\textit{accident}}.

另一个非常有用的命令是 \emph {...} 命令。\emph 命令的参数实际的效果取决于上下文-在普通文本中,强调的文本是斜体,但是如果在斜体文本中使用,则此行为是相反的-请参见以下示例:
Some of the greatest \emph{discoveries}in sciencewere made by accident.\textit{Some of the greatest \emph{discoveries}in sciencewere made by accident.}\textbf{Some of the greatest \emph{discoveries}in sciencewere made by accident.}

此外,某些软件包,例如 Beamer,更改了 \emph 命令的行为。
完整的代码如下:
\documentclass[12pt, letterpaper, twoside]{article}\usepackage[utf8]{inputenc}\title{First document}\author{Hubert Farnsworth \thanks{funded by the ShareLaTeX team}}\date{February 2017}\begin{document}\maketitleSome of the greatest \emph{discoveries} in science were made by accident.\textit{Some of the greatest \emph{discoveries} in science were made by accident.}\textbf{Some of the greatest \emph{discoveries} in science were made by accident.}\end{document}
文档的主体显示效果如下:

添加图像
现在,我们将研究如何在 LATEX 文档中添加图像。在Overleaf上,您首先必须上传图像。
以下是有关如何在文档中包含图片的示例。
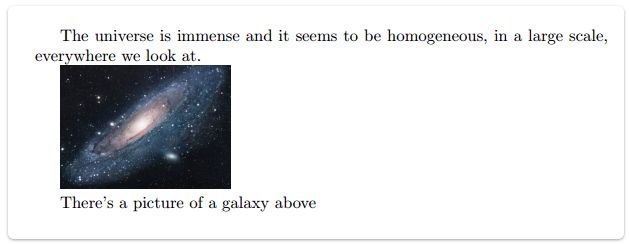
\documentclass{article}\usepackage{graphicx}\graphicspath{ {images/} }\begin{document}The universe is immense and it seems to be homogeneous,in a large scale, everywhere we look at.\includegraphics{universe}There's a picture of a galaxy above\end{document}
LATEX不能单独管理图像,因此您需要使用一个软件包(package)。软件包可用于更改LATEX文档的默认外观,或包含更多功能。在这种情况下,您需要在我们的文档中包含图像,因此您应该使用 graphicx 包。该软件包提供了新的命令,\includegraphics{...} 和 \graphicspath{...}. 要使用graphicx软件包,请在序言中包含以下行:\usepackage {graphicx}
命令 \graphicspath {{images/}} 告诉LATEX,图像被保存在当前目录下名为 images 的文件夹中。
\includegraphics {universe} 命令是将图像实际包含在文档中的命令。这里的 universe 是包含不带扩展名的图像的文件名称,所以universe.PNG 成为了 universe。图像的文件名不应包含空格或多个点。
注意:是允许包含文件扩展名,但是最好忽略它。如果省略文件扩展名,它将提示 LaTeX 搜索所有支持的格式。在上传图像文件时,通常也建议使用小写字母作为文件扩展名。有关更多详细信息,请参见有关生成高分辨率和低分辨率图像的部分。
标题,标签和参考
可以通过图形环境(figure environment )给图像添加字幕,标记和引用,如下所示:
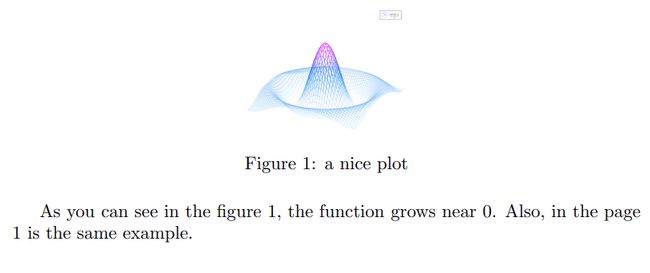
\documentclass{article}\usepackage{graphicx}\graphicspath{ {images/} }\begin{document}\begin{figure}[h]\centering\includegraphics[width=0.25\textwidth]{mesh}\caption{a nice plot}\label{fig:mesh1}\end{figure}As you can see in the figure \ref{fig:mesh1}, thefunction grows near 0. Also, in the page \pageref{fig:mesh1}is the same example.\end{document}
该示例中包含三个重要命令:
-
\caption {a nice plot}:就如您期望的那样此命令设置图形的标题。如果创建一系列图像,则标题将添加到此处。您可以将其放在图的上方或下方。
-
\label {fig:mesh1}:如果您需要在文档中引用图像,请使用此命令设置标签。标签将为图像编号,并与下一个命令结合使用,这样你就可以引用图像。
-
\ref {fig:mesh1}:该代码将被替换为引用图相对应的数字。
当要在 LATEX 文档中放置图像时,我们应始终将它们放置在图形环境或类似环境中,以便 LATEX 可以以适合您文本其余部分的方式放置图像。
注意:如果您在自己的计算机上使用标题和引用,则必须编译两次文档才能使引用正常工作。Overleaf 中会自动为您完成此操作。
在 LATEX 中创建列表
在 LATEX 中创建列表非常简单。您可以使用不同的列表环境创建列表。如果您希望文档的其余部分以不同的方式呈现它们,环境将是我们文档的多个部分。它们以 \begin {...} 命令开始,以 \end {...} 命令结束。
列表主要有两种类型,有序列表和无序列表。每个都将使用不同的环境。
无序列表
无序列表是由 itemize 环境生成的。每个条目之前必须带有控制序列 \item,如下所示:
\begin{itemize}\item The individual entries are indicated with a black dot, a so-called bullet.\item The text in the entries may be of any length.\end{itemize}

有序列表
在不同环境中,有序列表具有相同的语法。我们使用 enumerate 环境制作有序列表:
\begin{enumerate}\item This is the first entry in our list\item The list numbers increase with each entry we add\end{enumerate}

与无序列表一样,控制序列 \item 必须在每个条目之前,它将自动给该项目生成数字标签。枚举标签由从 1 开始的序列号组成。
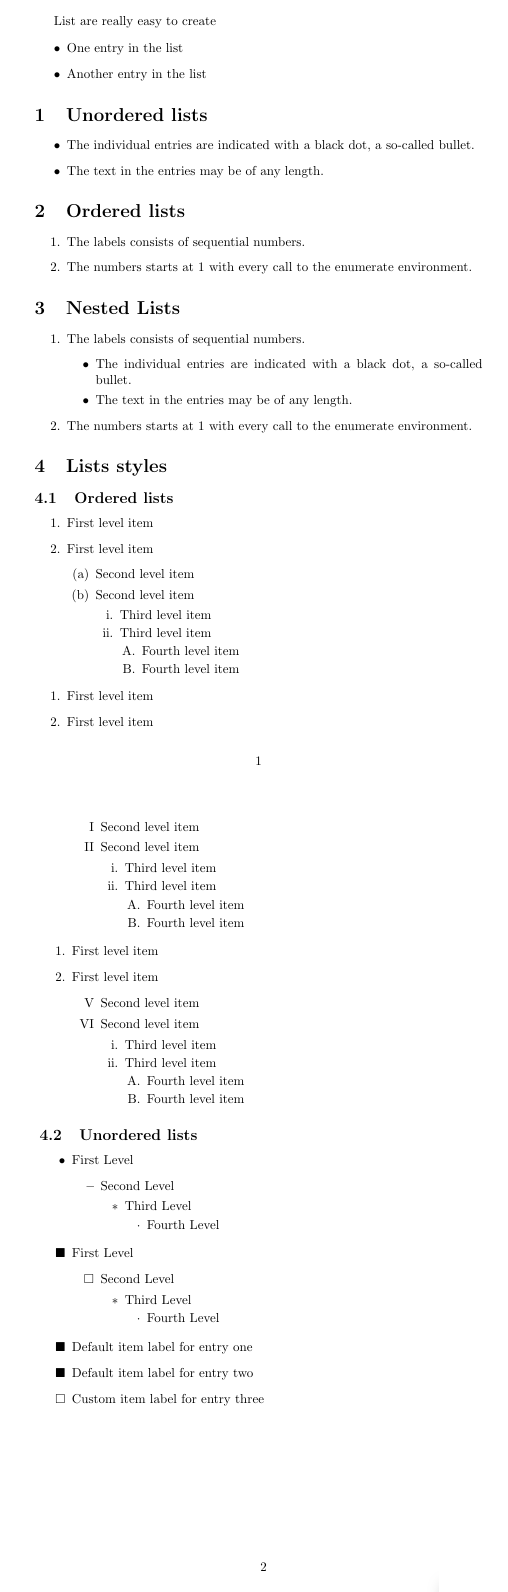
\documentclass{article}\usepackage[utf8]{inputenc}\usepackage{amssymb}\begin{document}List are really easy to create\begin{itemize}\item One entry in the list\item Another entry in the list\end{itemize}\section{Unordered lists}\begin{itemize}\item The individual entries are indicated with a black dot, a so-called bullet.\item The text in the entries may be of any length.\end{itemize}\section{Ordered lists}\begin{enumerate}\item The labels consists of sequential numbers.\item The numbers starts at 1 with every call to the enumerate environment.\end{enumerate}\section{Nested Lists}\begin{enumerate}\item The labels consists of sequential numbers.\begin{itemize}\item The individual entries are indicated with a black dot, a so-called bullet.\item The text in the entries may be of any length.\end{itemize}\item The numbers starts at 1 with every call to the enumerate environment.\end{enumerate}\section{Lists styles}\subsection{Ordered lists}\begin{enumerate}\item First level item\item First level item\begin{enumerate}\item Second level item\item Second level item\begin{enumerate}\item Third level item\item Third level item\begin{enumerate}\item Fourth level item\item Fourth level item\end{enumerate}\end{enumerate}\end{enumerate}\end{enumerate}\renewcommand{\labelenumii}{\Roman{enumii}}\begin{enumerate}\item First level item\item First level item\begin{enumerate}\item Second level item\item Second level item\begin{enumerate}\item Third level item\item Third level item\begin{enumerate}\item Fourth level item\item Fourth level item\end{enumerate}\end{enumerate}\end{enumerate}\end{enumerate}\begin{enumerate}\item First level item\item First level item\begin{enumerate}\setcounter{enumii}{4}\item Second level item\item Second level item\begin{enumerate}\item Third level item\item Third level item\begin{enumerate}\item Fourth level item\item Fourth level item\end{enumerate}\end{enumerate}\end{enumerate}\end{enumerate}\subsection{Unordered lists}\begin{itemize}\item First Level\begin{itemize}\item Second Level\begin{itemize}\item Third Level\begin{itemize}\item Fourth Level\end{itemize}\end{itemize}\end{itemize}\end{itemize}\renewcommand{\labelitemi}{$\blacksquare$}\renewcommand\labelitemii{$\square$}\begin{itemize}\item First Level\begin{itemize}\item Second Level\begin{itemize}\item Third Level\begin{itemize}\item Fourth Level\end{itemize}\end{itemize}\end{itemize}\end{itemize}\begin{itemize}\item Default item label for entry one\item Default item label for entry two\item[$\square$] Custom item label for entry three\end{itemize}\end{document}
翻译如下文章
原文:
https://www.overleaf.com/learn/latex/Learn_LaTeX_in_30_minutes
更多教程请关注“数据分析处理”