.NET Core使用Quartz执行调度任务进阶
一、前言运用场景
Quartz.Net是一个强大、开源、轻量的作业调度框架,在平时的项目开发当中也会时不时的需要运用到定时调度方面的功能,例如每日凌晨需要统计前一天的数据,又或者每月初需要统计上月的数据。当然也会出现既要统计日的也统计月的还需要进行其他的操作。那我们改如何来写这样的调度任务呢?
二、实际运用(.Net Core 2.2)
在一个解决方案中创建一个.Net控制台应用程序及一个类库,控制台应用程序用来作为程序的启动点。类库用来作为调度任务的执行程序。
然后我们需要完善一下项目的结构,首先我们得在控制台应用程序中创建一个Startup类,这个类也是任务启动的一个重要条件。
public class Startup
    {

        public Startup(IConfiguration configuration)
        {

            Configuration = configuration;

    }

    public IConfiguration Configuration { get; }

    // This method gets called by the runtime. Use this method to add services to the container.

    public void ConfigureServices(IServiceCollection services)
    {

        services.AddMvc().SetCompatibilityVersion(CompatibilityVersion.Version_2_2);

    }


    // This method gets called by the runtime. Use this method to configure the HTTP request pipeline.
    public void Configure(IApplicationBuilder app, IHostingEnvironment env)
    {

        if (env.IsDevelopment())
        {
            app.UseDeveloperExceptionPage();
        }
        else
        {
            app.UseExceptionHandler("/Error");
        }
        app.UseMvc();
    }
}
然后项目会报一定的错误,根据错误信息一步一步解决,解决方案:添加NuGet包 Microsoft.AspNetCore
解决错误信息之后意味着目前启动程序还算ok了,接下来我们可以详细讲下Quartz调度任务执行。
因为我们肯定不仅仅执行一个调度任务,实际项目运行中肯定是多个调度任务一起执行的,所以我们思路可以转变一下。在类库创建一个公共启动中心,同时引用NuGet包:Quartz。然后开始创建调度任务的公共核心
private IScheduler scheduler;
///
/// 创建调度任务的入口
///
///
/// 创建调度任务的公共调用中心
///
/// ("_StartLogInfoJob", "_StartLogInfoJob", " 0/3 * * * * ? ");
//每五秒打印一个debug日志
await CreateJob("_StartLogDebugJob", "_StartLogDebugJob", " 0/5 * * * * ? ");
//调度器时间生成地址-- http://cron.qqe2.com
}
///
/// 停止调度器
///
public void Stop()
{
scheduler.Shutdown();
scheduler=null;
}
///
/// 创建运行的调度器
///
/// (string name,string group, string cronTime) where T: IJob
{
//创建一个作业
var job = JobBuilder.Create()
.WithIdentity("name" + name, "gtoup" + group)
.Build();
//创建一个触发器
var tigger = (ICronTrigger)TriggerBuilder.Create()
.WithIdentity("name" + name, "group" + group)
.StartNow()
.WithCronSchedule(cronTime)
.Build();
//把作业和触发器放入调度器中
await scheduler.ScheduleJob(job, tigger);
}
然后再去创建两个执行业务逻辑的类,分别是StartLogInfoJob和StartLogDebugJob
public class StartLogInfoJob:IJob
    {
        public async Task Execute(IJobExecutionContext context)
        {
            await Start();
        }
        public async Task Start()
        {
            LogHelp.Debug("调度打印Debug");
        }
    }


public class StartLogDebugJob : IJob
    {
        public async Task Execute(IJobExecutionContext context)
        {
            await Start();
        }
        public async Task Start()
        {
            LogHelp.Info("调度打印Info");
        }
    }
到这里就顺利的完成了一个定时调度器来执行任务了,最后我们得把这个Program文件重新写一下,控制台应用程序生成的Program文件不太符合我们需要要求,同时把调度器在这里面启动。
class Program
    {
        static void Main(string[] args)
        {
            HandleStart();
            var webHostArgs = args.Where(arg => arg != "--console").ToArray();
            var host = WebHost.CreateDefaultBuilder(webHostArgs)
                .UseStartup()
                .UseKestrel(options => {
                    options.Limits.MinRequestBodyDataRate = null;
                })
                .Build();
            host.Run();
        }
        static void HandleStart()
        {
            try
            {
                new Scheduler().Start().GetAwaiter().GetResult();
            }
            catch (Exception ex)
            {
                LogHelp.Error(ex);
            }
        }
    }
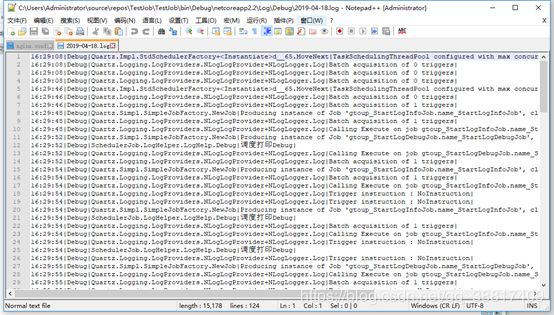
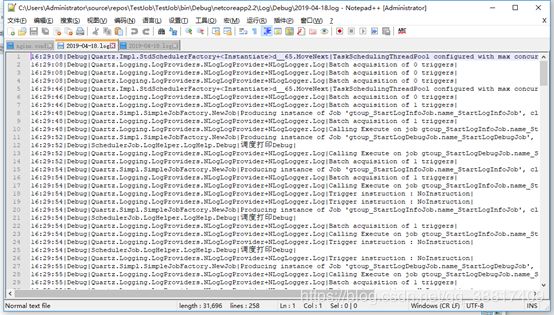
我们去看文件夹下面Log文件会发现有一个Debug和一个Info
到这里我们的调度就完成了,我们需要使用的时候将打印日志更换成我们日常想要处理的业务逻辑就可以了。刚刚提到打印日志就顺便提一下在.Net Core中如何打印日志吧。
三、.Net Cor打印日志文件
打印日志文件主要是用到了NuGet包:NLog,然后再加上一个NLog.config,首先在项目中安装NLog的包,然后创建一个LogHelper的公共类。
public  class LogHelp
    {
        static NLog.Logger logger = NLog.LogManager.GetCurrentClassLogger();

        public static void Debug(string info)
        {
            logger.Debug(info);
        }

        public static void Info(string info)
        {
            logger.Info(info);
        }

        public static void Error(Exception ex, string info = "")
        {
            logger.Error(ex);
        }

}
然后再添加一个NLog.config文件
完成这两个就可以实现日志的打印了。。


