Mac 下搭建 Nginx + PHP + MySQL
Mac 下搭建 Nginx + PHP + MySQL 。
文章目录
- Mac 下搭建 Nginx + PHP + MySQL 。
- Homebrew
- Nginx
- PHP
- Nginx + PHP
- 测试
- MySQL
- 参考文献
Homebrew
在安装Nginx与PHP之前,先要准备一个叫 Homebrew 的神器。
有兴趣的小伙伴可以去官网详细了解一下。这里我们直接干主线,就不搞支线了。
打开终端,然后复制下面的命令,粘贴并执行。
/usr/bin/ruby -e "$(curl -fsSL https://raw.githubusercontent.com/Homebrew/install/master/install)"
Nginx
接着借助 Homebrew 安装 Nginx 就变得非常容易了。
在终端直接输入下面的命令即可。
brew install nginx
这个时候可能要等上一会。
具体要等多久就得看你当前的网络状况了。
建议泡杯咖啡压压惊。
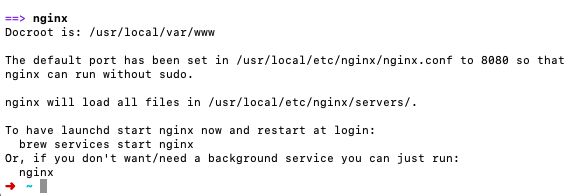
完成之后会看到这样的提示。
Docroot is: /usr/local/var/www

The default port has been set in /usr/local/etc/nginx/nginx.conf to 8080 so that
nginx can run without sudo.

nginx will load all files in /usr/local/etc/nginx/servers/.

To have launchd start nginx now and restart at login:
  brew services start nginx
Or, if you don't want/need a background service you can just run:
  nginx
大致意思就是安装完成了。
Docroot is: /usr/local/var/www
配置目录是:/usr/local/etc/nginx/。默认端口嘛,是8080。
运行 Nginx 直接在终端
nginx
然后访问本机就会看到可喜的画面。
PHP
依旧借助 Homebrew 之力来完成这一操作。
在开始安装之前,先添个源。
brew tap josegonzalez/php
然后就可以开始装了,直接命令走起。
brew install php56
或使用下面这个
brew install php56--without-snmp--without-apache--with-debug--with-fpm --with-intl --with-homebrew-curl --with-homebrew-libxslt --with-homebrew-openssl --with-imap --with-mysql --with-tidy
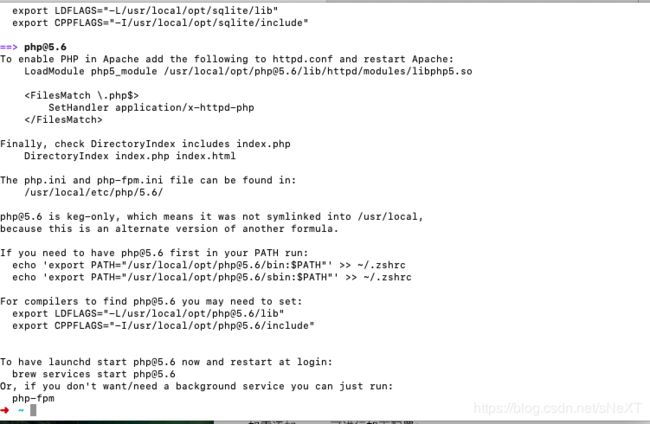
如果成功的话,会是这样
如果失败了,别灰心,去洗洗脸在试一次。
成功后的具体信息如下。
To enable PHP in Apache add the following to httpd.conf and restart Apache:
    LoadModule php5_module /usr/local/opt/[email protected]/lib/httpd/modules/libphp5.so


        SetHandler application/x-httpd-php


Finally, check DirectoryIndex includes index.php
    DirectoryIndex index.php index.html

The php.ini and php-fpm.ini file can be found in:
    /usr/local/etc/php/5.6/

[email protected] is keg-only, which means it was not symlinked into /usr/local,
because this is an alternate version of another formula.

If you need to have [email protected] first in your PATH run:
  echo 'export PATH="/usr/local/opt/[email protected]/bin:$PATH"' >> ~/.zshrc
  echo 'export PATH="/usr/local/opt/[email protected]/sbin:$PATH"' >> ~/.zshrc

For compilers to find [email protected] you may need to set:
  export LDFLAGS="-L/usr/local/opt/[email protected]/lib"
  export CPPFLAGS="-I/usr/local/opt/[email protected]/include"


To have launchd start [email protected] now and restart at login:
  brew services start [email protected]
Or, if you don't want/need a background service you can just run:
  php-fpm
因为是第一次装,也不是很懂,所以就按照上面的全套伺候了。
echo 'export PATH="/usr/local/opt/[email protected]/bin:$PATH"' >> ~/.zshrc
echo 'export PATH="/usr/local/opt/[email protected]/sbin:$PATH"' >> ~/.zshrc
export LDFLAGS="-L/usr/local/opt/[email protected]/lib"
export CPPFLAGS="-I/usr/local/opt/[email protected]/include"
这个时候需要重启一下终端。不然是你用 php -v 看到的还是Mac自带的那个PHP。
Nginx + PHP
这里需要修改一下 Ngnix 的配置。
打开文件 /usr/local/etc/nginx/nginx.conf。
然后找到如下内容
        #location ~ \.php$ {
        #    root           html;
        #    fastcgi_pass   127.0.0.1:9000;
        #    fastcgi_index  index.php;
        #    fastcgi_param  SCRIPT_FILENAME  /scripts$fastcgi_script_name;
        #    include        fastcgi_params;
        #}
把 # 都去掉。
然后将
fastcgi_param SCRIPT_FILENAME /scripts$fastcgi_script_name;
修改为
fastcgi_param SCRIPT_FILENAME $document_root$fastcgi_script_name;
测试
在根目录下创建一个 info.php 的文件。
文件内容为
启动 Nginx
sudo nginx
启动php
sudo php-fpm
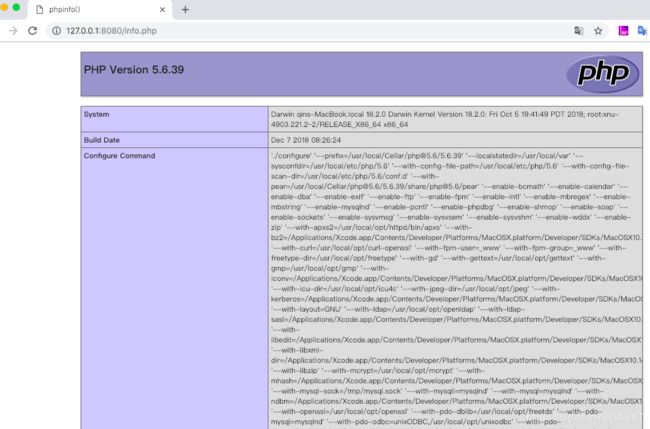
然后访问 配置的对应URL。
比如我的为 http://127.0.0.1:8080/info.php
MySQL
依然借助 Homebrew 来完成。
brew install mysql
这次就不截图了,完成后会看到下面这个。
==> Caveats
We've installed your MySQL database without a root password. To secure it run:
    mysql_secure_installation

MySQL is configured to only allow connections from localhost by default

To connect run:
    mysql -uroot

To have launchd start mysql now and restart at login:
  brew services start mysql
Or, if you don't want/need a background service you can just run:
  mysql.server start
==> Summary
?  /usr/local/Cellar/mysql/8.0.12: 257 files, 233.2MB
这代表MySQL已经成功的安装进你的Mac了。
但是你可能依旧不能用。这个时候不要急,我们还需要告诉系统,你搞了个MySQL进去。
具体怎么做呢?
其实我也不知道。。。
但是我们可以借鉴安装PHP的操作。
先在上面的提示语句中找到安装完后MySQL的目录,比如我的为/usr/local/Cellar/mysql/8.0.12
然后借鉴(抄袭)一下上面安装PHP是用到的shell命令。
echo 'export PATH="你的MySQL目录:$PATH"' >> ~/.zshrc
在终端中执行这句话之后,可以看看 ~/.zshrc 的最后是否添加上去了。
如果确实在最后面添加上了,并且你现在在终端输入mysql 依旧是什么鬼都没有。。。
说明你其实已经成功 99%,而阻挠你成功的最后1%是啥呢?
其实就是重启终端了。
最后就可以开开心心的配置你的 数据库了。
➜  ~ mysql_secure_installation

Securing the MySQL server deployment.

Connecting to MySQL using a blank password.

VALIDATE PASSWORD COMPONENT can be used to test passwords
and improve security. It checks the strength of password
and allows the users to set only those passwords which are
secure enough. Would you like to setup VALIDATE PASSWORD component?

Press y|Y for Yes, any other key for No:
参考文献
- mac搭建nginx和wordpress开发环境
- Mac os x下配置nginx + php
- mac下用brew重新装nginx+php+mysql全过程
- mac安装php5.6
- mac下nginx搭配php-fpm解析php文件
- Mac 电脑安装 MySQL 教程


