Python Flask 微信小程序点餐系统(五):管理员后台菜品模块
菜品模块架构
- 菜品相关数据表设计
- 菜品分类列表
- 添加 / 编辑 / 删除 / 恢复菜品分类
- 菜品列表
- 添加 / 编辑 / 删除 / 恢复菜品
- 菜品库存变更历史
表结构设计
CREATE TABLE `food_cat` (
  `id` int(11) unsigned NOT NULL AUTO_INCREMENT,
  `name` varchar(50) NOT NULL DEFAULT '' COMMENT '类别名称',
  `weight` tinyint(4) NOT NULL DEFAULT '1' COMMENT '权重',
  `status` tinyint(1) NOT NULL DEFAULT '1' COMMENT '状态 1:有效 0:无效',
  `updated_time` timestamp NOT NULL DEFAULT CURRENT_TIMESTAMP COMMENT '最后一次更新时间',
  `created_time` timestamp NOT NULL DEFAULT CURRENT_TIMESTAMP COMMENT '插入时间',
  PRIMARY KEY (`id`),
  UNIQUE KEY `idx_name` (`id`)
) ENGINE=InnoDB DEFAULT CHARSET=utf8mb4 COMMENT='食品分类';
以及同时定义的另外food、foodsalechangelog和foodstockchangelog三张表
代码书写
首先对于food.py文件中,我们可以看到相关文件如下:
route_food = Blueprint( 'food_page',__name__ )

@route_food.route( "/index" )
def index():
    return render_template( "food/index.html" )

@route_food.route( "/info" )
def info():
    return render_template( "food/info.html" )


@route_food.route( "/set" )
def set():
    return render_template( "food/set.html" )


@route_food.route( "/cat" )
def cat():
    return render_template( "food/cat.html" )

@route_food.route( "/cat-set" )
def catSet():
    return render_template( "food/cat_set.html" )
我们先对分类的编辑和创建接口进行书写:
@route_food.route( "/cat" )     # 分类列表的展示功能
def cat():
    resp_data = {}
    req = request.values
    query = FoodCat.query

    if 'status' in req and int( req['status'] ) > -1:
        query = query.filter( FoodCat.status == int( req['status'] ) )

    list = query.order_by( FoodCat.weight.desc(),FoodCat.id.desc() ).all()
    resp_data['list'] = list
    resp_data['search_con'] = req
    resp_data['status_mapping'] = app.config['STATUS_MAPPING']
    resp_data['current'] = 'cat'
    return ops_render( "food/cat.html",resp_data )

@route_food.route( "/cat-set" )     # 美餐管理分类中的编辑和创建接口
def catSet():
    if request.method == "GET":     # get请求
        resp_data = {}
        req = request.args
        id = int(req.get("id",0))
        info = None
        if id:
            info = FoodCat.query.filter_by(id=id).first()
        resp_data["info"] = info
        resp_data["current"] = "cat"
        return ops_render( "food/cat_set.html" )

    resp = {"code":200,"msg":"操作成功~~","data":{}}    # 开始post请求
    req = request.values

    id = req["id"] if "id" in req else 0
    name = req["name"] if "name" in req else ""
    weight = int(req["weight"]) if ("weight" in req and int(req["weight"]) > 0) else 1

    if name is None or len(name) < 1:
        resp["code"] = -1
        resp["msg"] = "请输入符合规范的分类名称~~"

    food_cat_info = FoodCat.query.filter_by(id = id).first()
    if food_cat_info:
        model_food_cat = food_cat_info
    else:
        model_food_cat = FoodCat()
        model_food_cat.created_time = getCurrentDate()
    model_food_cat.name = name
    model_food_cat.weight = weight
    model_food_cat.updated_time = getCurrentDate()
    db.session.add(model_food_cat)
    db.session.commit()
    return jsonify( resp )
后端逻辑和之前类似,我也是好久没敲了,但感觉换汤不换药,都是差不多逻辑,这篇的难点基本都在前端,但我重点介绍后面的吧,这里的前端逻辑就是需要根据后端更改的字段,将cat_set页面更改为相应形式,关于weight权重可以这样设置:{% if info and info.weight > 0 %}{{ info.weight }}{% else %}1{% endif%},写成一行,确实美观。js和之前一样也没有多大改动。另外和Linux不同的是载入配置文件的命令,两个区别如下:
#windows:
set ops-config=local && python manager.py runserver

#linux:
export ops-config=local && python manager.py runserver
然后我们还需要写页面展示和删除功能,才能在页面上显示出具体的更新,其实现在已经可以测试了,只不过只是数据库变化,页面上没有显示:

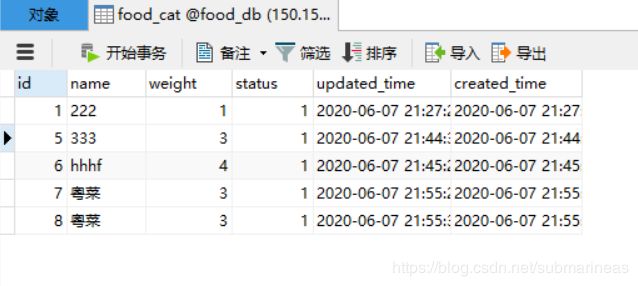
然后我们可以从数据库看到记录,当时网速有点差,所以点了两次,可以看到数据库中出现同时间两次。

再添加上分类展示,以及统一处理的两个接口,那么分类列表里的增删改查就做完了:
@route_food.route( "/cat" )
def cat():
    resp_data = {}
    req = request.values
    query = FoodCat.query

    if 'status' in req and int( req['status'] ) > -1:
        query = query.filter( FoodCat.status == int( req['status'] ) )

    list = query.order_by( FoodCat.weight.desc(),FoodCat.id.desc() ).all()
    resp_data['list'] = list
    resp_data['search_con'] = req
    resp_data['status_mapping'] = app.config['STATUS_MAPPING']
    resp_data['current'] = 'cat'
    return ops_render( "food/cat.html",resp_data )


@route_food.route("/cat-ops",methods = [ "POST" ])
def catOps():
    resp = {'code': 200, 'msg': '操作成功~~', 'data': {}}
    req = request.values

    id = req['id'] if 'id' in req else 0
    act = req['act'] if 'act' in req else ''
    if not id :
        resp['code'] = -1
        resp['msg'] = "请选择要操作的账号~~"
        return jsonify(resp)

    if  act not in [ 'remove','recover' ] :
        resp['code'] = -1
        resp['msg'] = "操作有误,请重试~~"
        return jsonify(resp)

    food_cat_info = FoodCat.query.filter_by( id= id ).first()
    if not food_cat_info:
        resp['code'] = -1
        resp['msg'] = "指定分类不存在~~"
        return jsonify(resp)

    if act == "remove":
        food_cat_info.status = 0
    elif act == "recover":
        food_cat_info.status = 1

        food_cat_info.update_time = getCurrentDate()
    db.session.add( food_cat_info )
    db.session.commit()
    return jsonify(resp)
前端中修改cat.html和相应的cat.js就能测试了,比较难改的地方在可选框的状态,这条语句有点长为
<select name="status" class="form-control inline">
    <option value="-1">请选择状态</option>
    {% for tmp_key in status_mapping %}
        <option value="{{ tmp_key }}" {% if tmp_key == search_con['status'] %} selected {% endif %}>{{ status_mapping[ tmp_key ] }}</option>
    {%  endfor %}
</select>
这个是判断status_mapping搜索框状态,1表示正常,0表示删除,search_con为可选框的值,这里做了两次判断两次选值还是很能证明jinjia2的写法。
然后我们就能看见最终结果:
ueditor可视化编辑器步骤
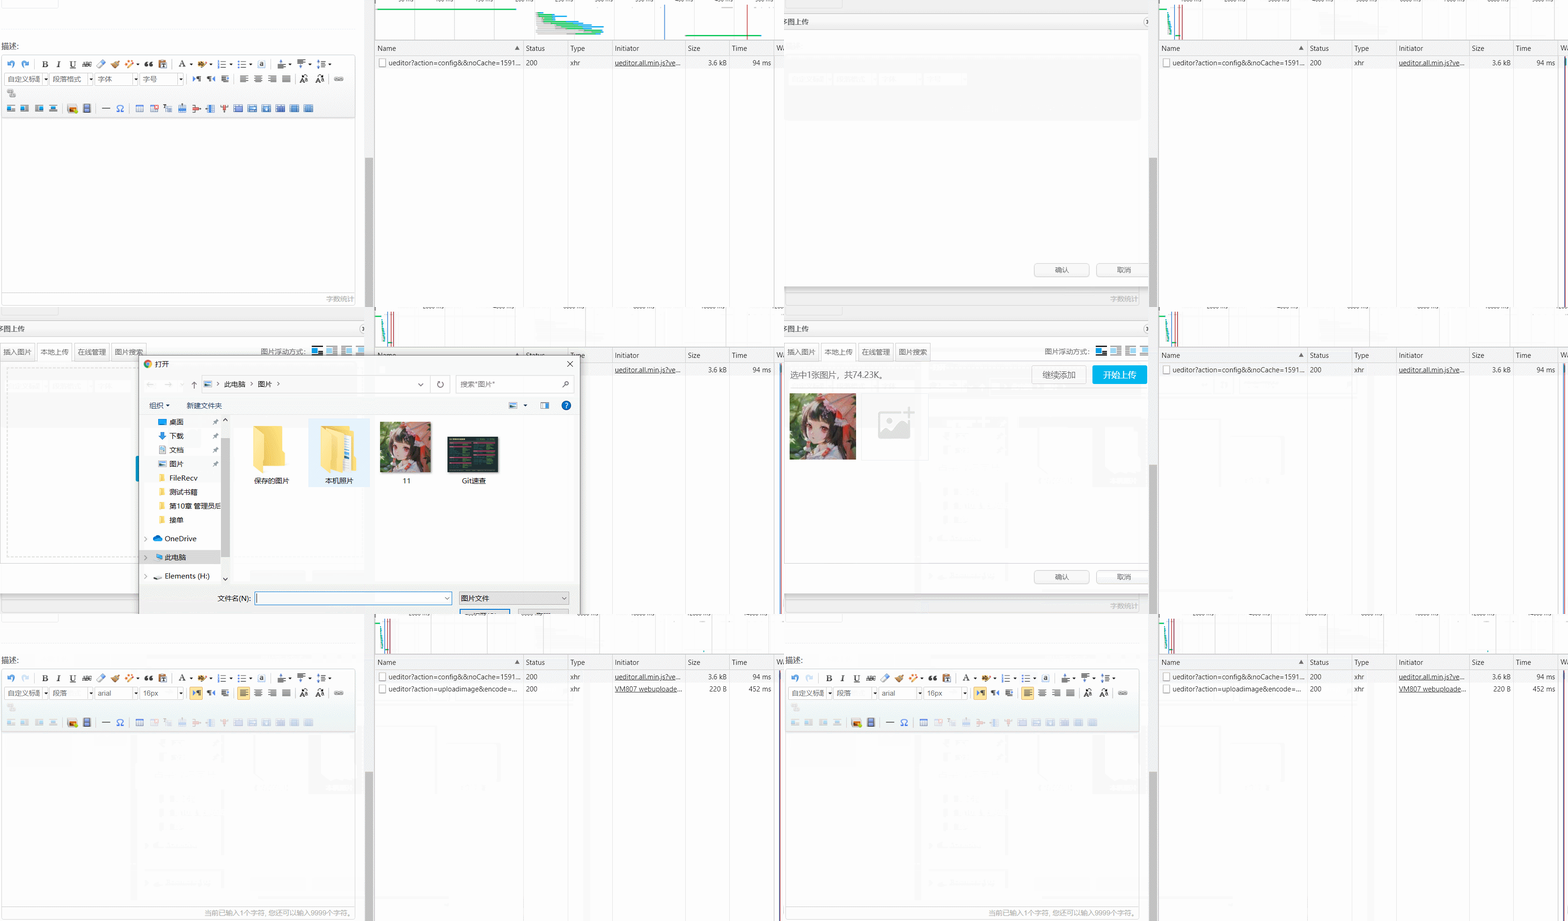
ueditor的文本编辑器可以看http://fex.baidu.com/ueditor/,我们只需要按照文档中所写的那样一步步去配置。首先下载好安装包放进项目文件中的plugin文件夹下,然后在前端的food/set.html中导入相关文件:
<script src="{{ buildStaticUrl( '/plugins/ueditor/ueditor.config.js' ) }}"></script>
<script src="{{ buildStaticUrl( '/plugins/ueditor/ueditor.all.min.js' ) }}"></script>
<script src="{{ buildStaticUrl( '/plugins/ueditor/lang/zh-cn/zh-cn.js' ) }}"></script>

<script src="{{ buildStaticUrl( '/js/food/set.js' ) }}"></script>
最后一个为我们自定义的js文件,按照ueditor文档中所写的那样,关键代码为var ue = UE.getEditor(‘container’);
js文件为:
var food_set_ops = {
    init:function () {
        this.eventBind();
        this.initEditor();
    },
    eventBind:function () {

    },
    initEditor:function () {
        var that = this;
        that.ue = UE.getEditor("editor");
    }
};

$(document).ready(function () {
    food_set_ops.init();
});
上面虽然有可视化编辑器了,但我们需要完善后端逻辑,首先写图片上传函数:
# -*- coding: utf-8 -*-
from werkzeug.utils import secure_filename
from application import app,db
from common.libs.Helper import getCurrentDate
import datetime
import  os,stat,uuid
from common.models.Image import Image
class UploadService():
	@staticmethod
	def uploadByFile( file ):


		config_upload = app.config['UPLOAD']       # """{'ext':[ 'jpg','gif','bmp','jpeg','png' ],'prefix_path':'/web/static/upload/','prefix_url':'/static/upload/'}"""

		resp = { 'code':200,'msg':'操作成功~~','data':{} }
		filename = secure_filename( file.filename )     # 得到一个安全验证的文件
		ext = filename.rsplit(".",1)[1]     # 0是文件名,1是扩展后缀
		if ext not in config_upload['ext']: # 检查文件后缀
			resp['code'] = -1
			resp['msg'] = "不允许的扩展类型文件"
			return resp


		root_path = app.root_path + config_upload['prefix_path']    # 创建服务器文件夹名字
		file_dir = datetime.datetime.now().strftime("%Y%m%d")
		save_dir = root_path + file_dir
		if not os.path.exists( save_dir ):
			os.mkdir( save_dir )
			os.chmod( save_dir,stat.S_IRWXU | stat.S_IRGRP |  stat.S_IRWXO )

		file_name = str( uuid.uuid4() ).replace("-","") + "." + ext  # 组成路径与文件
		file.save( "{0}/{1}".format( save_dir,file_name ) )

		model_image = Image()   # 将图片地址保存到数据库中
		model_image.file_key = file_dir + "/" + file_name
		model_image.created_time = getCurrentDate()
		db.session.add( model_image)
		db.session.commit()

		resp['data'] = {
			'file_key': model_image.file_key
		}
		return resp
然后我们需要写和前端对应的接口,再创建一个upload包,并申请一个蓝图,名字为route_upload,前缀为url_prefix = “/upload”,接口路径为"/ueditor",那么代码为:
# -*- coding: utf-8 -*-
from flask import Blueprint,request,jsonify
from application import  app
import re,json
from common.libs.UploadService import UploadService
from common.libs.UrlManager import UrlManager
from common.models.Image import Image
route_upload = Blueprint('upload_page', __name__)


@route_upload.route("/ueditor",methods = [ "GET","POST" ])
def ueditor():

	req = request.values
	action = req['action'] if 'action' in req else ''

	if action == "config":
		root_path = app.root_path
		config_path = "{0}/web/static/plugins/ueditor/upload_config.json".format( root_path )
		with open( config_path,encoding="utf-8" ) as fp:
			try:
				config_data =  json.loads( re.sub( r'\/\*.*\*/' ,'',fp.read() ) )
			except:
				config_data = {}
		return  jsonify( config_data )

	if action == "uploadimage":
		return uploadImage()

	if action == "listimage":
		return listImage()

	return "upload"


def uploadImage():	# 上传图片逻辑
	resp = { 'state':'SUCCESS','url':'','title':'','original':'' }	# 返回json格式
	file_target = request.files
	upfile = file_target['upfile'] if 'upfile' in file_target else None
	if upfile is None:
		resp['state'] = "上传失败"
		return jsonify(resp)

	ret = UploadService.uploadByFile( upfile )
	if ret['code'] != 200:
		resp['state'] = "上传失败:" + ret['msg']
		return jsonify(resp)

	resp['url'] = UrlManager.buildImageUrl( ret['data']['file_key'] )
	return jsonify( resp )

def listImage():	# 图片列表展示
	resp = { 'state':'SUCCESS','list':[],'start':0 ,'total':0 }

	req = request.values

	start = int( req['start']) if 'start' in req else 0
	page_size = int( req['size']) if 'size' in req else 20

	query = Image.query
	if start > 0:
		query = query.filter( Image.id < start )

	list = query.order_by( Image.id.desc() ).limit( page_size ).all()
	images = []

	if list:
		for item in list:
			images.append( { 'url': UrlManager.buildImageUrl( item.file_key ) } )
			start = item.id
	resp['list'] = images
	resp['start'] = start
	resp['total'] = len( images )
	return jsonify( resp )


