Xposed插件开发手册(2):Xposed插件开发入门
前言
在上一篇文章《Xposed插件开发手册(1): Xposed框架的安装》,我们学习到了Xposed的安装,这篇文章我们就来做一个简单的Xposed模块,劫持我们写的App,整篇文章我参考了官网的教程来编写。
环境参数
研发环境
- 操作系统:MacOS Mojava
- IDE:Android Studio 3.2
- Gradle:gradle-4.6-all.zip
手机参数
- 操作系统:魔趣OS 8.1
- 手机:Redmi 5A
- Xposed installer : XposedInstaller_3.1.5.apk
- Xposed : xposed-v90-sdk27-arm64-beta3.zip
- Xposed bridge version: 82
上面已经列出了环境参数,如果哪里不清楚可以留言给我修改。
开始研发
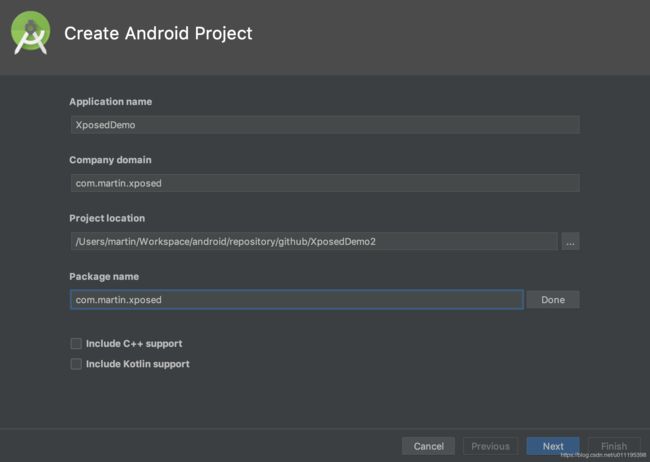
新建项目
新建一个Xposed的项目,环境配置为5.0

创建一个MainActivity
- activity_main.xml
布局中只包含一个按钮
<android.support.constraint.ConstraintLayout xmlns:android="http://schemas.android.com/apk/res/android"
    xmlns:app="http://schemas.android.com/apk/res-auto"
    xmlns:tools="http://schemas.android.com/tools"
    android:layout_width="match_parent"
    android:layout_height="match_parent"
    tools:context=".MainActivity">

    <Button
        android:id="@+id/button"
        android:layout_width="wrap_content"
        android:layout_height="wrap_content"
        android:text="Hook监测"
        app:layout_constraintBottom_toBottomOf="parent"
        app:layout_constraintEnd_toEndOf="parent"
        app:layout_constraintStart_toStartOf="parent"
        app:layout_constraintTop_toTopOf="parent" />

android.support.constraint.ConstraintLayout>
- MainActivity.class
代码中只做了一个点击监听操作。
public class MainActivity extends AppCompatActivity {

    @Override
    protected void onCreate(Bundle savedInstanceState) {
        super.onCreate(savedInstanceState);
        setContentView(R.layout.activity_main);
        findViewById(R.id.button).setOnClickListener(new View.OnClickListener() {
            @Override
            public void onClick(View v) {
                Toast.makeText(MainActivity.this, toastMessage(), Toast.LENGTH_SHORT).show();
            }
        });
    }

    public String toastMessage() {
        return "按钮未被劫持";
    }

}
配置XposedBridge
XposedBridge中包含了编写Xposed插件的java代码用于调用Xposed环境中提供的功能。
- 下载两个Xposed API
- api-82-sources.jar: 包含源码的
- api-82.jar: 不包含源码

我们将下载好的api-82.jar复制到Android Studio的libs目录下,在gradle中加载我们的jar包。
dependencies {
    compileOnly fileTree(dir: 'libs', include: ['*.jar'])
    implementation 'com.android.support:appcompat-v7:28.0.0'
    implementation 'com.android.support.constraint:constraint-layout:1.1.3'
    testImplementation 'junit:junit:4.12'
    androidTestImplementation 'com.android.support.test:runner:1.0.2'
    androidTestImplementation 'com.android.support.test.espresso:espresso-core:3.0.2'
    compileOnly 'de.robv.android.xposed:api:82' // 添加这一行且必须是 compileOnly
    compileOnly 'de.robv.android.xposed:api:82:sources'
}
注意compileOnly fileTree(dir: 'libs', include: ['*.jar'])这行代码,compileOnly命令只在编译时期打包进入,原因是Xposed里已有该jar包内容,再次打包进去会冲突。
ps: 上面那个修改很重要,不修改就会导致handleLoadPackage没有回调,具体参考《Using the Xposed Framework API》
修改AndroidManifest.xml文件
在Application标签里面添加三个meta-data,当我们安装的时候Xposed框架会检验信息,并且判定次App是Xposed插件。
<manifest xmlns:android="http://schemas.android.com/apk/res/android"
    package="com.martin.xposed">

    <application
        android:allowBackup="true"
        android:icon="@mipmap/ic_launcher"
        android:label="@string/app_name"
        android:roundIcon="@mipmap/ic_launcher_round"
        android:supportsRtl="true"
        android:theme="@style/AppTheme">


        <meta-data
            android:name="xposedmodule"
            android:value="true" />


        <meta-data
            android:name="xposeddescription"
            android:value="This is a Xposed Module Demo" />


        <meta-data
            android:name="xposedminversion"
            android:value="54" />


        <activity android:name=".MainActivity">
            <intent-filter>
                <action android:name="android.intent.action.MAIN" />

                <category android:name="android.intent.category.LAUNCHER" />
            intent-filter>
        activity>
    application>

manifest>
编写Xposed插件
- 创建
HookMain.java文件实现IXposedHookLoadPackage入口,这里是你的插件入口,参考Javadoc
public class HookMain implements IXposedHookLoadPackage {

    /**
     * XposedBridge.log():以原生logcat的形式写入到/data/user_de/0/de.robv.android.xposed.installer/log/error.log
     */
    @Override
    public void handleLoadPackage(XC_LoadPackage.LoadPackageParam loadPackageParam) throws Throwable {
        if (loadPackageParam.packageName.equals(BuildConfig.APPLICATION_ID)) {
            Class clazz = loadPackageParam.classLoader.loadClass("com.martin.xposed.MainActivity");
            XposedHelpers.findAndHookMethod(clazz, "toastMessage", new XC_MethodHook() {
                protected void beforeHookedMethod(MethodHookParam param) throws Throwable {
                    super.beforeHookedMethod(param);
                    XposedBridge.log("Hook成功");
                }

                protected void afterHookedMethod(MethodHookParam param) throws Throwable {
                    param.setResult("按钮已被劫持");
                }
            });
        }
    }

}
上面看代码很明显,是针对我们的MainActivity的toastMessage方法进行劫持。beforeHookedMethod方法,是在我们toastMessage运行前会调用,afterHookedMethod方法,在我们方法运行后调用。
编写插件入口配置文件Xposed_init
- assets/xposed_init
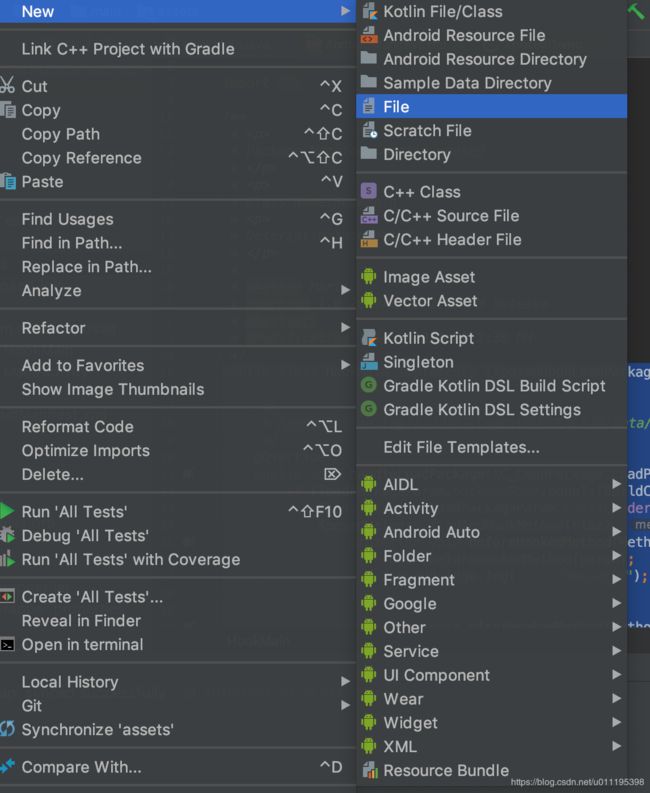
首先创建项目中的assets目录

创建一个文件(这里不需要任何后缀名),将我们的HookMain完整包名填写到文件中。
com.martin.xposed.HookMain
取消instant Run
在安装之前,需要配置取消IDE的instant run,如果不配置会监测不到你的入口。原因如下:
Please make sure to disable Instant Run (File -> Settings -> Build, Execution, Deployment -> Instant Run), otherwise your classes aren’t included directly in the APK, but loaded via a stub application which Xposed can’t handle.

运行
接下来,我们就可以直接运行我们的插件了,点开我们安装的Xposed installer的模块可以看见我们开发的插件已经被检测到了。

重启下手机生效,点击按钮查看我们的劳动成果。

小结
总结下步骤:
- 编写功能点
- 使用XposedBridge对功能点进行劫持。
- 配置插件入口文件
其实这篇入门文章大部分都是编写配置文件并没有使用太多API,大家细心点配置就没什么问题了,我把项目上传到Github了不想编写的,自己下载运行就好了。关于原理的讲解,大家可以参考这篇文章《深入理解 Android(三):Xposed 详解》目前是我找到的比较好的国内资料。
参考文献
- XposedBridge Development tutorial
- Using the Xposed Framework API