tf-CNN(二)Tensorflow制作自己的数据集并训练
参考:https://www.jianshu.com/p/15e3f74180fc
https://blog.csdn.net/wiinter_fdd/article/details/72835939
对于数据量较小而言,可能一般选择直接将数据加载进内存,然后再分batch输入网络进行训练。但是,如果数据量较大,这样的方法就不适用了,因为太耗内存。在这儿我介绍一种比较通用,高效的读取方法,即使用tensorflow内定标准格式——TFRecord.TFRecords其实是一种二进制文件,虽然它不如其他格式好理解,但是它能更好的利用内存,更方便复制和移动,并且不需要单独的标签文件。TFRecord会根据你输入的文件的类,自动给每一类打上同样的标签。
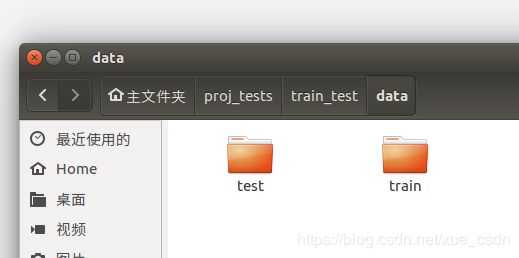
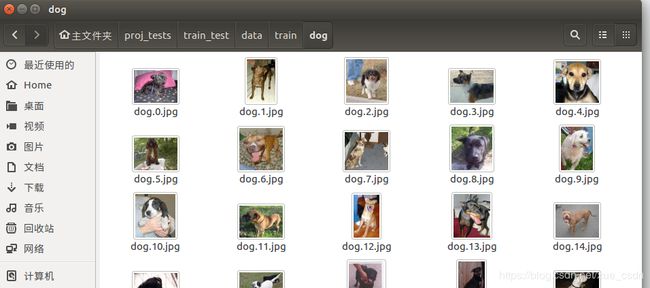
以训练猫狗分类器为例。收集猫狗的图片各150张,其中训练集各100张,测试集各50张,按顺序编号。如图,data与代码在同一路径下。
1、生成tfrecords文件
make_tfrecords.py
"""
#用自己的图片制作tfrecords数据集
"""

import tensorflow as tf
import os
from PIL import Image
#import matplotlib.pyplot as plt
import numpy as np

#训练集和测试集需要各自生成一个tfcords文件
#cwd = './data/train/'
cwd = './data/test/'

#自己定义类别
classes = {'dog', 'cat'}

#生成的records文件名
#writer = tf.compat.v1.python_io.TFRecordWriter("dog_and_cat_train.tfrecords")
##tensorflow2.0版的多加了compat.v1
writer = tf.compat.v1.python_io.TFRecordWriter("dog_and_cat_test.tfrecords")

for index,name in enumerate(classes):
    class_path = cwd + name + '/'
    for img_name in os.listdir(class_path):
        # 每张图片的地址
        img_path = class_path + img_name

        img = Image.open(img_path)
        img = img.resize((128,128))
        print(np.shape(img))

        # 图片转化为二进制格式
        img_raw = img.tobytes()

        # example对象对label和image数据进行封装
        example = tf.train.Example(features = tf.train.Features(feature={
            "label": tf.train.Feature(int64_list=tf.train.Int64List(value=[index])),
            "img_raw":tf.train.Feature(bytes_list=tf.train.BytesList(value=[img_raw]))
        }))

        #序列化为字符串
        writer.write(example.SerializeToString())

writer.close()
因为我的tensorflow是2。0版本,所以将
tf.python_io.TFRecordWriter写成
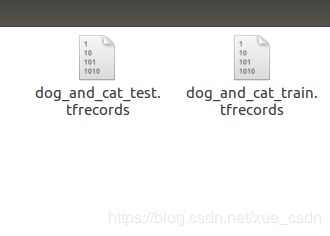
tf.compat.v1.python_io.TFRecordWriter运行之后就在代码所在路径下生成两个文件,一个是训练集,一个是测试集
2、读取tfrecords文件
read_tfrecords.py
"""
###读出tfrecords中的图片和标签
"""

import numpy as np
#import tensorflow as tf
import tensorflow.compat.v1 as tf
tf.disable_v2_behavior()

def read_and_decode(filename):

    #生成一个queue队列
    filename_queue = tf.train.string_input_producer([filename], shuffle = True)

    reader = tf.TFRecordReader()
    #返回文件名和文件
    _, serialized_example = reader.read(filename_queue)
    #将image和label取出来
    features = tf.parse_single_example(serialized_example,
                                       features={'label':tf.FixedLenFeature([],tf.int64),
                                                 'img_raw':tf.FixedLenFeature([],tf.string)})

    img = tf.decode_raw(features['img_raw'], tf.uint8)

    # reshape后图片的大小及通道
    img = tf.reshape(img, [128,128,3])

    #在流中抛出img张量   和   label张量
    img = tf.cast(img, tf.float32) * (1./255) -0.5
    label = tf.cast(features['label'], tf.int32)

    return img, label
3、训练
dog_and_cat_train.py
"""
###训练猫狗分类模型
"""

#import tensorflow as tf
import tensorflow.compat.v1 as tf
tf.disable_v2_behavior()
import numpy as np
import read_tfrecords

epoch = 15
batch_size = 20

def one_hot(labels, Label_class):
    one_hot_label = np.array([[int(i==int(labels[j])) for i in range(Label_class)] for j in range(len(labels))])
    return one_hot_label

#初始化权值
def weight_variable(shape):
    initial = tf.truncated_normal(shape, stddev = 0.02)
    return tf.Variable(initial)

#初始化偏置
def bias_variable(shape):
    initial = tf.constant(0.0 , shape=shape)
    return tf.Variable(initial)

#卷积层
def conv2d(x,W):
    return tf.nn.conv2d(x,W,strides = [1,1,1,1],padding = 'SAME')

#池化层
def max_pool_4x4(x):
    return tf.nn.max_pool(x,ksize=[1,4,4,1],strides=[1,4,4,1],padding='SAME')

x = tf.placeholder(tf.float32, [batch_size, 128,128,3])
y_ = tf.placeholder(tf.float32, [batch_size, 2])

#1 卷积1和池化1
W_conv1 = weight_variable([5,5,3,32])
b_conv1 = bias_variable([32])
h_conv1 = tf.nn.relu(conv2d(x,W_conv1)+b_conv1)
h_pool1 = max_pool_4x4(h_conv1)

#2 卷积2和池化2
W_conv2 = weight_variable([5,5,32,64])
b_conv2 = bias_variable([64])
h_conv2 = tf.nn.relu(conv2d(h_pool1,W_conv2)+b_conv2)
h_pool2 = max_pool_4x4(h_conv2)

#全连接,用1个MLP处理
reshape = tf.reshape(h_pool2,[batch_size, -1])
dim = reshape.get_shape()[1].value
W_fc1 = weight_variable([dim, 1024])
b_fc1 = bias_variable([1024])
h_fc1 = tf.nn.relu(tf.matmul(reshape, W_fc1)+b_fc1)

#dropout
keep_prob = tf.placeholder(tf.float32)
h_fc1_drop = tf.nn.dropout(h_fc1, keep_prob)

W_fc2 = weight_variable([1024,2])
b_fc2 = bias_variable([2])
y_conv = tf.nn.softmax(tf.matmul(h_fc1_drop, W_fc2)+b_fc2)

#损失函数及优化算法
cross_entropy = tf.reduce_mean(-tf.reduce_sum(y_ * tf.log(y_conv),reduction_indices = [1]))
train_step = tf.train.AdamOptimizer(0.001).minimize(cross_entropy)

correct_prediction = tf.equal(tf.argmax(y_conv,1),tf.argmax(y_,1))
accuracy = tf.reduce_mean(tf.cast(correct_prediction,tf.float32))

img,label = read_tfrecords.read_and_decode("dog_and_cat_train.tfrecords")
img_test, label_test = read_tfrecords.read_and_decode (("dog_and_cat_test.tfrecords"))

#使用shuffle_batch可以随机打乱输入
img_batch, label_batch = tf.train.shuffle_batch([img,label],
                                                batch_size=batch_size,capacity=2000,
                                                min_after_dequeue=1000)
img_test,label_test = tf.train.shuffle_batch([img_test,label_test],
                                             batch_size=batch_size,capacity=2000,
                                             min_after_dequeue=1000)

init = tf.initialize_all_variables()
t_vars = tf.trainable_variables()
print(t_vars)

with tf.Session() as sess:
    sess.run(init)
    coord = tf.train.Coordinator()
    threads = tf.train.start_queue_runners(sess=sess,coord=coord)
    batch_idxs = int(2314/batch_size)
    for i in range(epoch):
        for j in range(batch_idxs):
            val,l = sess.run([img_batch, label_batch])
            l = one_hot(l,2)
            _, acc = sess.run([train_step, accuracy], feed_dict={x: val, y_: l, keep_prob: 0.5})
            print("Epoch:[%4d] [%4d/%4d], accuracy:[%.8f]" % (i, j, batch_idxs, acc))

    val,l = sess.run([img_test,label_test])
    l=one_hot(l,2)
    print(l)
    y,acc = sess.run([y_conv,accuracy],feed_dict={x:val,y_:l,keep_prob:1})
    print(y)
    print("test accuracy:[%.8f]" % (acc))

    coord.request_stop()
    coord.join(threads)
这一部分不多说,就是卷积层、池化层、全连接层的CNN网络。
开头的
import tensorflow.compat.v1 as tf
tf.disable_v2_behavior()
代替
import tensorflow as tf主要还是因为我的tensorflow版本问题,如果直接import会出现“module 'tensorflow' has no attribute 'placeholder'”的错误。
而由于3要调用2的代码,所以read_tfrecords.py中,也需要这么写,否则也会出现错误。
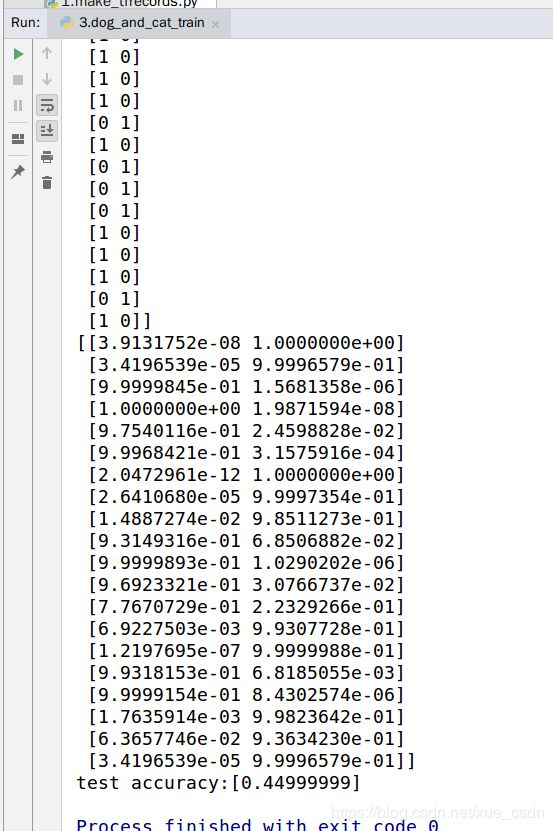
训练结果:
最终我的accuracy只有0.4499,可能是数据太少,欠拟合了。


