学习笔记:原生和flutter混合开发之flutter_boot的使用
一、概念梳理
flutter_boost 是一个 flutter 插件,他是Flutter - Native混合开发解决方案。
FlutterBoost 可以轻松地为现有原生应用程序提供Flutter混合集成方案。FlutterBoost的理念是将Flutter像Webview那样来使用。在现有应用程序中同时管理Native页面和Flutter页面并非易事。 FlutterBoost帮你处理页面的映射和跳转,你只需关心页面的名字和参数即可(通常可以是URL)。
二、混合集成条件:
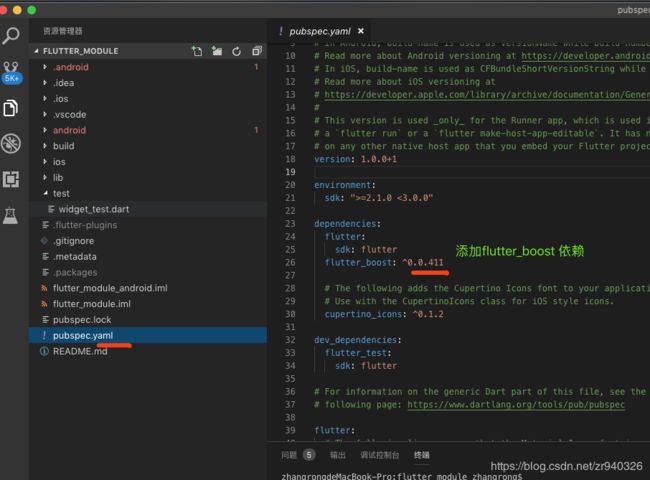
图片字错了,是依赖引用。
三、集成过程:
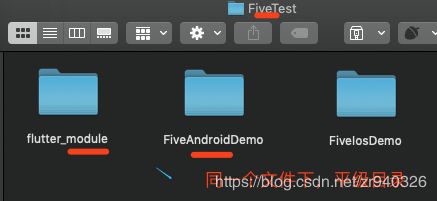
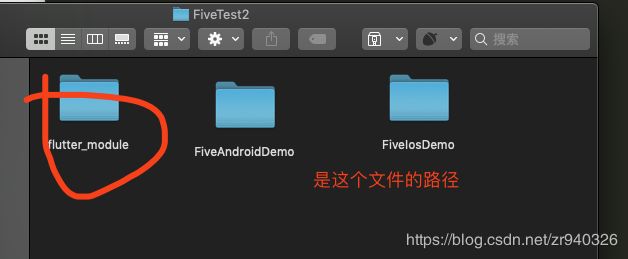
##1. 建立 flutter 依赖库(主的flutter开发包),完成flutter端集成
&&1.执行命令,新建 flutter module:
flutter create -t module flutter_module&&2. 用编译器,打开新建的flutter 库,添加flutter_boost依赖
&&3.执行命令,创建出anroid和ios 文件(上图可见这几个创建之后的android,ios文件)
flutter make-host-app-editable&&4.由于 flutter_boost有kotlin依赖,需要添加依赖
&&5.执行命令,检查依赖是否配置成功
可通过flutter build apk,来检查是否完成flutter_boost的依赖。
由于我使用的是sdk api 28 ,我做了如下的修改,才能正确完成flutter_boost的依赖,这个需要你们自己结合情况灵活处理,有时编译错误是千奇百怪。
这是成功后的操作显示图。
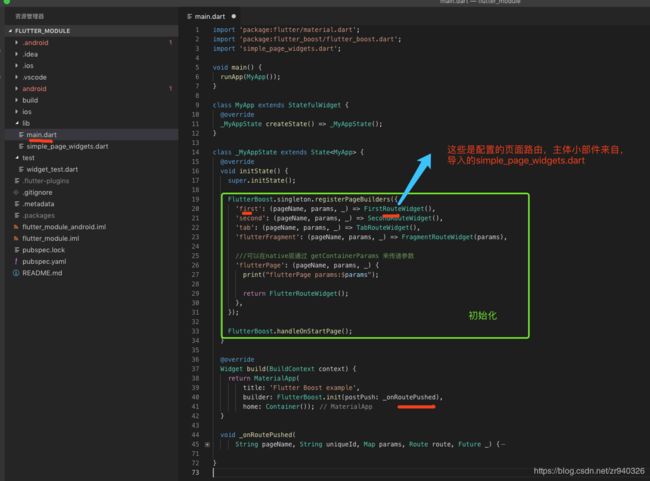
&&6.完成flutter端的 flutter_boost 初始化
##2. android 原生项目集成flutter ,彼此相互调用使用
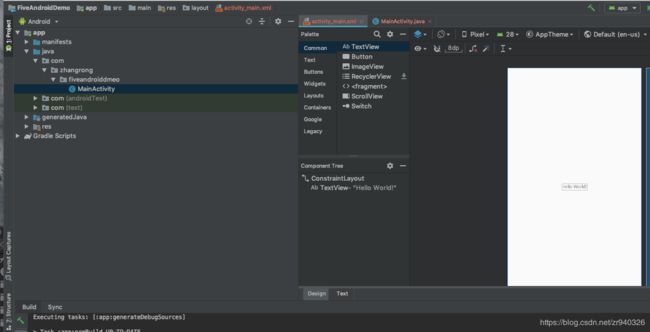
&&1.新建一个android项目,如果现成的项目,就可跳过这步
&&2.在项目的跟目录的settings.gradle文件中添加如下操作
添加完后,编译一下项目,sync now
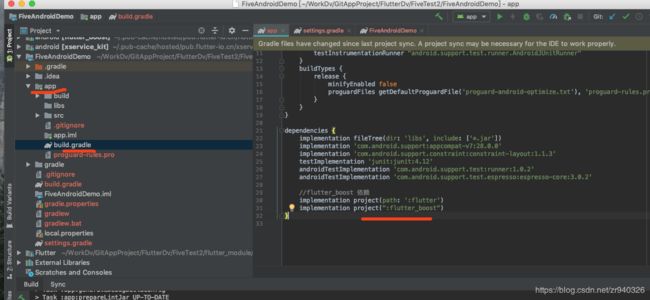
&&3.在app 下的 build.gradle添加 flutter_boost集成依赖
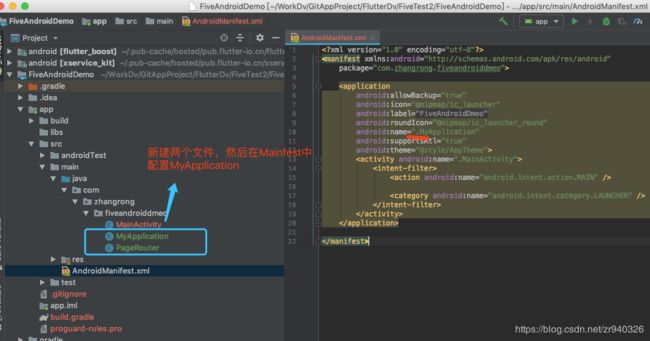
&&4.修改 application ,初始化 Flutterboost 完成android端初始化
文件如下:
import android.app.Activity;
import android.app.Application;
import android.content.Context;

import com.taobao.idlefish.flutterboost.Debuger;
import com.taobao.idlefish.flutterboost.FlutterBoostPlugin;
import com.taobao.idlefish.flutterboost.interfaces.IPlatform;

import java.util.Map;

import io.flutter.app.FlutterApplication;

public class MyApplication extends FlutterApplication {
    @Override
    public void onCreate() {
        super.onCreate();

        FlutterBoostPlugin.init(new IPlatform() {
            @Override
            public Application getApplication() {
                return MyApplication.this;
            }

            /**
             * 获取应用入口的Activity,这个Activity在应用交互期间应该是一直在栈底的
             */
            @Override
            public Activity getMainActivity() {
                return MainActivity.sRef.get();
            }

            @Override
            public boolean isDebug() {
                return false;
            }


            /**
             * 如果flutter想打开一个本地页面,将会回调这个方法,页面参数将会拼接在url中
             * 例如:sample://nativePage?aaa=bbb
             * 参数就是类似 aaa=bbb 这样的键值对
             */
            @Override
            public boolean startActivity(Context context, String url, int requestCode) {
                Debuger.log("startActivity url="+url);

                return PageRouter.openPageByUrl(context,url,requestCode);
            }

            @Override
            public Map getSettings() {
                return null;
            }
        });
    }
}
public class PageRouter {


    public static final String NATIVE_PAGE_URL = "sample://nativePage";
    public static final String FLUTTER_PAGE_URL = "sample://flutterPage";

    public static boolean openPageByUrl(Context context, String url) {
        return openPageByUrl(context, url, 0);
    }


    public static boolean openPageByUrl(Context context, String url, int requestCode) {

        //根据页面标识,做不同的页面跳转
        try {
            if (url.startsWith(FLUTTER_PAGE_URL)) {


                return true;
            } else if (url.startsWith(NATIVE_PAGE_URL)) {


                return true;
            } else {

                return false;
            }

        } catch (Throwable t) {
            return false;
        }
    }
}
&&5.相互调用使用
安卓:
1). 安卓要 调用flutter 页面。
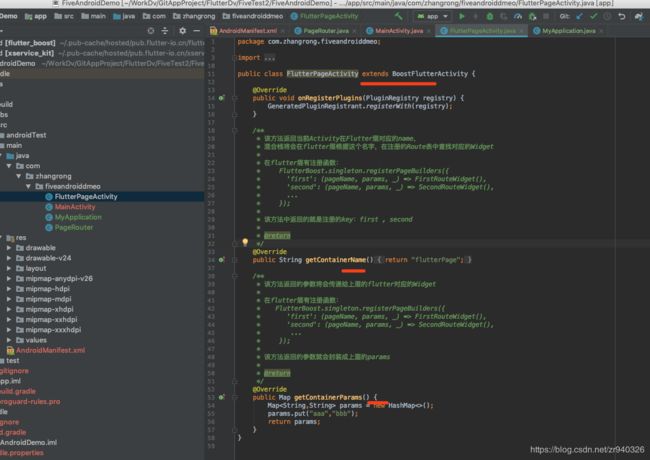
@@1. 跟正常建页面一样,需要清单注册,只是继承 会配置 名称需要注意
getContainerName() 返回的 是 要调用的那个flutter 页面
getContainerParams() 返回的是 要传递给那个flutter的参数
@@2. flutter main 函数中 ,在注册路由时,获取原生页面
传递的参数 ,返回要正式flutter显示的页面
2). flutter 调用 flutter 的页面
FlutterBoost.singleton.openPage("second", {}, animated: true); //路由配置 其他的flutter 注册页面
关闭当前页面:FlutterBoost.singleton.closePageForContext(context);
3). flutter 调用 原生页面
flutter 打开原生:
FlutterBoost.singleton.openPage("sample://nativePage", {"query": {"aaa": "bbb"} }), //打开 原生页面 ,传递的参数
字符串原生页面,是在 原生页面 PageRouter类中进行注册的,这里有一个执行跳转。 而这个操作,会回调 MyApplication中
flutterboot 集成的 startActivity 配置路由方法 。 参数 通过 ,url 自己截取获得。

##3.ios 原生项目集成fluter,相互调用使用
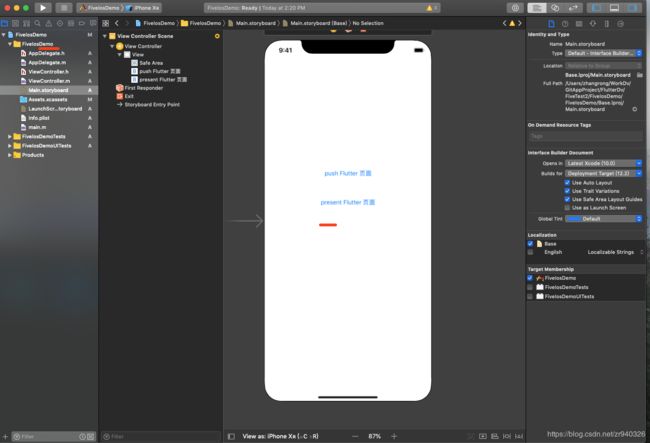
&&1.新建一个ios项目,如果现成的项目,就可跳过这步(你刚建立的,下面这个图是空白的页面)
&&2.进入初始化、配置项目
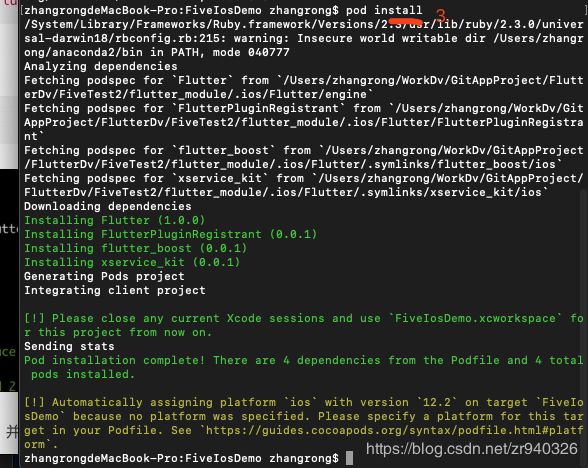
@@1. 进入到 项目,执行pod安装
cd FiveIosDemo
pod init
上面执行之后,会创建一个Podfile文件,我需要将其打开,进行修改。
#集成 flutter
flutter_application_path = '/Users/zhangrong/WorkDv/GitAppProject/FlutterDv/FiveTest2/flutter_module/'
  eval(File.read(File.join(flutter_application_path, '.ios', 'Flutter', 'podhelper.rb')), binding)
执行pod安装命令:pod install
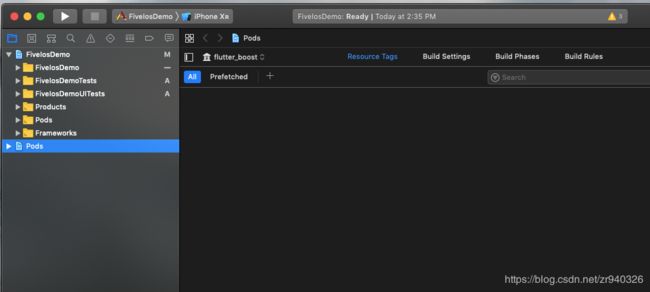
@@2.关掉原来的项目,重新打开FiveIosDemo.xcworkspace ,进行相应的配置操作
(这个文件是执行了上面命令之后创建的)
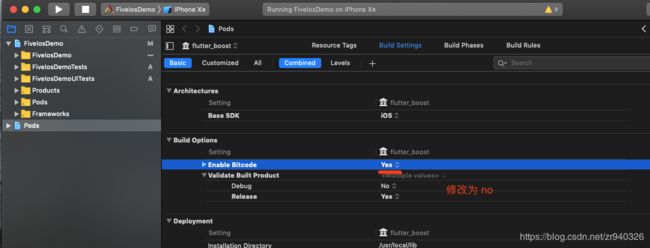
1).修改下Enable Bitcode为No
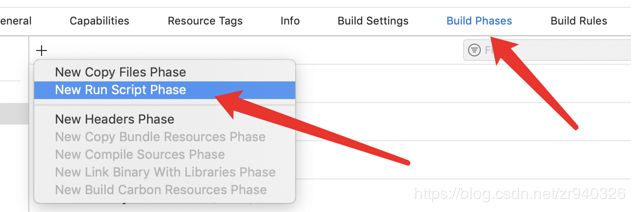
2)为构建Dart代码添加一个构建阶段
"$FLUTTER_ROOT/packages/flutter_tools/bin/xcode_backend.sh" build
"$FLUTTER_ROOT/packages/flutter_tools/bin/xcode_backend.sh" embed
可使用:⌘B 构建检查配置,看到下图就配置成功
3)添加flutter 产物
&&3.flutter_boost 初始化
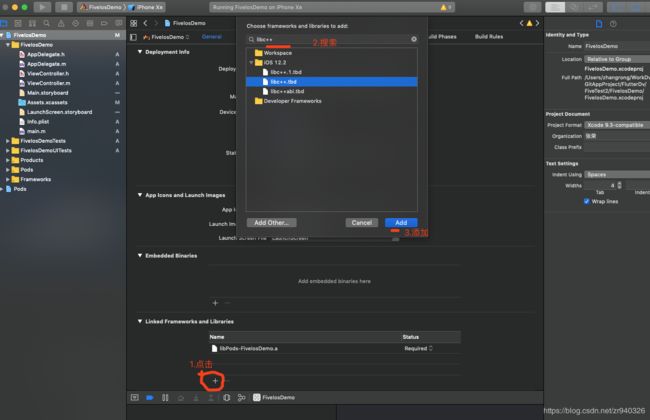
@@1.添加 lib 库
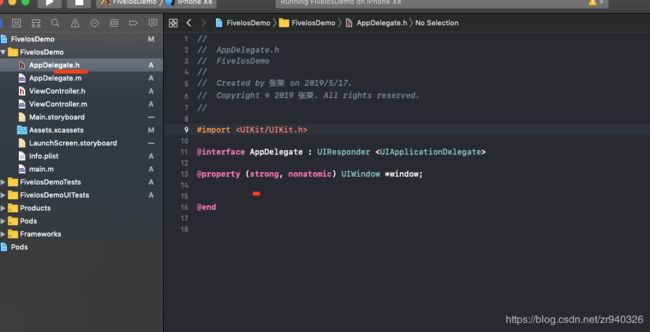
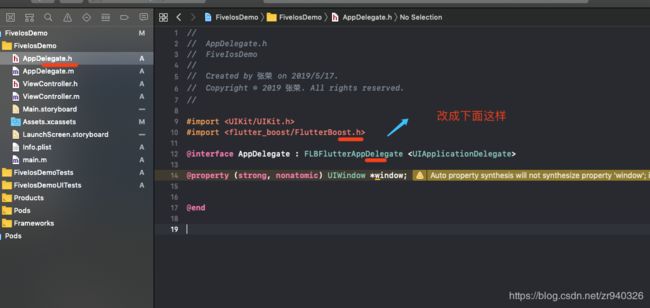
@@2.修改 AppDelegate 超类 、完成flutter_bost初始化
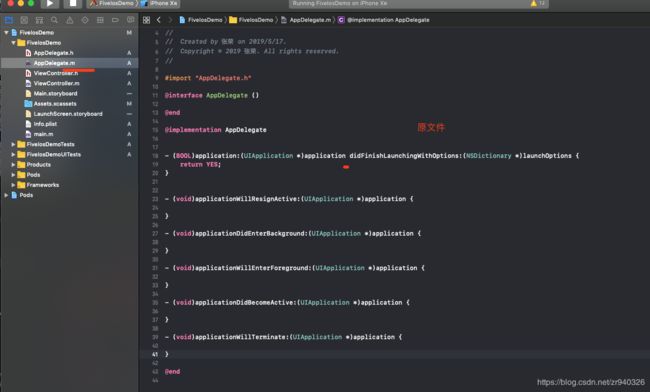
修改成下面这样:
代码:
AppDelegate.h文件:
#import
#import

@interface AppDelegate : FLBFlutterAppDelegate

@property (strong, nonatomic) UIWindow *window;


@end
DemoRouter.h文件:
#import
#import
#import

NS_ASSUME_NONNULL_BEGIN

@interface DemoRouter : NSObject

@property (nonatomic,strong) UINavigationController *navigationController;

+ (DemoRouter *)sharedRouter;


@end

NS_ASSUME_NONNULL_END
DemoRouter.m文件:
#import "DemoRouter.h"
#import

@implementation DemoRouter

+ (DemoRouter *)sharedRouter
{
    static id instance = nil;
    static dispatch_once_t onceToken;
    dispatch_once(&onceToken, ^{
        instance = [[self alloc] init];
    });
    return instance;
}

//打开 新 页面
- (void)openPage:(NSString *)name
          params:(NSDictionary *)params
        animated:(BOOL)animated
      completion:(void (^)(BOOL))completion
{
    if([params[@"present"] boolValue]){
        FLBFlutterViewContainer *vc = FLBFlutterViewContainer.new;
        [vc setName:name params:params];
        [self.navigationController presentViewController:vc animated:animated completion:^{}];
    }else{
        FLBFlutterViewContainer *vc = FLBFlutterViewContainer.new;
        [vc setName:name params:params];
        [self.navigationController pushViewController:vc animated:animated];
    }
}


//关闭 页面
- (void)closePage:(NSString *)uid animated:(BOOL)animated params:(NSDictionary *)params completion:(void (^)(BOOL))completion
{
    FLBFlutterViewContainer *vc = (id)self.navigationController.presentedViewController;
    if([vc isKindOfClass:FLBFlutterViewContainer.class] && [vc.uniqueIDString isEqual: uid]){
        [vc dismissViewControllerAnimated:animated completion:^{}];
    }else{
        [self.navigationController popViewControllerAnimated:animated];
    }
}
@end
UIViewControllerDemo.h文件:
#import

NS_ASSUME_NONNULL_BEGIN

@interface UIViewControllerDemo : UIViewController

@end

NS_ASSUME_NONNULL_END
UIViewControllerDemo.m文件:
#import "UIViewControllerDemo.h"
#import
#import "DemoRouter.h"


@interface UIViewControllerDemo ()

@end

@implementation UIViewControllerDemo

- (void)viewDidLoad {
    [super viewDidLoad];
    // Do any additional setup after loading the view from its nib.
}


- (IBAction)pushFlutterPage:(id)sender {
    [DemoRouter.sharedRouter openPage:@"first" params:@{} animated:YES completion:^(BOOL f){}];
}

- (IBAction)present:(id)sender {
    [DemoRouter.sharedRouter openPage:@"second" params:@{@"present":@(YES)} animated:YES completion:^(BOOL f){}];
    //    [self dismissViewControllerAnimated:YES completion:completion];
}

/*
 #pragma mark - Navigation

 // In a storyboard-based application, you will often want to do a little preparation before navigation
 - (void)prepareForSegue:(UIStoryboardSegue *)segue sender:(id)sender {
 // Get the new view controller using [segue destinationViewController].
 // Pass the selected object to the new view controller.
 }
 */

@end
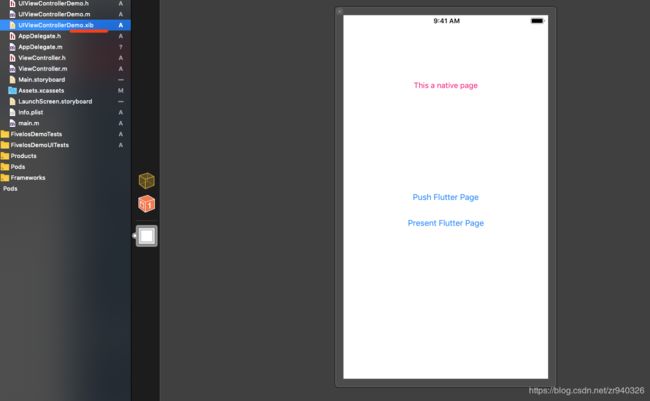
布局xib文件:
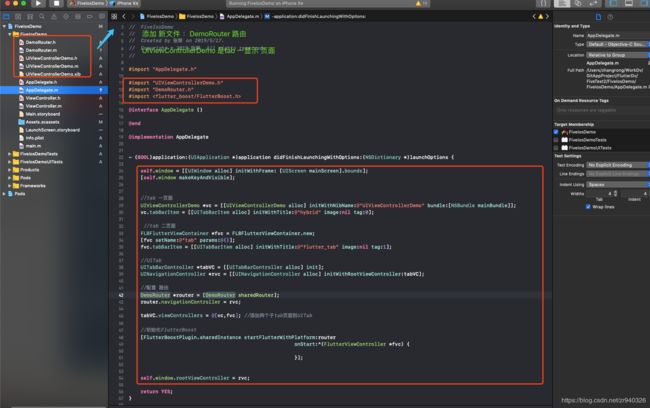
AppDelegate.m文件:
#import "AppDelegate.h"

#import "UIViewControllerDemo.h"
#import "DemoRouter.h"
#import

@interface AppDelegate ()

@end

@implementation AppDelegate


- (BOOL)application:(UIApplication *)application didFinishLaunchingWithOptions:(NSDictionary *)launchOptions {

    self.window = [[UIWindow alloc] initWithFrame: [UIScreen mainScreen].bounds];
    [self.window makeKeyAndVisible];


    //tab 一页面
    UIViewControllerDemo *vc = [[UIViewControllerDemo alloc] initWithNibName:@"UIViewControllerDemo" bundle:[NSBundle mainBundle]];
    vc.tabBarItem = [[UITabBarItem alloc] initWithTitle:@"hybrid" image:nil tag:0];

     //tab 二页面
    FLBFlutterViewContainer *fvc = FLBFlutterViewContainer.new;
    [fvc setName:@"tab" params:@{}];
    fvc.tabBarItem = [[UITabBarItem alloc] initWithTitle:@"flutter_tab" image:nil tag:1];

    //UITab
    UITabBarController *tabVC = [[UITabBarController alloc] init];
    UINavigationController *rvc = [[UINavigationController alloc] initWithRootViewController:tabVC];

    //配置 路由
    DemoRouter *router = [DemoRouter sharedRouter];
    router.navigationController = rvc;

    tabVC.viewControllers = @[vc,fvc]; //添加两个子tab页面到UITab

    //初始化FlutterBoost
    [FlutterBoostPlugin.sharedInstance startFlutterWithPlatform:router
                                                        onStart:^(FlutterViewController *fvc) {

                                                        }];


    self.window.rootViewController = rvc;

    return YES;
}


- (void)applicationWillResignActive:(UIApplication *)application {

}

- (void)applicationDidEnterBackground:(UIApplication *)application {

}

- (void)applicationWillEnterForeground:(UIApplication *)application {

}

- (void)applicationDidBecomeActive:(UIApplication *)application {

}

- (void)applicationWillTerminate:(UIApplication *)application {

}

@end
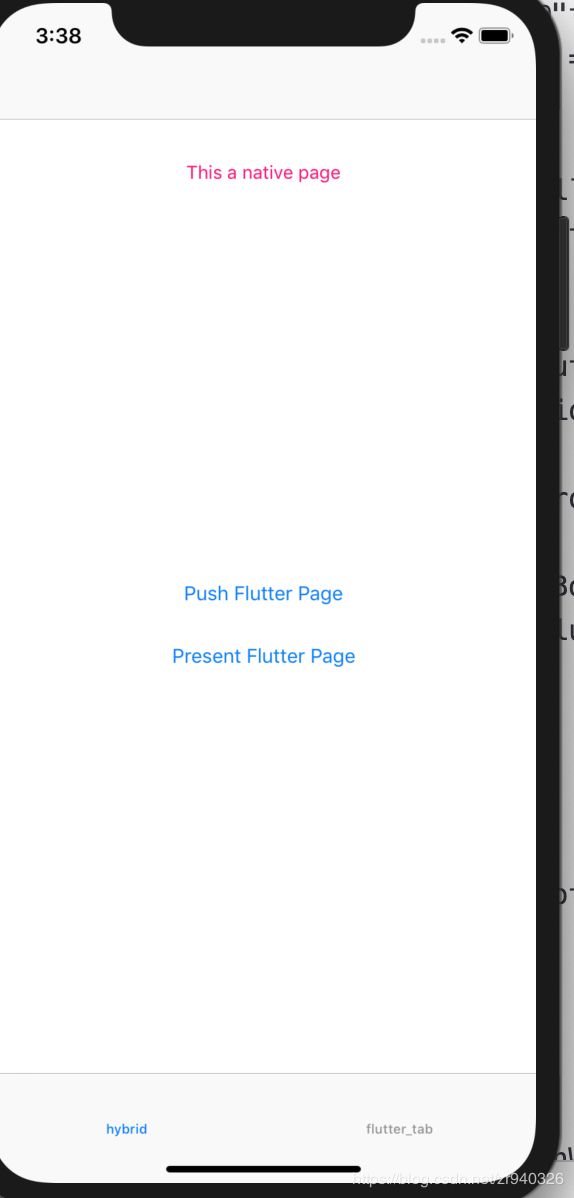
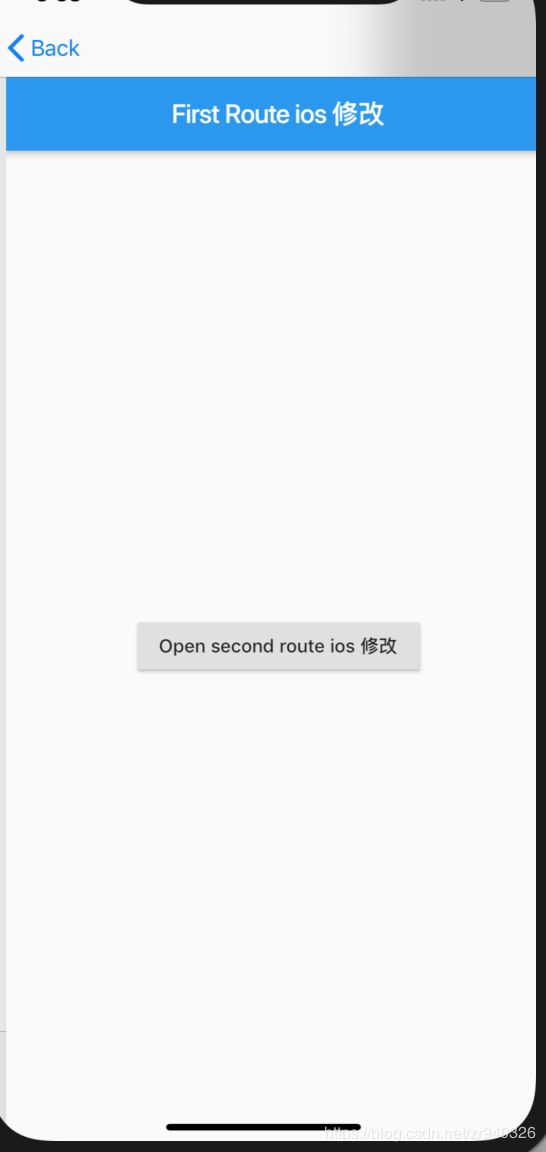
成功运行就是下面的页面:
&&4.相互调用使用
IOS:
1). ios 要 调用flutter 页面
@@1. [DemoRouter.sharedRouter openPage:@"first" params:@{} animated:YES completion:^(BOOL f){}];
//@"first" 是要打开的flutter 页面, @{} 是要传递的参数
@@2. flutter main 函数中 ,在注册路由时,获取原生页面
传递的参数 ,返回要正式flutter显示的页面
2). flutter 调用 flutter 的页面
FlutterBoost.singleton.openPage("second", {}, animated: true); //路由配置 其他的flutter 注册页面
关闭当前页面:FlutterBoost.singleton.closePageForContext(context);
3). flutter 调用 原生页面
路由注册 ,使用路由跳转。
&&5.拓展 flutter原理知识
引用:https://blog.csdn.net/xiangzhihong8/article/details/81712186
学习代码: https://github.com/zr940326/LearnNativeFlutterBoot
flutter_boost相关:
https://blog.csdn.net/LosingCarryJie/article/details/106059391
https://www.cnblogs.com/nightfallsad/
四、错误累积:
##1.Could not setup VM data to boostrap the VM from
https://github.com/flutter/flutter/issues/31596#issuecomment-492900195
https://blog.csdn.net/whbk101/article/details/102827645
https://flutter.dev/docs/development/add-to-app/android/project-setup

