Matplotlib:设置坐标轴范围,刻度,位置,自定义刻度名称,添加数据标签
在使用matplotlib模块时画坐标图时,往往需要对坐标轴设置很多参数,这些参数包括横纵坐标轴范围、坐标轴刻度大小、坐标轴名称等
xlim():设置x坐标轴范围ylim():设置y坐标轴范围xlabel():设置x坐标轴名称ylabel():设置y坐标轴名称xticks():设置x轴刻度yticks():设置y轴刻度
#创建数据
x = np.linspace(-5, 5, 100)
y1 = np.sin(x)
y2 = np.cos(x)

#创建figure窗口,figsize设置窗口的大小
plt.figure(num=3, figsize=(8, 5))
#画曲线1
plt.plot(x, y1)
#画曲线2
plt.plot(x, y2, color='blue', linewidth=5.0, linestyle='--')
#设置坐标轴范围
plt.xlim((-5, 5))
plt.ylim((-2, 2))
#设置坐标轴名称
plt.xlabel('xxxxxxxxxxx')
plt.ylabel('yyyyyyyyyyy')
#设置坐标轴刻度
my_x_ticks = np.arange(-5, 5, 0.5)
#对比范围和名称的区别
#my_x_ticks = np.arange(-5, 2, 0.5)
my_y_ticks = np.arange(-2, 2, 0.3)
plt.xticks(my_x_ticks)
plt.yticks(my_y_ticks)

#显示出所有设置
plt.show()
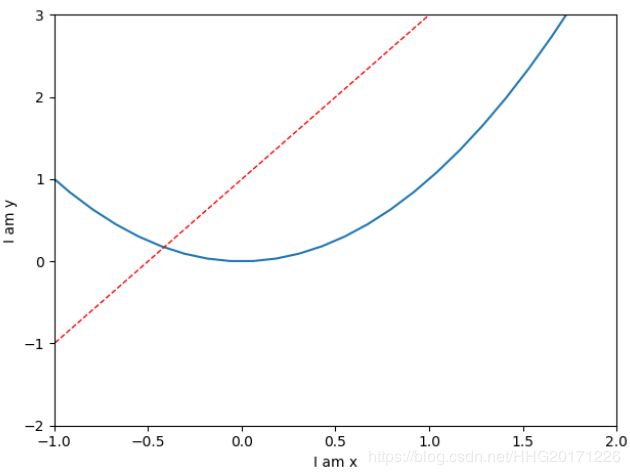
import matplotlib.pyplot as plt
import numpy as np

x = np.linspace(-3, 3, 50)
y1 = 2*x + 1
y2 = x**2

plt.figure()
plt.plot(x, y2)
plt.plot(x, y1, color='red', linewidth=1.0, linestyle='--')

plt.xlim((-1, 2))
plt.ylim((-2, 3))
plt.xlabel('I am x')
plt.ylabel('I am y')
plt.show()
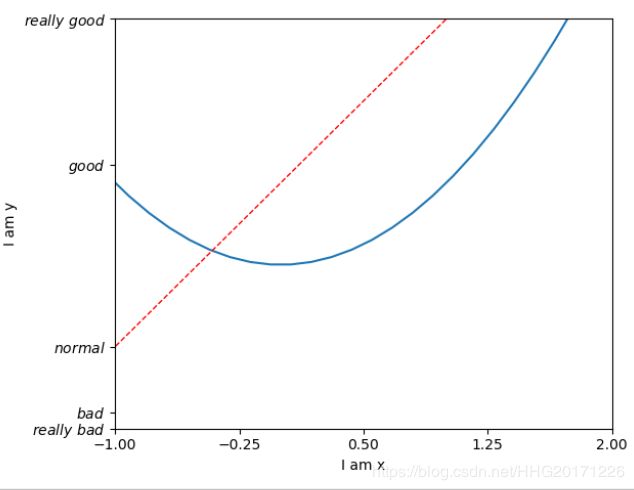
x = np.linspace(-3, 3, 50)
y1 = 2*x + 1
y2 = x**2

plt.figure()
plt.plot(x, y2)
plt.plot(x, y1, color='red', linewidth=1.0, linestyle='--')

plt.xlim((-1, 2))
plt.ylim((-2, 3))
plt.xlabel('I am x')
plt.ylabel('I am y')

new_ticks = np.linspace(-1, 2, 5)
print(new_ticks)
plt.xticks(new_ticks)

plt.yticks([-2, -1.8, -1, 1.22, 3],[r'$really\ bad$', r'$bad$', r'$normal$', r'$good$', r'$really\ good$'])
plt.show()
设置坐标轴–边框
gca():获取当前坐标轴信息.spines:设置边框.set_color:设置边框颜色:默认白色.spines:设置边框.xaxis.set_ticks_position:设置x坐标刻度数字或名称的位置.yaxis.set_ticks_position:设置y坐标刻度数字或名称的位置.set_position:设置边框位置
x = np.linspace(-3, 3, 50)
y1 = 2*x + 1
y2 = x**2

plt.figure()
plt.plot(x, y2)
plt.plot(x, y1, color='red', linewidth=1.0, linestyle='--')
plt.xlim((-1, 2))
plt.ylim((-2, 3))

new_ticks = np.linspace(-1, 2, 5)
plt.xticks(new_ticks)
plt.yticks([-2, -1.8, -1, 1.22, 3],['$really\ bad$', '$bad$', '$normal$', '$good$', '$really\ good$'])

ax = plt.gca()
#设置上边和右边无边框
ax.spines['right'].set_color('none')
ax.spines['top'].set_color('none')
plt.show()
ax = plt.gca()
#设置上边和右边无边框
ax.spines['right'].set_color('none')
ax.spines['top'].set_color('none')
#设置x坐标刻度数字或名称的位置
ax.xaxis.set_ticks_position('bottom')
#设置边框位置
ax.spines['bottom'].set_position(('data', 0))

plt.show()
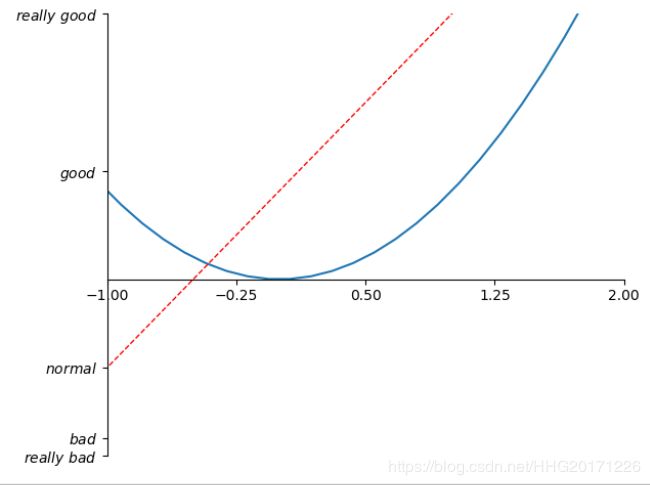
ax = plt.gca()
#设置上边和右边无边框
ax.spines['right'].set_color('none')
ax.spines['top'].set_color('none')
#设置x坐标刻度数字或名称的位置
ax.xaxis.set_ticks_position('bottom')
#设置边框位置
ax.spines['bottom'].set_position(('data', 0))
ax.yaxis.set_ticks_position('left')
ax.spines['left'].set_position(('data',0))

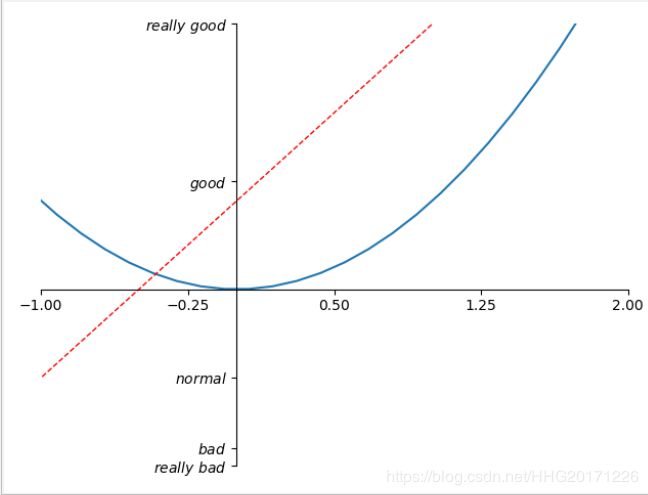
plt.show()
matplotlib.pyplot.text(x, y, s, fontdict=None, withdash=False, **kwargs)
x, y:表示坐标;
s:字符串文本;
fontdict:字典,可选;
kw:
fontsize=12,
horizontalalignment=‘center’、ha=’cener’
verticalalignment=’center’、va=’center’
#!/usr/bin/python
#coding: utf-8

import numpy as np
import matplotlib.pyplot as plt

x = np.arange(-10, 11, 1)  #形成一个数组,第三个参数表示步长,#start,end,step
y = x ** 2

plt.plot(x, y)

# 第一个参数是x轴坐标
# 第二个参数是y轴坐标
# 第三个参数是要显式的内容
# alpha 设置字体的透明度
# family 设置字体
# size 设置字体的大小
# style 设置字体的风格
# wight 字体的粗细
# bbox 给字体添加框,alpha 设置框体的透明度, facecolor 设置框体的颜色
plt.text(-3, 20, "function: y = x * x", size = 15, alpha = 0.2)
plt.text(-3, 40, "function: y = x * x", size = 15,\
         family = "fantasy", color = "r", style = "italic", weight = "light",\
         bbox = dict(facecolor = "r", alpha = 0.2))

plt.show()
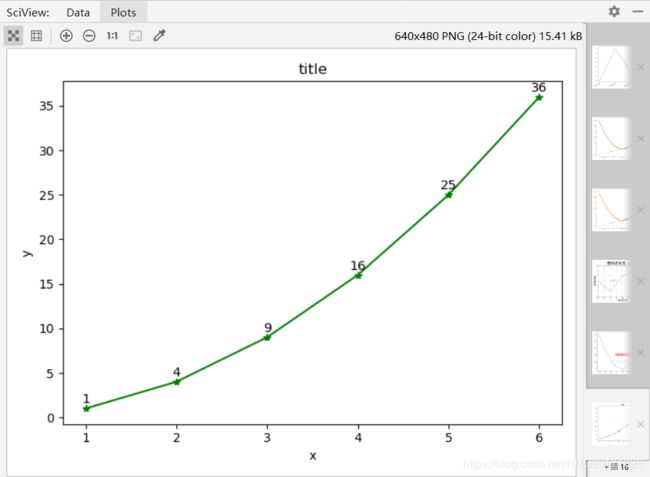
# -*- coding: utf-8 -*-
import time
import matplotlib.pyplot as plt

def showResult(xList, yList, title, xLabel, yLabel):
    plt.plot(xList, yList, 'g*-')
    plt.title(title)
    plt.xlabel(xLabel)
    plt.ylabel(yLabel)
    for x, y in zip(xList, yList):
        plt.text(x, y+0.3, str(y), ha='center', va='bottom', fontsize=10.5)
    plt.savefig('fig'+str(int(time.time()))+'.jpg')
    plt.show()

x_arr = [1, 2, 3, 4, 5, 6]
y_arr = [1, 4, 9, 16, 25, 36]
showResult(x_arr, y_arr, 'title', 'x', 'y')
其中
for x, y in zip(xList, yList):
	plt.text(x, y+0.3, '%.0f'%y, ha='center', va='bottom', fontsize=10.5)
逐个获取需要标注的点的横纵坐标 x与 y,然后在位置 (x, y+0.3) 处以 10.5 的字体显示出 y 的值,‘center’ 和 ‘bottom’ 分别指水平和垂直方向上的对齐方式。
