Selinux机制介绍与添加流程
Selinux机制介绍与添加流程
一.Selinux机制介绍
二.Selinux问题分析步骤
三.Selinux添加步骤;
3.1 添加/dev/ttyHSL1 串口字符设备selinux权限;
3.2 添加/sys/class 虚拟设备文件selinux权限;
3.3 添加proc/class 文件selinux权限;
3.4 添加开机脚本的selinux权限;
四.Selinux编译及验证;
一.Selinux机制介绍
Android L(5.1) 开始引入Selinux安全机制,其中SELinux带给Linux的主要价值是:提供了一个灵活的,可配置的MAC机制。Security-Enhanced Linux (SELinux)由以下两部分组成:
- Kernel SELinux模块(/kernel/security/selinux)
- 用户态工具
SELinux是一个安全体系结构,它通过LSM(Linux Security Modules)框架被集成到Linux Kernel 2.6.x中。它是NSA (United States National Security Agency)和SELinux社区的联合项目。
SELinux提供了一种灵活的强制访问控制(MAC)系统,且内嵌于Linux Kernel中。SELinux定义了系统中每个【用户】、【进程】、【应用】和【文件】的访问和转变的权限,然后它使用一个安全策略来控制这些实体(用户、进程、应用和文件)之间的交互,安全策略指定如何严格或宽松地进行检查。SELinux对系统用户(system users)是透明的,只有系统管理员需要考虑在他的服务器中如何制定严格的策略。策略可以根据需要是严格的或宽松的。
只有同时满足了【标准Linux访问控制】和【SELinux访问控制】时,主体才能访问客体。
Ps:真的AP与Framework层有效,fastmmi模式里面是没有selinux机制的。
二.Selinux问题分析步骤
2.1 log分析如:
Adb logcat |findstr /c:”avc”/c:”denied”
avc: denied { append/write } for pid=8317 comm=”RenderThread” name=”glsl_shader_log.txt” dev=”mmcblk0p35” ino=4077 scontext=u:r:system_app:s0 tcontext=u:object_r:system_data_file:s0 tclass=file permissive=0
2.1.1 安全上下文组成:
USER:ROLE:TYPE[LEVEL[:CATEGORY]]
USER: 用户常用u;
ROLE: 文件、设备和目录的role通常是object_r;
TYPE:安全上下文的类型;
LEVEL:安全级别等级为s0-s15,等级是递增提高的;
2.1.2
缺少的权限:denied { append/write }
哪个缺少的权限(就是对应的哪个 te 文件):scontext=u:r:system_app:s0
对谁缺少权限(就是对哪个文件/目录等缺少操作的权限):tcontext=u:object_r:system_data_file:s0
上述的是具体类型(文件/目录):tclass=file //普通文件
Scontext:源类型 即申请访问其他节点
Tcontext: 目标类型 即提供节点
由上面Log知道,system_app 在对system_data_file安全上下文(文件类型tclass-=file为普通文件)申请append/write 权限时 失败。
2.1.3 解决方法:
赋予 system_app (系统app)对 文件(file)类型 system_data_file 有append/write的权限:
allow system_app system_data_file:file rw_file_perms;
allow system_app system_data_file:file {append};
或者关闭selinux机制:
setenforce 0
getenforce

三.Selinux添加步骤
定义安全上下文;
绑定安全上下文到实际节点;
添加权限;
2.1 添加dev/ttyHSL1 串口节点的selinux权限
2.1.1 流程
2.1.1.1 定义安全上下文类型
在device/qcom/sepolicy/common/device.te添加:
type serial_docking_device, dev_type;
2.1.1.2 将安全上下文绑定到实际内核节点
在device/qcom/sepolicy/common/file_contexts添加:
/dev/ttyHSL1 u:object_r:serial_docking_device:s0
2.1.1.3 添加允许被进程访问的权限
在device/qcom/sepolicy/common/system_app.te
device/qcom/sepolicy/common/untrusted_app.te添加:
allow untrusted_app serial_docking_device:chr_file rw_file_perms;
2.1.1.5 修改节点权限与owner
在device/qcom/msm8953_64/init.target.rc 添加
chmod 0666 /dev/ttyHSL1
在device/qcom/common/rootdir/etc/ueventd.qcom.rc添加
/dev/ttyHSL1 0660 system system
备注::chr_file 表示字符设备,rw_file_perms表示读写权限;
2.1.2 将编译好的bootimage烧入后依然保错:
serialporttool( 3607): type=1400 audit(0.0:26): avc: denied { write } for name=“ttyHSL1” dev=“tmpfs”
ino=5475 scontext=u:r:untrusted_app:s0:c512,c768 tcontext=u:object_r:serial_docking_device:s0 tclass=chr_file permissive=0
levelFrom=user 导致 Slevel 从 s0 变成 s0:c512,c768
网上查询得知需要在type serial_docking_device, dev_type; 后面添加mlstrustedobject
即:type sysfs_usbuartsw, fs_type, sysfs_type, mlstrustedobject;
原因是:android6.0添加了:
user=_app domain=untrusted_app type=app_data_file levelFrom=user
levelFrom=user 导致 Slevel 从 s0 变成 s0:c512,c768
而android5.1没有这个规则。
2.1.3 修改后编译时报错:
device/qcom/sepolicy/common/device.te:113:ERROR ‘duplicate declaration of type/attribute’ at token ‘;’ on line 22872:
type serial_docking_device, dev_type, mlstrustedobject;
type serial_docking_device, dev_type;
说明此文件重复定义了serial_docking_device,需要删掉一个不用的即:
type serial_docking_device, dev_type;
2.1.4查看定义的安全上下文是否生效
ls –lZ /dev |grep docking*
![]() 由图可知安全上下文类型:serial_dockong_device 文件类型:字符设备
由图可知安全上下文类型:serial_dockong_device 文件类型:字符设备
Rw权限,usr:group为system system
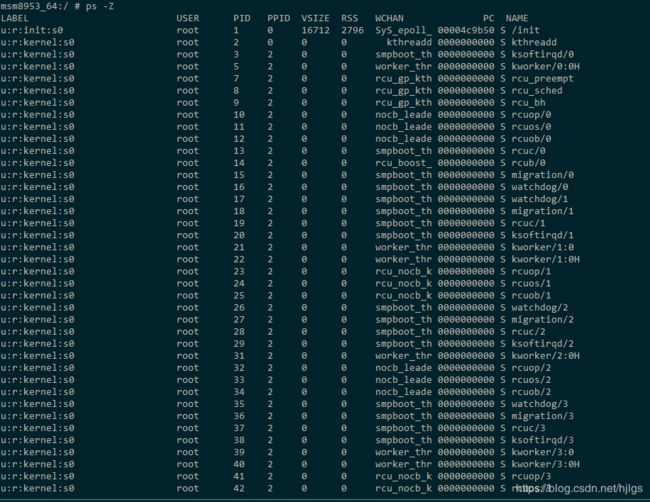
ps –Z |grep //查看安全上下文进程 2.1 添加/sys/ 虚拟文件设备节点:
功能:控制gpio22输出电压增强GPS信号
链接节点:/sys/class/gpio_ldo_power/gpio22/value
实际节点::/sys/devices/virtual/gpio_ldo_power/dk_pin5/value
 2.1.1 定义安全上下文类型:
在device/qcom/sepolicy/common/file.te中添加
type sysfs_dkpin5, fs_type, sysfs_type, mlstrustedobject;
2.1.2 安全上下文绑定到内核节点:
在device/qcom/sepolicy/common/file_contexts添加
/sys/devices/virtual/gpio_ldo_power/dk_pin5/value u:object_r:sysfs_dkpin5:s0
2.1.3 增加被进程访问的权限
device/qcom/sepolicy/common/system_app.te
device/qcom/sepolicy/common/system_server.te 添加:
allow system_server sysfs_dkpin5:file rw_file_perms;
2.1.4 修改节点的权限及owner
system/core/rootdir/init.rc添加
chown system system /sys/devices/virtual/gpio_ldo_power/dk_pin5/value
chmod 0666 /sys/devices/virtual/gpio_ldo_power/dk_pin5/value
 安全上下文类型:sysfs_gpsat已经生效
2.4 添加proc文件节点的selinux权限
功能:用于控制TP手套模式的开关
节点:/class/ms-touchscreen-msg20xx/device/glove_mode
添加流程:
2.4.1 定义安全上下文类型类型:
device/qcom/sepolicy/common/file.te添加
type proc_gloveswitch, fs_type;
2.4.2 将安全上下文绑定到内核节点
//此处与sys节点不是同个文件
device/qcom/sepolicy/common/genfs_contexts 添加
genfscon proc /class/ms-touchscreen-msg20xx/device/glove_mode u:object_r:proc_gloveswitch:s0
2.4.3 添加权限
device/qcom/sepolicy/common/system_app.te添加
allow system_app proc_gloveswitch:file rw_file_perms;
2.4.4 修改节点的权限及owner
system/core/rootdir/init.rc添加
chown system system /proc/class/ms-touchscreen-msg20xx/device/glove_mode
chmod 0660 /proc/class/ms-touchscreen-msg20xx/device/glove_mode
![]() 节点类型为proc_gloveswitch已经生效
节点类型为proc_gloveswitch已经生效
2.4 添加开机脚本的selinux权限;
2.4.1目标功能:
开机过程使用logcat命令、cat dev/kmsg 命令抓Log并保存在data目录里;
2.4.2实现思路:
把adb logcat –v time threadtim > data/log/user.log &
cat dev/kmsg > data/log/kernel.log & 制作成log.sh脚本 ;
再编译到system/bin/目录里
device/qcom/msm8953_64/msm8953_64.mk
PRODUCT_COPY_FILES +=
device/qcom/common/rootdir/etc/log.sh:system/bin/log.sh
在init.rc调用log.sh;
#!/bin/sh +x
echo “hello the world”
#mkdir -p /sdcard/log
while true
 do
     df | grep data
     cache_check=$?
     echo ${cache_check}
     if [ ${cache_check} = 1 ]; then
         echo "wait for data!"
         sleep 2
     else
         echo "data mounted!"
         break
     fi
 done
 if [ ! -d "/data/log/" ] ; then
	echo "there is no log "
	mkdir -p /data/log
	ls /data/log/
 fi
logcat -v time threadtime > /data/log/user.log &
cat /dev/kmsg > /data/log/kernel.log &
2.4.3 解决Selinux权限:
在init.rc中添加
service mm-setlog system/bin/sh /system/bin/log.sh
class main
user root
group root
oneshot //执行一次
disable //不会自动启动
seclabel u:r:mm-setlog:s0 //selinux权限审核标签对应mm-setlog.te文件
//也可使用其他label如:qti-testscripts
on boot
start mm-setlog
创建mm-setlog.te文件并添加:
方法一:使用permissive控制
type mm-setlog, domain, domain_deprecated, mlstrustedsubject;
type mm-setlog_exec, exec_type, file_type;
permissive mm-setlog; //服务mm-setlog所有操作都被允许
domain_trans(init, shell_exec, mm-setlog)
allow mm-setlog persist_file:dir r_dir_perms;
allow mm-setlog persist_file:file r_file_perms;
r_dir_file(mm-setlog, RIDL_data_file)
缺点:使用permissive 可以让mm-setlog服务具体所有操作的权限,但这个命令只适用于debug版本,在.mk中会限制user版本的使用;
方法二:不使用permissive
mm-setlog.te文件中添加:
#Policy file for qcom-system-daemon
type mm-setlog, domain;
type mm-setlog_exec, exec_type, file_type;
init_daemon_domain(mm-setlog);
#work for user version
#permissive mm-setlog;
#Needed for logging
allow mm-setlog shell_exec:file { read open execute execute_no_trans rx_file_perms entrypoint};
allow mm-setlog system_file:file execute_no_trans;
allow mm-setlog toolbox_exec:file { getattr execute read open execute_no_trans };
allow mm-setlog persist_file:dir { getattr };
allow mm-setlog block_device:dir { getattr search };
allow mm-setlog system_data_file:dir { read  write add_name create};
allow mm-setlog system_data_file:file { create execute_no_trans write open setattr };
allow mm-setlog adsprpcd_file:dir { getattr };
allow mm-setlog block_device:blk_file { getattr };
allow mm-setlog system_block_device:blk_file {getattr };
allow mm-setlog userdata_block_device:blk_file {getattr};
allow mm-setlog cache_block_device:blk_file {getattr};
allow mm-setlog block_device:blk_file {getattr};
allow mm-setlog kmsg_device:chr_file {read create write open };
allow mm-setlog logcat_exec:file {read open getattr execute execute_no_trans};
allow mm-setlog kernel:system {syslog_read};
allow mm-setlog logdr_socket:sock_file {write};
allow mm-setlog rootfs:lnk_file {getattr};
allow mm-setlog self:capability {dac_override};
allow mm-setlog logd:unix_stream_socket {connectto};
allow mm-setlog cache_file:dir {getattr};
allow mm-setlog storage_file:dir {getattr};
allow mm-setlog system_data_file:dir {open};
编译时会报错:
libsepol.report_failure: neverallow on line 478 of system/sepolicy/domain.te (or line 9350 of policy.conf) violated by allow mm-setlog system_data_file:file { write create setattr };
libsepol.check_assertions: 1 neverallow failures occurred
Error while expanding policy
原因是:添加的allow mm-setlog system_data_file:file { write create setattr };违反了谷歌的neverallow规则。
解决方案:到报错的文件system/sepolicy/domain.te 里去掉添加的mm-setlog.te即可。
即在neverallow后的第一个{}里使用 ‘–mm-setlog’ 表示不应有此规则。
neverallow {
domain
-recovery
-system_server
-system_app
-init
-installd # for relabelfrom and unlink, check for this in explicit neverallow
-mm-setlog
} system_data_file:file no_w_file_perms;
五. Selinux编译及验证;
5.1 源文件:
device/qcom/sepolicy/common/mm-setlog.te
中间文件:
out/target/product/msm8953_64/obj/ETC/sepolicy_intermediates/policy.conf.dontaudit
out/target/product/msm8953_64/obj/ETC/sepolicy_intermediates/policy.conf
最终文件:
Bootimage
5.2 源文件:
system/core/rootdir/init.rc
中间文件:
out/target/product/msm8953_64/obj/ETC/init.rc_intermediates/init.rc
最终文件:
Bootimage
参考:
https://blog.csdn.net/yelangjueqi/article/details/46761987
https://blog.csdn.net/u010164190/article/details/79012607
https://www.cnblogs.com/gailuo/p/5041034.html