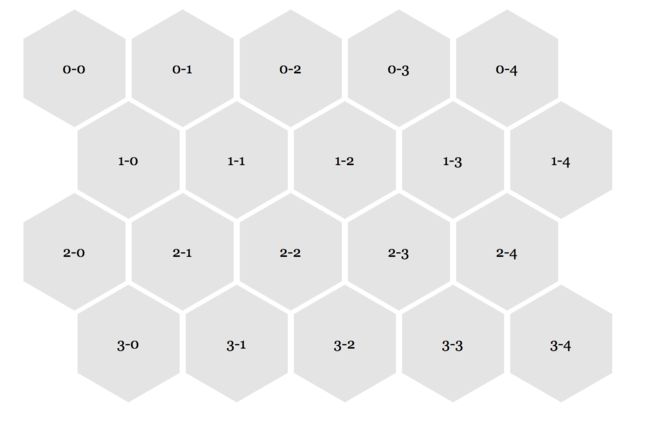
不知道为什么,UI 很喜欢设计蜂巢效果(摊手)
一、实现六边形
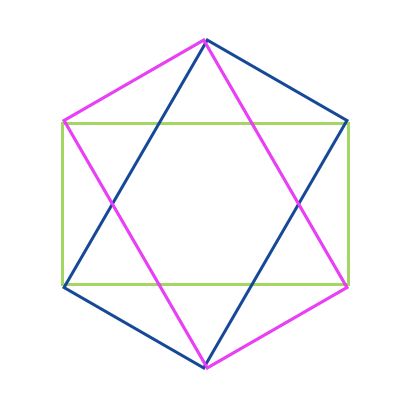
首先用传统的方式来分析一下六边形
可以拆分成三个矩形,每个矩形旋转正负 60° 得到其它两个矩形
由此可以设计出基本的 HTML 结构
矩形的宽高先随便设置,后面组件化的时候再计算其关系,通过 props 设置
然后设置 CSS 样式
.w-comb {
  background-color: #e4e4e4;
  display: inline-block;
  position: relative;
}

.w-comb-sub1,
.w-comb-sub2 {
  background-color: #e4e4e4;
  position: absolute;
  width: inherit;
  height: inherit;
}

.w-comb-sub1 {
  transform: rotate(-60deg);
}

.w-comb-sub2 {
  transform: rotate(60deg);
}
一个六边形就完成了
不过这只是传统的方式,如果不考虑兼容性问题,可以直接使用 clip-path 画一个六边形
.w-comb {
  clip-path: polygon(
    0 25%,
    50% 0,
    100% 25%,
    100% 75%,
    50% 100%,
    0 75%
  );
}
非常简单粗暴!不需要子节点不需要旋转,只要一行代码,六边形带回家!
二、设置尺寸
实际的应用场景通常都是一堆六边形拼在一起,所以需要将单个六边形处理为组件
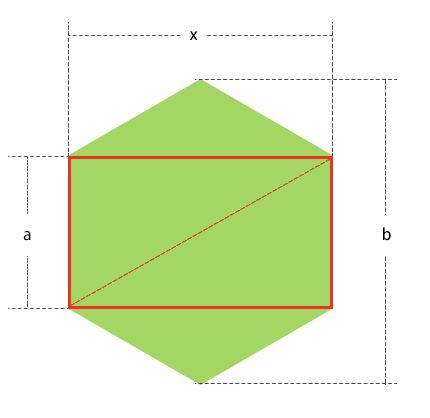
首先的问题就是,如何设置六边形的尺寸,这需要用一下初中学到的数学知识
经过计算,当矩形的长为 x 的时候,宽(边长 a )为
对角线 b 为
然后就能规定六边形的尺寸
如果是三个矩形旋转而成的传统方案:
// 传统方案
const RADICAL_3 = 1.7320508;
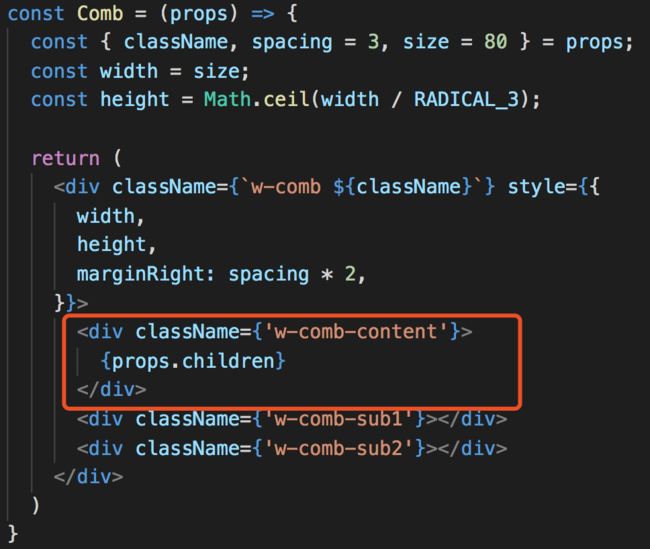
const Comb = (props) => {
  const { className } = props;
  const width = props.size || 80;
  const height = Math.ceil(width / RADICAL_3);

  return (
    w-comb ${className}`} style={{
      width,
      height,
    }}>
      'w-comb-sub1'}>
      'w-comb-sub2'}>

  )
}
如果是直接使用 clip-path 绘制的六边形:
// clip-path
const RADICAL_3 = 1.7320508;
const Comb = (props) => {
  const { className } = props;
  const width = props.size || 80;
  const height = 2 * Math.ceil(width / RADICAL_3);

  return (
    w-comb-test ${className}`} style={{
      width,
      height,
    }}>
  )
}
三、排列蜂巢
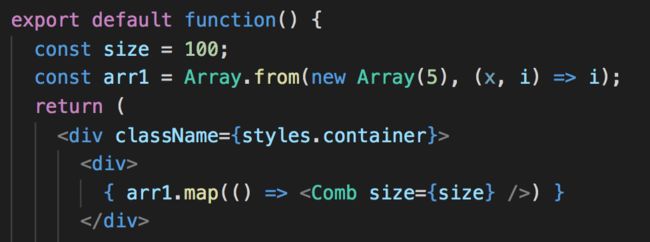
定义一个 spacing 字段,用来设置 margin-right,然后排列出一排六边形
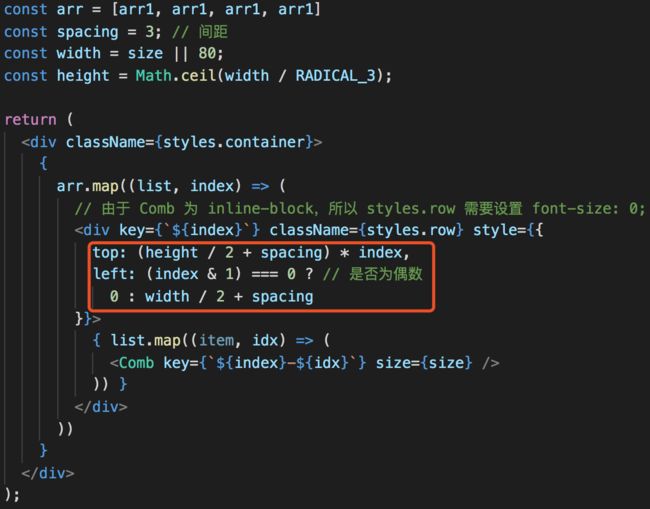
再生成第二排的时候,需要调整一下 top 和 left
left 为矩形长 ( x ) 的一半(这是基础偏移量,实际需要的距离在这个数字上增加)
而 top 则为六边形边长 ( a ) 的一半的一半(基础偏移量)
后面每一行的 top 都会增加,而 left 仅在偶数行生效
四、添加内容
在传统方案中,是以横向的矩形为基础,所以六边形的内容可以直接写在矩形里
