Spring官网阅读(八)容器的扩展点(三)(BeanPostProcessor)
在前面两篇关于容器扩展点的文章中,我们已经完成了对
BeanFactoryPostProcessor很FactoryBean的学习,对于BeanFactoryPostProcessor而言,它能让我们对容器中的扫描出来的BeanDefinition做出修改以达到扩展的目的,而对于FactoryBean而言,它提供了一种特殊的创建Bean的手段,能让我们将一个对象直接放入到容器中,成为Spring所管理的一个Bean。而我们今天将要学习的BeanPostProcessor不同于上面两个接口,它主要干预的是Spring中Bean的整个生命周期(实例化—属性填充—初始化—销毁),关于Bean的生命周期将在下篇文章中介绍,如果不熟悉暂且知道这个概念即可,下面进入我们今天的正文。
文章目录
- 官网介绍
- 应用举例
- 接口继承关系
- 源码分析
- 执行顺序
- 疑惑代码解读
- 总结
按照惯例,我们先看看官网对
BeanPostProcessor的介绍
官网介绍
从这段文字中,我们能获取到如下信息:
BeanPostProcessor接口定义了两个回调方法,通过实现这两个方法我们可以提供自己的实例化以及依赖注入等逻辑。而且,如果我们想要在Spring容器完成实例化,配置以及初始化一个Bean后进行一些定制的逻辑,我们可以插入一个甚至更多的BeanPostProcessor的实现。- 我们可以配置多个
BeanPostProcessor,并且只要我们配置的BeanFactoryPostProcessor同时实现了Ordered接口的话,我们还可以控制这些BeanPostProcessor执行的顺序
我们通过一个例子来看看BeanPostProcessor的作用
应用举例
Demo如下:
// 自己实现了一个BeanPostProcessor
@Component
public class MyBeanPostProcessor implements BeanPostProcessor {
	@Override
	public Object postProcessBeforeInitialization(Object bean, String beanName) throws BeansException {
		if (beanName.equals("indexService")) {
			System.out.println(bean);
			System.out.println("bean config invoke postProcessBeforeInitialization");
		}
		return bean;
	}

	@Override
	public Object postProcessAfterInitialization(Object bean, String beanName) throws BeansException {
		if (beanName.equals("indexService")) {
			System.out.println(bean);
			System.out.println("bean config invoke postProcessAfterInitialization");
		}
		return bean;
	}
}

@Component
public class IndexService {
    @Autowired
    LuBanService luBanService;

    @Override
    public String toString() {
        return "IndexService{" +
            "luBanService=" + luBanService +
            '}';
    }
}

public class Main {
    public static void main(String[] args) {
        AnnotationConfigApplicationContext ac = new AnnotationConfigApplicationContext(Config.class);
    }
}
运行上面的程序:
IndexService{luBanService=com.dmz.official.extension.entity.LuBanService@5e025e70}
bean config invoke postProcessBeforeInitialization
IndexService{luBanService=com.dmz.official.extension.entity.LuBanService@5e025e70}
bean config invoke postProcessAfterInitialization
*从上面的执行结果我们可以得出一个结论,BeanPostProcessor接口中的两个方法的执行时机在属性注入之后。*因为从打印的结果我们可以发现,IndexService中的luBanService属性已经被注入了。
接口继承关系
由于BeanPostProcessor这个接口Spring本身内置的实现类就有很多,所以这里我们暂且不分析其实现类,就从接口的定义上来分析它的作用,其接口的UML类图如下:
BeanPostProcessor,这个接口是我们Bean的后置处理器的顶级接口,其中主要包含了两个方法
// 在Bean初始化前调用
@Nullable
default Object postProcessBeforeInitialization(Object bean, String beanName) throws BeansException {
    return bean;
}
// 在Bean初始化前调用
@Nullable
default Object postProcessAfterInitialization(Object bean, String beanName) throws BeansException {
    return bean;
}
InstantiationAwareBeanPostProcessor,继承了BeanPostProcessor接口,并在此基础上扩展了四个方法,其中方法postProcessPropertyValues已经在5.1版本中被废弃了
// 在Bean实例化之前调用
@Nullable
default Object postProcessBeforeInstantiation(Class<?> beanClass, String beanName) throws BeansException {
    return null;
}
// 在Bean实例化之后调用
default boolean postProcessAfterInstantiation(Object bean, String beanName) throws BeansException {
    return true;
}

// 我们采用注解时,Spring通过这个方法完成了属性注入
@Nullable
default PropertyValues postProcessProperties(PropertyValues pvs, Object bean, String beanName)
    throws BeansException {
    return null;
}

// 在5.1版本中已经被废弃了
@Deprecated
@Nullable
default PropertyValues postProcessPropertyValues(
    PropertyValues pvs, PropertyDescriptor[] pds, Object bean, String beanName) throws BeansException {
    return pvs;
}
大部分情况下我们在扩展时都不会用到上面的postProcessProperties跟postProcessPropertyValues,如果在某些场景下,不得不用到这两个方法,那么请注意,在实现postProcessProperties必须返回null,否则postProcessPropertyValues方法的逻辑不会执行。
SmartInstantiationAwareBeanPostProcessor,继续扩展了上面的接口,并多提供了三个方法
// 预测Bean的类型,主要是在Bean还没有创建前我们可以需要获取Bean的类型
@Nullable
default Class<?> predictBeanType(Class<?> beanClass, String beanName) throws BeansException {
    return null;
}
// Spring使用这个方法完成了构造函数的推断
@Nullable
default Constructor<?>[] determineCandidateConstructors(Class<?> beanClass, String beanName)
    throws BeansException {

    return null;
}
// 主要为了解决循环依赖,Spring内部使用这个方法主要是为了让早期曝光的对象成为一个“合格”的对象
default Object getEarlyBeanReference(Object bean, String beanName) throws BeansException {
    return bean;
}
这个接口中的三个方法一般是在Spring内部使用,我们可以关注上这个接口上的一段java doc
This interface is a special purpose interface, mainly for
internal use within the framework. In general, application-provided
post-processors should simply implement the plain {@link BeanPostProcessor}
interface or derive from the {@link InstantiationAwareBeanPostProcessorAdapter}
class
上面这段文字很明确的指出了这个接口的设计是为了一些特殊的目的,主要是在Spring框架的内部使用,通常来说我们提供的Bean的后置处理器只要实现BeanPostProcessor或者InstantiationAwareBeanPostProcessorAdapter即可。正常情况下,我们在扩展时不需要考虑这几个方法。
DestructionAwareBeanPostProcessor,这个接口直接继承了BeanPostProcessor,同时多提供了两个方法,主要用于Bean在进行销毁时进行回调
// 在Bean被销毁前调用
void postProcessBeforeDestruction(Object bean, String beanName) throws BeansException;
// 判断是否需要被销毁,默认都需要
default boolean requiresDestruction(Object bean) {
    return true;
}
MergedBeanDefinitionPostProcessor,这个接口也直接继承了BeanPostProcessor,但是多提供了两个方法。
// Spring内部主要使用这个方法找出了所有需要注入的字段,同时做了缓存
void postProcessMergedBeanDefinition(RootBeanDefinition beanDefinition, Class<?> beanType, String beanName);

// 主要用于在BeanDefinition被修改后,清除容器中的缓存
default void resetBeanDefinition(String beanName) {
}
源码分析
我们带着两个问题去阅读源码:
- 容器中这么多
BeanPostProcessor,它们会按什么顺序执行呢? BeanPostProcessor接口中这么多方法,它们的执行时机是什么时候呢?
接下来我们解决这两个问题
执行顺序
在Spring内部,当去执行一个BeanPostProcessor一般都是采用下面这种形式的代码:
for (BeanPostProcessor bp : getBeanPostProcessors()) {
    // 判断属于某一类后置处理器
    if (bp instanceof SmartInstantiationAwareBeanPostProcessor) {
       	// 执行逻辑
        }
    }
}
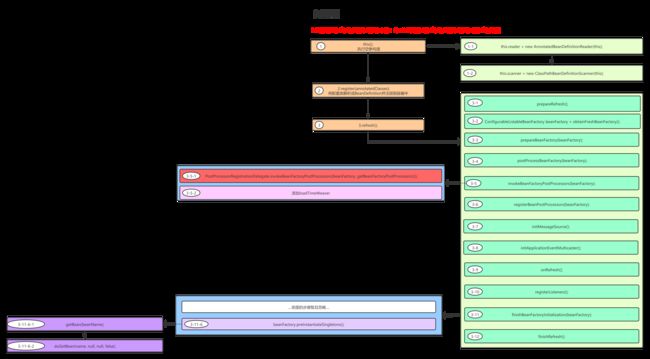
getBeanPostProcessors()获取到的BeanPostProcessor其实就是一个list集合,所以我们要分析BeanPostProcessor的执行顺序,其实就是分析这个list集合中的数据是通过什么样的顺序添加进来的,我们来看看之前说的一个Spring的执行流程图:
public static void registerBeanPostProcessors(ConfigurableListableBeanFactory beanFactory, AbstractApplicationContext applicationContext) {
	// 1.获取容器中已经注册的Bean的名称,根据BeanDefinition中获取BeanName
    String[] postProcessorNames = beanFactory.getBeanNamesForType(BeanPostProcessor.class, true, false);
    // 2.通过addBeanPostProcessor方法添加的BeanPostProcessor以及注册到容器中的BeanPostProcessor的总数量
    int beanProcessorTargetCount = beanFactory.getBeanPostProcessorCount() + 1 + postProcessorNames.length;
    // 3.添加一个BeanPostProcessorChecker,主要用于日志记录
    beanFactory.addBeanPostProcessor(new BeanPostProcessorChecker(beanFactory, beanProcessorTargetCount));

    // 保存同时实现了BeanPostProcessor跟PriorityOrdered接口的后置处理器
    List<BeanPostProcessor> priorityOrderedPostProcessors = new ArrayList<>();
    // 保存实现了MergedBeanDefinitionPostProcessor接口的后置处理器
    List<BeanPostProcessor> internalPostProcessors = new ArrayList<>();
    // 保存同时实现了BeanPostProcessor跟Ordered接口的后置处理器的名字
    List<String> orderedPostProcessorNames = new ArrayList<>();
    // 保存同时实现了BeanPostProcessor但没有实现任何排序接口的后置处理器的名字
    List<String> nonOrderedPostProcessorNames = new ArrayList<>();

    // 4.遍历所有的后置处理器的名字,并根据不同类型将其放入到上面申明的不同集合中
    // 同时会将实现了PriorityOrdered接口的后置处理器创建出来
    // 如果实现了MergedBeanDefinitionPostProcessor接口,放入到internalPostProcessors
    for (String ppName : postProcessorNames) {
        if (beanFactory.isTypeMatch(ppName, PriorityOrdered.class)) {
            BeanPostProcessor pp = beanFactory.getBean(ppName, BeanPostProcessor.class);
            priorityOrderedPostProcessors.add(pp);
            if (pp instanceof MergedBeanDefinitionPostProcessor) {
                internalPostProcessors.add(pp);
            }
        } else if (beanFactory.isTypeMatch(ppName, Ordered.class)) {
            orderedPostProcessorNames.add(ppName);
        } else {
            nonOrderedPostProcessorNames.add(ppName);
        }
    }

   	// 5.将priorityOrderedPostProcessors集合排序
    sortPostProcessors(priorityOrderedPostProcessors, beanFactory);
    // 6.将priorityOrderedPostProcessors集合中的后置处理器添加到容器中
    registerBeanPostProcessors(beanFactory, priorityOrderedPostProcessors);

    // 7.遍历所有实现了Ordered接口的后置处理器的名字,并进行创建
    // 如果实现了MergedBeanDefinitionPostProcessor接口,放入到internalPostProcessors
    List<BeanPostProcessor> orderedPostProcessors = new ArrayList<>();
    for (String ppName : orderedPostProcessorNames) {
        BeanPostProcessor pp = beanFactory.getBean(ppName, BeanPostProcessor.class);
        orderedPostProcessors.add(pp);
        if (pp instanceof MergedBeanDefinitionPostProcessor) {
            internalPostProcessors.add(pp);
        }
    }
    // 排序及将其添加到容器中
    sortPostProcessors(orderedPostProcessors, beanFactory);
    registerBeanPostProcessors(beanFactory, orderedPostProcessors);

    // 7.遍历所有实现了常规后置处理器(没有实现任何排序接口)的名字,并进行创建
    // 如果实现了MergedBeanDefinitionPostProcessor接口,放入到internalPostProcessors
    List<BeanPostProcessor> nonOrderedPostProcessors = new ArrayList<>();
    for (String ppName : nonOrderedPostProcessorNames) {
        BeanPostProcessor pp = beanFactory.getBean(ppName, BeanPostProcessor.class);
        nonOrderedPostProcessors.add(pp);
        if (pp instanceof MergedBeanDefinitionPostProcessor) {
            internalPostProcessors.add(pp);
        }
    }
    // 8.这里需要注意下,常规后置处理器不会调用sortPostProcessors进行排序
    registerBeanPostProcessors(beanFactory, nonOrderedPostProcessors);

    // 9.对internalPostProcessors进行排序并添加到容器中
    sortPostProcessors(internalPostProcessors, beanFactory);
    registerBeanPostProcessors(beanFactory, internalPostProcessors);

    // 10.最后添加的这个后置处理器主要为了可以检测到所有的事件监听器
    beanFactory.addBeanPostProcessor(new ApplicationListenerDetector(applicationContext));
}
疑惑代码解读
下面对上述代码中大家可能存疑的地方进行一波分析:
- 获取容器中已经注册的Bean的名称,根据
BeanDefinition中获取BeanName
这里主要是根据已经注册在容器中的
BeanDefinition,这些BeanDefinition既包括程序员自己注册到容器中的,也包括Spring自己注册到容器中。注意这些后置处理器目前没有被创建,只是以BeanDefinition的形式存在于容器中,所以如果此时调用getBeanPostProcessors(),是拿不到这些后置处理器的,至于容器什么时候注册了后置处理器的BeanDefinition,大家可以先自行阅读1-1步骤的源码,我在后续文章中会分析,当前就暂时先跳过了
- 通过
addBeanPostProcessor方法添加的BeanPostProcessor以及注册到容器中的BeanPostProcessor的总数量
这里主要是获取容器中已经存在的
BeanPostProcessor的数量再加上已经被扫描出BeanDefinition的后置处理器的数量(这些后置处理器还没有被创建出来),最后再加1。这里就有两个问题
- 容器中已经存在的
BeanPostProcessor是从哪里来的?
分为两个来源,第一,容器启动时,自身调用了addBeanPostProcessor添加了后置处理器;第二,程序员手动调用了addBeanPostProcessor方法添加了后置处理器,第二种情况很少见,代码形如下面这种形式:
AnnotationConfigApplicationContext ac = new AnnotationConfigApplicationContext();
ac.register(Config.class);
ac.getBeanFactory().addBeanPostProcessor(new MyBeanPostProcessor());
ac.refresh();
容器又是在什么时候添加的后置处理器呢?大家可以自己阅读第3-3步骤的源码。在第3-5步也添加了一个后置处理器,由于代码比较深,不建议大家现在去看,关注我后续的更新即可,这些问题都会在后面的文章中解决
- 为什么最后还需要加1呢?
这个就跟我们将要分析的第三行代码相关
- 添加一个
BeanPostProcessorChecker,主要用于日志记录
我们看下BeanPostProcessorChecker这个类的源码:
private static final class BeanPostProcessorChecker implements BeanPostProcessor {

		private static final Log logger = LogFactory.getLog(BeanPostProcessorChecker.class);

		private final ConfigurableListableBeanFactory beanFactory;

		private final int beanPostProcessorTargetCount;

		public BeanPostProcessorChecker(ConfigurableListableBeanFactory beanFactory, int beanPostProcessorTargetCount) {
			this.beanFactory = beanFactory;
			this.beanPostProcessorTargetCount = beanPostProcessorTargetCount;
		}

		@Override
		public Object postProcessBeforeInitialization(Object bean, String beanName) {
			return bean;
		}

		@Override
		public Object postProcessAfterInitialization(Object bean, String beanName) {
			if (!(bean instanceof BeanPostProcessor) && !isInfrastructureBean(beanName)
					&& this.beanFactory.getBeanPostProcessorCount() < this.beanPostProcessorTargetCount) {
				if (logger.isInfoEnabled()) {
					logger.info("Bean '" + beanName + "' of type [" + bean.getClass().getName()
							+ "] is not eligible for getting processed by all BeanPostProcessors "
							+ "(for example: not eligible for auto-proxying)");
				}
			}
			return bean;
		}

		private boolean isInfrastructureBean(@Nullable String beanName) {
			if (beanName != null && this.beanFactory.containsBeanDefinition(beanName)) {
				BeanDefinition bd = this.beanFactory.getBeanDefinition(beanName);
				return (bd.getRole() == RootBeanDefinition.ROLE_INFRASTRUCTURE);
			}
			return false;
		}

	}
这段代码中我们主要需要关注的就是以下两个方法:
isInfrastructureBean,这个方法主要检查当前处理的Bean是否是一个Spring自身需要创建的Bean,而不是程序员所创建的Bean(通过@Component,@Configuration等注解或者XML配置等)。postProcessAfterInitialization,我们可以看到这个方法内部只是做了一个判断,只要当前创建的Bean不是一个后置处理器并且不是一个Spring自身需要创建的基础的Bean,最后还有一个判断this.beanFactory.getBeanPostProcessorCount() < this.beanPostProcessorTargetCount,这是什么意思呢?其实意思就是说在创建这个Bean时容器中的后置处理器还没有完全创建完。这个判断也能解释我们上面遗留的一个问题。之所以要加1是为了方便判断,否则还需要进行等号判断。
- 上面代码段落中标注的
4到7之间的代码就不解释了,比较简单,可能大家需要注意的就是在registerBeanPostProcessors方法中调用了一个addBeanPostProcessor(BeanPostProcessor beanPostProcessor)方法,我们看下这个方法的执行逻辑:
public void addBeanPostProcessor(BeanPostProcessor beanPostProcessor) {
    Assert.notNull(beanPostProcessor, "BeanPostProcessor must not be null");
    // 可以看到,后添加进来的beanPostProcessor会覆盖之前添加的
    this.beanPostProcessors.remove(beanPostProcessor);
    // 这个状态变量会影响之后的执行流程,我们只需要知道一旦添加了一个InstantiationAwareBeanPostProcessor就会将变量置为true即可
    if (beanPostProcessor instanceof InstantiationAwareBeanPostProcessor) {
        this.hasInstantiationAwareBeanPostProcessors = true;
    }
    if (beanPostProcessor instanceof DestructionAwareBeanPostProcessor) {
        this.hasDestructionAwareBeanPostProcessors = true;
    }
    this.beanPostProcessors.add(beanPostProcessor);
}
- 注意下
第8段代码,对于没有实现任何排序接口的后置处理器,Spring是不会进行排序操作的。即使你添加了@Order注解也没有任何作用。这里只是针对Spring Framework。 第10段代码中又添加了一个后置处理器,添加的这个后置处理器主要为了可以检测到所有的事件监听器,我们看下它的代码(这里只分析下它的几个核心方法):
// 1.singletonNames保存了所有将要创建的Bean的名称以及这个Bean是否是单例的映射关系
// 这个方法会在对象被创建出来后,属性注入之前执行
public void postProcessMergedBeanDefinition(RootBeanDefinition beanDefinition, Class<?> beanType, String beanName) {
    this.singletonNames.put(beanName, beanDefinition.isSingleton());
}

// 2.整个Bean创建过程中最后一个阶段执行,在对象被初始化后执行
@Override
public Object postProcessAfterInitialization(Object bean, String beanName) {
    if (bean instanceof ApplicationListener) {
       // 3.判断当前这个Bean是不是单例,如果是的话,直接添加到容器的监听器集合中
        Boolean flag = this.singletonNames.get(beanName);
        if (Boolean.TRUE.equals(flag)) {
            // 添加到容器的监听器集合中
            this.applicationContext.addApplicationListener((ApplicationListener<?>) bean);
        }
        // 4.如果不是单例的,并且又是一个嵌套的Bean,那么打印日志,提示用户也就是程序员内嵌的Bean只有在单例的情况下才能作为时间监听器
        else if (Boolean.FALSE.equals(flag)) {
            if (logger.isWarnEnabled() && !this.applicationContext.containsBean(beanName)) {
                // inner bean with other scope - can't reliably process events
                logger.warn("Inner bean '" + beanName + "' implements ApplicationListener interface " +
                            "but is not reachable for event multicasting by its containing ApplicationContext " +
                            "because it does not have singleton scope. Only top-level listener beans are allowed " +
                            "to be of non-singleton scope.");
            }
            this.singletonNames.remove(beanName);
        }
    }
    return bean;
}
这个后置处理器主要是针对事件监听器(Spring中的事件监听机制在后续文章中会做介绍,这里如果有的同学不知道的话只需要暂时记住有这个概念即可,把它当作Spring中一个特殊的Bean即可)。上面代码中的第3步跟第4步可能会让人比较迷惑,实际上在我之前画的执行流程图中的3-10步,Spring就已经注册过了一次监听器,在3-10步骤中,其实Spring已经通过String[] listenerBeanNames = getBeanNamesForType(ApplicationListener.class, true, false)这段代码拿到了所有的名字,那么我们思考一个问题,为什么Spring不直接根据这些名字去过滤创建的Bean,而要通过一个特定的后置处理器去进行处理呢?比如可以通过下面这种逻辑:
if(listenerBeanNames.contains(beanName)){
	 this.applicationContext.addApplicationListener(bean);
}
这里主要是因为一种特殊的Bean,它会由Spring来创建,自身确不在Spring容器中,这种特殊的Bean就是嵌套bean。注意这里说的是嵌套Bean,不是内部类,是由形如下面的XML配置的Bean
<bean class="com.dmz.official.service.IndexService" id="indexService">
    <property name="luBanService">
        <bean class="com.dmz.official.service.LuBanService"/>
    property>
    <property name="dmzService" ref="dmzService"/>
bean>
在上面的例子中,LuBanService就是一个嵌套的Bean。
假设我们上面的LuBanService是一个事件监听器,那么在getBeanNamesForType这个方法执行时,是无法获取到这个Bean的名称的。所以Spring专门提供了上述的那个后置处理器,用于处理这种嵌套Bean的情况,但是所提供的嵌套Bean必须要是单例的。
在分析执行时机时,我们先要知道Spring在创建一个Bean时要经历过哪些阶段,这里其实涉及到Bean的生命周期了,在下篇文章中我会专门分析Spring的生命周期,这篇文章中为了说明后置处理器的执行时机,先进行一些大致的介绍,整体创建Bean的流程可以画图如下:
总结
在这篇文章中,我们学习过了Spring中最后一个扩展点BeanPostProcessor,通过这篇文章,我们算是对BeanPostProcessor中的方法以及执行顺序有了大致的了解,但是到目前为止我们还不知道每个方法具体的执行时机是什么时候,这个问题我打算把它放到下篇文章中,结合官网中关于Spring生命周期回调方法的相关内容一起分析。到此为止对于官网中提到了三个容器的扩展点就学习完了,可以简单总结如下:
1、BeanPostProcessor,主要用于干预Bean的创建过程。
2、BeanFactroyPostProcessor,主要用于针对容器中的BeanDefinition
3、FactoryBean,主要用于将一个对象直接放入到Spring容器中,同时可以封装复杂的对象的创建逻辑
扫描下方二维码,关注我的公众号,更多精彩文章在等您!~~
![]()


