无人驾驶传感器融合系列(十一)—— 相机内参标定
无人驾驶传感器融合系列(十一)—— 相机内参标定
本章摘要:本章讲解相机畸变产生的原因,标定原理,以及如何通过opencv实现相机内参的标定。
一、相机畸变产生的原因
相机主要有两大畸变,径向畸变,切向畸变。
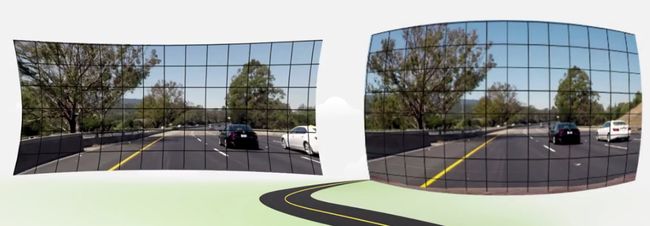
径向畸变:
下面左图为针孔相机模型,如果按此理想模型进行投影的话,其实是不会产生径向畸变的。但是实际上,相机是采用透镜来代替针孔的,以增加采光量,提升投影质量。在透镜的边缘,光线会或多或少的产生异常的弯曲,这就导致了相片边缘的畸变现象。

 切向畸变:
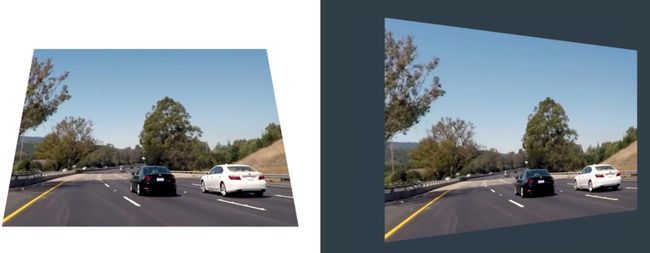
切向畸变:
由于透镜和成像平面之间的不平行,造成的成像的倾斜现象,这样就会导致成像物体看起来比实际物体更近,或者更远。
二、畸变系数计算原理
径向畸变系数为k1, k2, k3,切向畸变系数为p1, p2,可以通过如下两个方程求得:
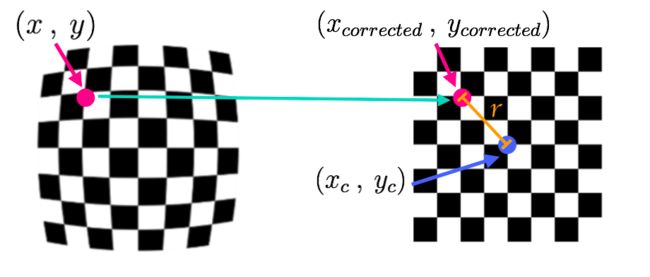 径向畸变计算方程:

切向畸变计算方程:

三、相机内参标定
根据上面畸变洗漱计算原理,下面讲讲如何采用opencv实现相机内参的标定主要流程。
- 采用cv2.findChessboardCorners( ),找到畸变棋盘上的角点。往往会收及一系列不同角度、方向上的的棋盘图片。
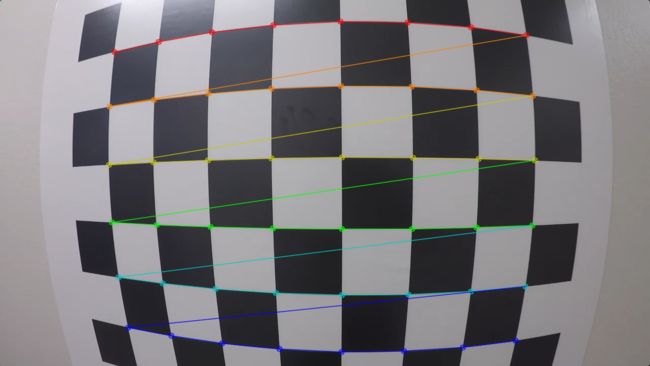
- 将畸变棋盘角点与非畸变棋盘角点对应。
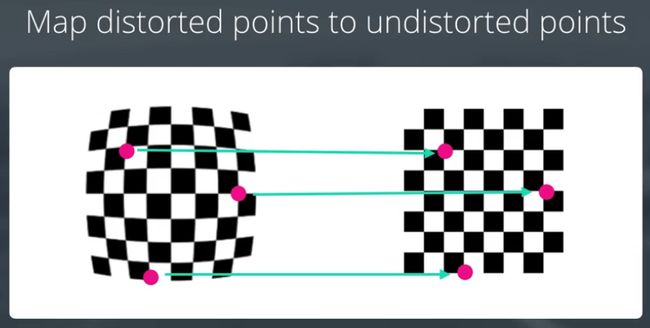
- 采用cv2.calibrateCamera()计算畸变系数。
- 采用cv2.undistort() 给图片去畸变。
四、实例演示
import numpy as np
import cv2
import glob
import matplotlib.pyplot as plt
import matplotlib.image as mpimg
import pickle

# prepare object points, like (0,0,0), (1,0,0), (2,0,0) ....,(6,5,0)
#非畸变棋盘角点
objp = np.zeros((6*9,3), np.float32)
objp[:,:2] = np.mgrid[0:9, 0:6].T.reshape(-1,2)

# Arrays to store object points and image points from all the images.
objpoints = [] # 3d points in real world space
imgpoints = [] # 2d points in image plane.

# Make a list of calibration images
#导入一组不同角度、距离的棋盘照片
images = glob.glob('camera_cal/*.jpg')

# Step through the list and search for chessboard corners
#找到角点,然后对应放入objpoints 、imgpoints
for idx, fname in enumerate(images):
    img = cv2.imread(fname)
    gray = cv2.cvtColor(img, cv2.COLOR_BGR2GRAY)

    # Find the chessboard corners
    ret, corners = cv2.findChessboardCorners(gray, (9,6), None)

    # If found, add object points, image points
    if ret == True:
        objpoints.append(objp)
        imgpoints.append(corners)

# Test undistortion on an image
img = cv2.imread('camera_cal/calibration1.jpg')
img_size = (img.shape[1], img.shape[0])

# Do camera calibration given object points and image points
# 计算畸变系数
# mtx:3维到2维像平面投影矩阵,dist:畸变洗漱矩阵 [k1, k2, p1, p2, k3]。
ret, mtx, dist, rvecs, tvecs = cv2.calibrateCamera(objpoints, imgpoints, img_size,None,None)

# 给图片去畸变
dst = cv2.undistort(img, mtx, dist, None, mtx)
cv2.imwrite('output_images/calibration1_undist.jpg',dst)

# Save the camera calibration result for later use (we won't worry about rvecs / tvecs)
dist_pickle = {}
dist_pickle["mtx"] = mtx
dist_pickle["dist"] = dist
pickle.dump( dist_pickle, open( "camera_cal/dist_pickle.p", "wb" ) )
#dst = cv2.cvtColor(dst, cv2.COLOR_BGR2RGB)
# Visualize undistortion
f, (ax1, ax2) = plt.subplots(1, 2, figsize=(20,10))
ax1.imshow(img)
ax1.set_title('Original Image', fontsize=30)
ax2.imshow(dst)
ax2.set_title('Undistorted Image', fontsize=30)
代码资源
关于上面的代码资源,见github: Advanced-Lane-Finding前半部分。
