1.自定义tabBar
要求的tabBar和普通的tabBar有所不同,中间多了一个发布按钮,因此需要滴定仪tabBar,重写它的layoutSubViews方法,来重新布局子控件.
1.1 继承UITabBar,重写其initWithFrame方法,在方法中创建发布按钮,将其加入到tabBar中.
- (instancetype)initWithFrame:(CGRect)frame {

    if ([super initWithFrame:frame]) {

        //创建发布按钮
        UIButton *publishBtn = [[UIButton alloc] init];
        [publishBtn setImage:[UIImage imageNamed:@"tabBar_publish_icon"] forState:UIControlStateNormal];
        [publishBtn setBackgroundImage:[UIImage imageNamed:@"tabBar_publish_click_icon"] forState:UIControlStateHighlighted];
        [publishBtn addTarget:self action:@selector(publishClick) forControlEvents:UIControlEventTouchUpInside];
        [publishBtn sizeToFit];
        [self addSubview:publishBtn];
        self.publishBtn = publishBtn;
    }

    return self;
}
1.2 重写layoutSubViews方法,遍历子控件,对子控件进行重新布局.
- (void)layoutSubviews {

    [super layoutSubviews];

    //获取tabBar的宽高
    CGFloat w = self.frame.size.width;
    CGFloat h = self.frame.size.height;

    //设置发布按钮的位置
    self.publishBtn.center = CGPointMake(w * 0.5, h * 0.5);

    //tabBarItem的frame属性
    CGFloat tabBarBtnW = w / 5;
    CGFloat tabBarBtnH = h;
    CGFloat tabBarBtnY = 0;

    //tabBar的索引
    int index = 0;

    //遍历所有的子控件,找出其中的额tabBarButton,进行布局

    for (UIView *tabBarBtn in self.subviews) {
        NSString *className = NSStringFromClass(tabBarBtn.class);

        //规避掉发布按钮
        if (![className isEqualToString:@"UITabBarButton"]) continue;

        CGFloat tabBarBtnX = index  * tabBarBtnW;

        if (index > 1) {
            tabBarBtnX += tabBarBtnW;
        }

        tabBarBtn.frame = CGRectMake(tabBarBtnX, tabBarBtnY, tabBarBtnW, tabBarBtnH);

        index++;

    }
}
1.3 在tabBarController中,将自定义的tabBar替换系统的tabBar.
- (void)setupTabBar {

    //tabBar属性为readonly,因此采用KVC的办法给tabBar属性赋值
    [self setValue:[[LXXTabBar alloc] init] forKeyPath:@"tabBar"];

}
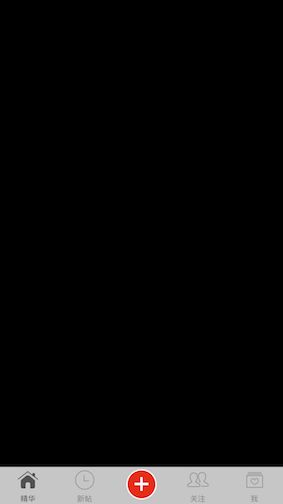
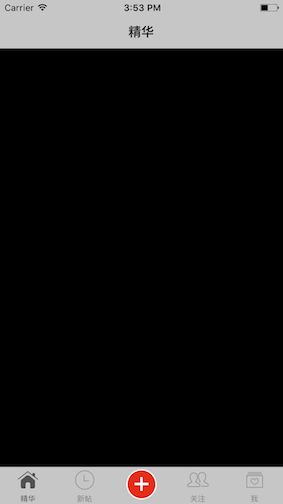
此时,效果如图:
2.封装frame的修改
为了修改控件的frame更加方便,给UIView写一个分类,将frame的修改封装.
UIView+LXXExtension.h中声明属性:
@property (nonatomic, assign) CGFloat width;
@property (nonatomic, assign) CGFloat height;
@property (nonatomic, assign) CGFloat x;
@property (nonatomic, assign) CGFloat y;
@property (nonatomic, assign) CGFloat centerX;
@property (nonatomic, assign) CGFloat centerY;
UIView+LXXExtension.m中实现相应的封装方法:
- (void)setWidth:(CGFloat)width
{
    CGRect frame = self.frame;
    frame.size.width = width;
    self.frame = frame;
}

- (CGFloat)width
{
    return self.frame.size.width;
}
此时设置frame的代码为:
封装前:
    CGFloat w = self.frame.size.width;
    CGFloat h = self.frame.size.height;
封装后:
    CGFloat w = self.width;
    CGFloat h = self.height;
3.设置导航栏
3.1 在tabBarController中,将每个子控制器包装一个导航控制器.
/**
 设置tabBar
 */
- (void)setupOneChildVc:(UIViewController *)vc title:(NSString *)title image:(NSString *)image selectedImage:(NSString *)selectedImage
{
    vc.title = title;
    vc.tabBarItem.image = [UIImage imageNamed:image];
    vc.tabBarItem.selectedImage = [UIImage imageNamed:selectedImage];
    UINavigationController *nav = [[UINavigationController alloc] initWithRootViewController:vc];
    [self addChildViewController:nav];
}
3.2 封装导航栏上UIBarButtonItem的创建方法
给UIBarButtonItem创建了一个分类:
/**
 创建UIBarButtonItem

 @param image     图片
 @param highImage 高亮图片
 @param target    方法的执行者
 @param action    方法

 @return 创建好的UIBarButtonItem
 */
+ (instancetype)itemWithImage:(NSString *)image highImage:(NSString *)highImage target:(id)target action:(SEL)action
{
    UIButton *button = [UIButton buttonWithType:UIButtonTypeCustom];
    [button setImage:[UIImage imageNamed:image] forState:UIControlStateNormal];
    [button setImage:[UIImage imageNamed:highImage] forState:UIControlStateHighlighted];
    [button sizeToFit];
    [button addTarget:target action:action forControlEvents:UIControlEventTouchUpInside];
    return [[UIBarButtonItem alloc] initWithCustomView:button];

}
再创建item时,只需要一行代码:
//设置左上角
    self.navigationItem.leftBarButtonItem = [UIBarButtonItem itemWithImage:@"MainTagSubIcon" highImage:@"MainTagSubIconClick" target:self action:@selector(mainTagSubClick)];
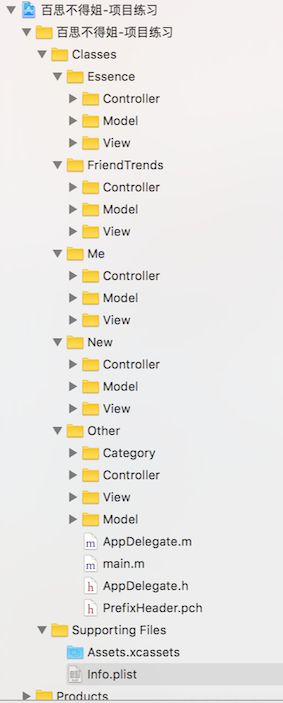
4.调整项目文件结构
项目整体采用MVP模式,文件结构如下:
5.自定义导航控制器
当push到一个新的控制器时,新的控制器的左上角显示的为上一个控制器导航栏的title.为了使push到的新的控制器的左上角统一显示为"返回",需要拦截导航控制器的push的过程,即需要自定义导航控制器,重写push这个方法.
- (void)pushViewController:(UIViewController *)viewController animated:(BOOL)animated
{
    //如果push进来的不是第一个控制器
    if (self.childViewControllers.count > 0) {

        // 当push这个子控制器时, 隐藏底部的工具条
        viewController.hidesBottomBarWhenPushed = YES;
        UIButton *backBtn = [UIButton buttonWithType:UIButtonTypeCustom];
        [backBtn setImage:[UIImage imageNamed:@"navigationButtonReturn"] forState:UIControlStateNormal];
        [backBtn setImage:[UIImage imageNamed:@"navigationButtonReturnClick"] forState:UIControlStateHighlighted];

        [backBtn setTitle:@"返回" forState:UIControlStateNormal];
        [backBtn setTitleColor:[UIColor blackColor] forState:UIControlStateNormal];
        [backBtn setTitleColor:[UIColor redColor] forState:UIControlStateHighlighted];
        backBtn.titleLabel.font = [UIFont systemFontOfSize:14];
        [backBtn sizeToFit];


        [backBtn addTarget:self action:@selector(back) forControlEvents:UIControlEventTouchUpInside];

        //设置按钮的内边距,可以让按钮更靠近左边
        backBtn.contentEdgeInsets = UIEdgeInsetsMake(0, -20, 0, 0);

        viewController.navigationItem.leftBarButtonItem = [[UIBarButtonItem alloc] initWithCustomView:backBtn];

    }

    //放在后面,是想先帮你设置导航栏的左边再进行push,push成功之后如果想要重新设置左边,可以覆盖
    [super pushViewController:viewController animated:animated];
}

- (void)back
{
    [self popViewControllerAnimated:YES];
}


