如何迁移FaceNet到自己的数据集
文章目录
- 概述
- 如何迁移
- 对齐你的图片
- 分割
- 修改源代码
- 注释掉人脸检测模块
- 训练模型
- 测试模型
- 后记
概述
FaceNet是人脸检测中一个比较出名的框架,其主要特色是应用了tripletloss一个三元组的方式,能够比较好的区分正例和负例。
通过 CNN 将人脸映射到欧式空间的特征向量上,计算不同图片人脸特征的距离,通过相同个体的人脸的距离,总是小于不同个体的人脸这一先验知识训练网络。 测试时只需要计算人脸特征,然后计算距离使用阈值即可判定两张人脸照片是否属于相同的个体。
![]()
可以看到上面的公式中需要三个输入人像,如何选择这一个三元组训练呢?为了保证训练收敛速度,我们就选择距离最远的相同人像,和距离最近的不同人像来训练好了。
于是作者在每个 mini-batch 中进行上述选择。
卷积网络。选择模型是常见的问题,作者针对 ZF/GoogLeNet 做了不同的测试。
最终验证。通过计算不同图片的特征向量的距离,使用阈值后得到结果
如何迁移
对齐你的图片
对于facenet是集成了MTCNN(一个人脸区域检测的CNN型),如果你自己需要训练的图片不是人脸,而是其他的东西,那么你需要做的是,要么自己用自己的标记数据重新训练一个MTCNN,要么就是自己将要识别的图片主体裁剪为160*160,不然训练的时候会报错“no face detected”。
%%cmd
cd facenet/
mkdir data/lfw_160
python src/align/align_dataset_mtcnn.py data/lfw data/lfw_160 --image_size 160 --margin 32 --random_order
分割
分割训练集和测试集,并将你的测试集以“目录——文件名1-文件名2”的形式做成TXT文档。大致如下面图片所示

import shutil
import os

def mymovefile(srcfile,dstfile):
    if not os.path.isfile(srcfile):
        print("%s not exist!"%(srcfile))
    else:
        fpath,fname=os.path.split(dstfile)    #分离文件名和路径
        if not os.path.exists(fpath):
            os.makedirs(fpath)                #创建路径
        shutil.copy(srcfile,dstfile)          #移动文件

def  del_file(path):
    for i in os.listdir(path):
        path_file = os.path.join(path,i)  #取文件绝对路径
        if os.path.isfile(path_file):
            os.remove(path_file)
        else:
            del_file(path_file)


with open('./Project1_ML2_2018F/Pairs_test.txt','r') as test:
    f=test.readlines()

test_params=[]
for each in f:
    each=each.replace('\n','')
    test_params.append(each.split('\t'))

os.mkdir('./facenet/data/meta_test2/')

i=0
for each in test_params:
    if len(each)==3:
        srcfile1='./Project1_ML2_2018F/Images_Akos_NegNP_RGB/%s/%s_%s.jpg'%(each[0],each[0],each[1].zfill(2))
        srcfile2='./Project1_ML2_2018F/Images_Akos_NegNP_RGB/%s/%s_%s.jpg'%(each[0],each[0],each[2].zfill(2))
        dstfile1='./facenet/data/meta_test2/%d/%s_%s.jpg'%(i,each[0],each[1].zfill(2))
        dstfile2='./facenet/data/meta_test2/%d/%s_%s.jpg'%(i,each[0],each[2].zfill(2))
        mymovefile(srcfile1,dstfile1)
        mymovefile(srcfile2,dstfile2)
        i+=1
    else:
        srcfile1='./Project1_ML2_2018F/Images_Akos_NegNP_RGB/%s/%s_%s.jpg'%(each[0],each[0],each[1].zfill(2))
        srcfile2='./Project1_ML2_2018F/Images_Akos_NegNP_RGB/%s/%s_%s.jpg'%(each[2],each[2],each[3].zfill(2))
        dstfile1='./facenet/data/meta_test2/%d/%s_%s.jpg'%(i,each[0],each[1].zfill(2))
        dstfile2='./facenet/data/meta_test2/%d/%s_%s.jpg'%(i,each[2],each[3].zfill(2))
        mymovefile(srcfile1,dstfile1)
        mymovefile(srcfile2,dstfile2)
        i+=1

# shutil.move('./Project1_ML2_2018F/Images_Akos_NegNP_RGB/','./facenet/data/meta_train/')

#统计文件夹下文件的数目

DIR = './facenet/data/meta_test2/' #要统计的文件夹
# print(len([name for name in os.listdir(DIR) if os.path.isfile(DIR+name)]))

#如统计文件夹数量,用 os.path.isdir(path)做判断语句。

dir_list=os.listdir(DIR)
path_list=[]

for i in range(len(dir_list)):

    path_list.append(DIR+dir_list[i])

for sub_dir in path_list:
    num_files=len(os.listdir(sub_dir))
    if num_files<=1:
        print(sub_dir)
        print("deleted dirs:",sub_dir)
        del_file(sub_dir)
        os.removedirs(sub_dir)
修改源代码
修改源代码的读取格式要求。原代码关于读取训练数据和测试数据的方法是把文件名标准化为4位数,为此,你需要按照你的文件命名方式重新修改

def get_paths(lfw_dir, pairs):
    nrof_skipped_pairs = 0
    path_list = []
    issame_list = []
    for pair in pairs:
        if len(pair) == 3:
            path0 = add_extension(os.path.join(lfw_dir, pair[0], pair[0] + '_' + '%02d' % int(pair[1])))
            path1 = add_extension(os.path.join(lfw_dir, pair[0], pair[0] + '_' + '%02d' % int(pair[2])))
            issame = True
        elif len(pair) == 4:
            path0 = add_extension(os.path.join(lfw_dir, pair[0], pair[0] + '_' + '%02d' % int(pair[1])))
            path1 = add_extension(os.path.join(lfw_dir, pair[2], pair[2] + '_' + '%02d' % int(pair[3])))
            issame = False
        if os.path.exists(path0) and os.path.exists(path1):    # Only add the pair if both paths exist
            path_list += (path0,path1)
            issame_list.append(issame)
        else:
            nrof_skipped_pairs += 1
    if nrof_skipped_pairs>0:
        print('Skipped %d image pairs' % nrof_skipped_pairs)

    return path_list, issame_list
注释掉人脸检测模块
def load_and_align_data(image_paths, image_size, margin, gpu_memory_fraction):

    minsize = 20 # minimum size of face
    threshold = [ 0.6, 0.7, 0.7 ]  # three steps's threshold
    factor = 0.709 # scale factor

    print('Creating networks and loading parameters')
    with tf.Graph().as_default():
        gpu_options = tf.GPUOptions(per_process_gpu_memory_fraction=gpu_memory_fraction)
        sess = tf.Session(config=tf.ConfigProto(gpu_options=gpu_options, log_device_placement=False))
        with sess.as_default():
            pnet, rnet, onet = align.detect_face.create_mtcnn(sess, None)

    tmp_image_paths=copy.copy(image_paths)
    img_list = []
    for image in tmp_image_paths:
        img = misc.imread(os.path.expanduser(image), mode='RGB')
        img_size = np.asarray(img.shape)[0:2]
        # bounding_boxes, _ = align.detect_face.detect_face(img, minsize, pnet, rnet, onet, threshold, factor)
        # if len(bounding_boxes) < 1:
        #   image_paths.remove(image)
        #   print("can't detect face, remove ", image)
        #   continue
        # det = np.squeeze(bounding_boxes[0,0:4])
        # bb = np.zeros(4, dtype=np.int32)
        # bb[0] = np.maximum(det[0]-margin/2, 0)
        # bb[1] = np.maximum(det[1]-margin/2, 0)
        # bb[2] = np.minimum(det[2]+margin/2, img_size[1])
        # bb[3] = np.minimum(det[3]+margin/2, img_size[0])
        # cropped = img[bb[1]:bb[3],bb[0]:bb[2],:]
        aligned = misc.imresize(img, (image_size, image_size), interp='bilinear')
        # aligned = misc.imresize(cropped, (image_size, image_size), interp='bilinear')
        prewhitened = facenet.prewhiten(aligned)
        img_list.append(prewhitened)
    images = np.stack(img_list)
    return images
训练模型
%%cmd
cd facenet/
python src/train_tripletloss.py ^
--logs_base_dir ./logs/facenet/ ^
--models_base_dir ./models/facenet/  ^
--data_dir ./data/lfw_160 ^ ^
--model_def models.inception_resnet_v1 ^
--optimizer RMSPROP ^
--image_size 160 ^
--batch_size 30 ^
--learning_rate 0.01 ^
--weight_decay 1e-4 ^
--max_nrof_epochs 50 ^
--epoch_size 50 ^
--gpu_memory_fraction 0.7
%%cmd
cd facenet/
python src/train_tripletloss.py ^
--logs_base_dir ./logs/facenet/ ^
--models_base_dir ./models/metanet/  ^
--data_dir ./data/meta_train. ^
--model_def models.inception_resnet_v1 ^
--optimizer RMSPROP ^
--image_size 160 ^
--batch_size 30 ^
--learning_rate 0.01 ^
--weight_decay 1e-4 ^
--max_nrof_epochs 50 ^
--epoch_size 50 ^
--gpu_memory_fraction 0.7
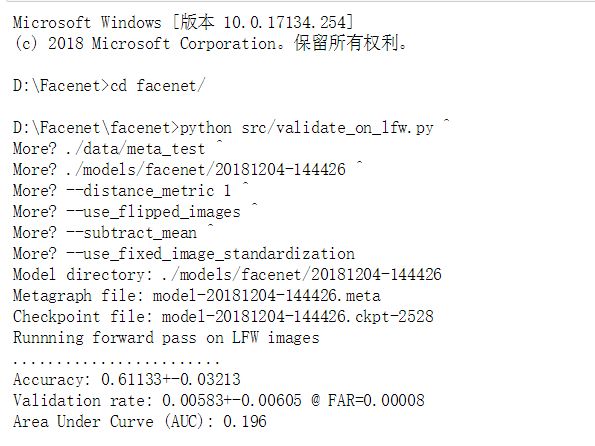
测试模型
%%cmd
cd facenet/
python src/validate_on_lfw.py ^
./data/meta_test ^
./models/facenet/20181204-144426 ^
--distance_metric 1 ^
--use_flipped_images ^
--subtract_mean ^
--use_fixed_image_standardization
%%cmd
cd facenet/
python src/validate_on_lfw.py ^
./data/meta_test ^
./models/metanet/20181204-173209 ^
--distance_metric 1 ^
--use_flipped_images ^
--subtract_mean ^
--use_fixed_image_standardization
后记
第一次尝试使用这种CNN框架,这中间尝试的过程中出现的错误挺多的,像图片读取不出来,路径找不到,不知道如何设置测试集读取,中间曾一度想过一张一张图片的compare,但是实践证明,人家的框架很完善,只是需要在我们需要的基础上修改一些小的细节而已。
AT the End ,如果你也要用这个框架进行迁移,一个好的忠告就是——仔细阅读源码,查找错误~


