RF+Appium框架实现app自动化测试--环境搭建(mac)
mac上使用RF+Appium实现app的自动化测试–环境搭建
- 安装rf环境
- 安装Python:
下载地址:https://www.python.org/
RF框架是基于python 的,所以一定要有python环境。 - 安装Robot framework :
目前最新版本是3.0.2,下载地址: https://pypi.python.org/pypi/robotframework/3.0.2
下载后解压,打开终端切换到解压目录下,然后执行 python setup.py install 安装。 - 安装 wxPython :
Wxpython 是python 非常有名的一个GUI库,因为RIDE 是基于这个库开发的,所以这个必须安装。
另附一篇很好的 wxPython 教程,图文并茂:http://wiki.wxpython.org/AnotherTutorial
方法1:使用命令行安装,需要先安装homebrew, 然后执行brew install wxpython安装wxpython。
方法2:下载安装,下载地址:http://www.wxpython.org/download.php
或 https://sourceforge.net/projects/wxpython/files/wxPython/
- 安装 Robot framework-ride
下载地址:https://pypi.python.org/pypi/robotframework-ride
RIDE就是一个图形界面的用于创建、组织、运行测试的软件。下载后解压,打开终端切换到解压目录下,执行 sudo easy_install robotframework-ride 安装。 - 安装好RF-ride之后,在终端 输入ride.py即可启动,界面如下:
装rf踩过的坑
问题1:
已经安装了python3.8,执行pip install robot framework安装robotframwork时报:
DEPRECATION: Python 2.7 reached the end of its life on January 1st, 2020. Please upgrade your Python as Python 2.7 is no longer maintained. A future version of pip will drop support for Python 2.7. More details about Python 2 support in pip, can be found at https://pip.pypa.io/en/latest/development/release-process/#python-2-support
Defaulting to user installation because normal site-packages is not writeable
Requirement already satisfied: robotframework in /Users/luwang/Library/Python/2.7/lib/python/site-packages (3.1.2)
解决方法:
由于提示python版本问题,所以尝试使用pip3 install robot framework执行,但是依然提示 is not writeable
is not writeable看起来是没有权限的原因,所以使用sudo pip3 install robot framework,但是依然报错如下:
WARNING: The directory ‘/Users/luwang/Library/Caches/pip’ or its parent directory is not owned or is not writable by the current user. The cache has been disabled. Check the permissions and owner of that directory. If executing pip with sudo, you may want sudo’s -H flag.
说的很清楚因为该目录属主不是root用户,所以又使用sudo chown root /Users/luwang/Library/Caches/pip 将该目录属主修改成root用户即可
问题2:
运行pybot —version,报错command not found
解决方法:
robotframework的版本问题:重新安装3.0版本的ok了
sudo pip uninstall robotframework
sudo pip install robotframework==3.0
问题3:
运行ride.py的时候报错如下:
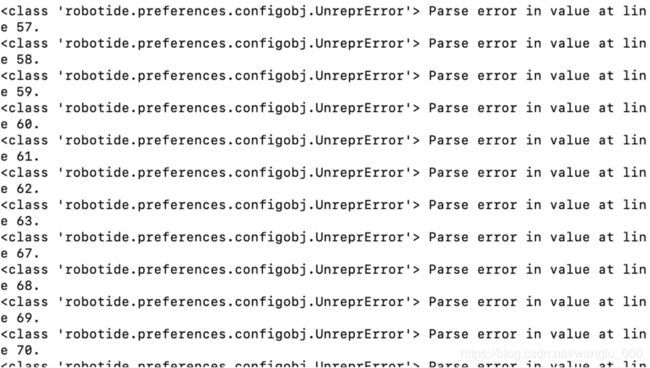
解决方法:
因为之前将python2卸载了,但是wxPython只能兼容 python2.7,重装之后就可以正常启动啦!
- 安装appium环境
-
安装Java:
下载路径:https://www.java.com/ES/download/ -
安装git:
在终端执行:$ brew install git -
安装Python:
下载地址:https://www.python.org/
PS:之前安装RF的时候已经安装过了,这里就不用重复安装了。 -
安装Xcode:
直接在Appstore下载最新版本就可以了。 -
安装homebrew:
homebrew 简称brew,是Mac OSX上的软件包管理工具,能在Mac中方便的安装软件或者卸载软件,可以说Homebrew就是mac下的apt-get、yum等神器。
在终端执行:$ /usr/bin/ruby -e "$(curl -fsSL https://raw.githubusercontent.com/Homebrew/install/master/install)” -
安装libimobiledevice:
libimobiledevice 是一个跨平台的软件库,支持 iPhone®, iPod Touch®, iPad® and Apple TV® 等设备的通讯协议。不依赖任何已有的私有库,不需要越狱。应用软件可以通过这个开发包轻松访问设备的文件系统、获取设备信息,备份和恢复设备,管理 SpringBoard 图标,管理已安装应用,获取通讯录、日程、备注和书签等信息,使用 libgpod 同步音乐和视频。
在终端执行:$ brew install libimobiledevice —HEAD -
安装node:
node是安装npm的前置条件。
在终端执行:$ brew install node -
安装npm:
npm是一个NodeJS包管理和分发工具,已经成为了非官方的发布Node模块(包)的标准。
在终端执行:$ brew install npm -
安装cnpm:
国内直接用npm下载安装会有好多网络问题,安装淘宝的cnpm要比npm好用,https://npm.taobao.org/
在终端执行:$ npm install -g cnpm --registry=https://registry.npm.taobao.org -
安装xcpretty:
xcpretty是用于对xcodebuild的输出进行格式化。并包含输出report功能。
在终端执行:$ gem install xcpretty -
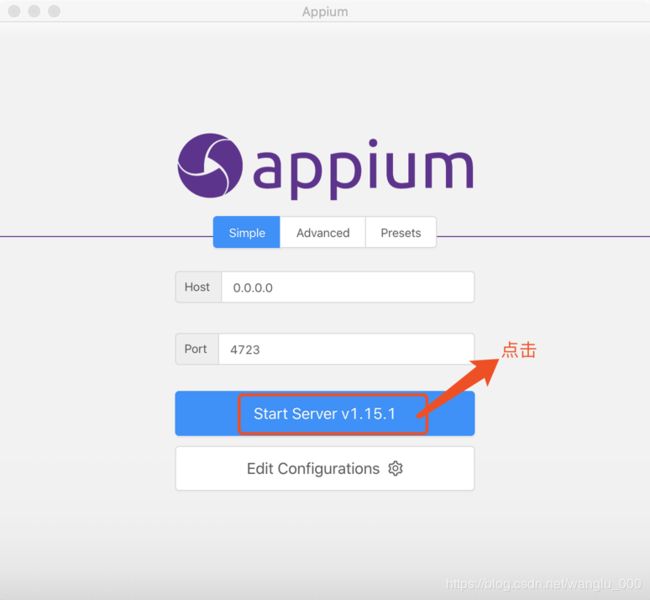
安装Appium:
直接下载appium.dmg 运行即可http://appium.io/downloads.html
安装Appium-Client,终端执行:pip install robotframework-appiumlibrary
由于最新版本的appium-Desktop中不包含appium-doctor文件,所以需要手动安装,在终端执行 -
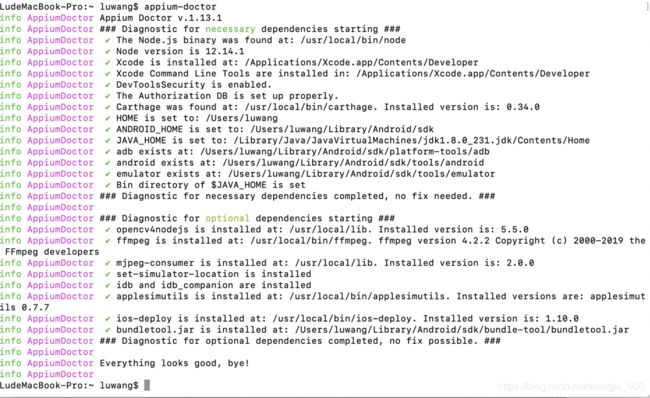
使用appium-doctor检查appium环境
PS:只想检查IOS环境时使用appium-doctor —ios,只想检查Android环境时使用appium-doctor —android
运行结果应该如下图所示说明环境已经ok了:
-
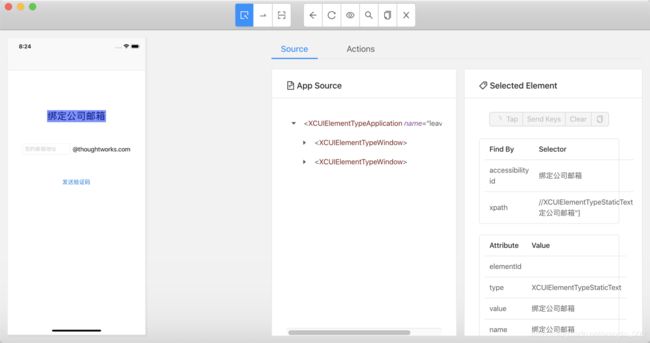
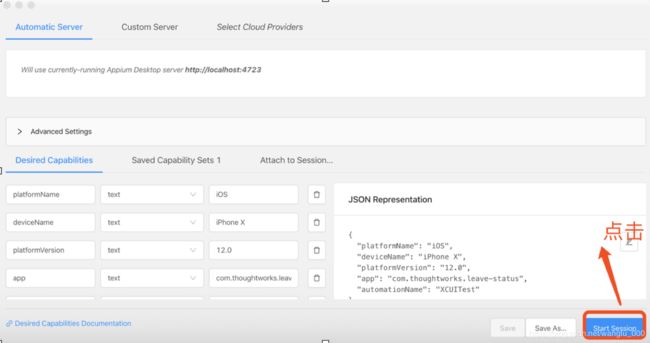
在应用程序中打开Appium,新建一个session,输入ios模拟器的参数后可以成功使用Appium的inspector功能。
 装appium踩过的坑
**问题1:**运行appium-doctor遇到报错:解决方法:
1.IOS的模拟器跑不起来

解决方法:在终端执行如下命令 sudo xcode-select -s /Applications/Xcode.app/Contents/Developer/
2.没有安装安装Carthage
 解决方法:使用brew install Carthage安装
3.没有设置安卓环境变量(如果你只需要进行IOS自动化测试,此项可忽略)
 解决方法:1.安装android studio 打开android sdk检查sdk的路径
2.将该路径放在./bash_profile文件中,source ./bash_profile,重启终端可生效
设置完后这三项也不再报错:
 4.Java环境变量未设置

解决方法:
a.在./bash_profile文件中加入如下内容
export JAVA_HOME= ( / u s r / l i b e x e c / j a v a h o m e ) e x p o r t P A T H = (/usr/libexec/java_home) export PATH= (/usr/libexec/javahome)exportPATH={JAVA_HOME}/bin:$PATH
b.source ./bash_profile,重启终端可生效
5.opencv4nodejs未安装

解决方法:
a.打开terminal执行:cmake —version,提示未安装
b.安装cmake,CMake http://www.cmake.org/
c.打开 .bash_profile 文件配置环境变量,终端输入 open -e .bash_profile
打开的文件加入下面两句,保存修改即可。
# Add Cmake Root to Path
export CMAKE_ROOT=/Applications/CMake.app/Contents/bin/(你自己的安装目录)
export PATH= C M A K E R O O T : CMAKE_ROOT: CMAKEROOT:PATHd.执行sudo npm -g install opencv4nodejs
我安装的时候遇到报错:在/usr/local/lib/node_modules路径下mkdir 文件夹的时候没有权限,
解决方法:sudo chown -R luwang /usr/local/lib/node_modules
6.ffmpeg未安装

解决方法:在终端使用brew install ffmpeg安装
7.mjpeg-consume未安装

解决方法:在终端使用npm i -g mjpeg-consumer安装
8.set-simulator-location未安装

解决方法:在终端使用brew install lyft/formulae/set-simulator-location 安装
9.applesimutils未安装

解决方法:在终端依次执行以下命令
brew tap wix/brew
brew install applesimutils
10.idb-companion和fb-idb没有安装

解决方法:在终端依次执行以下命令
brew tap facebook/fb
brew install idb-companion
pip3.7 install fb-idb
11.ios-deploy没有安装

解决方法:在终端执行sudo npm install -g ios-deploy —unsafe-perm=true
12.![]()
解决方法:到https://github.com/google/bundletool/releases下载bundletool.jar的最新版本,下载到的这个jar的文件名可能有带版本号,无论是什么,都改名为bundletool.jar,在android sdk目录下,创建一个子目录bundle-tool,把bundletool.jar放在这个子目录下,给这个子目录和这个jar文件,增加权限。执行下面的脚本:
chmod +x bundle-tool
chmod +x bundletool.jar
在全局变量PATH中,增加bundletool.jar的路径,如下所示:
export PATH= P A T H : {PATH}: PATH:ANDROID_HOME/bundle-tool
source .bash_profile后重启终端
至此,执行appium-doctor检查appium环境所出现的问题就全部就解决啦~
**问题2:**打开appium,新建一个seesion时闪退,查看日志并未报错,但是每次执行到连接idb时就出现闪退,部分日志如下:
[info] [Appium] Appium v1.15.1 creating new XCUITestDriver (v2.133.1) session
[debug] [BaseDriver] Creating session with MJSONWP desired capabilities: {
[debug] [BaseDriver] “app”: “com.thoughtworks.leave-status”,
[debug] [BaseDriver] “deviceName”: “iPhone 11”,
[debug] [BaseDriver] “platformName”: “ios”,
[debug] [BaseDriver] “platformVersion”: “13.3”,
[debug] [BaseDriver] “newCommandTimeout”: 0,
[debug] [BaseDriver] “connectHardwareKeyboard”: true
[debug] [BaseDriver] }
[info] [BaseDriver] Session created with session id: 0d9ae93a-c766-4c34-811a-40a68a47f9d3[debug] [XCUITest] Current user: ‘luwang’
[info] [XCUITest] iOS SDK Version set to ‘13.2’[info] [iOSSim] Constructing iOS simulator for Xcode version 11.3.1 with udid ‘98FFDAE4-8474-45F9-9D27-9E2FE2C0567B’
[info] [XCUITest] Determining device to run tests on: udid: ‘98FFDAE4-8474-45F9-9D27-9E2FE2C0567B’, real device: false
[debug] [BaseDriver] Event ‘xcodeDetailsRetrieved’ logged at 1584354736505 (18:32:16 GMT+0800 (CST))
[debug] [XCUITest] App is an iOS bundle, will attempt to run as pre-existing
[debug] [BaseDriver] Event ‘appConfigured’ logged at 1584354736505 (18:32:16 GMT+0800 (CST))
[debug] [BaseDriver] Event ‘resetStarted’ logged at 1584354736506 (18:32:16 GMT+0800 (CST))[debug] [iOSSim] Cleaning app data files for ‘’, ‘com.thoughtworks.leave-status’
[debug] [iOSSim] Checking whether simulator has been run before: yes
[debug] [iOSSim] Building bundle path map[debug] [iOSSim] Could not find app directories to delete. It is probably not installed
[debug] [BaseDriver] Event ‘resetComplete’ logged at 1584354737107 (18:32:17 GMT+0800 (CST))
[debug] [IOSSimulatorLog] Starting log capture for iOS Simulator with udid ‘98FFDAE4-8474-45F9-9D27-9E2FE2C0567B’, using ‘xcrun simctl spawn 98FFDAE4-8474-45F9-9D27-9E2FE2C0567B log stream --style compact’[debug] [BaseDriver] Event ‘logCaptureStarted’ logged at 1584354737563 (18:32:17 GMT+0800 (CST))
[info] [XCUITest] Setting up simulator
[debug] [iOS] No reason to set locale
[debug] [iOS] No iOS / app preferences to set
[debug] [iOS] Setting did not need to be updated
[debug] [iOSSim] Setting preferences of 98FFDAE4-8474-45F9-9D27-9E2FE2C0567B Simulator to {“ConnectHardwareKeyboard”:true}
[debug] [iOSSim] Setting common Simulator preferences to {“RotateWindowWhenSignaledByGuest”:true,“ConnectHardwareKeyboard”:true}[debug] [iOSSim] Got Simulator UI client PID: 35066
[info] [iOSSim] Both Simulator with UDID 98FFDAE4-8474-45F9-9D27-9E2FE2C0567B and the UI client are currently running
[debug] [IDB] Connecting idb service to ‘98FFDAE4-8474-45F9-9D27-9E2FE2C0567B’
[debug] [IDB] Disconnecting idb service to ‘98FFDAE4-8474-45F9-9D27-9E2FE2C0567B’
解决方法:
This issue is with idb. It seems that idb is not working properly. You need to uninstall idb completely.
使用如下命令卸载idb
pip uninstall fb-idb
brew uninstall idb
brew uninstall idb-companion
检查是否成功卸载:
which idb
which idb-companion
问题3:运行appium时发现无法唤起模拟器,尝试直接使用Xcode唤醒模拟器,可以唤醒但是模拟器无法自动弹出并打开APP,尝试过clean工程,重启模拟器,删除并重装模拟器,甚至卸载并重装Xcode,重启电脑都未解决,报错如下:
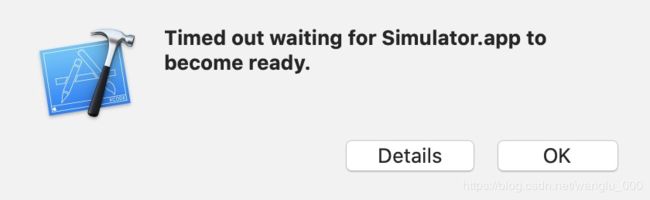
解决方法:
1.卸载Xcode,然后删除 ~/Library/Developer 和 /Users/luwang/library/Developer
2.卸载appium
3.重装appium和Xcode,然后重启电脑
原因:可能是在配置真机调试时修改了WDA的配置导致的,因为WDA的配置会注入到xcode的模拟器中