梳理19年上半年图文记录笔记(vue)
这篇笔记,是自己学习的学习大杂烩,主要用于记录,方便自己查找,其中有些,现在自己看起来都有点好笑,因为错的太低级了,不过这也是成长,后面会梳理好的。
一、基础 宁浩篇
文字记录:
&&1. 安装 导入 vue.js
@@1.创建文件,下载vue.js
创建使用目录 19Learn,然后 在下面新建一个vue-demo 文件夹。
通过,终端,执行 :curl -O http://vuejs.org/js/vue.js 下载vue.js文件
---- 下载 不下来,自己替换这个文件。
https://vuejs.org/js/vue.js
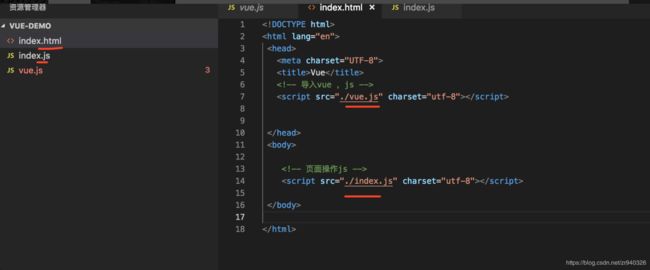
@@2.用vscode,打开vue-demo,新建 index.html文件和 index.js文件,
将vue.js 导入到头部,index.js导入到底部
@@3.安装 BrowserSync 浏览器同步工具,监视文件
sudo npm install -g browser-sync
测试安装:browser-sync
监视文件:
browser-sync start --server --no-notify --files='index.html,index.js'
--------图 2----
&&2.初步使用vue.js 的功能。
===1. 渲染
页面动态,显示 文本:
--- index.js 中:
var app= new Vue({
el:'#app',
data:{
message:'hello'
}
})
--- index.html 中:
{{ message }} //按照data的层次结构取
===2. 绑定元素属性
--- index.html 中:
{{ message }}
绑定div动态属性
--- index.js 中
var app= new Vue({
el:'#app',
data:{
message:'hello',
title:'showText'
}
})
注意一定要是,app下的div 控件。
&&2.初步使用vue.js 的功能。
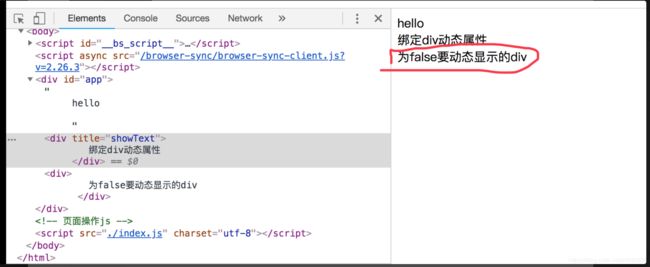
===3. 条件
----页面动态显示,html控件----------------------
--- index.html 中:
为ture要动态显示的div
为false要动态显示的div
--- index.js 中:
var app= new Vue({
el:'#app',
data:{
message:'hello',
title:'showText',
isVbool:false
}
})
---------------------------图3---
===4.用户输入和事件绑定
具体操作:
var app= new Vue({
el:'#app',
methods:{
logMessage(){
console.log(this.message)
}
},
data:{
message:'hello',
title:'showText',
isVbool:false
}
})
&&2.初步使用vue.js 的功能。
===5.循环,组件
--- index.html 中:
{{comment.content}}
--- index.js 中:
var app= new Vue({
el:'#app',
methods:{
logMessage(){
console.log(this.message)
}
},
data:{
comments:[
{content:'元素数据 1'},
{content:'元素数据 2'},
{content:'元素数据 3'},
{content:'元素数据 4'},
{content:'元素数据 5'},
{content:'元素数据 6'},
],
message:'hello',
title:'showText',
isVbool:false
}
})
组件:
-------------图4
第二课,Vue实例,模板,数组,事件,表单
&&1.====Vue实例
Vue,Options 开头的一些 实例
如: Data,DOM ,Lifecycle Hooks(生命周期钩子),Assets,Composition,Misc等
var vm=new Vue({})
命令行:vm.$mount("元素")
vm.$el
或者:new Vue({
el:'#app'
})
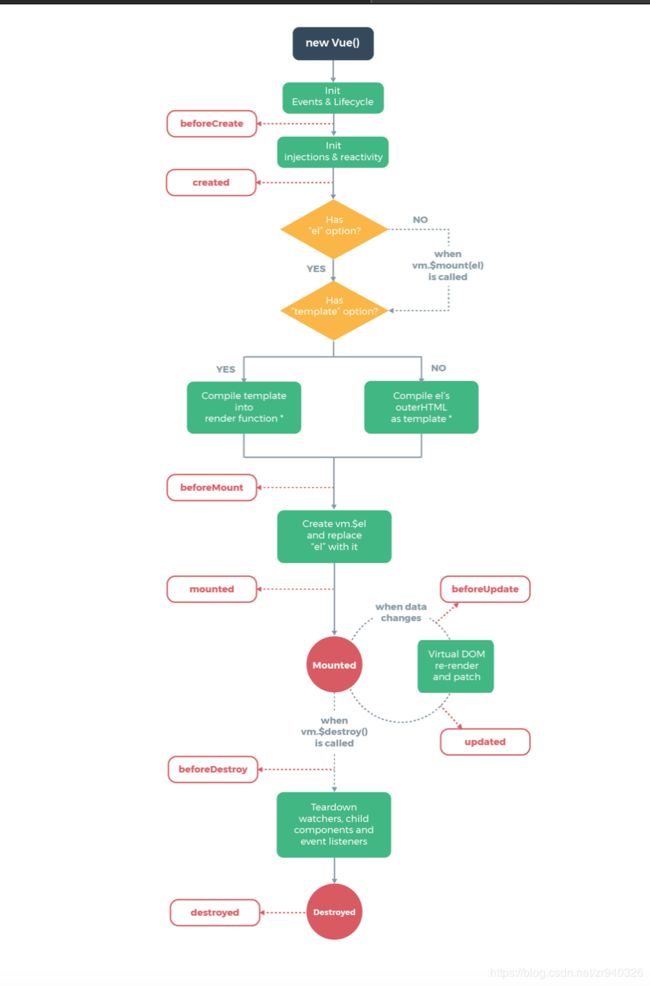
实例生命周期图:
//生命周期方法(详解vue 生命周期)
created(){//创建vue实例执行的方法
},
beforeDestroy(){//开始销毁vue实例执行的方法
},
destroyed(){//销毁掉了,vue实例执行的方法
}//命令行:vm.$destroy()
@@2. 三目运算符
{{ loggedIn?message:’请先登录‘ }}
@@3. v-bind 的动态设置属性值
--- index.js 中:
data:{
imageSrc:"图片地址",
imageWidth:"100%"
}
v-bind:style="{{width:imageWidth}}"/>
@@4.semantic-ui 的使用:
下载 :curl -O http://semantic-ui.com/dist/semantic.min.css
--- index.html 中:
>按钮
--- index.js 中:
data{
//ui 应用
buttonClass:'ui button',
colorClass:'violet',
isLoading:true
}
第二课,Vue实例,模板,数组,事件,表单
&&2.====Vue模板
//htmlCon 里是html文本:最好不要显示很关键的用户文本。
&&3.====Vue数组
v-if v-else 和v-show 控件显示
v-for的使用:
{{ index+1}}.{{item.text}}
//for数据源
items:[
{text:'nicw'},
{text:'great'},
{text:'awesome'},
]
数组操作:
vm.items.push({text:'zhangrong'}) //最后插入
vm.items.unshift({text:'zhangsan'}) //第一个插入
vm.items.reverse() //倒叙排
vm.items.shift()//移除第一个
vm.items.pop() //移除最后一个
vm.items.splice(1,0,{text:'zhangrong'}) //在第1个元素后面插入一个元素
vm.items.splice(2,1,{text:'zhangrong'}) //移除元素
第二课,Vue实例,模板,数组,事件,表单
&&2.====Vue事件
----- index.js 中
var app= new Vue({
el:'#app',
methods:{
logMessage(){
console.log(this.message)
},
lickLove(event){//超喜欢点击事件
this.loveCounter+=1
console.log(event.text);
}
},
data:{
comments:[
{content:'元素数据 1'},
{content:'元素数据 2'},
{content:'元素数据 3'},
{content:'元素数据 4'},
{content:'元素数据 5'},
{content:'元素数据 6'},
],
message:'hello',
title:'showText',
isVbool:false,
//ui 应用
buttonClass:'ui button',
colorClass:'violet',
isLoading:true,
//for数据源
items:[
{text:'nicw'},
{text:'great'},
{text:'awesome'},
],
//事件绑定
counter:0,//喜欢显示数
noCounter:0,//不喜欢显示数
loveCounter:0,//超喜欢显示数
},
//生命周期方法(详解vue 生命周期)
created(){//创建vue实例执行的方法
},
beforeDestroy(){//开始销毁vue实例执行的方法
},
destroyed(){//销毁掉了,vue实例执行的方法
}//命令行:vm.$destroy()
})
键盘事件:
// process 指的一个方法 ,keyup.enter是回车事件
第二课,Vue实例,模板,数组,事件,表单
&&5.====Vue表单
输入控件取值:
data:{
message:"",
}
--- index.html 中
v-on:input="message=$event.target.value"
>
简写:
>
集合处理CheckBox:
data:{
checkBoxSleList:[],
}
--- index.html 中
集合数据:------------check集合数据
===radio 一样的:
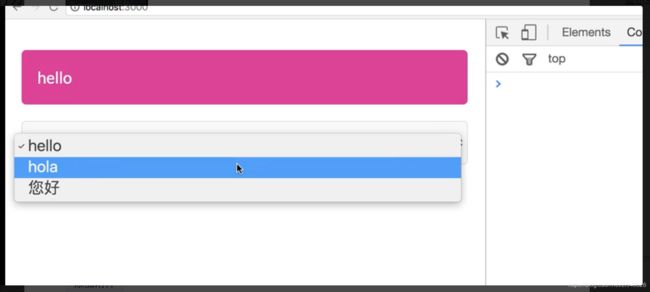
===下拉列表 ----------图下拉列表1
----------图下拉列表2
第三课: vue 的组件
&&1.局部 组件:
----index.js 中
var uiButton={
template:' '
}
var vm=new Vue({
el:'#app',
components:{
'ui-button':uiButton
}
})
----index.html 中
&&2.全局组件:
Vue.component('ui-button',{
template:' '
})
----index.html 中 一样
&&3. 组合组件
A--B A 父,B 子
A到B: props down ,events up
Vue.component('ui-button',{
template:' ',
props:['text'] ,//外面传递 进来的button显示名称
})
----index.html 中 一样
第三课: vue 的组件
&&4.传递的更深使用 props ,属性验证
Vue.component('ui-button',{
template:' ',
props:{
text:{
type:String, //类型
default:"button" ,//默认显示
required:true,//是否必须的
validator(value){ //属性验证
return value.length>3
}
},
}
})
&&5.自定义组件事件
vm.$on()
vm.$emit() -------详见 :组件自定义 图
子调用外面的方法:
Vue.component('ui-button',{
template:' ',
data:{
counter:0
},
methods:{
increment(){
this.counter +=1,
//调用外面的方法:
this.$emit('increment') //自定义外面的 increment 事件名
}
}
})
----index.html 中
主appVue中:
methods:{
incrementTotal(){
this.total +=1
}
}
&&6. 模板 slot的使用:
-----详见 图 slot 2张
第四课: vue 的数据管理
vuex数据管理, https://unpkg.com/[email protected]/dist/vuex.js
state , store ,mutations,actions
vue 插件安装:https://github.com/zr940326/vue-devtools
下载 vue-devtools 谷歌插件。
@@1.定义:
--------index.js中定义:
const store=new Vuex.Store({
state:{//用户需要的数据
count:0
},
mutations:{//修改数据的操作
add(state,payload){
state.count++
}
}
})
控制台输入:
store.commit('add',3)
真实使用:
-------index.js
app=new Vue({
el:'#app',
store, //管理
})
引用:this.$store.state.count
const store=new Vuex.Store({
state:{//用户需要的数据
count:[]
},
mutations:{//修改数据的操作
add(state,payload){
state.count.push(payload)
}
},
getters:{//要操作的方法
sum(state){
return state.count.reduce((a,b)=>a+b,0)//对数组count,求和
}
}
})
引用:this.$store.getters.sum
第五课: vue 的路由
##1.路由配置使用
--------index.js中定义:
// 路由配置
const Home={
template:'
首页
'}
const Event={
template:'
活动
'}
const routes=[
{
path:'/',
component:Home
},
{
path:'/events',
component:Event
}
]
// 创建路由实例
const router=new VueRouter({
routes
})
var app= new Vue({
el:'#app',
router,//配置路由实例
})
----index.html 中
##2.使用首页和活动切换 ,样式
##3.动态路由
const routes=[
{
path:'/events/:id', //动态路由 ,id是变换的值
component:Event,
props:true //传递true的参数
}
]
//没传递参数的使用
const Event={
template:'
活动{{ $route.params.id}}
',beforeRouteUpdate(to,from,next){ //路由变动监听
console.log(to,from); //打印出的 path是路径,params就是path后面的动态参数 ,query是请求的参数列表
next()
}
}
//传递了参数的使用
const Event={
props:['id'],
template:'
活动{{ id }}
',beforeRouteUpdate(to,from,next){ //路由变动监听
console.log(to,from); //打印出的 path是路径,params就是path后面的动态参数 ,query是请求的参数列表
next()
}
}
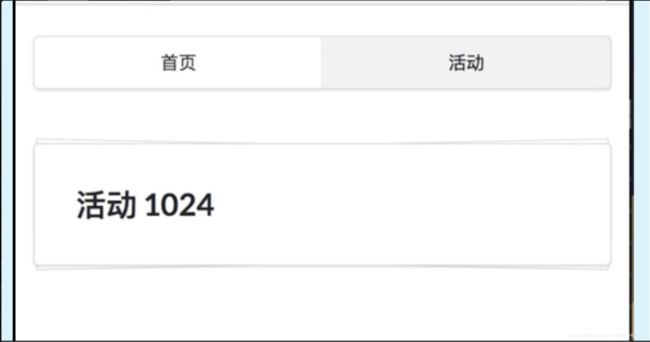
地址直接给:locallhost:3000/#/events/1024 显示的就是活动1024
##3.镶嵌路由的使用
const routes=[
{
path:'/events/:id', //动态路由 ,id是变换的值
component:Event,
children:[ //镶嵌路由
{
path:'comments',
component:Comment
},
]
}
]
//Comment
const Comment ={
template:`
评论
`
}
//动态配置之后,就能显示。
----------- 图:镶嵌路由切换
##3.路由加名字,结合命令行使用
const routes=[
{
path:'/events/:id', //动态路由 ,id是变换的值
component:Event,
name:'abc', //定义路由名字 ,name和path可以不一样,随便
alias:'abcAlias' //设置别名 ,请求 就是url加接口地址
}
//重定向
,{
path:'/',
component:Home,
name:'home',
},
{
path:'/home',
redirect:{name:'home'} //重定向
}
]
重定向:请求url/#/home 会自动跳转到 :url/#/
----index.html 中
//命令行对显示的操作:
router.push('/') //到跟目录
router.push({name:'abc'}) //到名为abc的页面
router.push({name:'abc',query:{filter:'postCs'}}) //到abc的页面,加上参数:如url/abc?filter=postCs
Vue 路由与视图,异步数据,数据管理
&& 1.路由与视图
@@1. 创建nuxt 项目 :npx create-nuxt-app hello-nuxt,下载完之后,依次回答完安装问题,完成创建项目。
----------------图:创建nuxt 项目
----------------图:启动创建的nuxt项目命令
@@2. nuxt 可以自动生成 路由,不用配置:直接在pages文件中,建立文件就行了。
@@3. 跳转
// 给style 添加 scopend 可以不复用这个页面的属性到下一个页面
@@4.动态配置路由
------------图:.动态配置路由使用
验证参数:
惦记你 {{ $route.params }} 次
@@5.模板处理
可在 跟目录的app.html 中进行整个app的模板配置:
{{ HEAD }}
{{ APP }}
Vue 路由与视图,异步数据,数据管理
&&2. 框架异步数据
@@1.使用假数据
安装:sudo npm install json-server --global
在nuxt项目的assets文件夹中:/assets/postJson.json 文件中放返回的json数据
启动接口: json-server --watch assets/postJson.json --port 3333
http://localhost:3333/posts 接口地址
@@2.动态页面显示和错误页面显示 详看视频
@@3.内容布局样式和 head标题,集成到开发中dev-server
&&3.数据管理
store的使用很简单 :详细见视频
//state 的变量值
export const state=()=>({
loveNmae:"杨志",
lovePyNmae:"YangZhi",
loveXlNum:100,
})
//提供的修改state 方法
export const mutations={
add(state,number){ //意思是 填入 传入的数据到loveXlNum
state.loveXlNum=state.loveXlNum+number
}
}
//提供 动作
export const actions={
addAction(context,number){
context.commit('add',number)
}
}
@@2.执行数据操作:
fetch 请求接口 ,删除接口内容,移除本地进行接口删除
---------------------
二、复习和进阶 极客篇
-------------------------待完善
