Semantic-Segmentation-Suite 自己数据集使用攻略
在网上看到星星超级多的语义分割项目,这个项目可以切换多种网络,十分方便,将使用流程记录在此。
将项目从github上打包下载后,看到CamVid文件夹,这就是我们放数据的地方,其中class_dict为我们放标签及标签像素值的地方。

首先是用labelme制作数据集,labelme的使用方法博客上有很多足够详细的教程,这里讲几个关键步骤。
先归一化图片尺寸,不然图像太大,可能跑不了。
#coding:utf-8
import glob
from PIL import Image
import os
import zipfile

# 获取image文件夹下的图片路径
path = "C:/Users/lenovo/Desktop/数据集demo/png原图/"

# 获取到当前文件的目录,并检查是否有result文件夹,如果没有则创建
# image、result文件夹及该python文件路径均为:D:\PythonSpace\
Newimg_Path = os.getcwd()[:0] + 'C:/Users/lenovo/Desktop/数据集demo/resize 256x256/'
if not os.path.exists(Newimg_Path):
    os.makedirs(Newimg_Path)
def changesize(img):
    img_name = img
    # 打开图片
    oldimg = Image.open(path + img_name)
    # 大小缩放为64*64
    new_img = oldimg.resize((256, 256))
    # 以原名称存储图片
    new_img.save(Newimg_Path + img_name)


# 压缩文件
def zipImagefile():
    # 新建压缩包hahaha.zip,若压缩包已经存在,讲其覆盖
    azip = zipfile.ZipFile('hahaha.zip', 'w', zipfile.ZIP_DEFLATED)
    # os.walk()递归查找文件夹中的所有内容
    for current_path, subfolders, filesname in os.walk(r'D:\PythonSpace\result'):
        # filesname是一个列表,我们需要里面的每个文件名和当前路径组合
        for file in filesname:
            # 将当前路径与当前路径下的文件名组合,就是当前文件的绝对路径
            azip.write(os.path.join(current_path, file))
    # 关闭资源
    azip.close()


# 读取图片及名称
for img in os.listdir(path):
    # 不同格式
    if (img.endswith('.gif') or img.endswith('.png') or img.endswith('.jpg')):
        # 修改图片,存储图片
        changesize(img)
    # 压缩文件
zipImagefile()
最好排列一下图片
import os
import re
import sys
def renameall():
	fileList = os.listdir(r"C:\Users\Administrator\Desktop\stars")		#待修改文件夹
	print("修改前:"+str(fileList))		#输出文件夹中包含的文件
	currentpath = os.getcwd()		#得到进程当前工作目录
	os.chdir(r"C:\Users\Administrator\Desktop\stars")		#将当前工作目录修改为待修改文件夹的位置
	num=1		#名称变量
	for fileName in fileList:		#遍历文件夹中所有文件
		pat=".+\.(jpg|png|gif)"		#匹配文件名正则表达式
		pattern = re.findall(pat,fileName)		#进行匹配
		os.rename(fileName,(str(num)+'.'+pattern[0]))		#文件重新命名
		num = num+1		#改变编号,继续下一项
	print("---------------------------------------------------")
	os.chdir(currentpath)		#改回程序运行前的工作目录
	sys.stdin.flush()		#刷新
	print("修改后:"+str(os.listdir(r"C:\Users\Administrator\Desktop\stars")))		#输出修改后文件夹中包含的文件
renameall()
归一化处理和排序后是这样的

你会发现图像的大小小了很多
标注生成的json文件最好写一个脚本批量生成dataset。(我这里在ubuntu中实现)
num=你自己的数量
for ((i=1;i
生成后是这样的

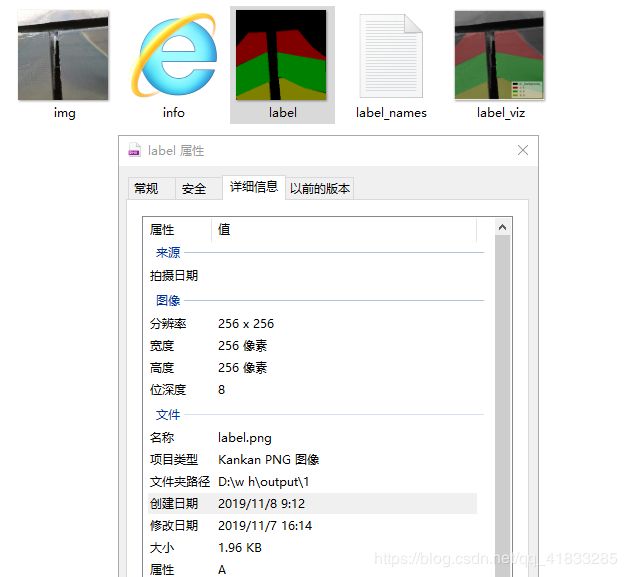
每一个文件夹里面都有5个文件,label.png才是我们所需要的。

值得一提的是,旧版本的labelme生成的看起来全黑的图像,需要借助matlab等来转化和上色处理。
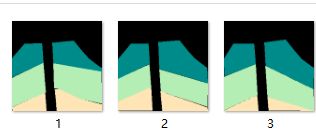
批量提取后是这样的,再根据7:2:1的比例放入Camvid中即可。

至此,这里还有最后一步,就是class_dict文件,前面已经说了,是用来存储标签和rgb像素值的。
这里提供一个打印像素值的代码
from __future__ import print_function

打印像素值
from PIL import Image

f = open("o.txt", 'w+')
im = Image.open('E:\\remote_sensing_image\\seg_train\\train\\label\\13801.png')
rgb_im = im.convert('RGB')
for i in range(256):
	for j in range(256):
		r, g, b = rgb_im.getpixel((i, j))
		print(r, g, b,file=f)
打印完成后,根据r是红,g是绿,b是蓝,推测像素值是哪个标签。
然后更改class_dict如下:

name是labelme标注时的标签,后面是打印出来的像素值。
假如你推断不出来打印出来的像素值或者你想换成你喜欢的颜色,这里提供一个代码,可以更改为你喜欢的颜色(可参照网络上的rgb颜色对照表,找你喜欢的颜色)
import os
from PIL import Image

x = 0
y = 0

img_path = '/media/wang/CCC3-0F06/数据集plus/trainannot'
file_img = sorted(os.listdir(img_path))

for image in file_img:
    img_name = str(image)
    # img_name = img_name.replace('.png','.jpg') #!!!
    img = Image.open(os.path.join(img_path, image))
    img = img.convert("RGB")
    img_weight = img.size[0]
    img_hight = img.size[1]
    w_range = range(img_weight)
    h_range = range(img_hight)
    for x in w_range:
        for y in h_range:
            pix = img.getpixel((x, y))
            if pix == (0, 0, 0):  # background
                pix = img.putpixel((x, y), (0, 0, 0))
            elif pix == (1, 1, 1):  # road
                pix = img.putpixel((x, y), (0, 255, 0))
            elif pix == (2, 2, 2):  # grass
                pix = img.putpixel((x, y), (144, 228, 144))
            elif pix == (3, 3, 3):  # fence
                pix = img.putpixel((x, y), (255, 255, 0))
            elif pix == (4, 4, 4):  # stone
                pix = img.putpixel((x, y), (255, 0, 0))
            elif pix == (5, 5, 5):  # pit
                pix = img.putpixel((x, y), (30, 144, 255))
    img.save("/media/wang/CCC3-0F06/数据集plus/colabel" + img_name)
以我为例,更改成了这样:
训练可参考github上的文档和我的另外一篇博客
https://blog.csdn.net/qq_41833285/article/details/99621101