Android 自定义View(二):创建复合控件
另一个例子:自定义switch按钮
创建复合控件分为三步:
1. 设计属性
2. 实现View
3. 引用View
这里设计一个qq联系人界面的TopBar
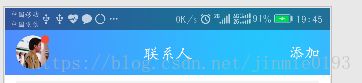
其中有三部分组成,左边圆形头像,中间文本,右边按钮,还有个蓝色默认背景
1.设计属性
在Android Studio的res的values中右键新建XML文件qq_topbar_attrs.xml,内容如下
android中通过<declare-styleable>属性声明自定义属性,并通过name设置引用名称
通过
declare-styleable:告诉系统,以下是我们自定义的属性
attr标签为自定义属性
format为所引用资源类型
Reference为drawable中的文件
第二步:创建自己的View
2.在layout中新建组合控件mytopbat.xml,qq顶部的TopBar
效果:

代码:
3.新建java类MyTopBar并继承一个布局,此处我们使用LinearLayout
然后系统会提示添加构造方法,这儿有四种构造方法,如下:

其中第一个为一般的控件,不需要自定义属性;而自定义属性需要一个Attrs参数,因此选第二个构造方法。
4.然后在java类中声明控件
    //定义需要的控件
    private CircleImageView headCImage;     //头像
    private TextView titleTView;            //标题
private Button addButton; //添加5..其次声明所需要的属性
    //声明需要的属性
    private Drawable background;
    private Drawable leftHead;
    private String title;
    private String addfriend;
6.之后要做的就是赋值,进行控件和属性的关联
在构造方法中获得在attr.xml中自定义的属性,并把属性值赋值给控件
通过TypedArray获得存储在attr.xml中所定义的属性集,如下
//得到自定义属性
TypedArray typedArray = getContext().obtainStyledAttributes(attrs, R.styleable.MyTopBar);其中R.styleable.MyTopBar的MyTopBar即在atts的declare-styleable中的name
7.通过TypedArray,就可以获得自定义的属性的值
其中属性名为styleable的名字加下划线,加自定义属性名,如下:
//获得自定义的属性的值
        background = typedArray.getDrawable(R.styleable.MyTopBar_topbar_background);
        leftHead = typedArray.getDrawable(R.styleable.MyTopBar_topbar_leftHead);
        title = typedArray.getString(R.styleable.MyTopBar_topbar_title);
addfriend = typedArray.getString(R.styleable.MyTopBar_topbar_addfriend);8.TypedArray使用完要进行回收,避免浪费资源,如下:
        //使用TypedArray后,要回收资源
typedArray.recycle();9.之后需要实例化控件,使用动态加载布局的方法
        //动态加载布局
        View view = LayoutInflater.from(getContext()).inflate(R.layout.mytopbar,this);
        //最后实例化控件
        initView();
private void initView() {
//最后实例化控件
headCImage = (CircleImageView) findViewById(R.id.myview_topbar_head);
titleTView = (TextView) findViewById(R.id.myview_topbar_title);
addButton = (Button) findViewById(R.id.myview_topbar_addfriend);
}10.有了控件,之后就需要把自定义属性赋值给控件,如下:
//自定义属性赋值给控件
headCImage.setImageDrawable(leftHead);
titleTView.setText(title);
addButton.setText(addfriend);
//设置背景
setBackground(background);11.最后就是点击事件了,qq顶部Topbar只有头像和添加可以点击,因此,设置两个监听事件
一般有一下三步完成接口回调机制,
(1) 定义接口,在点击接口中设置点击虚函数,头像点击事件,添加点击事件
//定义点击接口
public interface MyTopBarClickListener{
public void headListener();
public void addListener();
}定义之后需要声明这个借口的私有对象,以便使用
//声明点击接口对象
MyTopBarClickListener myTopBarClickListener;(2) 设置一个监听方法,给调用者,参数为接口类型,如下:
//定义设置点击接口方法
public void setMyTopBarClickListener(MyTopBarClickListener listener){
this.myTopBarClickListener = listener;
}(3) 修改控件点击事件,如下:
private void initEvent() {
//头像点击事件
headCImage.setOnClickListener(new OnClickListener() {
@Override
public void onClick(View v) {
myTopBarClickListener.headListener();
}
});
//添加按钮点击事件
addButton.setOnClickListener(new OnClickListener() {
@Override
public void onClick(View v) {
myTopBarClickListener.addListener();
}
});
}(4)除了事件的点击接口,我们还可以设置一些共有方法,方便控制,如setText等
//除了事件的点击接口,我们还可以设置一些共有方法,方便控制,如setText等
public void setMyTopBarTitle(String title){
//得到传入的值
this.title = title;
//赋值给控件
titleTView.setText(this.title);
}第三步:引用自定义View
1. 添加到布局文件,如下:
这里需要注意,怎么使用我们自定义的属性,很简单类型java的import,首先引入我们的自定义控件,
然后按住ctrl加左键单击android会弹到上方的
android:layout_width="match_parent"复制这句话,粘贴在下面,并改为app(或自定义),引用第三方包名的时候只需要把末尾的android替换为res-auto即可,如下,
xmlns:app="http://schemas.android.com/apk/res-auto"不过不要和系统的android一样
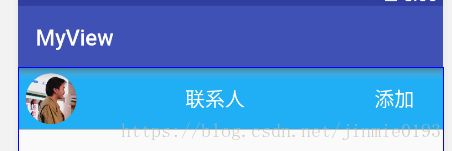
效果:
2.在MainActivity中实例化,并重写点击事件,如下
private MyTopBar myTopbarActivity;
myTopbarActivity = (MyTopBar) findViewById(R.id.my_topbar);
//这样点击头像,标题变为头像,点击添加标题变为添加
myTopbarActivity.setMyTopBarClickListener(new MyTopBar.MyTopBarClickListener() {
@Override
public void headListener() {
Toast.makeText(MyTopbarActivity.this,"头像",Toast.LENGTH_SHORT).show();
myTopbarActivity.setMyTopBarTitle("Click头像");
}
@Override
public void addListener() {
Toast.makeText(MyTopbarActivity.this,"添加",Toast.LENGTH_SHORT).show();
myTopbarActivity.setMyTopBarTitle("Click添加");
}
});
}

最后给出MyTopBar.java的代码:
public class MyTopBar extends LinearLayout {
//定义需要的控件
private CircleImageView headCImage; //头像
private TextView titleTView; //标题
private Button addButton; //添加
//声明需要的属性
private Drawable background;
private Drawable leftHead;
private String title;
private String addfriend;
//声明点击接口对象
MyTopBarClickListener myTopBarClickListener;
public MyTopBar(Context context) {
super(context);
}
public MyTopBar(Context context, AttributeSet attrs) {
super(context, attrs);
initAttrs(attrs);
initEvent();
}
    private void initView() {
        //最后实例化控件
        headCImage = (CircleImageView) findViewById(R.id.myview_topbar_head);
        titleTView = (TextView) findViewById(R.id.myview_topbar_title);
        addButton = (Button) findViewById(R.id.myview_topbar_addfriend);
    }
private void initEvent() {
//头像点击事件
headCImage.setOnClickListener(new OnClickListener() {
@Override
public void onClick(View v) {
myTopBarClickListener.headListener();
}
});
//添加按钮点击事件
addButton.setOnClickListener(new OnClickListener() {
@Override
public void onClick(View v) {
myTopBarClickListener.addListener();
}
});
}
//进行控件和属性的关联
private void initAttrs(AttributeSet attrs) {
//得到自定义属性
TypedArray typedArray = getContext().obtainStyledAttributes(attrs, R.styleable.MyTopBar);
//获得自定义的属性的值
background = typedArray.getDrawable(R.styleable.MyTopBar_topbar_background);
leftHead = typedArray.getDrawable(R.styleable.MyTopBar_topbar_leftHead);
title = typedArray.getString(R.styleable.MyTopBar_topbar_title);
addfriend = typedArray.getString(R.styleable.MyTopBar_topbar_addfriend);
//使用TypedArray后,要回收资源
typedArray.recycle();
//动态加载布局
View view = LayoutInflater.from(getContext()).inflate(R.layout.mytopbar,this);
//最后实例化控件
initView();
        //自定义属性赋值给控件
        headCImage.setImageDrawable(leftHead);
        titleTView.setText(title);
        addButton.setText(addfriend);
        //设置背景
        setBackground(background);
}
    //定义点击接口
    public interface MyTopBarClickListener{
        public void headListener();
        public void addListener();
    }
   //定义设置点击接口方法
    public void setMyTopBarClickListener(MyTopBarClickListener listener){
        this.myTopBarClickListener = listener;
    }
    //除了事件的点击接口,我们还可以设置一些共有方法,方便控制,如setText等
    public void setMyTopBarTitle(String title){
        //得到传入的值
        this.title = title;
        //赋值给控件
        titleTView.setText(this.title);
    }
}