Android的页面布局小结
Android的页面布局小结
- 关于布局
- 布局举例
- LinearLayout---线性布局
- RelativeLayout---相对布局
- FrameLayout---帧布局
- TableLayout---表格布局
- AbsoluteLayout---绝对布局
关于布局
Android程序中界面是通过布局文件设置的,在每个应用程序创建时会默认包含一个主界面布局,该布局位于res/layout中。由于实际开发中每个应用程序都包含多个界面,而程序默认提供的一个主界面布局无法满足需求,因此经常会在程序中添加多个布局。
接下来将逐个回顾所学习的布局
布局举例
LinearLayout—线性布局
在实际开发中比较常用的布局,它主要以水平和垂直的方式来显示界面中的控件。在线性布局中,线性布局管理器允许为每一个子视图指定一个weight属性,以控制每一个子视图在空间内的大小。而线性布局中的orientation属性则是用于控制控件的排列方向。
<?xml version="1.0" encoding="utf-8"?>
<LinearLayout xmlns:android="http://schemas.android.com/apk/res/android"
    android:orientation="vertical" android:layout_width="match_parent"
    android:layout_height="match_parent">
    <Button
    android:layout_width="wrap_content"
    android:layout_height="wrap_content"
    android:text="按钮1"/>
    <Button
        android:layout_width="wrap_content"
        android:layout_height="wrap_content"
        android:text="按钮2"/>
    <Button
    android:layout_width="wrap_content"
    android:layout_height="wrap_content"
    android:text="按钮3"/>
</LinearLayout>
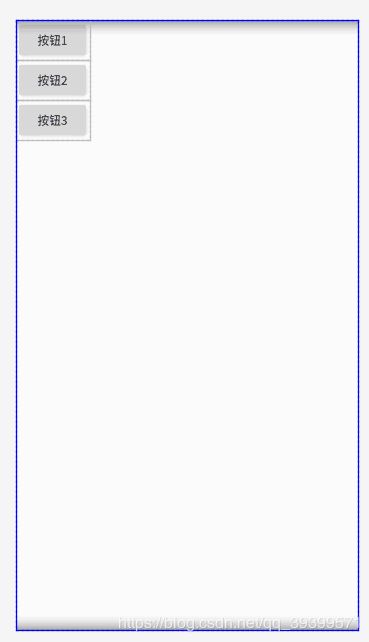
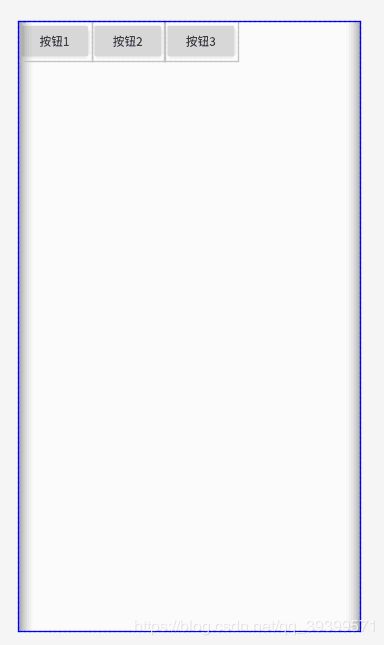
如果将orientation的vertical设置成horizontal则会变成水平排列,如下图显示
可以使用layout_weight属性来设置每行控件的相对大小
<?xml version="1.0" encoding="utf-8"?>
<LinearLayout xmlns:android="http://schemas.android.com/apk/res/android"
    android:orientation="horizontal" android:layout_width="match_parent"
    android:layout_height="wrap_content">
    <Button
        android:layout_width="0dp"
        android:layout_height="wrap_content"
        android:layout_weight="1"
        android:text="按钮1"/>
    <Button
        android:layout_width="0dp"
        android:layout_height="wrap_content"
        android:layout_weight="1"
        android:text="按钮2"/>
    <Button
        android:layout_width="0dp"
        android:layout_height="wrap_content"
        android:layout_weight="1"
        android:text="按钮3"/>
</LinearLayout>
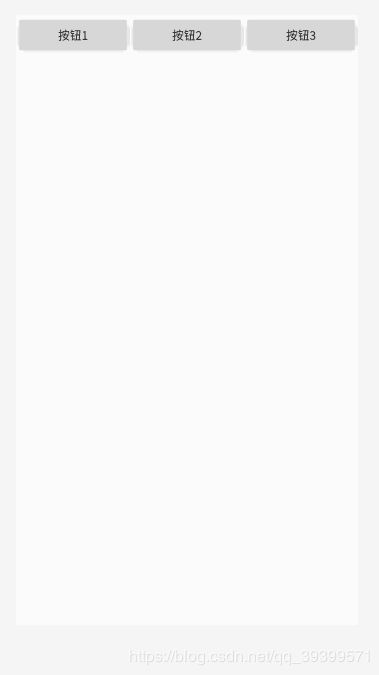
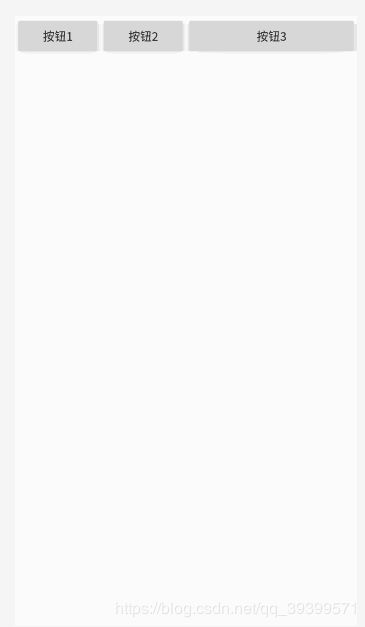
在layout_weight中我们设置它的占据权重为1,则总的权重为1+1+1=3,所以每个控件的所占大小就会是1/3,就会平均分掉这一行的布局。那当我们将其中一个控件的权重修改为2时,就会显示下图的结果。他们的权重比就会是1/4、1/4、2/4。
RelativeLayout—相对布局
相对布局是通过相对定位的方式制定控件位置,即以其他的控件或父容器为参照物,摆放控件位置。在设计相对布局时要遵循控件之间的依赖关系,后放入的控件的位置要依赖于先放入的控件。
<?xml version="1.0" encoding="utf-8"?>
<RelativeLayout xmlns:android="http://schemas.android.com/apk/res/android"
    android:layout_width="match_parent" android:layout_height="match_parent"
    android:paddingBottom="20dp">
    <Button
        android:layout_width="wrap_content"
        android:layout_height="wrap_content"
        android:layout_alignParentBottom="true"
        android:text="按钮1" />
    <Button
        android:id="@+id/btn_two"
        android:layout_width="wrap_content"
        android:layout_height="wrap_content"
        android:layout_centerHorizontal="true"
        android:layout_marginTop="260dp"
        android:text="按钮2"/>
    <Button
        android:layout_width="wrap_content"
        android:layout_height="wrap_content"
        android:layout_alignBottom="@+id/btn_two"
        android:layout_marginBottom="100dp"
        android:layout_toRightOf="@+id/btn_two"
        android:text="按钮3"/>
</RelativeLayout>
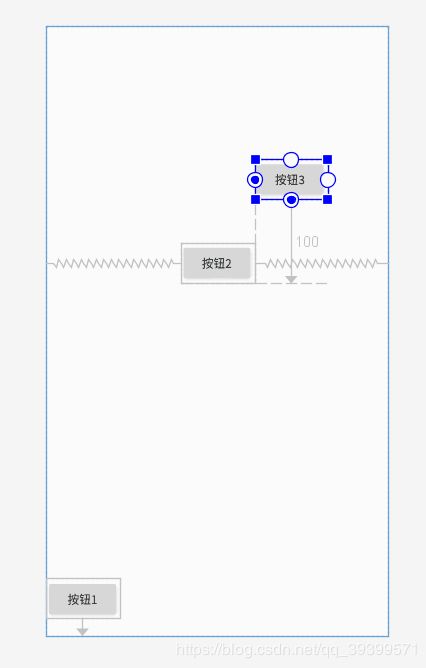
上述代码中,“按钮1”通过 android:layout_alignParentBottom 属性指定当前控件位于布局底端,通过这两个属性的控制,“按钮1”距离底端的距离为20dp。
“按钮2”通过 android:layout_centerHorizontal 属性指定它在父布局中水平居中,通过 android:layout_marginTop 属性指定当前控件上边缘与父布局顶部距离260dp。
“按钮3”通过 android:layout_alignBottom 属性指定它与“按钮2”底部对齐,通过 android:layout_marginBottom属性指定距离“按钮2”底部100dp,android:layout_toRightOf 属性指定了它将被放在按钮2的右边。
相对布局除了上面列出来的一些属性之外,还有其他很多的属性如下所示(参照 http://www.miui.com/thread-574167-1-1.html )
相对于兄弟元素
android:layout_below="@id/aaa":在指定View的下方
android:layout_above="@id/xxx":在指定View的上方
android:layout_toLeftOf="@id/bbb":在指定View的左边
android:layout_toRightOf="@id/cccc":在指定View的右边
相对于父元素
android:layout_alignParentLeft=“true”:在父元素内左边
android:layout_alignParentRight=“true”:在父元素内右边
android:layout_alignParentTop=“true”:在父元素内顶部
android:layout_alignParentBottom=“true”:在父元素内底部
对齐方式
android:layout_centerInParent=“true”:居中布局
android:layout_centerVertical=“true”:水平居中布局
android:layout_centerHorizontal=“true”:垂直居中布局
android:layout_alignTop="@id/xxx":与指定View的上边界一致
android:layout_alignBottom="@id/xxx":与指定View下边界一致
android:layout_alignLeft="@id/xxx":与指定View的左边界一致
android:layout_alignRight="@id/xxx":与指定View的右边界一致
间隔
android:layout_marginBottom=""; 离某元素底边缘的距离
android:layout_marginLeft=""; 离某元素左边缘的距离
android:layout_marginRight ="";离某元素右边缘的距离
android:layout_marginTop=""; 离某元素上边缘的距离
android:layout_paddingBottom=""; 离父元素底边缘的距离
android:layout_paddingLeft=""; 离父元素左边缘的距离
android:layout_paddingRight ="";离父元素右边缘的距离
android:layout_paddingTop=""; 离父元素上边缘的距离
FrameLayout—帧布局
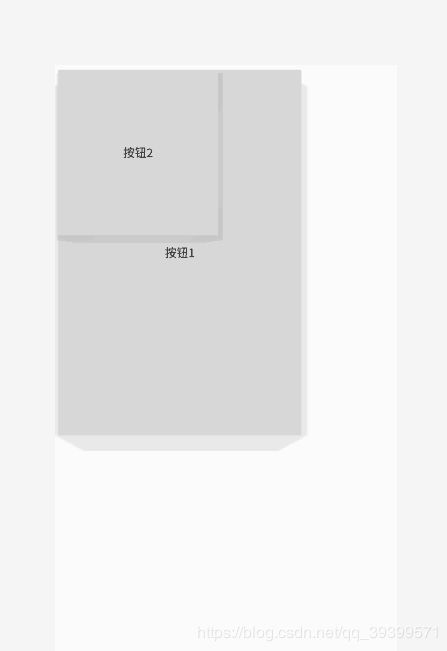
帧布局是最为简单的一种布局,该布局为每个加入其中的控件创建一个空白区域,称为一帧,每个控件占据一帧。采用帧布局时,所有控件都默认显示在屏幕左上角,并按照先后放入的顺序重叠摆放,先放入的将会在最底层,后放入的控件显示在最顶层。帧布局使用于图层设计。
其中:foreground 属性设置帧布局容器的前景图像
foregroundGravity 属性设置图像的显示位置
<?xml version="1.0" encoding="utf-8"?>
<FrameLayout xmlns:android="http://schemas.android.com/apk/res/android"
    android:layout_width="match_parent" android:layout_height="match_parent"
    android:foreground="@mipmap/iclauncher"
    android:foregroundGravity="left">
    <Button
        android:layout_width="300dp"
        android:layout_height="450dp"
        android:text="按钮1"/>
    <Button
        android:layout_width="200dp"
        android:layout_height="210dp"
        android:text="按钮2"/>

</FrameLayout>
TableLayout—表格布局
<?xml version="1.0" encoding="utf-8"?>
<LinearLayout xmlns:android="http://schemas.android.com/apk/res/android"
    android:layout_width="match_parent"
    android:layout_height="match_parent"
    android:orientation="vertical"
    >

    <TextView
        android:id="@+id/text1"
        android:layout_width="wrap_content"
        android:layout_height="wrap_content"
        android:text="①隐藏、收缩、扩展" />

    <TableLayout
        android:layout_width="match_parent"
        android:layout_height="wrap_content"
        android:collapseColumns="2"
        android:shrinkColumns="1"
        android:stretchColumns="0">
        <TableRow>
            <Button
                android:id="@+id/b1"
                android:text="第一列可以行扩展" />
            <Button
                android:id="@+id/b2"
                android:text="第二列可以列扩展" />
            <Button
                android:id="@+id/b3"
                android:text="第三列是被隐藏的列" />
        </TableRow>
        <TableRow>
            <TextView android:text="这行设置了stretchColumns可以行方向扩展"/>
            <TextView android:text="这行设置了shrinkColumns可以列方向扩展"/>
        </TableRow>
    </TableLayout>
    <TextView
        android:id="@+id/text2"
        android:layout_width="wrap_content"
        android:layout_height="wrap_content"
        android:text="②单元格的属性设置" />
    <TableLayout
        android:layout_width="wrap_content"
        android:layout_height="wrap_content">
        <TableRow>
            <Button
                android:id="@+id/b11"
                android:text="第一列" />
            <Button
                android:id="@+id/b22"
                android:text="第二列" />
            <Button
                android:id="@+id/b33"
                android:text="第三列" />
        </TableRow>
        <TableRow>
            <TextView android:text="横跨了1到2列………………………"
                android:layout_span="2"
                android:layout_column="1"/>
        </TableRow>
    </TableLayout>

    <TextView
        android:id="@+id/text3"
        android:layout_width="wrap_content"
        android:layout_height="wrap_content"
        android:text="③单元格的分布与均匀分布" />
    <TableLayout
        android:layout_width="match_parent"
        android:layout_height="wrap_content">
        <TableRow>
            <Button
                android:id="@+id/b111"
                android:text="第一列" />
            <Button
                android:id="@+id/b222"
                android:text="第二列" />
            <Button
                android:id="@+id/b333"
                android:text="第三列" />
        </TableRow>
        <TableRow>
            <Button
                android:id="@+id/b1111"
                android:layout_weight="1"
                android:text="第一列" />
            <Button
                android:id="@+id/b2222"
                android:layout_weight="1"
                android:text="第二列" />
            <Button
                android:id="@+id/b3333"
                android:layout_weight="1"
                android:text="第三列" />
        </TableRow>
    </TableLayout>
</LinearLayout>
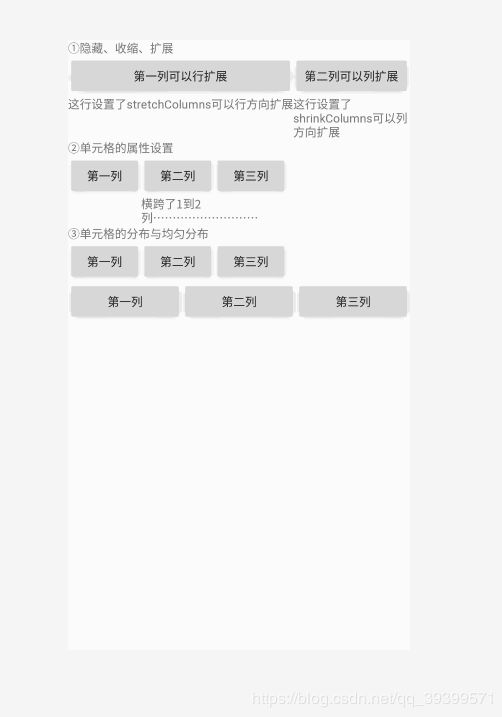
注:TableRow标签中设置 layout_width 和 layout_height 属性是没有用的,控件的宽度和高度是根据单元格属性来决定的,所以通常会忽略这两个属性。如果其他属性设置在 TableRow 标签外,则会自成一行。
此段表格布局的代码转载至:https://www.cnblogs.com/eoooxy/p/5937661.html
AbsoluteLayout—绝对布局
绝对布局是通过 x,y 坐标来控制每一个控件位置的。随着智能手机种类增多且屏幕分辨率千变万化,使用绝对布局时要精确地计算控件大小,同时还要考虑手机屏幕尺寸和分辨率,在开发中是十分低效的,所以不推荐使用。
layout_x 和 layout_y 分别是设置 x,y 坐标的属性。
林昱-123012016189
https://blog.csdn.net/qq_39399571/article/details/90544392
