Coproject - a RIA Caliburn.Micro demo, part 4
In this part, we will dig a little bit into Caliburn.Micro and create application modules.
Note: some information are intentionally simplified to make the whole concept easier to understand. Once you master it, go ahead and read more detailed articles.
Screens
As I indicated in the last part, we will describe Coproject structure and hierarchy of application screens via ViewModels. And then, we will let C.M to take care of wiring it to views and showing it to the user. You will see that this approach helps keep the solution clean and easy to manage.
For this purpose, Caliburn.Micro has several useful classes already prepared.
Screen
Screen is a simple base class for all ViewModels. Not that it already implements INotifyPropertysChanged, it also contains virtual functions that you can use in scenario of nested ViewModels:
OnInitialize
OnActivate
OnDeactivate
TryClose
Conductor
Conductors are basically screens with other nested screens. Therefore, their additional functions are like:
ActivateItem
DeactivateItem
GetChildren
Conductor.Collection.OneActive
To save you as much time as possible, there is an even more specific base class for you to use. It contains property Items and helps you to manage collection of nested viewmodels.
In Coproject, we will this third base class as Shell contains a collection od Modules and, for example, ToDoLists module will contain a collection of opened ToDoItem details.
As I don’t want to duplicate this great article, you should read it if you want to get more information about screens in C.M.
Modules
Ok, let’s use all the screens and conductors and write some code!
First of all, we should create interface for modules (as seen there – Home, Messages, To do, and Milestones will be modules of Coproject). Create interface ViewModels.Interfaces.IModule as follows:
namespace Coproject.ViewModels.Interfaces
{
        public interface IModule
        {
                string Description { get; }
        }
}
Then, under ViewModels, create HomeViewModel:
[Export(typeof(IModule))]
public class HomeViewModel : Screen, IModule
{
        public string Description { get; private set; }

        public HomeViewModel()
        {
                DisplayName = "Home";
                Description = "Project overview & activity";
        }
}
As you can see, no magic here. We just set some text properties and notifies MEF that this is a module. The DisplayName property is already implemented in Screen.
Do the same for other modules (don't forget to export):
[Class name] - [DisplayName] - [Description]
MessagesViewModel - Messages - All messages
ToDoListsViewModel - To Do - To-do lists
MilestonesViewModel - Milestones - string.Format("Milestones (today is {0:D})", DateTime.Today)
If you’ve done it right, your Solution Explorer should look like this:
Next, we need to import those exported modules into the shell.
Change ShellViewModel’s base class from Screen to
public class ShellViewModel : Conductor<IModule>.Collection.OneActive, IShell
And add this constructor:
[ImportingConstructor]
public ShellViewModel([ImportMany]IEnumerable<IModule> modules)
{
        Items.AddRange(modules);
}
That is all we need to do to make MEF import all IModule implementations it has into our shell.
Put a breakpoint into the constructor and run debugging to see that it works. Note that we didn’t listed or even mentioned modules anywhere in the application. So if you want to add a new module, just create ViewModel and let it export IModule. That’s all! You can read more about importing in MEF here.
Tips for Silverlight debugging
Sometimes people have difficulties to debug Silverlight applications. Let me give you a hint to make it easy. The key thing is to understand that there are two applications (processes) you might want to debug – server and client. If you typically hit F5 sometimes only server gets debugged. That’s why I do it another way:
1. At the beginning, Start Without Debugging:
This will run the server and open the client in your default browser. Because of easier finding of the right process, I close the browser and open client URL in Internet Explorer, since I don’t use it for other tasks (you will see in a minute). You don’t have to start it again as long as the ASP.NET Development Server is running.
2. Then, before you want to debug your application, you just need to build the solution (in larger applications, rebuilding of the affected project should be enough).
3. Attach to Process (or press CTRL+ALT+P)
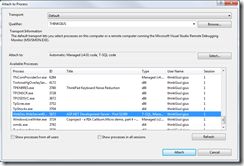
4. If you want to debug server, attach to process called WebDev.WebServer40.EXE (press keys w,e,b and the listbox will find it for you):
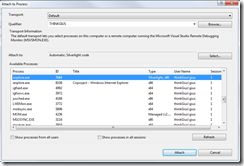
If you want to debug client, attach to process of your browser (make sure to choose the process of Type Silverlight!). In my case, it is iexplore.exe:
So, if you want to debug your client app opened in the only Internet Explorer instance running, press: CTRL+ALT+P, i, e, ENTER. Just don’t forget to build the solution and refresh your browser (so that the latest version of client gets loaded).
Show menu
So, modules are loaded into shell but nothing is shown in the application – we have to update ShellView to show nested modules.
Open ShellView.xaml and add the following ListBox just below the TextBlock with text ‘Coproject’:
 x:Name="Items" Style="{StaticResource NavigationMenuStyle}">


                         Text="{Binding DisplayName}" />


                         Orientation="Horizontal" />
Tip: You can press CTRL+K, D to have Visual Studio reformat the code.
This is just a ListBox that shows DisplayName of some items it is bound to. But if you run the application, you will see that it is already bound to the Items property of ShellViewModel:
This is caused by convention imposed by Caliburn.Micro – because the ListBox is called ‘Items’, C.M tries to bind its ItemsSource property to property Items of respective ViewModel. And since ShellViewModel is a conductor with collection of child modules, it has one. Of course, you could bind ItemsSource by hand, C.M would not overwrite it.
Show module content
Below the Items ListBox, add the following controls:
 x:Name="ActiveItem_Description" Style="{StaticResource CurrentPageTitleStyle}" />
 x:Name="ActiveItem" Style="{StaticResource MainContentStyle}" />
As you can guess, the first will show Description of currently selected module, the second one will show its content. But if you run the application, you will see that it works right away.
This is caused by Items ListBox again. There is another convention in C.M – if a control supports SelectedItem property, C.M will try to add Active, Current, or Selected to its singularized name and check whether there is respective property in ViewModel. And if successful, it will create a TwoWay binding. Conductors in C.M have ActiveItem property.
This binding over naming conventions has one flaw – it does not work in design time, co if you want to have some data bound to the controls on design time, you will have to use standard {Binding} syntax.
View location
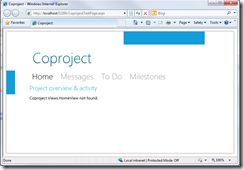
If you select a module, you might see 'Coproject,Views.MessagesView not found’. It is a C.M error message that it could not locate proper view for your ViewModel. This convention works as that to get View name, it just removes ‘Model’ from the full name of ViewModel. Of course, you can customize this logic, but it is usually sufficient.
Although it might not seem like, it is very flexible. You can have a simple structure like we do:
/ViewModels/MessagesViewModel + /Views/MessagesView
But you can also add structure for modules:
/MessagesModule/ViewModels/ListViewModel + /MessagesModule/Views/ListView
or
/ViewModels/MessagesModule/ListViewModel + /Views/MessagesModule/ListView
Get the source
You can download Coproject source codes from its Codeplex site. Feel free to experiment!
That is all for this part.