Android中使用Fragment实现标题栏(不可滑动)
首先,声明一下,此篇文章是学习自郭林大神的《Android Fragment应用实战,使用碎片向ActivityGroup说再见》,链接在此:http://blog.csdn.net/guolin_blog/article/details/13171191
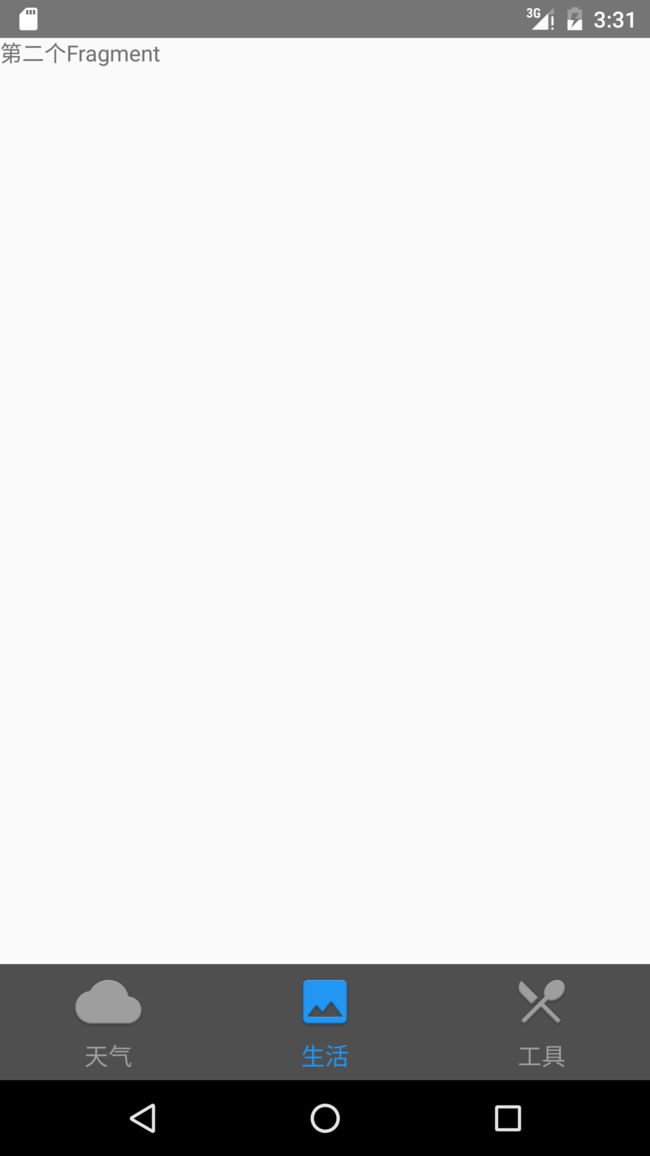
1、先来一张效果图:
2、注意:使用的是:
import android.app.FragmentManager;
import android.app.FragmentTransaction;
包,对应的Fragment.java文件中也是导入:
import android.app.Fragment;包,否则会出错。
额外知识:android.support.v4.app.Fragment和android.app.Fragment区别
即android.support.v4.app.Fragment和android.app.Fragment这两包的区别。
Fragment(碎片)是在3.0以后才出现的,Google为了兼容3.0以前的版本,使用了android.support.v4来兼容以前的SDK。
1.最低支持版本不同
android.app.Fragment 兼容的最低版本是android:minSdkVersion=”11” 即3.0版
android.support.v4.app.Fragment 兼容的最低版本是android:minSdkVersion=”4” 即1.6版
2.需要导jar包
fragment android.support.v4.app.Fragment 需要引入包android-support-v4.jar
3.在Activity中取的方法不同
android.app.Fragment使用 (ListFragment)getFragmentManager().findFragmentById(R.id.userList) 获得 ,继承Activity
android.support.v4.app.Fragment使用 (ListFragment)getSupportFragmentManager().findFragmentById(R.id.userList) 获得 ,需要继承android.support.v4.app.FragmentActivity
4.关于这两个fragment使用标签的问题
app.fragment和v4.fragment都是可以使用标签。
只是在在使用的时候如果是app.fragment则没有什么特殊的地方继承Activity即可。
当v4.fragment使用标签的时候就要特别注意了:
当这个Activity的布局中有标签的时候,这个Activity必须继承FragmentActivity,否则就会报错。
Android Support兼容包
Support Library
我们都知道Android一些SDK比较分裂,为此google官方提供了Android Support Library package 系列的包来保证高版本sdk开发的向下兼容性, 所以你可能经常看到v4,v7,v13这些数字,首先我们就来理清楚这些数字的含义,以及它们之间的区别。
1.support-v4
用在API lever 4(即Android 1.6)或者更高版本之上。它包含了相对更多的内容,而且用的更为广泛,例如:Fragment,NotificationCompat,LoadBroadcastManager,ViewPager,PageTabAtrip,Loader,FileProvider 等
Gradle引用方法:
compile ‘com.android.support:support-v4:21.0.3’
2.support-v7
这个包是为了考虑API level 7(即Android 2.1)及以上版本而设计的,但是v7是要依赖v4这个包的,v7支持了Action Bar以及一些Theme的兼容。
Gradle引用方法:
compile ‘com.android.support:appcompat-v7:21.0.3’
3.support-v13
这个包的设计是为了API level 13(即Android 3.2)及更高版本的,一般我们都不常用,平板开发中能用到,这里就不过多介绍了。
3、贴上代码,代码中有注释。
public class HomePageActivity extends Activity implements View.OnClickListener {
    private LinearLayout lineWeather, lineLife, lineTools;//用于可以点击的功能
    private ImageView imageWeather, imageLife, imageTools;//图片显示
    private TextView textWeather, textLife, textTools;//文字显示
    private FragmentManager fragmentManager;//声明fragmentManager
    //三个Fragment的创建
    ForecastFragment forecastFragment;
    LifeFragment lifeFragment;
    ToolsFragment toolsFragment;

    @Override
    protected void onCreate(Bundle savedInstanceState) {
        super.onCreate(savedInstanceState);
        setContentView(R.layout.activity_home_page);
        //初始化控件
        init();
        fragmentManager = getFragmentManager();//实例化fragmentManager
        //第一次启动时候默认选择第一个fragment
        setSelection(0);
    }

    //根据传入的index值来设置选中的第几个fragment
    private void setSelection(int index) {
        //每次选中之前先清楚掉状态
        clearSelection();
        // 开启一个Fragment事务
        FragmentTransaction transaction = fragmentManager.beginTransaction();
        // 先隐藏掉所有的Fragment,以防止有多个Fragment显示在界面上的情况
        hideFragments(transaction);
        switch (index) {
            case 0:
                //选择第一个的时候,改变图片和文字颜色,显示forecastFragment
                imageWeather.setImageResource(R.mipmap.home_weather_down);
                textWeather.setTextColor(getResources().getColor(R.color.home_bottom_text_down));
                if (forecastFragment == null) {
                    //如果forecastFragment为空,则创建一个并添加到界面上
                    forecastFragment = new ForecastFragment();
                    transaction.add(R.id.fragment_content, forecastFragment);
                } else {
                    //如果forecastFragment不为空,则直接将它显示出来
                    transaction.show(forecastFragment);
                }
                break;
            case 1:
                //选择第二个的时候,改变图片和文字颜色,显示lifeFragment
                imageLife.setImageResource(R.mipmap.home_life_down);
                textLife.setTextColor(getResources().getColor(R.color.home_bottom_text_down));
                if (lifeFragment == null) {
                    //如果lifeFragment为空,则创建一个并添加到界面上
                    lifeFragment = new LifeFragment();
                    transaction.add(R.id.fragment_content, lifeFragment);
                } else {
                    //如果lifeFragment不为空,则直接将它显示出来
                    transaction.show(lifeFragment);
                }
                break;
            case 2:
                //选择第三个的时候,改变图片和文字颜色,显示toolsFragment
                imageTools.setImageResource(R.mipmap.home_tools_down);
                textTools.setTextColor(getResources().getColor(R.color.home_bottom_text_down));
                if (toolsFragment == null) {
                    //如果toolsFragment为空,则创建一个并添加到界面上
                    toolsFragment = new ToolsFragment();
                    transaction.add(R.id.fragment_content, toolsFragment);
                } else {
                    //如果toolsFragment不为空,则直接将它显示出来
                    transaction.show(toolsFragment);
                }
                break;
        }
        transaction.commit();
    }

    @Override
    public void onClick(View v) {
        switch (v.getId()) {
            case R.id.line_weather:
                //显示第一个
                setSelection(0);
                break;
            case R.id.line_life:
                //显示第二个
                setSelection(1);
                break;
            case R.id.line_tools:
                //显示第三个
                setSelection(2);
                break;
        }
    }

    //隐藏所有的Fragments
    private void hideFragments(FragmentTransaction transaction) {
        if (forecastFragment != null) {
            transaction.hide(forecastFragment);
        }
        if (lifeFragment != null) {
            transaction.hide(lifeFragment);
        }
        if (toolsFragment != null) {
            transaction.hide(toolsFragment);
        }
    }

    //设置为原始的样式
    private void clearSelection() {
        imageWeather.setImageResource(R.mipmap.home_weather_up);
        textWeather.setTextColor(getResources().getColor(R.color.home_bottom_text_up));
        imageLife.setImageResource(R.mipmap.home_life_up);
        textLife.setTextColor(getResources().getColor(R.color.home_bottom_text_up));
        imageTools.setImageResource(R.mipmap.home_tools_up);
        textTools.setTextColor(getResources().getColor(R.color.home_bottom_text_up));
    }

    private void init() {
        lineWeather = (LinearLayout) findViewById(R.id.line_weather);
        lineLife = (LinearLayout) findViewById(R.id.line_life);
        lineTools = (LinearLayout) findViewById(R.id.line_tools);
        imageWeather = (ImageView) findViewById(R.id.image_weather);
        imageLife = (ImageView) findViewById(R.id.image_life);
        imageTools = (ImageView) findViewById(R.id.image_tools);
        textWeather = (TextView) findViewById(R.id.text_weather);
        textLife = (TextView) findViewById(R.id.text_life);
        textTools = (TextView) findViewById(R.id.text_tools);
        lineWeather.setOnClickListener(this);
        lineLife.setOnClickListener(this);
        lineTools.setOnClickListener(this);
    }
}
这个类中的注释已经写得非常详细了,下面我再带大家简单梳理一遍。在onCreate()方法中先是调用了init()来获取每个控件的实例,并给相应的控件设置好点击事件,然后调用setTabSelection()方法设置默认的选中项,这里传入的0说明默认选中第1个Tab项。
那么setSelection()方法中又是如何处理的呢?可以看到,首先第一步是调用clearSelection()方法来清理掉之前的选中状态,然后开启一个Fragment事务,并隐藏掉所有的Fragment,以防止有多个Fragment显示在界面上。接下来根据传入的index参数判断出选中的是哪一个Tab项,并改变该Tab项的图标和文字颜色,然后将相应的Fragment添加到界面上。这里注意一个细节,我们添加Fragment的时候并没有使用replace()方法,而是会先判断一下该Fragment是否为空,如果是空的则调用add()方法添加一个进来,如果不是空的则直接调用show()方法显示出来即可。那么为什么没有使用replace()方法呢?这是因为replace()方法会将被替换掉的那个Fragment彻底地移除掉,该Fragment的生命周期就结束了。当再次点击刚才那个Tab项的时候,就会让该Fragment的生命周期重新开始,onCreate()、onCreateView()等方法都会重新执行一遍。这显然不是我们想要的,也和ActivityGroup的工作原理不符,因此最好的解决方案就是使用hide()和show()方法来隐藏和显示Fragment,这就不会让Fragment的生命周期重走一遍了。
设置完默认选中项后,我们当然还可以通过点击Tab项来自由地切换界面,这就会进入到onClick()方法中。onClick()方法中的逻辑判断非常简单,当点击了天气标签时就会选中第1个tab项,点击生活标签时就会选中第2个tab项,点击工具标签时就会选中第3个tab项。都是通过调用setSelection()方法来完成的,只是传入了不同的参数。
