firewalld中常用的区域名称及策略规则:
区域
默认策略规则
trusted
允许所有的数据包
home
拒绝流入的流量,除非与流出的流量相关,而如果流量与ssh,mdns,ipp-client,amba_client与dhcpv6-client服务相关,则允许流量
internal
等同于home区域
work
拒绝流入的流量,除非与流出的流量数相关,而如果流量与ssh,mdns,ipp-client与dhcpv6-client服务相关,则允许流量
public
拒绝流入的流量,除非与流出的流量相关,而如果流量与ssh,dhcpv6-client服务相关,则允许流量
external
拒绝流入的流量,除非与流出的流量相关,而如果流量与ssh服务相关,则允许流量
dmz
拒绝流入的流量,除非与流出的流量相关,而如果流量与ssh服务相关,则允许流量
block
拒绝流入的流量,除非与流出的流量相关
drop
拒绝流入的流量,除非与流出的流量相关
终端管理工具–firewalld-cmd
参数
作用
–get-default-zone
查询默认的区域名称
–set-default-zone=<区域名称>
设置默认的区域,使其永久生效
–get-zones
显示可用的区域
–get-services
显示预先定义的服务
–get-active-zones
显示当前正在使用的区域与网卡名称
–add-source=
将源自此Ip或子网的流量导向指定的区域
–remove-source
不再将源自此Ip或子网的流量导向指定的区域
–add-interface=<网卡名称>
将源自该网卡的所有流量都导向某个指定区域
–change-interface=<网卡名称>
将某个网卡与区域进行关联
–list-all
显示当前区域的网卡配置参数,资源,端口以及服务等信息
–list-all-zones
显示当前区域的网卡配置参数,资源,端口以及服务等信息
–add-service=<服务名>
设置默认区域允许该服务的流量
–add-port=<端口号/协议>
设置默认区域允许该端口的流量
–remove-service=<服务名>
设置默认区域不再允许该服务的流量
–remove-port=<端口号/协议>
设置默认区域不再允许该端口的流量
–reload
让永久生效的配置规则立即生效,并覆盖当前的配置规则
–panic-on
开启应急状态模式
–panic-off
关闭应急状态模式
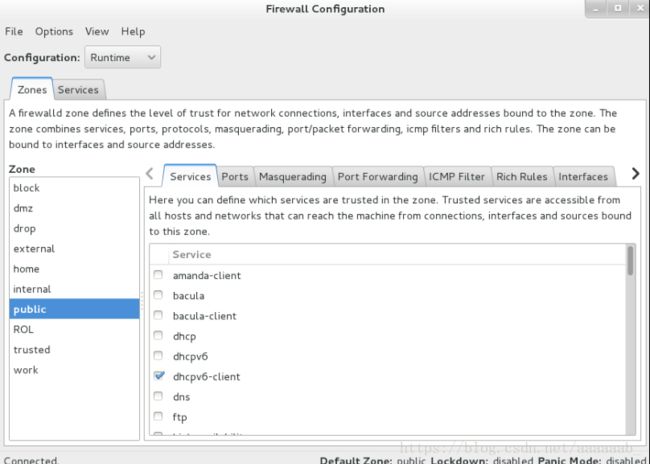
图形管理工具–firewall-config:
[root@client Desktop]# yum install firewalld firewalld-config 安装
[root@client Desktop]# firewall-config 会直接打开界面
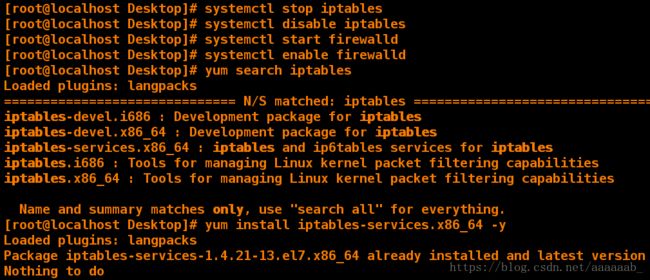
[root@client Desktop]# systemctl stop iptables  关闭iptables
[root@client Desktop]# systemctl disable iptables 开机自动关闭
[root@client Desktop]# systemctl start firewalld 打开防火墙
[root@client Desktop]# systemctl enable firewalld 开机自动开启
[root@client Desktop]# yum search iptables 寻找iptables安装包
[root@client Desktop]# yum install iptables-services.x86_64 安装
[root@client Desktop]# firewall-cmd --state  查看火墙状态
running
[root@client Desktop]# firewall-cmd --get-active-zones 列出当前被系统使用的域
ROL
  sources: 172.25.0.252/32
public
  interfaces: eth0
[root@client Desktop]# firewall-cmd --get-default-zone  查看火墙默认生效的域
public
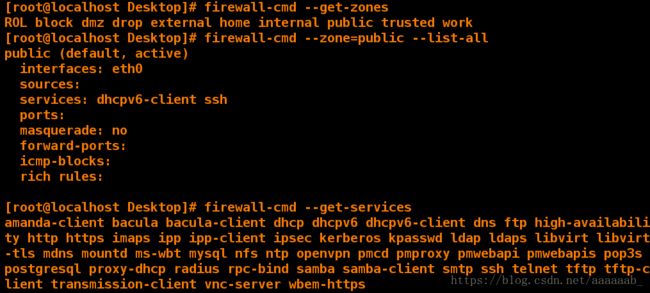
[root@client Desktop]# firewall-cmd --get-zones  查看默认的规则
ROL block dmz drop external home internal public trusted work
[root@client Desktop]# firewall-cmd --zone=public --list-all   查看public域里面的信息
public (default, active)
  interfaces: eth0
  sources:
  services: dhcpv6-client ssh
  ports:
  masquerade: no
  forward-ports:
  icmp-blocks:
  rich rules:

[root@client Desktop]# firewall-cmd --get-services  列出系统中用名称表示的服务
amanda-client bacula bacula-client dhcp dhcpv6 dhcpv6-client dns ftp high-availability http https imaps ipp ipp-client ipsec kerberos kpasswd ldap ldaps libvirt libvirt-tls mdns mountd ms-wbt mysql nfs ntp open pmcd pmproxy pmwebapi pmwebapis pop3s postgresql proxy-dhcp radius rpc-bind samba samba-client smtp ssh telnet tftp tftp-client transmission-client vnc-server wbem-https
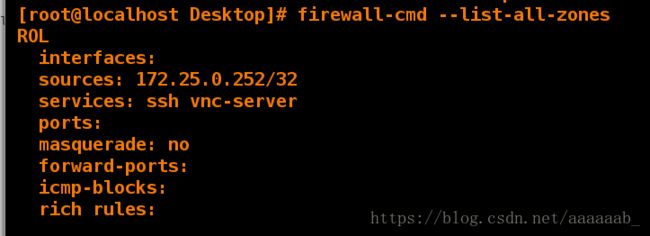
[root@client Desktop]# firewall-cmd --list-all-zones  查看所有的域
ROL
  interfaces:
  sources: 172.25.0.252/32
  services: ssh vnc-server
  ports:
  masquerade: no
  forward-ports:
  icmp-blocks:
  rich rules:
[root@client Desktop]# yum install httpd -y  安装阿帕奇
[root@client Desktop]# systemctl start httpd  开启服务
[root@client Desktop]# echo westos >/var/www/html/index.html 在浏览器测试不允许访问
[root@client Desktop]# firewall-cmd --set-default-zone=trusted
success
[root@client Desktop]# firewall-cmd --get-default-zone
trusted
设置成功之后在浏览器可以看到westos
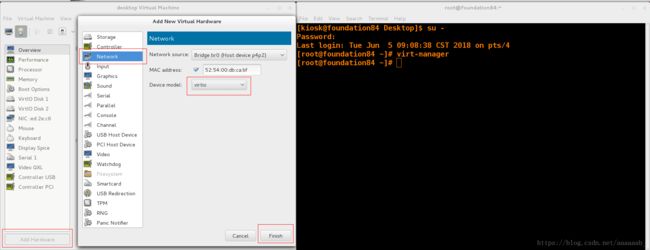
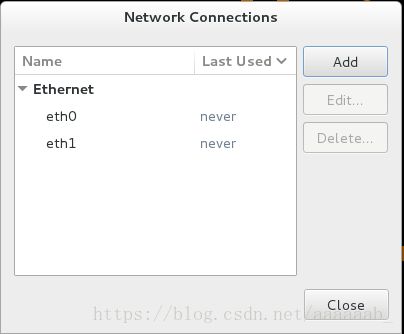
在desktop虚拟机添加两块网卡:
[root@client Desktop]# nm-connection-editor 添加两个IP
[root@client Desktop]# systemctl restart network 重启网络
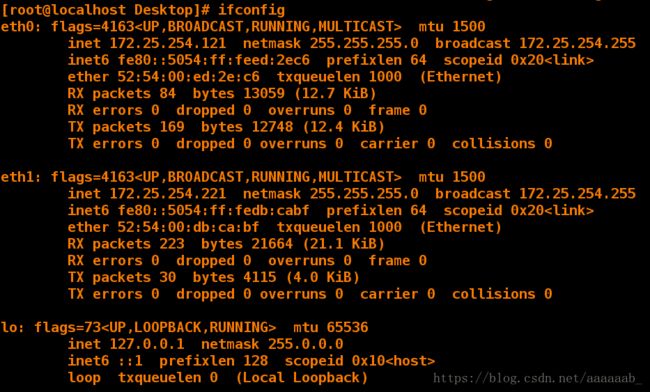
[root@client Desktop]# ifconfig 查看IP
eth0: flags=4163 mtu 1500
inet 172.25.254.121 netmask 255.255.0.0 broadcast 172.25.255.255
inet6 fe80::5054:ff:fe53:a42d prefixlen 64 scopeid 0x20 mtu 1500
inet 172.25.254.221 netmask 255.255.255.0 broadcast 172.25.254.255
inet6 fe80::5054:ff:fec0:5d6 prefixlen 64 scopeid 0x20
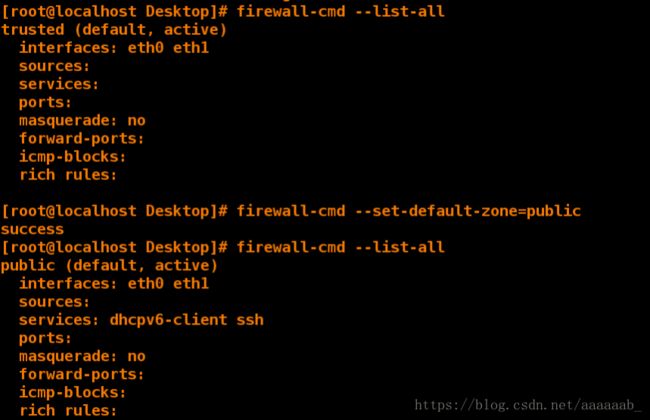
[root@client Desktop]# firewall-cmd --list-all
trusted (default, active)
  interfaces: eth0 eth1
  sources:
  services:
  ports:
  masquerade: no
  forward-ports:
  icmp-blocks:
  rich rules:

[root@client Desktop]# firewall-cmd --set-default-zone=public  更改域为public
success
[root@client Desktop]# firewall-cmd --list-all
public (default, active)
  interfaces: eth0 eth1
  sources:
  services: dhcpv6-client ssh
  ports:
  masquerade: no
  forward-ports:
  icmp-blocks:
  rich rules:
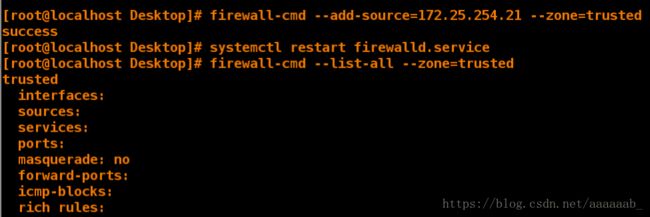
[root@client Desktop]# firewall-cmd --add-source=172.25.254.21 --zone=trusted  添加主机IP域为信任
success
[root@client Desktop]# systemctl restart firewalld  重启网络
[root@client Desktop]# firewall-c
firewall-cmd     firewall-config
[root@client Desktop]# firewall-cmd --list-all --zone=trusted   查看
trusted
  interfaces:
  sources:
  services:
  ports:
  masquerade: no
  forward-ports:
  icmp-blocks:
  rich rules:
[root@client Desktop]# firewall-cmd --add-source=172.25.254.21 --zone=trusted  添加
success
[root@client Desktop]# firewall-cmd --remove-source=172.25.254.21 --zone=trusted  移除
success
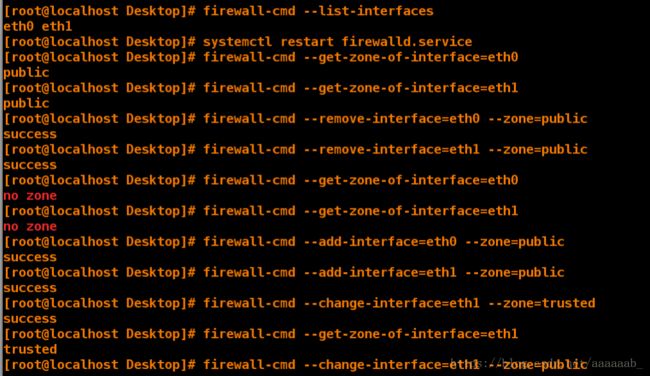
[root@client Desktop]# firewall-cmd --list-interfaces  查看端口
eth0 eth1
[root@client Desktop]# systemctl restart firewalld
[root@client Desktop]# firewall-cmd --get-zone-of-interface=eth0  查看eth0状态
public
[root@client Desktop]# firewall-cmd --get-zone-of-interface=eth1  查看eth1状态
public
[root@client Desktop]# firewall-cmd --remove-interface=eth0 --zone=public 移除eth0
success
[root@client Desktop]# firewall-cmd --remove-interface=eth1 --zone=public 移除eth1
success
[root@client Desktop]# firewall-cmd --get-zone-of-interface==eth0  再次查看eth0已经没有域
no zone
[root@client Desktop]# firewall-cmd --get-zone-of-interface=eth1   再次查看eth1已经没有域
no zone
[root@client Desktop]# firewall-cmd --add-interface=eth0 --zone=public  添加public域
success
[root@client Desktop]# firewall-cmd --add-interface=eth1 --zone=public 添加public域
success
[root@client Desktop]# firewall-cmd --change-interface=eth1 --zone=trusted  更改域
success
[root@client Desktop]# firewall-cmd --get-zone-of-interface=eth1  查看更改成功
trusted
[root@client Desktop]# firewall-cmd --change-interface=eth1 --zone=public 更改域
success
[root@client Desktop]# firewall-cmd --get-zone-of-interface=eth1  查看域
public
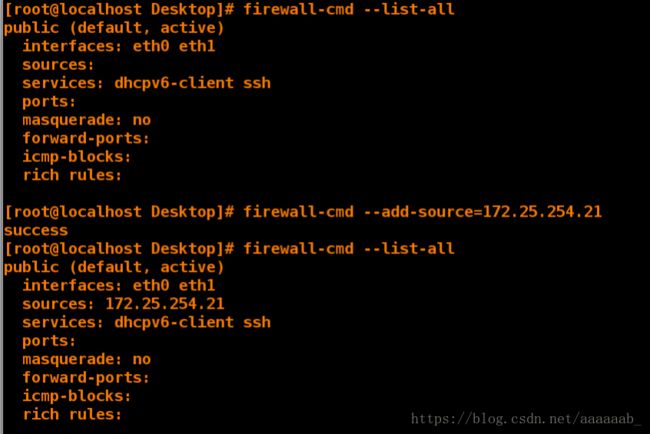
[root@client Desktop]# firewall-cmd --list-all  列出所有
public (default, active)
  interfaces: eth0 eth1
  sources:
  services: dhcpv6-client ssh
  ports:
  masquerade: no
  forward-ports:
  icmp-blocks:
  rich rules:

[root@client Desktop]# firewall-cmd --add-source=172.25.254.21 --zone=trusted    添加主机域为public
success
[root@client Desktop]# firewall-cmd --list-all
public (default, active)
  interfaces: eth0 eth1
  sources: 172.25.254.21
  services: dhcpv6-client ssh
  ports:
  masquerade: no
  forward-ports:
  icmp-blocks:
  rich rules:
[root@client Desktop]# firewall-cmd --remove-source=172.25.254.21 --zone=trusted  移除主机域
success
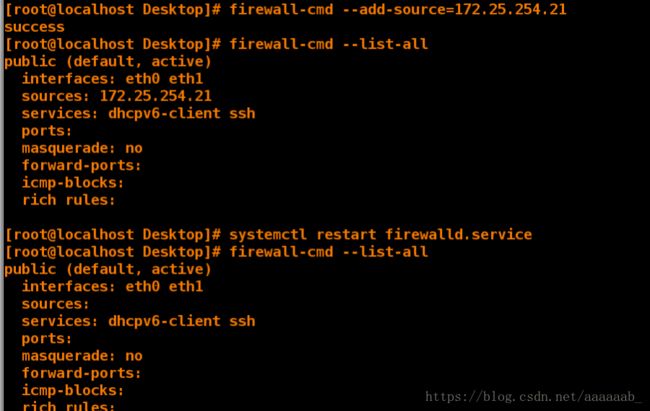
[root@client Desktop]# firewall-cmd --add-source=172.25.254.21 重新添加
success
[root@client Desktop]# firewall-cmd --list-all 临时的重启失效
public (default, active)
  interfaces: eth0 eth1
  sources: 172.25.254.21
  services: dhcpv6-client ssh
  ports:
  masquerade: no
  forward-ports:
  icmp-blocks:
  rich rules:

[root@client Desktop]# systemctl restart firewalld  重启防火墙
[root@client Desktop]# firewall-cmd --list-all 失效
public (default, active)
  interfaces: eth0 eth1
  sources:
  services: dhcpv6-client ssh
  ports:
  masquerade: no
  forward-ports:
  icmp-blocks:
  rich rules:
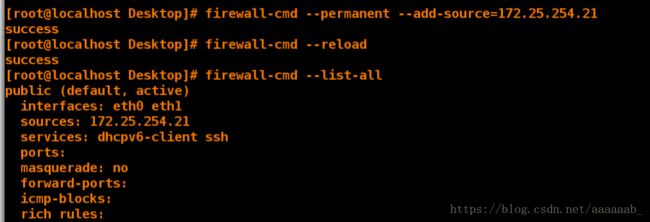
[root@client Desktop]# firewall-cmd --permanent --add-source=172.25.254.21 永久添加
success
[root@client Desktop]# firewall-cmd --reload 刷新
success
[root@client Desktop]# firewall-cmd --list-all 已经添加
public (default, active)
  interfaces: eth0 eth1
  sources: 172.25.254.21
  services: dhcpv6-client ssh
  ports:
  masquerade: no
  forward-ports:
  icmp-blocks:
  rich rules:
[root@client zones]# cd /etc/firewalld/
[root@client firewalld]# cd zones/
[root@client zones]# vim public.xml
[root@client zones]# cat public.xml  在文件中添加http
[root@client zones]# systemctl restart firewalld  重启防火墙服务
[root@client zones]# firewall-cmd --list-all 已经永久添加
public (default, active)
  interfaces: eth0 eth1
  sources: 172.25.254.21
  services: dhcpv6-client http ssh
  ports:
  masquerade: no
  forward-ports:
  icmp-blocks:
  rich rules:
[root@client zones]# cd
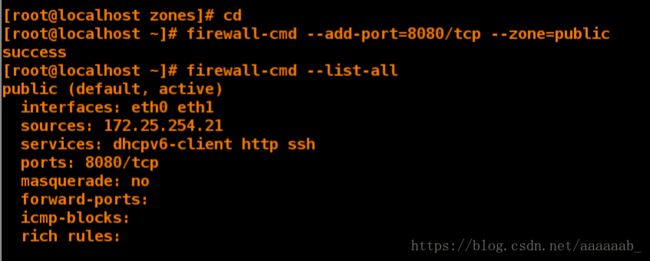
[root@client ~]# firewall-cmd --add-port=8080/tcp --zone=public   更改端口
success  改变端口
[root@client ~]# firewall-cmd --list-all 查看已经更改成功
public (default, active)
  interfaces: eth0 eth1
  sources: 172.25.254.21
  services: dhcpv6-client http ssh
  ports: 8080/tcp
  masquerade: no
  forward-ports:
  icmp-blocks:
  rich rules:
reload刷新之后不会中端连接,complete-reload刷新之后会中断连接。
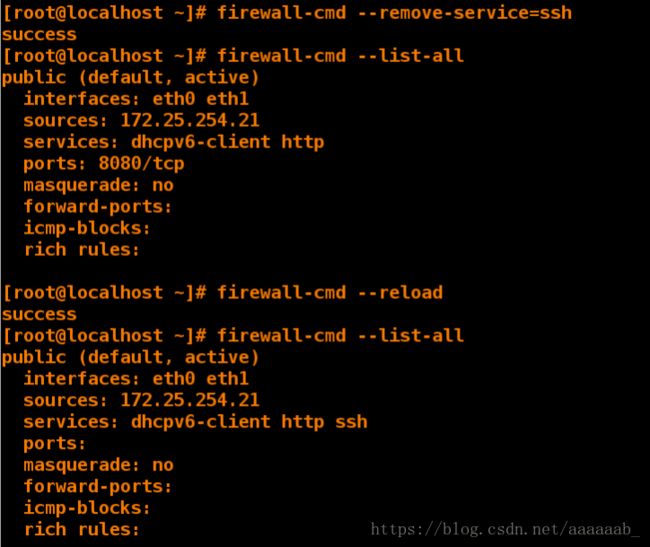
[root@client ~]# firewall-cmd --remove-service=ssh 移除ssh
success
[root@client ~]# firewall-cmd --list-all
public (default, active)
  interfaces: eth0 eth1
  sources: 172.25.254.21
  services: dhcpv6-client http
  ports: 8080/tcp
  masquerade: no
  forward-ports:
  icmp-blocks:
  rich rules:

[root@client ~]# firewall-cmd --reload 刷新失效
success
[root@client ~]# firewall-cmd --list-all
public (default, active)
  interfaces: eth0 eth1
  sources: 172.25.254.21
  services: dhcpv6-client http ssh
  ports:
  masquerade: no
  forward-ports:
  icmp-blocks:
  rich rules:
[root@client ~]# firewall-cmd --permanent --remove-service=ssh  移除ssh服务
success  永久移除不会中断连接
[root@client ~]# firewall-cmd --list-all
public (default, active)
  interfaces: eth0 eth1
  sources: 172.25.254.21
  services: dhcpv6-client http ssh
  ports:
  masquerade: no
  forward-ports:
  icmp-blocks:
  rich rules:

[root@client ~]# firewall-cmd --reload  刷新
success
[root@client ~]# firewall-cmd --list-all  ssh服务已经被删除
public (default, active)
  interfaces: eth0 eth1
  sources: 172.25.254.21
  services: dhcpv6-client http
  ports:
  masquerade: no
  forward-ports:
  icmp-blocks:
  rich rules:
[kiosk@foundation84 Desktop]$ ssh [email protected] 使用ssh连接
[email protected] 's password:
Last login: Tue Jun 5 07:54:28 2018
[root@localhost ~]# touch file 删除ssh服务之后还可以建立文件不会中断连接
[root@localhost ~]# cd /mnt/
[root@localhost mnt]#
[root@client ~]# firewall-cmd --complete-reload  直接中断连接
success
无法输入各种指令字符也不可以,完全中断ssh服务。
httpd是软件,http是协议。
Direct Rules:
通过firewall-cmd工具,可以使用--direct选项在运行时间里增加或者移除链。
如果不熟悉iptables,使用直接接口非常危险,因为您可能无意间导致防火墙被入
侵。直接端口模式适用于服务或者程序,以便在运行时间内增加特定的防火墙规则
。直接端口模式添加的规则优先应用。
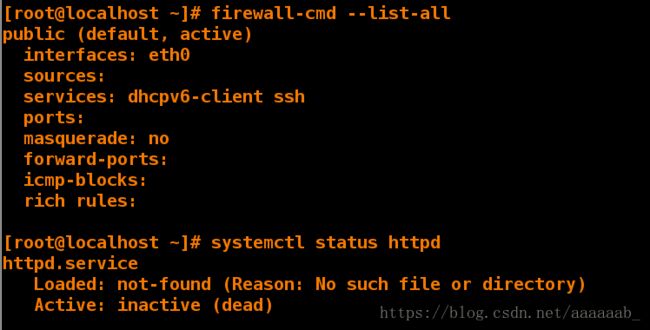
[root@desktop Desktop]# firewall-cmd --list-all 查看防火墙状态
public (default, active)
  interfaces: eth0
  sources:
  services: dhcpv6-client ssh
  ports:
  masquerade: no
  forward-ports:
  icmp-blocks:
  rich rules:

[root@desktop Desktop]# systemctl status httpd   查看http服务的状态
httpd.service
   Loaded: not-found (Reason: No such file or directory)
   Active: inactive (dead)
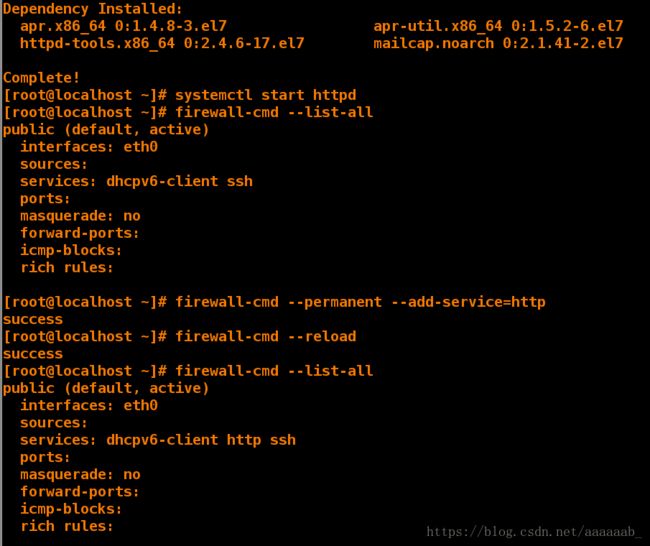
[root@desktop Desktop]# yum install httpd -y   安装阿帕其
[root@desktop Desktop]# systemctl start httpd  开启服务
[root@desktop Desktop]# firewall-cmd --list-all 查看防火墙支持服务
public (default, active)
  interfaces: eth0
  sources:
  services: dhcpv6-client ssh
  ports:
  masquerade: no
  forward-ports:
  icmp-blocks:
  rich rules:

[root@desktop Desktop]# firewall-cmd --permanent --add-service=http 永久添加http协议
success
[root@desktop Desktop]# firewall-cmd --reload   刷新
success
[root@desktop Desktop]# firewall-cmd --list-all  已经支持http服务
public (default, active)
  interfaces: eth0
  sources:
  services: dhcpv6-client http ssh
  ports:
  masquerade: no
  forward-ports:
  icmp-blocks:
  rich rules:
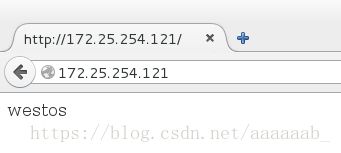
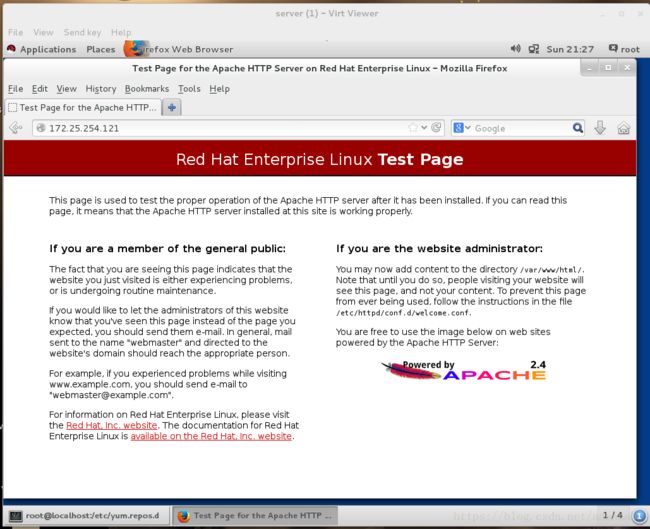
在真机和server虚拟机测试172.25.254.121可以进入阿帕其测试界面。
真机测试:
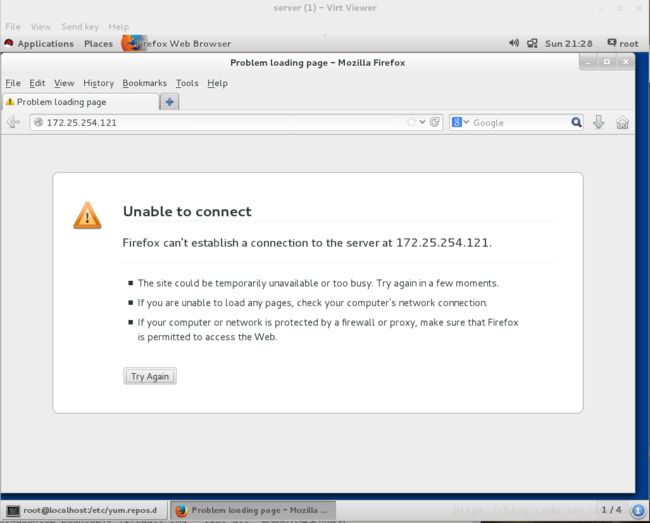
虚拟机测试:
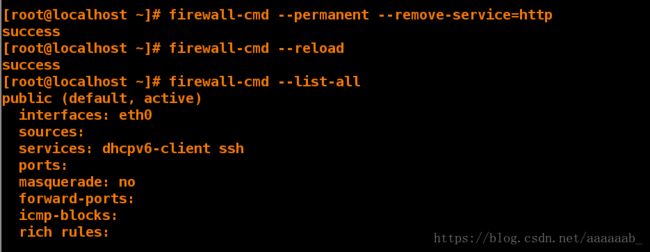
[root@desktop Desktop]# firewall-cmd --permanent --remove-service=http  移除http协议
success
[root@desktop Desktop]# firewall-cmd --reload  重新读入
success
[root@desktop Desktop]# firewall-cmd --list-all  查看支持服务已经删除http
public (default, active)
  interfaces: eth0
  sources:
  services: dhcpv6-client ssh
  ports:
  masquerade: no
  forward-ports:
  icmp-blocks:
  rich rules:
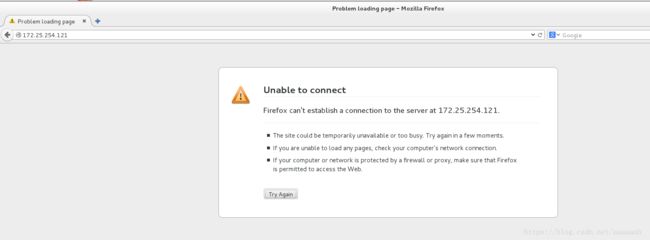
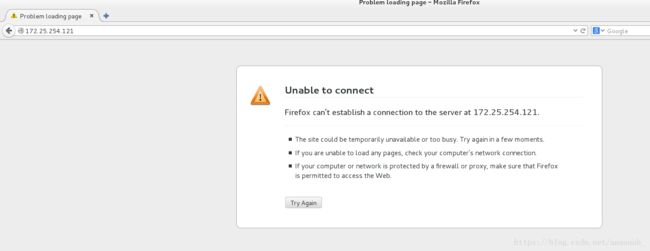
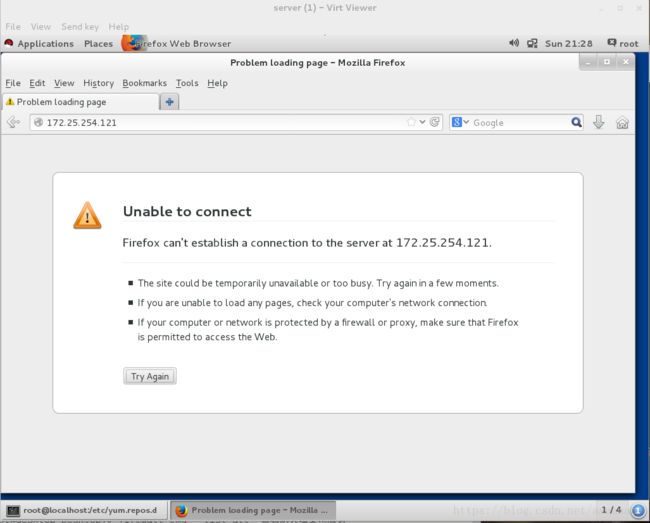
在真机和server虚拟机测试172.25.254.121显示不可以连接
真机测试:
[root@desktop Desktop]# firewall-cmd --direct --add-rule ipv4 filter INPUT 1 -p tcp --dport 80 -s  172.25.254.84 -j ACCEPT   添加真机访问80端口
success
-j动作,reject拒绝,accept允许,drop丢弃
--dport目的端口
-s数据来源
-p表示所使用的协议
一般采取reject
[root@desktop Desktop]# firewall-cmd --direct --get-all-rules   查看direct-rules规则
ipv4 filter INPUT 1 -p tcp --dport 80 -s 172.25.254.84 -j ACCEPT
ssh
外网访问内网用地址伪装。
出栈直接打开masquerd。
地址转发:
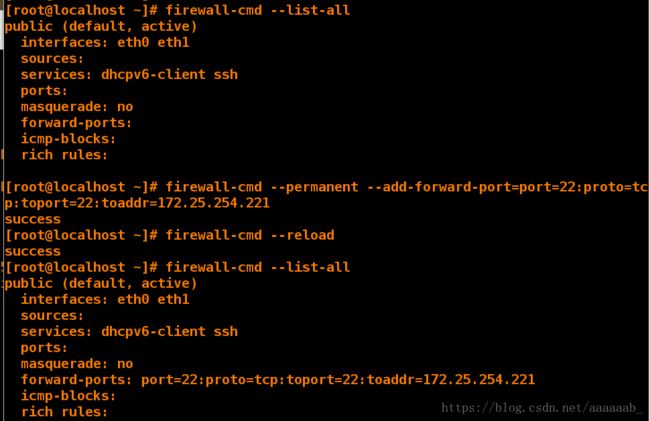
[root@localhost ~]# firewall-cmd --list-all
public (default, active)
  interfaces: eth0 eth1
  sources:
  services: dhcpv6-client ssh
  ports:
  masquerade: no
  forward-ports:
  icmp-blocks:
  rich rules:

[root@localhost ~]# firewall-cmd --permanent --add-forward-  port=port=22:proto=tcp:toport=22:toaddr=172.25.254.221 伪装端口,连接本机时看到的是伪装的IP
success
[root@localhost ~]# firewall-cmd --reload  重新读入
success
[root@localhost ~]# firewall-cmd --list-all  已经添加伪装IP
public (default, active)
  interfaces: eth0 eth1
  sources:
  services: dhcpv6-client ssh
  ports:
  masquerade: no
  forward-ports: port=22:proto=tcp:toport=22:toaddr=172.25.254.221
  icmp-blocks:
  rich rules:
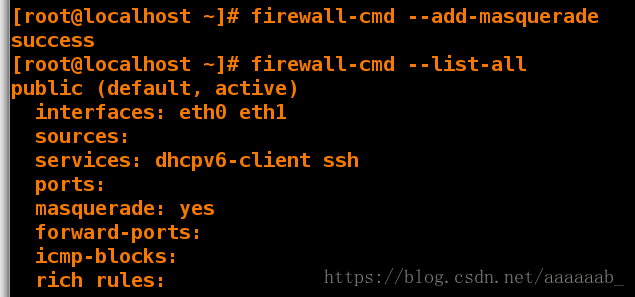
[root@localhost ~]# firewall-cmd --add-masquerade   打开masquerade服务
success
[root@localhost ~]# firewall-cmd --list-all  查看已经打开
public (default, active)
  interfaces: eth0 eth1
  sources:
  services: dhcpv6-client ssh
  ports:
  masquerade: yes
  forward-ports: port=22:proto=tcp:toport=22:toaddr=172.25.254.221
  icmp-blocks:
  rich rules:
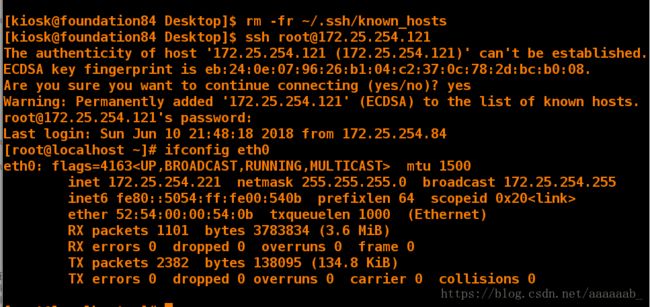
[kiosk@foundation84 Desktop]$ rm -fr ~/.ssh/known_hosts
[kiosk@foundation84 Desktop]$ ssh [email protected] 连接172.25.254.121
The authenticity of host '172.25.254.121 (172.25.254.121)' can't be established.
ECDSA key fingerprint is eb:24:0e:07:96:26:b1:04:c2:37:0c:78:2d:bc:b0:08.
Are you sure you want to continue connecting (yes/no)? yes
Warning: Permanently added '172.25.254.121' (ECDSA) to the list of known hosts.
[email protected] 's password:
Last login: Sun Jun 10 21:48:18 2018 from 172.25.254.84
连接的时候输入的是伪装IP的密码。
[root@localhost ~]# ifconfig eth0 查看IP时为伪装的172.25.254.221
eth0: flags=4163 mtu 1500
inet 172.25.254.221 netmask 255.255.255.0 broadcast 172.25.254.255
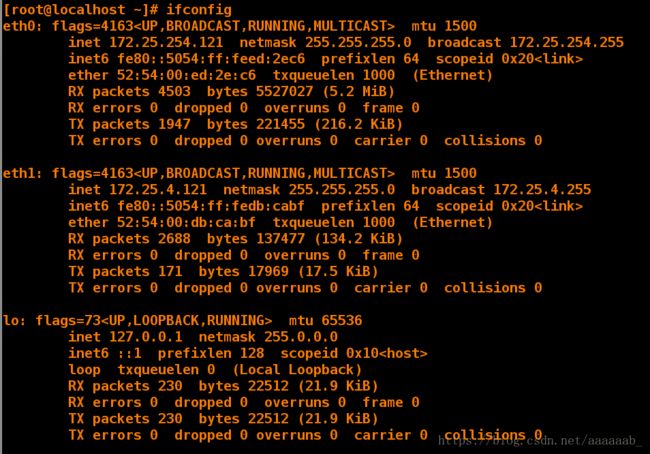
inet6 fe80::5054:ff:fe00:540b prefixlen 64 scopeid 0x20 在desktop添加两块网卡,设置两个网段的IP
[root@desktop Desktop]# nm-connection-editor 图形化操作配置IP
[root@desktop Desktop]# ifconfig 查看IP,出现两个网段的IP
eth0: flags=4163 mtu 1500
inet 172.25.254.121 netmask 255.255.255.0 broadcast 172.25.254.255
inet6 fe80::5054:ff:fe18:95e4 prefixlen 64 scopeid 0x20 mtu 1500
inet 172.25.4.121 netmask 255.255.255.0 broadcast 172.25.4.255
inet6 fe80::5054:ff:fef1:5379 prefixlen 64 scopeid 0x20 mtu 65536
inet 127.0.0.1 netmask 255.0.0.0
inet6 ::1 prefixlen 128 scopeid 0x10
loop txqueuelen 0 (Local Loopback)
RX packets 134 bytes 11296 (11.0 KiB)
RX errors 0 dropped 0 overruns 0 frame 0
TX packets 134 bytes 11296 (11.0 KiB)
TX errors 0 dropped 0 overruns 0 carrier 0 collisions 0
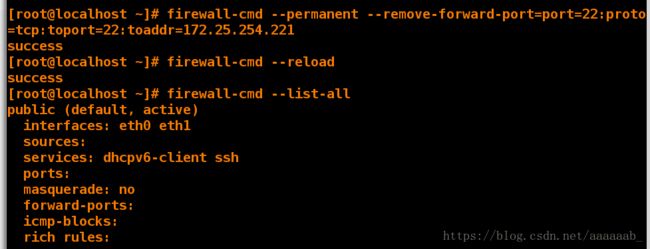
[root@localhost ~]# firewall-cmd --permanent --remove-forward-port=port=22:proto=tcp:toport=22:toaddr=172.25.254.221  移除伪装的IP端口
success
[root@localhost ~]# firewall-cmd --reload  重新读入
success
[root@localhost ~]# firewall-cmd --list-all 查看服务
public (default, active)
  interfaces: eth0 eth1
  sources:
  services: dhcpv6-client ssh
  ports:
  masquerade: no
  forward-ports:
  icmp-blocks:
  rich rules:
[root@localhost ~]# firewall-cmd --add-masquerade  打开masquerade
success

[root@desktop Desktop]# firewall-cmd --list-all  只需要打开masquerade服务即可
public (default, active)
  interfaces: eth0 eth1
  sources:
  services: dhcpv6-client ssh
  ports:
  masquerade: yes
  forward-ports:
  icmp-blocks:
  rich rules:
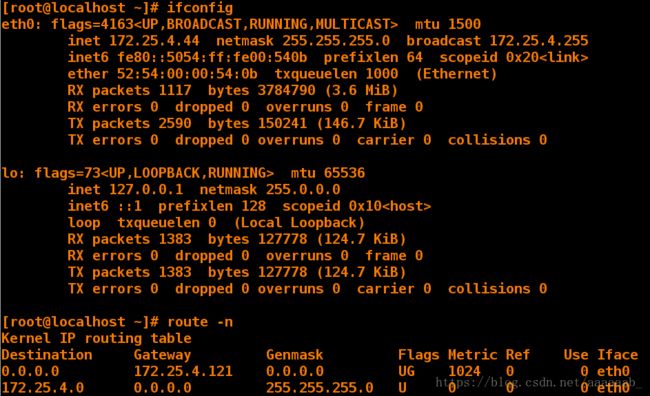
[root@localhost Desktop]# nm-connection-editor 配置4网段的IP,同时配置网关为172.25.4.121
[root@localhost Desktop]# ifconfig 查看IP
eth0: flags=4163 mtu 1500
inet 172.25.4.44 netmask 255.255.255.0 broadcast 172.25.4.255
inet6 fe80::5054:ff:fea7:9373 prefixlen 64 scopeid 0x20 mtu 65536
inet 127.0.0.1 netmask 255.0.0.0
inet6 ::1 prefixlen 128 scopeid 0x10
loop txqueuelen 0 (Local Loopback)
RX packets 796 bytes 69304 (67.6 KiB)
RX errors 0 dropped 0 overruns 0 frame 0
TX packets 796 bytes 69304 (67.6 KiB)
TX errors 0 dropped 0 overruns 0 carrier 0 collisions 0
[root@localhost Desktop]# route -n 查看网关
Kernel IP routing table
Destination Gateway Genmask Flags Metric Ref Use Iface
0.0.0.0 172.25.4.121 0.0.0.0 UG 1024 0 0 eth0
172.25.4.0 0.0.0.0 255.255.255.0 U 0 0 0 eth0
[root@localhost Desktop]# vim /etc/sysctl.conf
[root@localhost Desktop]# sysctl -p
net.ipv4.ip_forward = 1
[root@localhost Desktop]# ping 172.25.254.84 可以ping通与本机不同网段的IP
