UnityShader应用——使用深度值实现Fog雾效
1.开启深度
GetComponent().depthTextureMode = DepthTextureMode.Depth; //开启摄像机深度mode
2._CameraDepthTexture
存储深度信息的Tex,需要在Shader中声明;
sampler2D _CameraDepthTexture;
3.ZBuffer (只有ShaderTag是Opaque的才会被写入ZBuffer)
经过光栅化之后,计算每个多边形上每个片元的Z值,并和对应位置上的深度缓冲区中的值作比较。
如果z <= Zbuffer[x][y](即距离观察者更近),将对应位置的深度缓冲区的值修改为该片元的深度。
4.计算深度
vert中:
o.scrPos = ComputeScreenPos(o.vertex);
ComputeScreenPos用于将裁剪空间坐标范围从[-w,w]映射到[0,w](不做透视除法,直接插值)
接下来对深度纹理进行采样,两种方式都可以:
fixed4 c =  tex2Dproj(_CameraDepthTexture, UNITY_PROJ_COORD(i.scrPos));
fixed4 c =  tex2D(_CameraDepthTexture, UNITY_PROJ_COORD(i.scrPos) / UNITY_PROJ_COORD(i.scrPos).w);
tex2D手动除以w分量就可以可以达到tex2Dproj的效果。 tex2Dproj是映射的时候自动除以w分量。
接下来用 UNITY_SAMPLE_DEPTH 获取到深度值,但此时的depth是非线性的。
float depth = UNITY_SAMPLE_DEPTH(c);
使用Linear01Depth转化成线性。
float depthValue = Linear01Depth(depth);
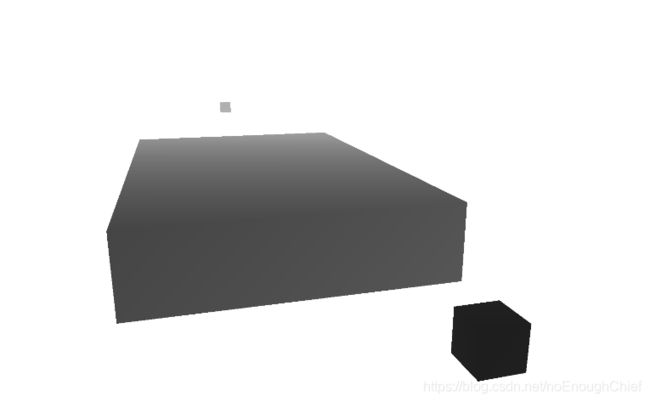
此时就获得了这个像素的深度值,0是近裁面,1是远裁面。
如果直接返回当前深度值组成的颜色, 距离摄像机越近,depthValue越接近0,颜色越黑。
return fixed4(depthValue, depthValue, depthValue, 1);
5.实现Fog雾效
Fog雾效我理解是:越远越呈现FogColor,越近越呈现原色,使用depthValue做插值。
所以:
fixed4 selfColor = tex2Dproj(_MainTex, i.scrPos);
fixed4 fogColor = _FogColor * depthValue;   //再乘一次雾的颜色会更平滑
return lerp(selfColor, fogColor, depthValue);
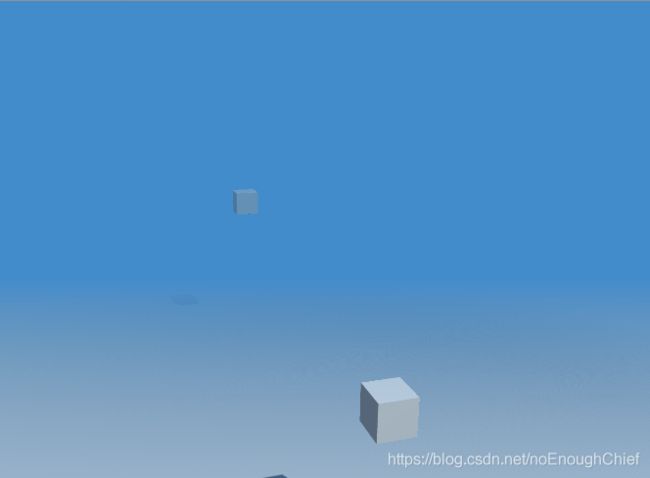
完成~,可以使用Camera的近远裁面值控制雾的范围。
附上Shader:
Shader "MyUse/FogShader"
{
	//只有不透明shader才会被写入ZBuffer
	Properties
	{
		_MainTex ("Texture", 2D) = "white" {}
		_FogColor("Fog Color", Color) = (1,1,1,1)
	}
		SubShader
	{
		Tags { "RenderType" = "Opaque" }
		LOD 100

		Pass
		{
			CGPROGRAM
			#pragma vertex vert
			#pragma fragment frag

			#include "UnityCG.cginc"
			sampler2D _CameraDepthTexture;

			struct appdata
			{
				float4 vertex : POSITION;
				float2 uv : TEXCOORD0;
			};

			struct v2f
			{
				float2 uv : TEXCOORD0;
				float4 vertex : SV_POSITION;
				float4 scrPos : TEXCOORD1;
			};

			sampler2D _MainTex;
			float4 _MainTex_ST;
			float4 _FogColor;

			v2f vert (appdata v)
			{
				v2f o;
				o.vertex = UnityObjectToClipPos(v.vertex);
				o.uv = TRANSFORM_TEX(v.uv, _MainTex);
				o.scrPos = ComputeScreenPos(o.vertex); //齐次坐标下的屏幕坐标, 范围(0,w)
				return o;
			}

			fixed4 frag (v2f i) : SV_Target
			{
				float depth = UNITY_SAMPLE_DEPTH(tex2Dproj(_CameraDepthTexture, UNITY_PROJ_COORD(i.scrPos)));
				float depthValue = Linear01Depth(depth);

				//fog的效果 越近越呈现自己的原色,越远越接近fogColor
				fixed4 selfColor = tex2Dproj(_MainTex, i.scrPos);
				fixed4 fogColor = _FogColor * depthValue;
				return lerp(selfColor, fogColor, depthValue);    //返回深度纹理 uv映射后的颜色
			}
			ENDCG
		}
	}
}
以及挂在Camera上的FogEffect脚本,把Shader的材质拖到Mat即可
using System.Collections;
using System.Collections.Generic;
using UnityEngine;

[ExecuteInEditMode, ImageEffectAllowedInSceneView]
public class FogEffect : MonoBehaviour
{
    public Material mat;
    public Color fogColor;
    public float DepthStart;
    public float DepthDistance;

    private void Start()
    {
        GetComponent().depthTextureMode = DepthTextureMode.Depth;
    }
    private void Update()
    {
        mat.SetColor("_FogColor", fogColor);
        mat.SetFloat("_DepthStart", DepthStart);
        mat.SetFloat("_DepthDistance", DepthDistance);
    }
    private void OnRenderImage(RenderTexture source, RenderTexture destination)
    {
        Graphics.Blit(source, destination, mat);
    }
}
参考:
https://zhuanlan.zhihu.com/p/27233958