.net 第五章实验
实验05 Windows应用编程(1)
///具体的实验内容在教学平台上
///一共10个Form窗体
///全部实验代码如下
///老师给的示例图片我就不放了,太麻烦
///文中出现的图片都是我根据示例图设计的,直接参考就可以
**最重要的一点:给出的截图中的空白部分很有可能是Label标签,那是因为我把label标签的初始名称给删去了,所以看起来像没有控件一样,实际上是有的
如果没有label标签,何来的显示数据呢**
【实验目的】
1.掌握Windows窗体的基本属性、事件和方法的使用。
2.掌握控件(Control)的基本属性、事件和方法的使用。需要掌握控件有:窗体)、标签、超链接标签、文本框、按钮、单选按钮和复选框、列表框、组合框和复选列表框、微调按钮、滚动条和进度条、Timer、DateTimePicker与MonthCalendar、图片框、ToolTip。
【实验内容】
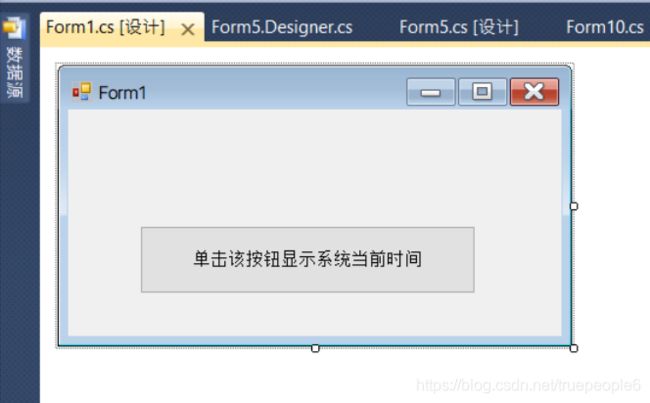
1. 设计一个如图5-1所示窗体。该窗体自动位于屏幕中央;大小不可调;最小化、最大化按钮不可用;窗体标题为“烟台大学”。在该窗体上,放置一个按钮、一个标签。单击按钮时,在标签上显示当前系统时间。
using System;
using System.Collections.Generic;
using System.ComponentModel;
using System.Data;
using System.Drawing;
using System.Linq;
using System.Text;
using System.Windows.Forms;

namespace test5
{
    public partial class Form1 : Form
    {
        public Form1()
        {
            InitializeComponent();
            this.StartPosition = FormStartPosition.CenterScreen;
            this.MinimizeBox = false;
            this.MaximizeBox = false;
            this.FormBorderStyle = FormBorderStyle.FixedDialog;
            this.Text = "烟台大学";
        }

        private void button1_Click(object sender, EventArgs e)
        {
            DateTimePicker datetime = new DateTimePicker();
            this.label1.Text = datetime.Value.ToShortTimeString().ToString();
        }


    }
}
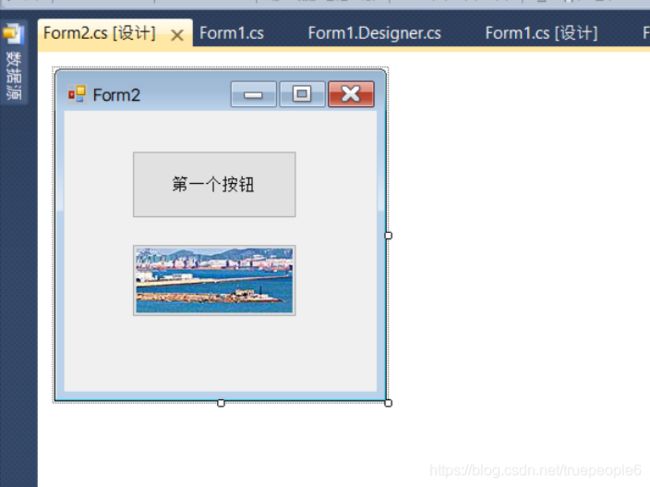
2.设计一个如图5-2所示的窗体。窗体上有2个按钮,一个显示文本,一个显示图片。(1)单击上面按钮或按下Alt+B,可以弹出图5-2右图所示的消息框。(2)单击下面按钮也可以弹出图5-2右图所示的消息框(消息对话框参照教材6.5.1节)。
using System;
using System.Collections.Generic;
using System.ComponentModel;
using System.Data;
using System.Drawing;
using System.Linq;
using System.Text;
using System.Windows.Forms;

namespace test5
{
    public partial class Form2 : Form
    {
        public Form2()
        {
            InitializeComponent();
        }

        private void button1_Click(object sender, EventArgs e)
        {
            DialogResult dr = MessageBox.Show("单击了我", "提示", MessageBoxButtons.YesNo, MessageBoxIcon.Warning);
            if (DialogResult.Yes == dr) {

            }
            if (DialogResult.No == dr)
            {

            }
        }

        private void button2_Click(object sender, EventArgs e)
        {

            DialogResult dr1 = MessageBox.Show("单击了我", "提示", MessageBoxButtons.YesNo, MessageBoxIcon.Warning);
            if (DialogResult.Yes == dr1)
            {

            }
            if (DialogResult.No == dr1)
            {

            }
        }

        private void Form2_KeyDown(object sender, KeyEventArgs e)
        {
            if (e.Modifiers==Keys.Alt&&e.KeyCode==Keys.B) {
                DialogResult dr1 = MessageBox.Show("单击了我", "提示", MessageBoxButtons.YesNo, MessageBoxIcon.Warning);
                if (DialogResult.Yes == dr1)
                {

                }
                if (DialogResult.No == dr1)
                {

                }
            }
        }
    }
}
////注意:此处第二个按钮的图片路径我是直接在按钮属性的Image条目下设置的,没有用代码指定图片路径
3.设计如图5-3所示的窗体。要求:窗体启动后自动位于屏幕中央;窗体大小不可调;窗体背景色为白色;窗体标题为“我的窗体实验”;窗体上有两个标签,其中一个为链接标签,链接标签字体为宋体16号;单击该链接可以打开烟大主页;单击“结束”按钮程序即可结束。
using System;
using System.Collections.Generic;
using System.ComponentModel;
using System.Data;
using System.Drawing;
using System.Linq;
using System.Text;
using System.Windows.Forms;

namespace test5
{
    public partial class Form3 : Form
    {
        public Form3()
        {
            InitializeComponent();
            this.StartPosition = FormStartPosition.CenterScreen;
            this.MinimizeBox = false;
            this.MaximizeBox = false;
            this.BackColor = Color.White;
            this.FormBorderStyle = FormBorderStyle.FixedDialog;
        }

        private void button1_Click(object sender, EventArgs e)
        {
            Application.Exit();
        }

        private void linkLabel1_LinkClicked(object sender, LinkLabelLinkClickedEventArgs e)
        {
            System.Diagnostics.Process.Start("http://www.ytu.edu.cn/");
        }
    }
}
///此处字体样式和字体大小的修改是在属性处的Font条目下修改的
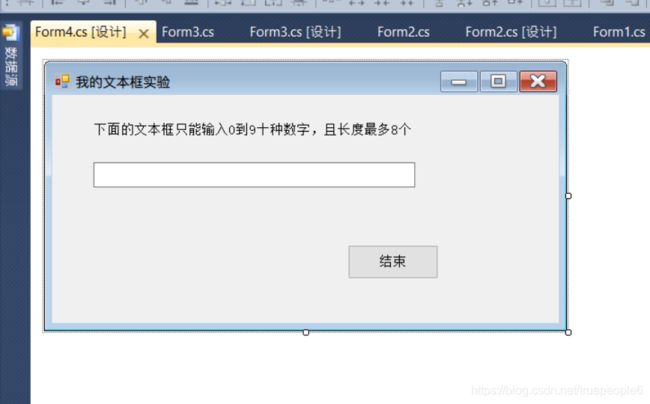
4.设计如图5-4所示的窗体。要求:窗体标题为“我文本框实验”;窗体上一个标签,内容如图;窗体上有一个文本框,文本框中只能输入0~9十种数字,最多输入8个字符。单击“结束”按钮程序即可结束。
using System;
using System.Collections.Generic;
using System.ComponentModel;
using System.Data;
using System.Drawing;
using System.Linq;
using System.Text;
using System.Windows.Forms;

namespace test5
{
    public partial class Form4 : Form
    {
        public Form4()
        {
            InitializeComponent();
        }

        private void button1_Click(object sender, EventArgs e)
        {
            Application.Exit();
        }

        private void textBox1_KeyPress(object sender, KeyPressEventArgs e)
        {
            if (!(e.KeyChar == '\b' || (e.KeyChar >= '0' && e.KeyChar <= '9')))
            {
                e.Handled = true;
            }

        }
    }
}
///此处,textbox代码的最大长度,在textbox属性的MaxLength条目下,改成8即可
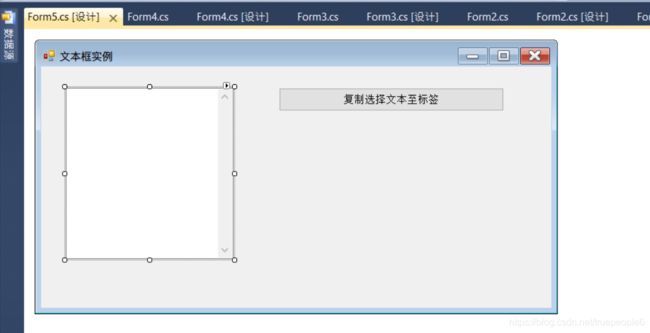
5.设计一个如下图5-5所示的窗体。窗体上有一个文本框(多行、且带有垂直滚动条)、一个标签(字体颜色红色、字号16)、一个按钮(该按钮被单击时,实现将文本框中选择文本复制到标签。
using System;
using System.Collections.Generic;
using System.ComponentModel;
using System.Data;
using System.Drawing;
using System.Linq;
using System.Text;
using System.Windows.Forms;

namespace test5
{
    public partial class Form5 : Form
    {
        public Form5()
        {
            InitializeComponent();
        }

        private void button1_Click(object sender, EventArgs e)
        {
            label1.Text = textBox1.Text;
        }
    }
}
///这里的textbox的属性里要修改两项,一项是multiline要修改为True,这样就可以打入多行,并且可以任意修改大小。另一项是ScrollBars要修改为Vertical,这样的话会多一个垂直的滚动条
6.设计一个如图5-6所示的窗体。窗体上有两个文本框:一个文本框中最多输入字符6个;一个文本框中输入任何内容都显示*号。再添加一个按钮、两个单选按钮。实现单击按钮后,根据单选按钮,将对应文本框中内容显示在标签。

using System;
using System.Collections.Generic;
using System.ComponentModel;
using System.Data;
using System.Drawing;
using System.Linq;
using System.Text;
using System.Windows.Forms;

namespace test5
{
    public partial class Form6 : Form
    {
        string textselected;
        public Form6()
        {

            InitializeComponent();
        }

        private void radioButton1_CheckedChanged(object sender, EventArgs e)
        {

            textselected = textBox1.Text;
        }

        private void radioButton2_CheckedChanged(object sender, EventArgs e)
        {
            textselected = textBox2.Text;
        }

        private void button1_Click(object sender, EventArgs e)
        {
            label1.Text = textselected;
        }
    }
}
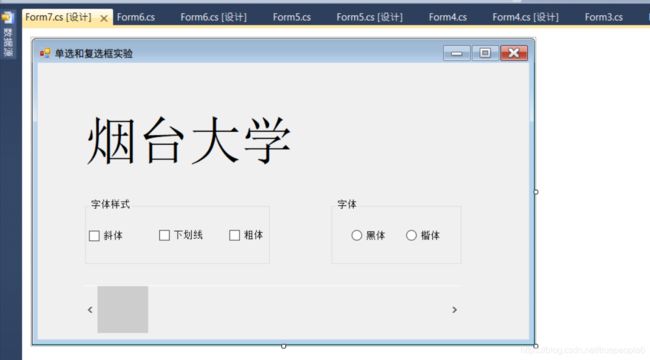
7.设计如图5-7所示的窗体,实现下面要求的效果。
(1)复选框中文字在左边;
(2)最下部为水平滚动条。水平滚动条最小值为4、最大值为72,且在窗体Load事件中通过代码设置;
(3)单击任何复选框,标签上文字样式都发生变化;
(4)单击任意单选按钮,标签上文字字体都发生改变;
(5)拖动水平滚动条,标签上文字大小发生变化。
using System;
using System.Collections.Generic;
using System.ComponentModel;
using System.Data;
using System.Drawing;
using System.Linq;
using System.Text;
using System.Windows.Forms;

namespace test5
{
    public partial class Form7 : Form
    {
        public Form7()
        {
            InitializeComponent();
        }

        private void checkBox1_CheckedChanged(object sender, EventArgs e)
        {
            label1.Font = new Font(label1.Font.Name, label1.Font.Size, checkBox1.Checked ? label1.Font.Style | FontStyle.Italic : label1.Font.Style^(FontStyle.Italic));
        }

        private void checkBox2_CheckedChanged(object sender, EventArgs e)
        {
            label1.Font = new Font(label1.Font.Name, label1.Font.Size, checkBox1.Checked ? label1.Font.Style | FontStyle.Underline : label1.Font.Style ^ (FontStyle.Underline));
        }

        private void checkBox3_CheckedChanged(object sender, EventArgs e)
        {
            label1.Font = new Font(label1.Font.Name, label1.Font.Size, checkBox1.Checked ? label1.Font.Style | FontStyle.Bold : label1.Font.Style ^ (FontStyle.Bold));
        }

        private void radioButton1_CheckedChanged(object sender, EventArgs e)
        {
            label1.Font = new Font("黑体", label1.Font.Size, label1.Font.Style);
        }

        private void radioButton2_CheckedChanged(object sender, EventArgs e)
        {
            label1.Font = new Font("楷体", label1.Font.Size, label1.Font.Style);
        }

        private void Form7_Load(object sender, EventArgs e)
        {
            label1.Text = "烟台大学";
            label1.AutoSize = true;
            label1.Font = new Font("宋体", 48, FontStyle.Regular);

        }

        private void hScrollBar1_Scroll(object sender, ScrollEventArgs e)
        {
            label1.Font = new Font(label1.Font.Name, hScrollBar1.Value);

        }


    }
}
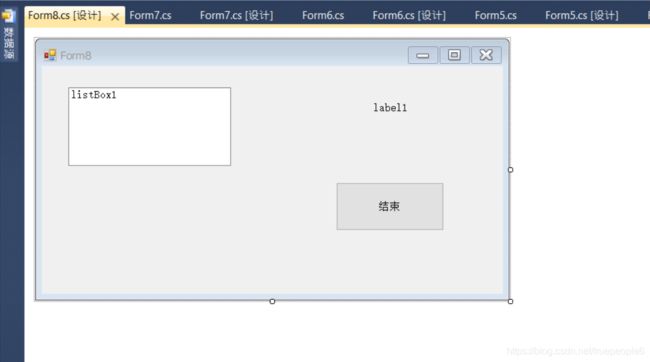
8.设计如图5-8所示的窗体,窗体上有一个列表框、一个标签和一个按钮。利用Random类产生10个[10,99]之间的随机数,并将这10个随机数在列表框中显示出来,每个数占一项。用户选择某项后,在右边标签中显示所选内容。
using System;
using System.Collections.Generic;
using System.ComponentModel;
using System.Data;
using System.Drawing;
using System.Linq;
using System.Text;
using System.Windows.Forms;

namespace test5
{
    public partial class Form8 : Form
    {
        public Form8()
        {
            InitializeComponent();
        }

        private void button1_Click(object sender, EventArgs e)
        {
            Application.Exit();
        }

        private void Form8_Load(object sender, EventArgs e)
        {
            Random ran = new Random();
            int[] array = new int[10];
            for (int i = 0; i < 10; i++) {
                array[i] = ran.Next(10, 99);
                listBox1.Items.Add(array[i]);
            }
        }

        private void listBox1_SelectedIndexChanged(object sender, EventArgs e)
        {
            label1.Text = listBox1.Text;
        }


    }
}
9、利用Timer控件,设计一个如下图5-9所示的电子时钟。要求启动窗体后,在窗体的标签上显示系统当前日期和时间,单击“结束”按钮,则停止显示日期和时间。

using System;
using System.Collections.Generic;
using System.ComponentModel;
using System.Data;
using System.Drawing;
using System.Linq;
using System.Text;
using System.Windows.Forms;

namespace test5
{
    public partial class Form9 : Form
    {
        public Form9()
        {
            InitializeComponent();
        }

        private void Form9_Load(object sender, EventArgs e)
        {
            timer1.Enabled = true;
            timer1.Interval = 100;

        }

        private void timer1_Tick(object sender, EventArgs e)
        {

            label1.Text = DateTime.Now.ToString("yyyy-mm-dd hh:mm:ss");
        }

        private void button1_Click(object sender, EventArgs e)
        {
            timer1.Stop();
        }
    }
}
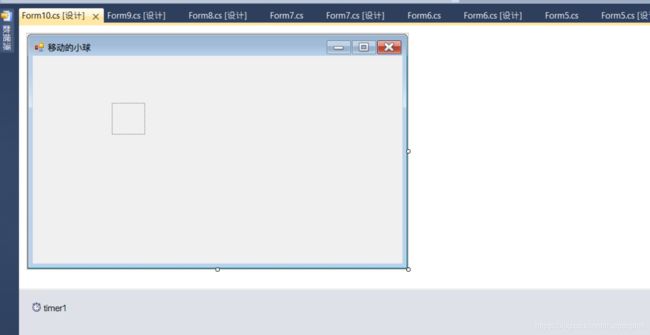
10、利用Timer和图片框控件,编写一个图片不断向左向右移动的小动画。效果如图5-10所示,图片文件名称为a.png,位于压缩包内。
要求:
(1)改变图片的Left值,图片向左(右)移动。
(2)利用Random类的Next方法产生一个[1,9]的数字作为Left值。
(3)图片不要移出窗体,如果Left值超出窗体范围,能控制图片在窗体内向左或向右移动。
using System;
using System.Collections.Generic;
using System.ComponentModel;
using System.Data;
using System.Drawing;
using System.Linq;
using System.Text;
using System.Windows.Forms;

namespace test5
{

    public partial class Form10 : Form
    {

        public Form10()
        {
            InitializeComponent();
        }

        private void Form10_Load(object sender, EventArgs e)
        {
            pictureBox1.SizeMode = PictureBoxSizeMode.StretchImage;
            pictureBox1.Image = Image.FromFile(Application.StartupPath + @"\ball.png");
            timer1.Enabled = true;
            timer1.Interval = 100;
        }

        private void timer1_Tick(object sender, EventArgs e)
        {
            Random r=new Random();
            int t = r.Next(0, pictureBox1.Size.Height);
            int l = r.Next(0, pictureBox1.Size.Width);
            pictureBox1.Top = t;
            pictureBox1.Left = l;
        }


    }
}
