前言:
上两节我们讲了用户的添加、登录……,这一次我们遵循Rails的理念,快速实现用户的注册、登录……
理念:
1、少就是多
2、不要重复制造轮子
开始:
1、新建rails工程
$ rails new r2 -d=mysql
配置Gemfile文件,添加一句:
gem 'devise' #devise是一个gem包
配置config/database.yml文件,修改适合自己的数据库名、用户名和密码。
$ bundle install
$ rake db:create #创建数据库解释:
- devise是一个开源的工程,主要用于用户的注册、登录、找回密码、session等等。所谓“不要重复制造轮子”,既然有好的工程,我们就拿来用,直接在Gemfile中作为gem包引入,方便之极。Do you want to know more? https://github.com/plataformatec/devise
2、配置devise
(1)应用devise:
$ rails g devise:install
输出如下:
===============================================================================

Some setup you must do manually if you haven't yet:

  1. Setup default url options for your specific environment. Here is an
     example of development environment:

       config.action_mailer.default_url_options = { :host => 'localhost:3000' }

     This is a required Rails configuration. In production it must be the
     actual host of your application

  2. Ensure you have defined root_url to *something* in your config/routes.rb.
     For example:

       root :to => "home#index"

  3. Ensure you have flash messages in app/views/layouts/application.html.erb.
     For example:

       <%= notice %>
       <%= alert %>

===============================================================================
以上提示,我们后面再做理会!
(2)使用devise创建user model:
$ rails g devise User
发生了什么?
- 在app/models文件夹下产生了一个user.rb,也就是创建了一个user model
- 在db/migrate文件夹下产生了一个migrate文件
- 在config/routes.rb文件中添加了一行 devise_for :users
(3)配置user
编辑app/models/user.rb文件
class User < ActiveRecord::Base
  # Include default devise modules. Others available are:
  # :token_authenticatable, :encryptable, :confirmable, :lockable, :timeoutable and :omniauthable
  devise :database_authenticatable, :registerable,
         :recoverable, :rememberable, :trackable, :validatable,     #末尾添加,号
         :confirmable, :lockable                 #添加这一行

  # Setup accessible (or protected) attributes for your model
  attr_accessible :email, :password, :password_confirmation, :remember_me
end
编辑db/migrate/20110726xxxxxx_devise_create_users.rb文件
class DeviseCreateUsers < ActiveRecord::Migration
  def self.up
    create_table(:users) do |t|
      t.database_authenticatable :null => false
      t.recoverable
      t.rememberable
      t.trackable
      #添加以下两行
      t.confirmable
      t.lockable :lock_strategy => :failed_attempts, :unlock_strategy => :both

      # t.encryptable
      # t.confirmable
      # t.lockable :lock_strategy => :failed_attempts, :unlock_strategy => :both
      # t.token_authenticatable


      t.timestamps
    end

    add_index :users, :email,                :unique => true
    add_index :users, :reset_password_token, :unique => true
    #添加以下两行
    add_index :users, :confirmation_token,   :unique => true
    add_index :users, :unlock_token,         :unique => true
    # add_index :users, :confirmation_token,   :unique => true
    # add_index :users, :unlock_token,         :unique => true
    # add_index :users, :authentication_token, :unique => true
  end

  def self.down
    drop_table :users
  end
end
生成数据表:
$ rake db:migrate(3)配置邮件服务器
编辑config/initializers/devise.rb
# Use this hook to configure devise mailer, warden hooks and so forth. The first
# four configuration values can also be set straight in your models.
Devise.setup do |config|
  # ==> Mailer Configuration
  # Configure the e-mail address which will be shown in DeviseMailer.
  config.mailer_sender = "[email protected]"   #换成你的邮箱,最好不要是gmail

  # Configure the class responsible to send e-mails.
  # config.mailer = "Devise::Mailer"

  # ==> ORM configuration
  # Load and configure the ORM. Supports :active_record (default) and
  # :mongoid (bson_ext recommended) by default. Other ORMs may be
  # available as additional gems.
  require 'devise/orm/active_record'

  # ==> Configuration for any authentication mechanism
  # Configure which keys are used when authenticating a user. The default is
  # just :email. You can configure it to use [:username, :subdomain], so for
  # authenticating a user, both parameters are required. Remember that those
  # parameters are used only when authenticating and not when retrieving from
  # session. If you need permissions, you should implement that in a before filter.
  # You can also supply a hash where the value is a boolean determining whether
  # or not authentication should be aborted when the value is not present.
  # config.authentication_keys = [ :email ]

  # Configure parameters from the request object used for authentication. Each entry
  # given should be a request method and it will automatically be passed to the
  # find_for_authentication method and considered in your model lookup. For instance,
  # if you set :request_keys to [:subdomain], :subdomain will be used on authentication.
  # The same considerations mentioned for authentication_keys also apply to request_keys.
  # config.request_keys = []

  # Configure which authentication keys should be case-insensitive.
  # These keys will be downcased upon creating or modifying a user and when used
  # to authenticate or find a user. Default is :email.
  config.case_insensitive_keys = [ :email ]

  # Configure which authentication keys should have whitespace stripped.
  # These keys will have whitespace before and after removed upon creating or
  # modifying a user and when used to authenticate or find a user. Default is :email.
  config.strip_whitespace_keys = [ :email ]

  # Tell if authentication through request.params is enabled. True by default.
  # config.params_authenticatable = true

  # Tell if authentication through HTTP Basic Auth is enabled. False by default.
  # config.http_authenticatable = false

  # If http headers should be returned for AJAX requests. True by default.
  # config.http_authenticatable_on_xhr = true

  # The realm used in Http Basic Authentication. "Application" by default.
  # config.http_authentication_realm = "Application"

  # It will change confirmation, password recovery and other workflows
  # to behave the same regardless if the e-mail provided was right or wrong.
  # Does not affect registerable.
  # config.paranoid = true

  # ==> Configuration for :database_authenticatable
  # For bcrypt, this is the cost for hashing the password and defaults to 10. If
  # using other encryptors, it sets how many times you want the password re-encrypted.
  config.stretches = 10

  # Setup a pepper to generate the encrypted password.
  # config.pepper = "025e837f7ae23e7f4e3b0a3dd048577e3b82c0f803fc4a8bac896303ab40545ab6e47600962cd8075c3122af0c98dba62bd6399604d622579797c282b0b1b2a1"

  # ==> Configuration for :confirmable
  # The time you want to give your user to confirm his account. During this time
  # he will be able to access your application without confirming. Default is 0.days
  # When confirm_within is zero, the user won't be able to sign in without confirming.
  # You can use this to let your user access some features of your application
  # without confirming the account, but blocking it after a certain period
  # (ie 2 days).
  # config.confirm_within = 2.days

  # Defines which key will be used when confirming an account
  # config.confirmation_keys = [ :email ]

  # ==> Configuration for :rememberable
  # The time the user will be remembered without asking for credentials again.
  # config.remember_for = 2.weeks

  # If true, a valid remember token can be re-used between multiple browsers.
  # config.remember_across_browsers = true

  # If true, extends the user's remember period when remembered via cookie.
  # config.extend_remember_period = false

  # If true, uses the password salt as remember token. This should be turned
  # to false if you are not using database authenticatable.
  config.use_salt_as_remember_token = true

  # Options to be passed to the created cookie. For instance, you can set
  # :secure => true in order to force SSL only cookies.
  # config.cookie_options = {}

  # ==> Configuration for :validatable
  # Range for password length. Default is 6..128.
  # config.password_length = 6..128

  # Regex to use to validate the email address
  # config.email_regexp = /\A([\w\.%\+\-]+)@([\w\-]+\.)+([\w]{2,})\z/i

  # ==> Configuration for :timeoutable
  # The time you want to timeout the user session without activity. After this
  # time the user will be asked for credentials again. Default is 30 minutes.
  # config.timeout_in = 30.minutes

  # ==> Configuration for :lockable
  # Defines which strategy will be used to lock an account.
  # :failed_attempts = Locks an account after a number of failed attempts to sign in.
  # :none            = No lock strategy. You should handle locking by yourself.
  # config.lock_strategy = :failed_attempts

  # Defines which key will be used when locking and unlocking an account
  # config.unlock_keys = [ :email ]

  # Defines which strategy will be used to unlock an account.
  # :email = Sends an unlock link to the user email
  # :time  = Re-enables login after a certain amount of time (see :unlock_in below)
  # :both  = Enables both strategies
  # :none  = No unlock strategy. You should handle unlocking by yourself.
  # config.unlock_strategy = :both

  # Number of authentication tries before locking an account if lock_strategy
  # is failed attempts.
  # config.maximum_attempts = 20

  # Time interval to unlock the account if :time is enabled as unlock_strategy.
  # config.unlock_in = 1.hour

  # ==> Configuration for :recoverable
  #
  # Defines which key will be used when recovering the password for an account
  # config.reset_password_keys = [ :email ]

  # Time interval you can reset your password with a reset password key.
  # Don't put a too small interval or your users won't have the time to
  # change their passwords.
  config.reset_password_within = 2.hours

  # ==> Configuration for :encryptable
  # Allow you to use another encryption algorithm besides bcrypt (default). You can use
  # :sha1, :sha512 or encryptors from others authentication tools as :clearance_sha1,
  # :authlogic_sha512 (then you should set stretches above to 20 for default behavior)
  # and :restful_authentication_sha1 (then you should set stretches to 10, and copy
  # REST_AUTH_SITE_KEY to pepper)
  # config.encryptor = :sha512

  # ==> Configuration for :token_authenticatable
  # Defines name of the authentication token params key
  # config.token_authentication_key = :auth_token

  # If true, authentication through token does not store user in session and needs
  # to be supplied on each request. Useful if you are using the token as API token.
  # config.stateless_token = false

  # ==> Scopes configuration
  # Turn scoped views on. Before rendering "sessions/new", it will first check for
  # "users/sessions/new". It's turned off by default because it's slower if you
  # are using only default views.
  # config.scoped_views = false

  # Configure the default scope given to Warden. By default it's the first
  # devise role declared in your routes (usually :user).
  # config.default_scope = :user

  # Configure sign_out behavior.
  # Sign_out action can be scoped (i.e. /users/sign_out affects only :user scope).
  # The default is true, which means any logout action will sign out all active scopes.
  # config.sign_out_all_scopes = true

  # ==> Navigation configuration
  # Lists the formats that should be treated as navigational. Formats like
  # :html, should redirect to the sign in page when the user does not have
  # access, but formats like :xml or :json, should return 401.
  #
  # If you have any extra navigational formats, like :iphone or :mobile, you
  # should add them to the navigational formats lists.
  #
  # The :"*/*" and "*/*" formats below is required to match Internet
  # Explorer requests.
  # config.navigational_formats = [:"*/*", "*/*", :html]

  # The default HTTP method used to sign out a resource. Default is :delete.
  config.sign_out_via = :delete

  # ==> OmniAuth
  # Add a new OmniAuth provider. Check the wiki for more information on setting
  # up on your models and hooks.
  # config.omniauth :github, 'APP_ID', 'APP_SECRET', :scope => 'user,public_repo'

  # ==> Warden configuration
  # If you want to use other strategies, that are not supported by Devise, or
  # change the failure app, you can configure them inside the config.warden block.
  #
  # config.warden do |manager|
  #   manager.failure_app   = AnotherApp
  #   manager.intercept_401 = false
  #   manager.default_strategies(:scope => :user).unshift :some_external_strategy
  # end
end
编辑config/environments/development.rb
R2::Application.configure do
  # Settings specified here will take precedence over those in config/application.rb

  # In the development environment your application's code is reloaded on
  # every request.  This slows down response time but is perfect for development
  # since you don't have to restart the webserver when you make code changes.
  config.cache_classes = false

  # Log error messages when you accidentally call methods on nil.
  config.whiny_nils = true

  # Show full error reports and disable caching
  config.consider_all_requests_local       = true
  config.action_view.debug_rjs             = true
  config.action_controller.perform_caching = false

  # Don't care if the mailer can't send
  config.action_mailer.raise_delivery_errors = true  #此处改为true
  #添加以下内容
  config.action_mailer.default_url_options = { :host => "localhost:3000" } #刚才devise的提示中提到这一句
  config.action_mailer.delivery_method = :smtp
  config.action_mailer.smtp_settings = {
    :address => "smtp.126.com",
    :port => 25,
    :domain => "126.com",
    :authentication => :login,
    :user_name => "[email protected]", #你的邮箱
    :password => "xxxxxx" #你的密码
  }

  # Print deprecation notices to the Rails logger
  config.active_support.deprecation = :log

  # Only use best-standards-support built into browsers
  config.action_dispatch.best_standards_support = :builtin
end
(4)其它配置
随便新建一个home controller
$ rails g controller home index
删除public目录下的index.html文件
修改config/routes.rb文件,添加一句
root :to => "home#index"
编辑app/controllers/home_controller.rb文件
class HomeController < ApplicationController
  before_filter :authenticate_user!  #添加这一句

  def index
  end

end
编辑app/views/layouts/application.html.erb文件
  R2
  <%= stylesheet_link_tag :all %>
  <%= javascript_include_tag :defaults %>
  <%= csrf_meta_tag %>


#添加以下两句
<%= notice %>
<%= alert %>

<%= yield %>
3、运行程序
启动工程:
$ rails s
浏览器输入:http://localhost:3000
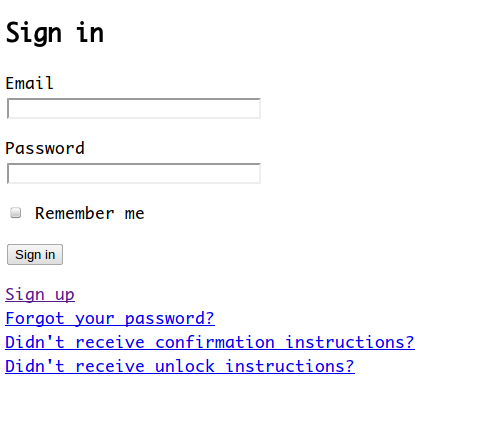
结果转到了http://localhost:3000/users/sign_in,要求你登录
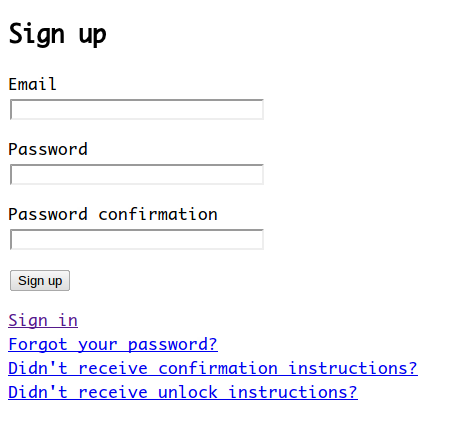
我没有账户登录怎么办?点击sign_up注册账户
填写email、密码,点击“sign up ”,不出意外的话去注册邮箱收取确认邮件吧!
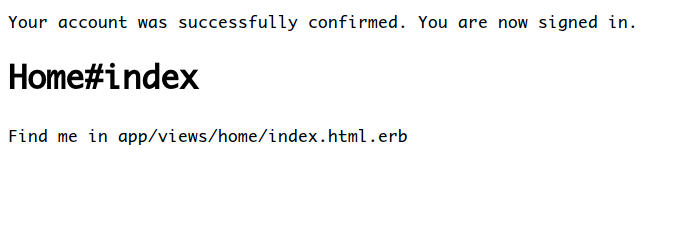
点一下链接:
一个注册、登录程序就完成了!!!


