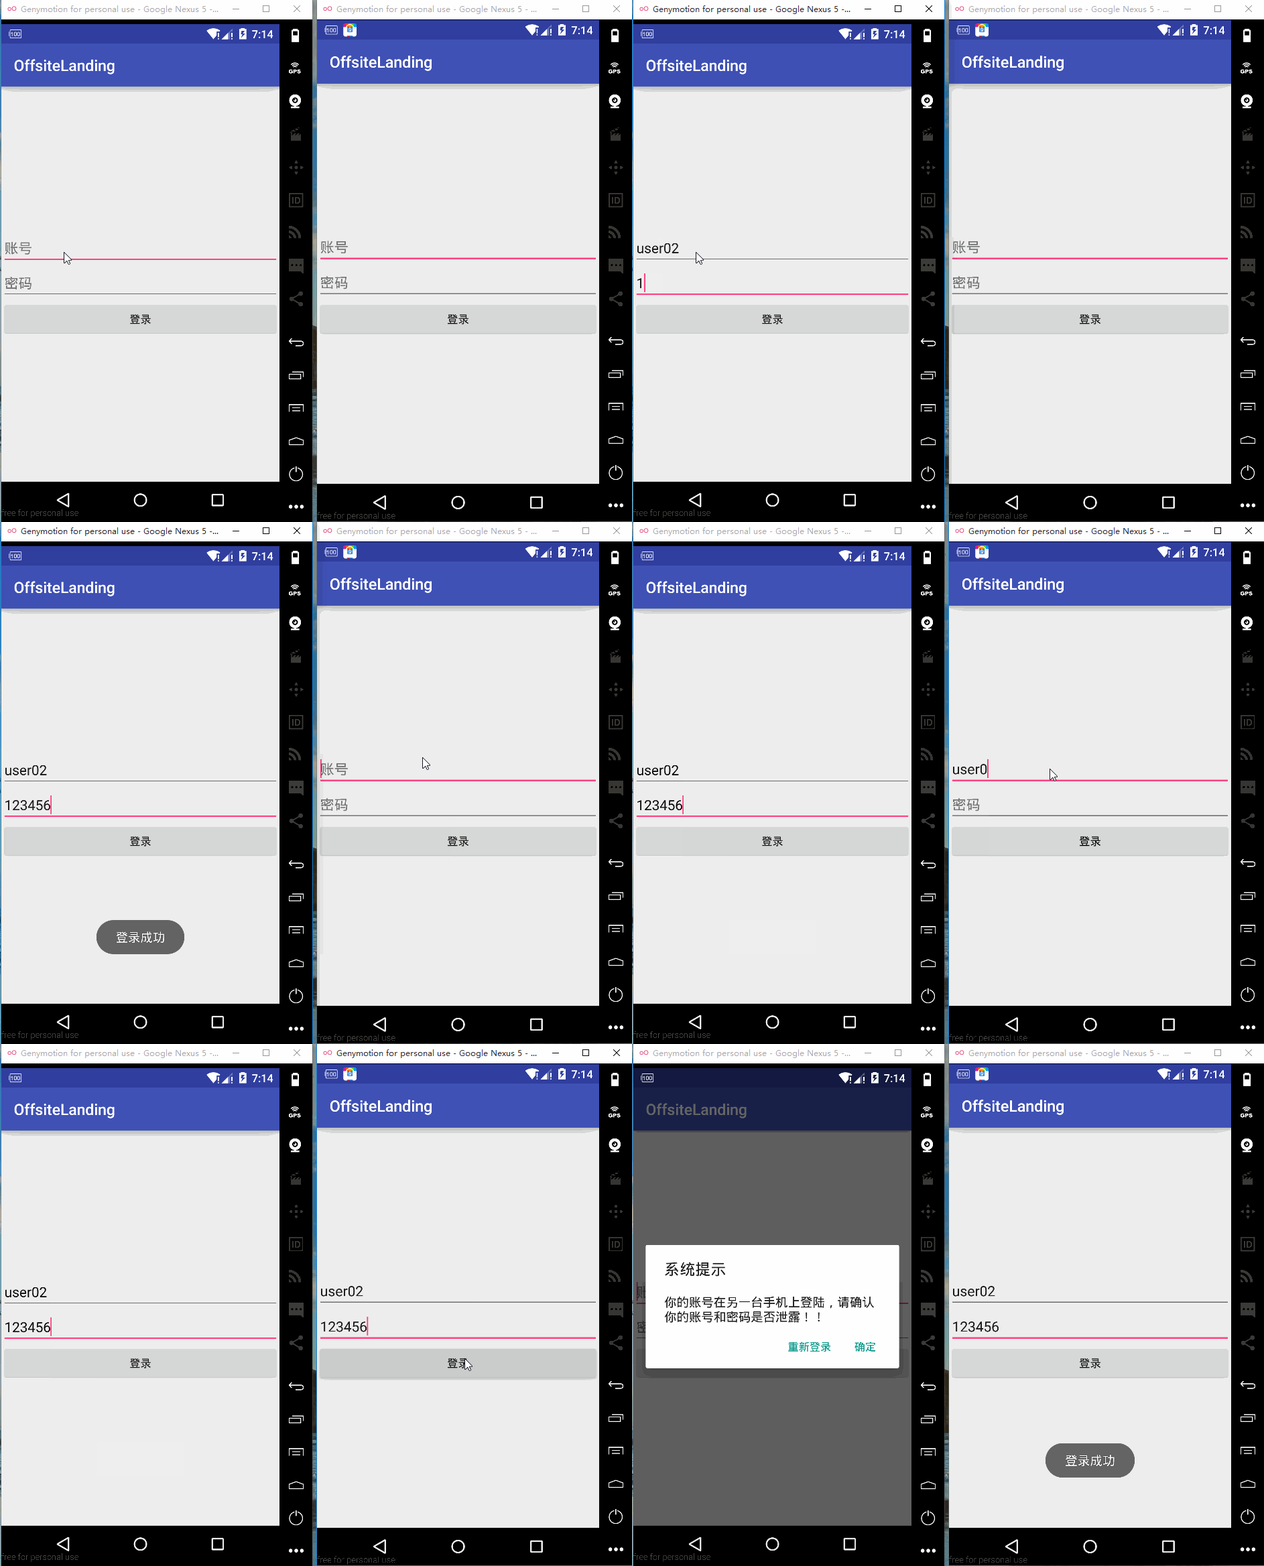
Android利用Jpush实现异地登陆下线
一、说明
- 客户端程序中使用了xUtils框架(进行UI,资源的绑定,以及访问网络)
- JPush客户端集成可参照:http://docs.jiguang.cn/jpush/client/Android/android_guide/
- JPush服务器端集成参照:http://docs.jiguang.cn/jpush/server/3rd/java_sdk/
- xUtils下载及使用:https://github.com/wyouflf/xUtils3
二、客户端
2.1 添加依赖
compile 'cn.jiguang:jpush:2.1.8'
compile 'org.xutils:xutils:3.3.36'
2.2 创建MyApplication,初始化jpush以及xutils
MyApplication.java
package com.gcy.offsitelanding.offsitelanding;

import android.app.Application;

import org.xutils.x;

import cn.jpush.android.api.JPushInterface;


/**
 * Created by gcy71 on 2016/10/9.
 */

public class MyApplication extends Application {


    @Override
    public void onCreate() {
        super.onCreate();
        JPushInterface.setDebugMode(true);
        JPushInterface.init(this);

        /*xUtils 初始化*/
        x.Ext.init(this);
        x.Ext.setDebug(BuildConfig.DEBUG);
    }
}
MyApplication.java写完后,还需将其在AndroidManifest.xml中配置,直接在application尖括号里添加如下代码:
android:name=".MyApplication"2.3 创建自定义Receiver
客户端向服务器端发起登录请求后,服务器端若发现该账号已处于登录状态时,服务器会向当前账户在线的终端推送一条自定义消息,如果没有自定义Receiver的话,客户端将不会对该自定义消息进行处理。
JpushReceiver.java
package com.gcy.offsitelanding.offsitelanding;
import android.app.NotificationManager;
import android.content.BroadcastReceiver;
import android.content.Context;
import android.content.Intent;
import android.os.Bundle;
import android.util.Log;

import cn.jpush.android.api.JPushInterface;

public class JpushReceiver extends BroadcastReceiver {

    private NotificationManager nm;

    @Override
    public void onReceive(Context context, Intent intent) {
        if (null == nm) {
            nm = (NotificationManager) context.getSystemService(Context.NOTIFICATION_SERVICE);
        }

        Bundle bundle = intent.getExtras();
       // Log.d(TAG, "onReceive - " + intent.getAction() + ", extras: " + AndroidUtil.printBundle(bundle));

        if (JPushInterface.ACTION_REGISTRATION_ID.equals(intent.getAction())) {
            //Log.d(TAG, "JPush用户注册成功");

        } else if (JPushInterface.ACTION_MESSAGE_RECEIVED.equals(intent.getAction())) {
            Log.d("jpush" , bundle.getString(JPushInterface.EXTRA_MESSAGE) + "自定义消息");
            Intent mIntent = new Intent(context, MainActivity.class);
            //mIntent.putExtra("intentType", 0);
            mIntent.putExtra("MessageContent",bundle.getString(JPushInterface.EXTRA_MESSAGE));
            mIntent.setFlags(Intent.FLAG_ACTIVITY_NEW_TASK);
            context.startActivity(mIntent);
        } else if (JPushInterface.ACTION_NOTIFICATION_RECEIVED.equals(intent.getAction())) {
            //Log.d(TAG, "接受到推送下来的通知");
        } else if (JPushInterface.ACTION_NOTIFICATION_OPENED.equals(intent.getAction())) {
            //Log.d(TAG, "用户点击打开了通知");
        } else {
            //Log.d(TAG, "Unhandled intent - " + intent.getAction());
        }
    }

}
JpushReceiver书写完毕后,我们仍需在AndroidManifest.xml中配置该Recevier
<receiver
    android:name="com.gcy.offsitelanding.offsitelanding.JpushReceiver"
    android:enabled="true">
    <intent-filter>

        <action android:name="cn.jpush.android.intent.REGISTRATION" />
        <action android:name="cn.jpush.android.intent.UNREGISTRATION" />

        <action android:name="cn.jpush.android.intent.MESSAGE_RECEIVED" />

        <action android:name="cn.jpush.android.intent.NOTIFICATION_RECEIVED" />

        <action android:name="cn.jpush.android.intent.NOTIFICATION_OPENED" />

        <action android:name="cn.jpush.android.intent.ACTION_RICHPUSH_CALLBACK" />

        <action android:name="cn.jpush.android.intent.CONNECTION" />
        <category android:name="您的程序包名" />
    intent-filter>
receiver>
2.4 布局文件以及MainActivity代码
activity_main.xml
<LinearLayout xmlns:android="http://schemas.android.com/apk/res/android"
    android:id="@+id/activity_main"
    android:layout_width="match_parent"
    android:layout_height="match_parent"
    android:orientation="vertical"
    android:gravity="center">

    <EditText
        android:layout_width="match_parent"
        android:layout_height="wrap_content"
        android:hint="账号"
        android:id="@+id/login_username"/>

    <EditText
        android:layout_width="match_parent"
        android:layout_height="wrap_content"
        android:hint="密码"
        android:id="@+id/login_pwd"/>

    <Button
        android:layout_width="match_parent"
        android:layout_height="wrap_content"
        android:text="登录"
        android:id="@+id/login" />

LinearLayout>
MainActivity.java
package com.gcy.offsitelanding.offsitelanding;

import android.content.ContentValues;
import android.content.DialogInterface;
import android.os.AsyncTask;
import android.support.v7.app.AlertDialog;
import android.support.v7.app.AppCompatActivity;
import android.os.Bundle;
import android.view.View;
import android.widget.Button;
import android.widget.EditText;
import android.widget.Toast;

import org.xutils.common.Callback;
import org.xutils.http.RequestParams;
import org.xutils.view.annotation.ViewInject;
import org.xutils.x;

import java.net.HttpURLConnection;
import java.util.ArrayList;
import java.util.List;

import cn.jpush.android.api.JPushInterface;

public class MainActivity extends AppCompatActivity {

    String url = "http://169.254.97.133:8080/offsitelanding_server/LoginServlet";
    /**
     * @ViewInject注解
     * xUtils使用注解方式就可以进行UI,资源的绑定,替代findViewById()
     */
    @ViewInject(R.id.login_username)
    private EditText loginUserName;
    @ViewInject(R.id.login_pwd)
    private EditText loginPwd;
    @ViewInject(R.id.login)
    private Button loginBtn;

    @Override
    protected void onCreate(Bundle savedInstanceState) {
        super.onCreate(savedInstanceState);
        setContentView(R.layout.activity_main);
        x.view().inject(this);
        init();
    }
    public void init(){
        loginBtn.setOnClickListener(new View.OnClickListener() {
            @Override
            public void onClick(View v) {
                //利用xUtils访问网络(post请求)
                RequestParams params = new RequestParams(url);
                params.addParameter("username" , loginUserName.getText().toString());
                params.addParameter("password" , loginPwd.getText().toString());
                params.addParameter("registrationId" , JPushInterface.getRegistrationID(MainActivity.this));
                x.http().post(params, new Callback.CommonCallback() {
                    @Override
                    public void onSuccess(String result) {
                        Toast.makeText(MainActivity.this , "登录成功" , Toast.LENGTH_LONG).show();
                    }

                    @Override
                    public void onError(Throwable ex, boolean isOnCallback) {
                        Toast.makeText(MainActivity.this , "登陆失败" , Toast.LENGTH_LONG).show();
                    }

                    @Override
                    public void onCancelled(CancelledException cex) {

                    }

                    @Override
                    public void onFinished() {

                    }
                });
            }
        });

        //利用Intent判断是否有自定义消息
        String message = getIntent().getStringExtra("MessageContent");
        if(message != null && !message.equals("")){
            //如果有,则弹出对话框,提示用户下线
            new AlertDialog.Builder(this).setTitle("系统提示").setMessage(message).setPositiveButton("确定", new DialogInterface.OnClickListener() {
                @Override
                public void onClick(DialogInterface dialog, int which) {
                    //在这里可清除本地的用户信息
                }
            }).setNegativeButton("重新登录", new DialogInterface.OnClickListener() {
                @Override
                public void onClick(DialogInterface dialog, int which) {
                    //再次执行登录操作
                }
            }).show();
        }
    }
}
三、服务器端
3.1 说明
- 首先创建一个Dynamic Web project。
- 服务器器端集成jpush需要注意依赖包:gosn、log4j、slf4j,本例的服务器端程序为使用的是servlet实现。
- 本例未使用数据库,采用一个集合(users)来存储用户信息。
- 本例的实体类User(username : 用户名 , password : 密码 , status : 在线状态 , registrationId : 用户在线的设备ID(指在Jpush上注册的ID))。
3.2 处理逻辑
- Servlet接收客户端传来的参数(username , password , registrationId)。
- Servlet判断是否存在该用户,若存在跳转到3,若不存在,返回用户不存在
- 判断用户输入的密码是否正确,若不正确返回密码错误,若正确跳转到4
- 判断当前用户是否处于在线状态,若不在线,执行登陆操作添加在线终端ID,若在线,则通知下线,并执行登录操作,修改用户在线终端ID。
3.3 LoginServlet的编写
LoginServlet.java
package com.gcy.offsitelanding_server;

import java.io.IOException;
import java.io.PrintWriter;
import java.util.ArrayList;
import java.util.List;

import javax.servlet.ServletException;
import javax.servlet.annotation.WebServlet;
import javax.servlet.http.HttpServlet;
import javax.servlet.http.HttpServletRequest;
import javax.servlet.http.HttpServletResponse;

import cn.jiguang.common.resp.APIConnectionException;
import cn.jiguang.common.resp.APIRequestException;
import cn.jpush.api.JPushClient;
import cn.jpush.api.push.model.Message;
import cn.jpush.api.push.model.Platform;
import cn.jpush.api.push.model.PushPayload;
import cn.jpush.api.push.model.audience.Audience;

@WebServlet("/LoginServlet")
public class LoginServlet extends HttpServlet {
    private static final long serialVersionUID = 1L;

    private List users = new ArrayList();

    public LoginServlet() {
        super();
        users.add(new User("user01", "123456", 0));
        users.add(new User("user02", "123456", 0));
        users.add(new User("user03", "123456", 0));
    }

    protected void doGet(HttpServletRequest request, HttpServletResponse response) throws ServletException, IOException {
        response.getWriter().append("Served at: ").append(request.getContextPath());
    }

    protected void doPost(HttpServletRequest request, HttpServletResponse response) throws ServletException, IOException {
        doGet(request, response);
        response.setContentType("text/html");
        response.setCharacterEncoding("UTF-8");
        PrintWriter out = response.getWriter();
        String username = request.getParameter("username");
        String password = request.getParameter("password");
        String registrationId = request.getParameter("registrationId");
        User user = findUserByName(username);

        if(user == null){
            out.println("The current user does not exist");
        }else{
            if(user.getPassword().equals(password)){
                //登录成功,若当前用户在其他地方登录,应向其推送消息并将其下线
                if(user.getStatus() == 1){
                    //这里注意:两个字符串前面是masterSecret , 后面是appKey
                    JPushClient jPushClient = new JPushClient("0bdecb00531ec118a7b982db", "f9ad20faed32beed296a71bd");
                    PushPayload payload = PushPayload.newBuilder().setPlatform(Platform.all()).setAudience(Audience.registrationId(user.getRegistrationId()))
                            .setMessage(Message.newBuilder().setMsgContent("你的账号在另一台手机上登陆,请确认你的账号和密码是否泄露!!").build()).build();
                    try {
                        jPushClient.sendPush(payload);
                    } catch (APIConnectionException | APIRequestException e) {
                        e.printStackTrace();
                    }
                }else{
                    user.setStatus(1);
                }
                user.setRegistrationId(registrationId);
                System.out.println(registrationId);
                out.print("success");
            }else{
                out.println("Account and password do not match");
            }
        }
    }

    public User findUserByName(String userName){
        for(User u : users){
            if(u.getUsername().equals(userName)){
                return u;
            }
        }
        return null;
    }

}
3.4 实体类User
User.java
package com.gcy.offsitelanding_server;

public class User {
    private String username;
    private String password;
    private String registrationId;//用户登录的设备(在jpush上的注册ID)
    private int status;//登录状态,0-离线 1-在线

    public User() {
        super();
    }
    public User(String username, String password, int status) {
        super();
        this.username = username;
        this.password = password;
        this.status = status;
    }


    public String getUsername() {
        return username;
    }
    public void setUsername(String username) {
        this.username = username;
    }
    public String getPassword() {
        return password;
    }
    public void setPassword(String password) {
        this.password = password;
    }
    public int getStatus() {
        return status;
    }
    public void setStatus(int status) {
        this.status = status;
    }
    public String getRegistrationId() {
        return registrationId;
    }
    public void setRegistrationId(String registrationId) {
        this.registrationId = registrationId;
    }
}
