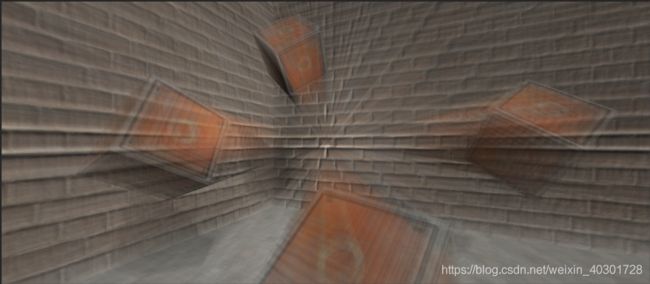
UnityShader_屏幕后处理之运动模糊
第一种运动模糊(累计缓存)
思路: 逐帧抓取屏幕中的景象,每次获取的帧都叠加起来;为了产生一种虚幻的效果,我们让合成的景象都仅保持一定的透明度。可以简单的理解成下面的公式
dest = (src*alpha + dest)
其中dest 为目标纹理,是不进行清空的,因此会一直保留着之前的景象;scr 是原纹理,也就是相机当前帧截下的画面;alpha 是透明度。 整个公式的意思就是将相机当前帧截下的图像透明化后跟之前的纹理混合
上代码
using UnityEngine;
using System.Collections;

public class MotionBlur : PostEffectsBase {

	public Shader motionBlurShader;
	private Material motionBlurMaterial = null;

	public Material material {
		get {
			motionBlurMaterial = CheckShaderAndCreateMaterial(motionBlurShader, motionBlurMaterial);
			return motionBlurMaterial;
		}
	}

	[Range(0.0f, 1f)]
	public float blurAmount = 0.5f;

	private RenderTexture accumulationTexture;

	void OnDisable() {
		DestroyImmediate(accumulationTexture);
	}

	void OnRenderImage (RenderTexture src, RenderTexture dest) {
		if (material != null) {
			// Create the accumulation texture
			if (accumulationTexture == null || accumulationTexture.width != src.width || accumulationTexture.height != src.height) {
				DestroyImmediate(accumulationTexture);
				accumulationTexture = new RenderTexture(src.width, src.height, 0);
				accumulationTexture.hideFlags = HideFlags.HideAndDontSave;
				Graphics.Blit(src, accumulationTexture);//原纹理渲染到accumulationTexture
			}

			//因为accumulationTexture是不被清除的,这样我们才可以把accumulationTexture和当前帧进行混合
			//MarkRestoreExpected用于 声明在这里有一个renderTexture是预期的恢复操作(防止报错)
			accumulationTexture.MarkRestoreExpected();

			material.SetFloat("_BlurAmount", 1.0f - blurAmount);
			//依次运行所有Pass,将屏幕的渲染纹理跟之前的累计纹理混合(累计纹理是不清空的)
			Graphics.Blit (src, accumulationTexture, material);
			Graphics.Blit (accumulationTexture, dest);//将之前所有混合的图像显示到屏幕
		} else {
			Graphics.Blit(src, dest);
		}
	}
}
Shader "Motion Blur" {
	Properties {
		_MainTex ("Base (RGB)", 2D) = "white" {}
		_BlurAmount ("Blur Amount", Float) = 1.0
	}
	SubShader {
		CGINCLUDE

		#include "UnityCG.cginc"

		sampler2D _MainTex;
		fixed _BlurAmount;

		struct v2f {
			float4 pos : SV_POSITION;
			half2 uv : TEXCOORD0;
		};

		v2f vert(appdata_img v) {
			v2f o;

			o.pos = UnityObjectToClipPos(v.vertex);

			o.uv = v.texcoord;

			return o;
		}

		fixed4 fragRGB (v2f i) : SV_Target {
			return fixed4(tex2D(_MainTex, i.uv).rgb, _BlurAmount);
		}

		half4 fragA (v2f i) : SV_Target {
			return tex2D(_MainTex, i.uv);
		}

		ENDCG

		ZTest Always Cull Off ZWrite Off

		Pass {
			Blend SrcAlpha OneMinusSrcAlpha
			ColorMask RGB //表示要渲染的只有RGB通道  如为0表示RGBA都不渲染

			CGPROGRAM

			#pragma vertex vert
			#pragma fragment fragRGB

			ENDCG
		}

		Pass {
			Blend One Zero
			ColorMask A

			CGPROGRAM

			#pragma vertex vert
			#pragma fragment fragA

			ENDCG
		}
	}
 	FallBack Off
}
部分解析:
Q1: 文中Blend的作用
A1: 透明度混合基础相关链接,Blend SrcAlpha OneMinusSrcAlpha相关的解释
Q2: 为什么要分成两个Pass?第一个渲染RGB通道 第二个渲染A通道?
A2: 在设置RBG的时候我们会设置A通道,为了不让这个A通道写入渲染的纹理中。
Q3: accumulationTexture.MarkRestoreExpected()的作用是什么?
A3: 具体查看下面三张图


第二种运动模糊(速度缓存)
思路: 计算获取当前帧的位置以及上一帧的位置,两者做差求出速度 v (方向、大小),利用这个速度我们就可以求得 n 张移动过程中的动画帧,将这些动画帧叠加并取平均,这样就可以得到一个含有 n 个虚影的运动模糊效果。即利用速度v预测出之前的成像并将其渲染出来
难点: 如何求 v <= 得到点在前后两帧的位置信息/时间;
问题就转化为如何获取前后两帧位置信息。我们可以利用深度纹理 计算片元着色器中每个像素的世界坐标。下面介绍一下 为什么能利用深度纹理计算像素的世界坐标
深度纹理的相关知识详看另一篇博客 之后补上
深度纹理上存储的值如下,其中zv是NDC坐标下的深度值 zv∈[-1,1]
d = 1 2 ∗ z v + 1 2 d = \frac{1}{2}*z_v+\frac{1}{2}\quad d=21∗zv+21
因此我们就可以利用d求出zv,x、y坐标同理代码里会有标注,此处我们设点 pos1=(x,y,zv) ,之后利用 矩阵M1 = 视角*投影矩阵的逆矩阵 求出屏幕上像素点的世界坐标 p;
接着我们可以利用 矩阵M2= 视角*投影矩阵 (此处是上一帧保存的) 以及求出的 点p 求出上一帧的坐标 pos2 。
上面得到的 pos1、pos2就是我们要获取的前后两帧的位置信息。
上代码
代码皆引用自《UnityShader入门精要》冯乐乐版本
using UnityEngine;
using System.Collections;

public class MotionBlurWithDepthTexture : PostEffectsBase {

	public Shader motionBlurShader;
	private Material motionBlurMaterial = null;

	public Material material {
		get {
			motionBlurMaterial = CheckShaderAndCreateMaterial(motionBlurShader, motionBlurMaterial);
			return motionBlurMaterial;
		}
	}

	private Camera myCamera;
	public Camera camera {
		get {
			if (myCamera == null) {
				myCamera = GetComponent<Camera>();
			}
			return myCamera;
		}
	}

	[Range(0.0f, 1.0f)]
	public float blurSize = 0.5f;
	[Range(0, 15)]
	public int drawCount = 3;
	[Range(2.0f, 20.0f)]
	public float speedTime = 0.5f;

	private Matrix4x4 previousViewProjectionMatrix;

	void OnEnable() {
		camera.depthTextureMode |= DepthTextureMode.Depth;

		previousViewProjectionMatrix = camera.projectionMatrix * camera.worldToCameraMatrix;
	}

	void OnRenderImage (RenderTexture src, RenderTexture dest) {
		if (material != null) {
			material.SetFloat("_BlurSize", blurSize);
			material.SetFloat("_DrawCount", drawCount);
			material.SetFloat("_SpeedTime", speedTime);

			material.SetMatrix("_PreviousViewProjectionMatrix", previousViewProjectionMatrix);
			Matrix4x4 currentViewProjectionMatrix = camera.projectionMatrix * camera.worldToCameraMatrix;
			Matrix4x4 currentViewProjectionInverseMatrix = currentViewProjectionMatrix.inverse;
			material.SetMatrix("_CurrentViewProjectionInverseMatrix", currentViewProjectionInverseMatrix);
			previousViewProjectionMatrix = currentViewProjectionMatrix;

			Graphics.Blit (src, dest, material);
		} else {
			Graphics.Blit(src, dest);
		}
	}
}
Shader "Motion Blur With Depth Texture" {
	Properties {
		_MainTex ("Base (RGB)", 2D) = "white" {}
		_BlurSize ("Blur Size", Float) = 1.0
		_DrawCount("DrawCount", Range(3,15)) = 1.0
	}
	SubShader {
		CGINCLUDE

		#include "UnityCG.cginc"

		sampler2D _MainTex;
		half4 _MainTex_TexelSize;
		sampler2D _CameraDepthTexture;
		float4x4 _CurrentViewProjectionInverseMatrix;
		float4x4 _PreviousViewProjectionMatrix;
		half _BlurSize;
		int _DrawCount;
		float _SpeedTime;

		struct v2f {
			float4 pos : SV_POSITION;
			half2 uv : TEXCOORD0;
			half2 uv_depth : TEXCOORD1;
		};

		v2f vert(appdata_img v) {
			v2f o;
			o.pos = UnityObjectToClipPos(v.vertex);

			o.uv = v.texcoord;
			o.uv_depth = v.texcoord;

			#if UNITY_UV_STARTS_AT_TOP
			if (_MainTex_TexelSize.y < 0)
				o.uv_depth.y = 1 - o.uv_depth.y;
			#endif

			return o;
		}

		//把屏幕上的点还原到世界坐标中,然后求速度
		//之后在NDC坐标下进行速度方向的绘图?
		fixed4 frag(v2f i) : SV_Target {
			//获取深度纹理图
			float d = SAMPLE_DEPTH_TEXTURE(_CameraDepthTexture, i.uv_depth);
			//将深度值转化到NDC坐标下,即[-1,1]
			//z是∵d=0.5*z+0.5  x y 同理
			float4 H = float4(i.uv.x * 2 - 1, i.uv.y * 2 - 1, d * 2 - 1, 1);
			//得到的是一个未作齐次除法的世界坐标
			float4 D = mul(_CurrentViewProjectionInverseMatrix, H);
			//做齐次除法转化成世界坐标
			float4 worldPos = D / D.w;

			//当前帧NDC坐标系下的坐标
			float4 currentPos = H;
			//利用上一帧的 视角*投影矩阵(因为Unity中使用的是纵向两乘法,因此实际上是 投影矩阵*视角 矩阵,C#可知)得到上一帧剪裁空间下的坐标
			//只是在屏幕上做处理
			float4 previousPos = mul(_PreviousViewProjectionMatrix, worldPos);
			//做齐次除法得到NDC坐标系下的坐标
			previousPos /= previousPos.w;

			//利用坐标差求得速度
			float2 velocity = (currentPos.xy - previousPos.xy)/ _SpeedTime;

			//根据速度画出路径上多个相同的成像
			float2 uv = i.uv;
			float4 c = tex2D(_MainTex, uv);
			uv += velocity * _BlurSize;
			for (int it = 1; it < _DrawCount; it++, uv += velocity * _BlurSize) {
				float4 currentColor = tex2D(_MainTex, uv);
				c += currentColor;
			}
			//存在3张图片叠加,对叠加的图片颜色取平均得到正确的颜色
			c /= _DrawCount;

			return fixed4(c.rgb, 1.0);
		}

		ENDCG

		Pass {
			ZTest Always Cull Off ZWrite Off

			CGPROGRAM

			#pragma vertex vert
			#pragma fragment frag

			ENDCG
		}
	}
	FallBack Off
}
两种运动模糊对比
第一种方式是通过采集每一帧的屏幕成像,并将图像累计混合得到模糊运动成像。
第二种方式是通过深度图以及 视角*投影矩阵 变化,得到在当前帧及前一帧的速度变化,直接在当前帧模拟出路径上的模糊残影。
总体上的感觉来说,第一种更为真实,第二种会感觉到较为明显的抖动,尤其是在_DrawCount数量增加 or _BlurSize变大 or _SpeedTime变小 三者有一个或者多个发生的时候,因为此时残影还没画完但物体实际已经偏离了当前位置。
