SpringBoot集成并简单使用Swagger2
Swagger2是一个自动生成HTTP接口API的框架;其提供了一个API的UI界面,可供开发人员、测试人员测试接口(就测试接口而言,与postman类似)。
注:Swagger与Swagger2功能类似,不过Swagger2比Swagger更严谨,Swagger2是Swagger的进化版。
忍不住了,直接开撸吧!
本人测试时的软硬件环境:Windows10、IntelliJ IDEA、SpringBoot 2.1.1.RELEASE
准备一个基本的SpringBoot项目:
使用SpringBoot正常编写一个Controller,并保证能正常访问:
import com.aspire.model.Employee;
import io.swagger.annotations.Api;
import io.swagger.annotations.ApiOperation;
import org.springframework.web.bind.annotation.*;
import springfox.documentation.annotations.ApiIgnore;
import java.util.ArrayList;
import java.util.List;
import java.util.Random;

/**
 * 控制层
 *
 * @author JustryDeng
 * @date 2019/1/8 18:53
 */
@RestController
public class JustryDengController {

    /**
     * 简单获取Employee
     *
     *
     * @return Employee模型
     *
     * @date 2019/1/9 0:36
     */
    @GetMapping("/get/single/employee")
    public Employee getEmployee() {
        Employee employee = new Employee();
        employee.setName("张三123");
        employee.setAge(18);
        employee.setGender("男");
        employee.setId(9527);
        return employee;
    }

    /**
     * 根据Employee模型获取toString信息
     *
     * @param employee
     *            employee模型
     * @return  模型toString结果
     * @date 2019/1/9 0:38
     */
    @PostMapping("/get/employee/info")
    public String getEmployeeInfo(@RequestBody Employee employee) {
        return employee.toString();
    }

    /**
     * 获取随机数
     *
     * @param basenumber
     *            基数
     * @return 随机数
     * @date 2019/1/9 0:44
     */
    @GetMapping("/get/random/number")
    public Integer geteRandomNumber(@RequestParam("basenumber") Integer basenumber){
        return basenumber + new Random().nextInt(100);
    }

    /**
     * 获取随机数
     *
     * @return Employee集合
     * @date 2019/1/9 0:44
     */
    @PostMapping("/get/employee/list")
    public List geteEmployeeList(){
        List list = new ArrayList<>(4);
        Employee employeeOne = new Employee();
        employeeOne.setName("JustryDeng");
        employeeOne.setAge(18);
        employeeOne.setGender("男");
        employeeOne.setId(9527);
        list.add(employeeOne);
        Employee employeeTwo = new Employee();
        employeeTwo.setName("邓沙利文");
        employeeTwo.setAge(24);
        employeeTwo.setGender("男");
        employeeTwo.setId(8080);
        list.add(employeeTwo);
        return list;
    }

}
注:正常编写controller需要引入web等基础依赖,这里就不再给出了。
注:上图中的Employee为自定义的一个简单的模型这里也不再给出。
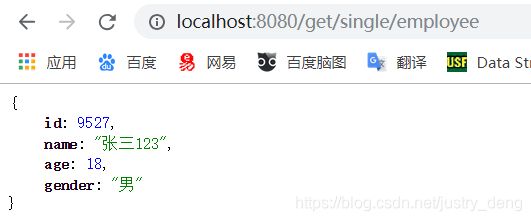
启动项目并访问此controller中的任意一个HTTP接口,保证能正常访问:
集成swagger2:
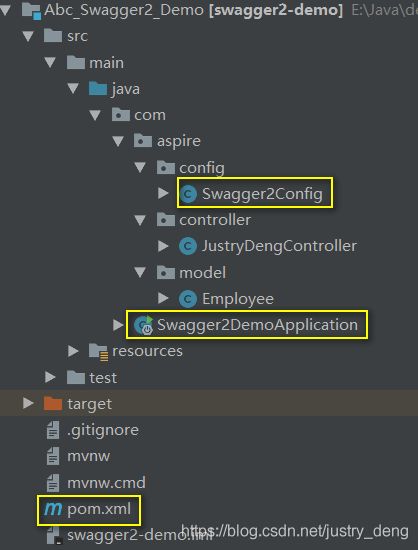
先给出此步结束后的项目结构:
第一步:在pom.xml中引入swagger2的相关依赖
    io.springfox
    springfox-swagger2
    2.9.2


    io.springfox
    springfox-swagger-ui
    2.9.2
第二步:在启动类上启用swagger2
import org.springframework.boot.SpringApplication;
import org.springframework.boot.autoconfigure.SpringBootApplication;
import springfox.documentation.swagger2.annotations.EnableSwagger2;

/**
 * 启动类
 *
 * 注:顾名思义 @EnableSwagger2 表示启用Swagger2
 *
 * @author JustryDeng
 * @date 2019/1/9 11:21
 */
@SpringBootApplication
@EnableSwagger2
public class Swagger2DemoApplication {

    public static void main(String[] args) {
        SpringApplication.run(Swagger2DemoApplication.class, args);
    }

}
第三步:编写swagger2配置类
import org.springframework.context.annotation.Bean;
import org.springframework.context.annotation.Configuration;
import springfox.documentation.builders.ApiInfoBuilder;
import springfox.documentation.builders.PathSelectors;
import springfox.documentation.builders.RequestHandlerSelectors;
import springfox.documentation.service.ApiInfo;
import springfox.documentation.service.Contact;
import springfox.documentation.spi.DocumentationType;
import springfox.documentation.spring.web.plugins.Docket;

/**
 * swagger2配置项
 *
 * @author JustryDeng
 * @date 2019/1/8 22:29
 */
@Configuration
public class Swagger2Config {

    /**
     * 注入一个Springfox framework主要的构建器Docket进入Spring容器
     *
     * @date 2019/1/8 22:31
     */
    @Bean
    public Docket createRestApi() {
        return new Docket(DocumentationType.SWAGGER_2)
                // API基础信息
                .apiInfo(apiInfo())
                .select()
                /* 指定swagger2的“扫描”范围,假设指定的basePackage为xxx,那么凡是以xxx开头的包,都属于
                 * 其管辖范围(注:源代码中是以startsWith实现的)
                 * 注:指定此配置后,swagger2会自动扫描并发现该范围下的被@RequestMapping注解注解了的方法并生成对应的API
                 * 注:@GetMapping、@PostMapping、@PutMapping等注解也属于@RequestMapping注解的一种变形
                 */
                .apis(RequestHandlerSelectors.basePackage("com.aspire.controller"))
                .paths(PathSelectors.any())
                .build();
    }

    /**
     * Api基础信息模型
     *
     * @date 2019/1/8 22:31
     */
    private ApiInfo apiInfo() {
        return new ApiInfoBuilder()
                // 页面标题
                .title("SpringBoot使用Swagger2简单示例")
                // 创建人信息
                .contact(new Contact("JustryDeng", "https://blog.csdn.net/justry_deng", "[email protected]"))
                // 版本号
                .version("1.0")
                // 描述
                .description("我是此次更新的描述信息!")
                .build();
    }
}
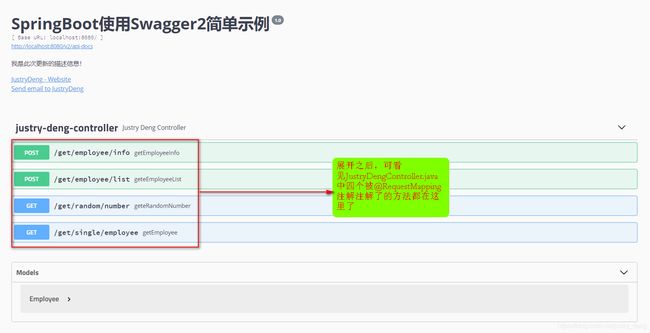
注:swagger2会自动扫描并发现该范围下的被@RequestMappingz注解注解了的方法并生成对应的
API(提示:@GetMapping、@PostMapping、@PutMapping等注解也属于@RequestMapping
注解的一种变形)。
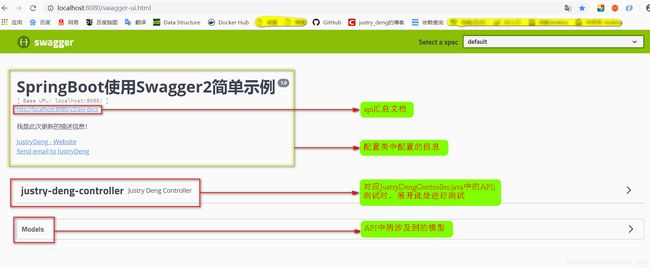
第四步:启动项目,访问一下地址swagger-ui界面
ip:端口/${server.servlet.context-path}/swagger-ui.html
注:server.servlet.context-path可在application.properties文件中进行配置,其默认值为“/”。
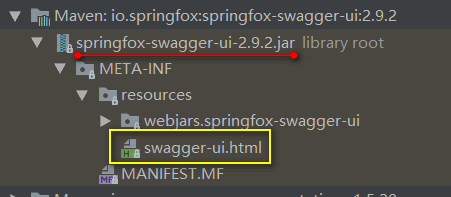
注:swagger-ui.html文件位于:
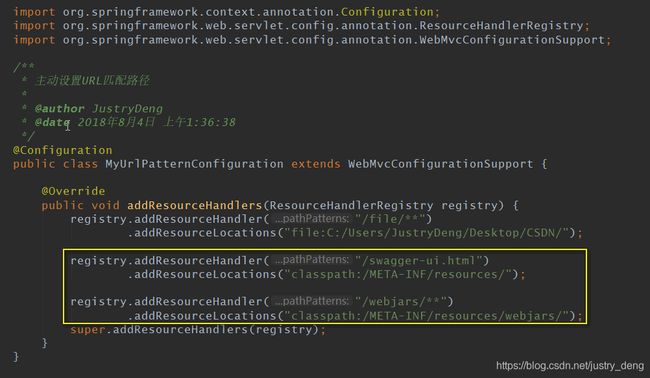
注:如果SpringBoot(使用配置类)指定了资源文件路径映射(可详见
https://blog.csdn.net/justry_deng/article/details/81406752),那么直接访问
ip:端口/${server.servlet.context-path}/swagger-ui.html时是不会出现swagger界面的;
这时,就需要在指定资源文件映射的同时,再额外指定:
给出关键部分代码(文字版):
registry.addResourceHandler("/swagger-ui.html")
        .addResourceLocations("classpath:/META-INF/resources/");

registry.addResourceHandler("/webjars/**")
        .addResourceLocations("classpath:/META-INF/resources/webjars/");
注:到这里为止,其实已经算是集成swagger2完毕了!
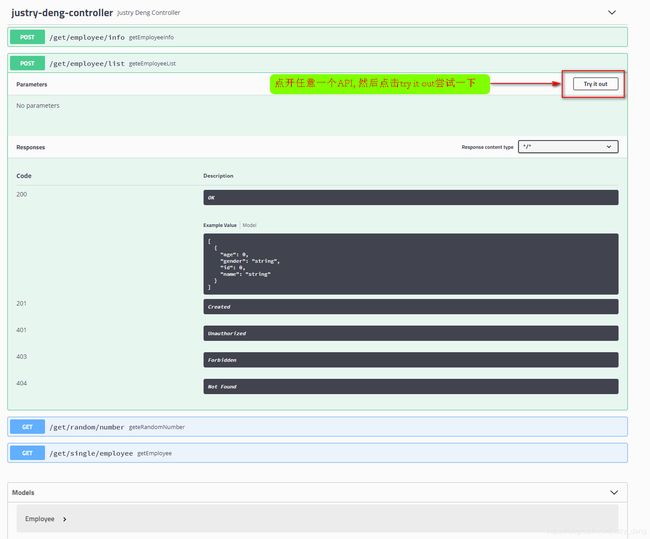
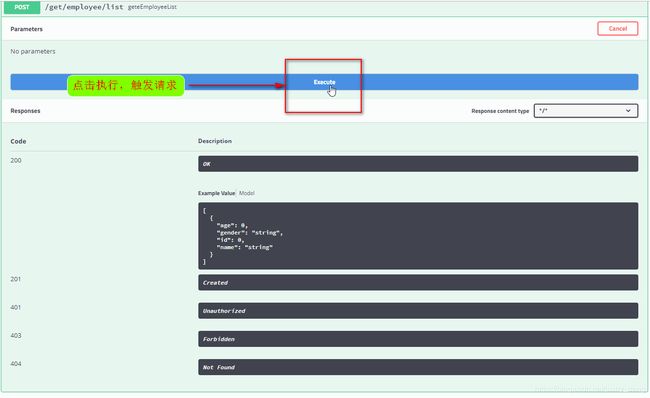
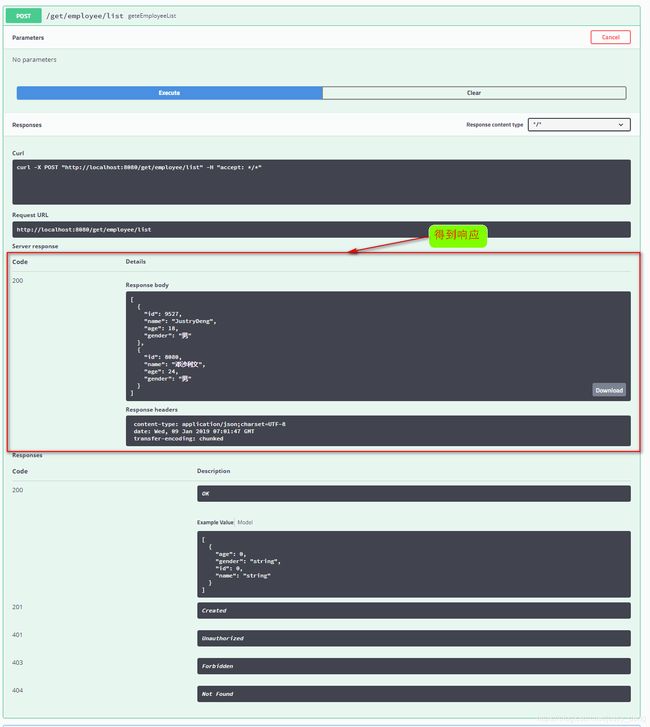
第五步:测试一下接口
注:如果是需要参数的请求,那么在execute时,会给出相应的提示,根据提示输入参数值再执行execute即可。
swagger2注解:
API免不了对字段、方法、类等进行文字说明,swagger2作为一个API框架,自然也免不了这些,swagger2提供了一些列的注解来完成这件事。
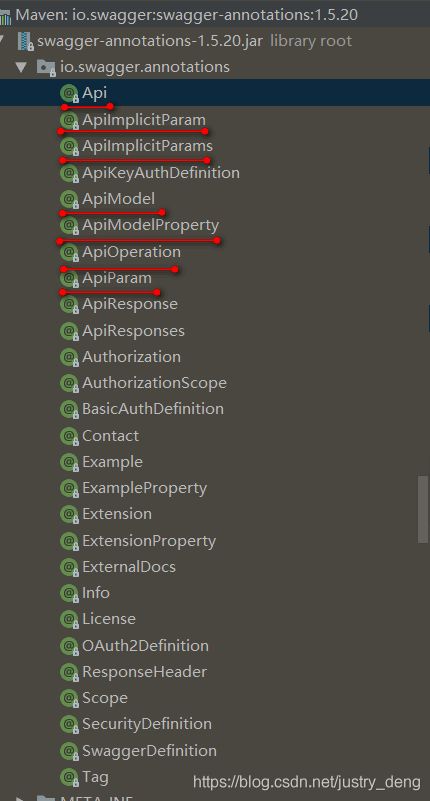
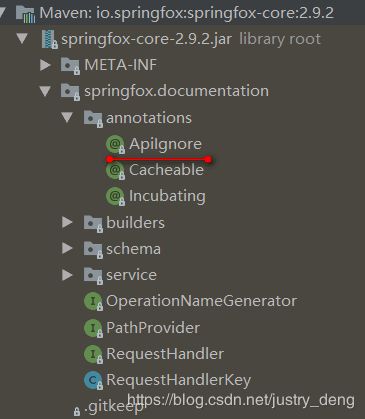
swagger2的注解有很多,下面列举一部分:
注:如果只是简单的使用swagger的话,一般的上两图中被画上红线的注解就够用了。
使用方式较简单,这里以其中的@Api、@ApiOperation、@ApiIgnore注解示例:
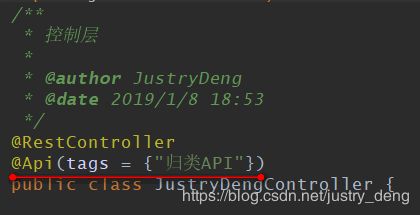
@Api的简单使用:
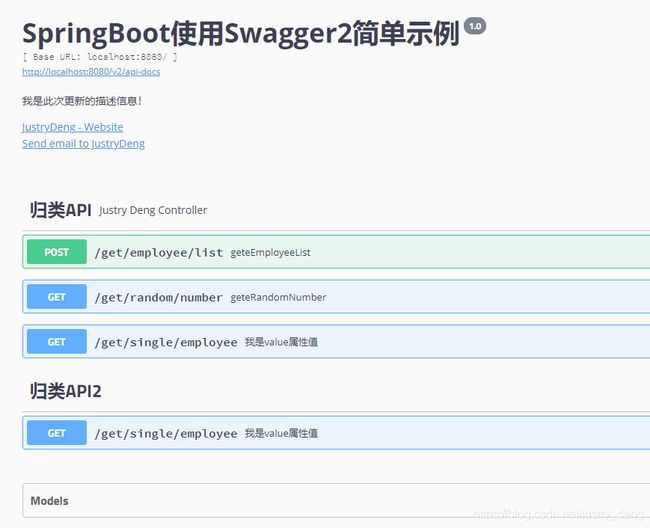
swagger-ui此时是这样的:
说明:JustryDengController.java对应的一栏原来此处为“justry-deng-controller”,通过设置@Api(tags = {"归类API"})
后,此处变为了“归类API”。
说明:@Api作用于类上,其属性不少,个人认为其中的tags属性较实用;一般的不同的controller的tags不同,分类也
不同;我们可以通过设置将不同controller的@Api注解的tags值设成相同的,来将其归为一类(逻辑分组)。也可
通过设置tags值来完成各种各样的分组。
注:被@Api分组的类中的所有API接口,都属于该tags组。一个API接口,可以属于多个组。
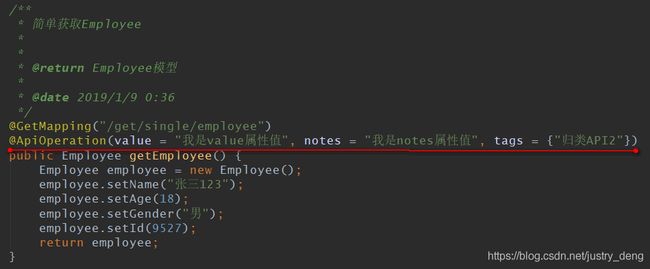
@ApiOperation的简单使用:
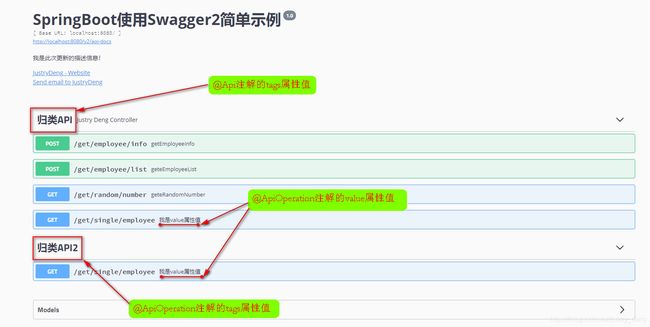
swagger-ui此时是这样的:
展开:
说明:@ApiOperation即可用类上,又可用在方法上。一般使用@ApiOperation注解来说明方法的用途等。
@ApiIgnore的简单使用:
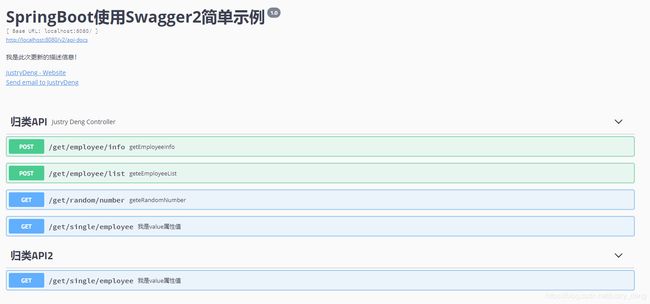
使用@ApiIgnore注解前,swagger-ui是这样的:
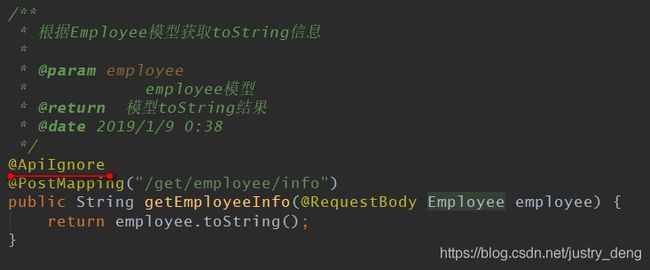
我们对/get/employee/info对应的方法使用@ApiIgnore注解:
再看swagger-ui,就变成了:
即:/get/employee/info对应的API被忽略了。
说明:当我们在配置文件中指定了basePackage时,swagger2就会自动扫描其下的HTTPMethod接口(即:被
@RequestMapping注解注解了的方法);如果我们不想让某个被@RequestMapping注解注解了的方
法生成API的话,那么可以使用@ApiIgnore注解来实现。
笔者语录:更多使用细节,需要在实际项目中去实践体会。
