cocos2dx shader -- Vol.2(blur, frost, bloom)
cocos2dx shader系列一——中级篇
讲完基本篇,现在讲中级篇。主要有这几个效果高斯模糊、冰霜、外发光三个效果。
一、blur
模糊是常用的效果,而高斯模糊是最常见的模糊效果。基本原理就是原pixel需要混合周围pixel生成目标pixel,混合的方式有多种,常用的有四点采样、七点采样和九点采样,这里采用九点采样,采样偏移和权重分别为:
float p_offset = {-4, -3, -2, -1, 0, 1, 2, 3, 4};
float p_weight = {0.05, 0.09, 0.12, 0.15, 0.16, 0.15, 0.12, 0.09, 0.05};
目标像素即为:
	vec4 sample = vec4(0, 0, 0, 0);
	for (int i = 0; i < 9; i ++){
	    sample+= texture2D(u_texture, v_texCoord - p_offset[i] * pix_size) * p_weight[i];
	}
	gl_FragColor = sample;
水平上blur和垂直上blur的效果分别为:
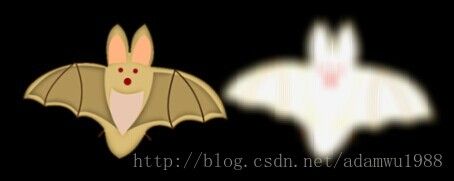
经过两轮blur后的效果:
二、frost
这是个霜冻效果,
进过blur后:
shader:
#ifdef GL_ES
precision mediump float;
#endif

uniform sampler2D u_texture;
uniform sampler2D tex_noise;

uniform vec2 pix_size;
uniform float PixelX = 0.5;
uniform float PixelY = 0.5;
uniform float Freq = 0.115;

varying vec2 v_texCoord;
varying vec4 v_fragmentColor;


vec4 spline(float x, vec4 c1, vec4 c2, vec4 c3, vec4 c4, vec4 c5, vec4 c6, vec4 c7, vec4 c8, vec4 c9)
{
	float w1, w2, w3, w4, w5, w6, w7, w8, w9;
	w1 = 0.0;
	w2 = 0.0;
	w3 = 0.0;
	w4 = 0.0;
	w5 = 0.0;
	w6 = 0.0;
	w7 = 0.0;
	w8 = 0.0;
	w9 = 0.0;
	float tmp = x * 8.0;
	if (tmp<=1.0) {
	w1 = 1.0 - tmp;
	w2 = tmp;
	}
	else if (tmp<=2.0) {
	tmp = tmp - 1.0;
	w2 = 1.0 - tmp;
	w3 = tmp;
	}
	else if (tmp<=3.0) {
	tmp = tmp - 2.0;
	w3 = 1.0-tmp;
	w4 = tmp;
	}
	else if (tmp<=4.0) {
	tmp = tmp - 3.0;
	w4 = 1.0-tmp;
	w5 = tmp;
	}
	else if (tmp<=5.0) {
	tmp = tmp - 4.0;
	w5 = 1.0-tmp;
	w6 = tmp;
	}
	else if (tmp<=6.0) {
	tmp = tmp - 5.0;
	w6 = 1.0-tmp;
	w7 = tmp;
	}
	else if (tmp<=7.0) {
	tmp = tmp - 6.0;
	w7 = 1.0 - tmp;
	w8 = tmp;
	}
	else
	{
	//tmp = saturate(tmp - 7.0);
	// http://www.ozone3d.net/blogs/lab/20080709/saturate-function-in-glsl/
	tmp = clamp(tmp - 7.0, 0.0, 1.0);
	w8 = 1.0-tmp;
	w9 = tmp;
	}
	return w1*c1 + w2*c2 + w3*c3 + w4*c4 + w5*c5 + w6*c6 + w7*c7 + w8*c8 + w9*c9;
}

vec3 noise(vec2 p)
{
	return texture2D(tex_noise,p).xyz;
}

void main()
{
	vec2 uv = v_texCoord.xy;
	vec3 tc = vec3(1.0, 0.0, 0.0);

	float DeltaX = PixelX * pix_size.x;
	float DeltaY = PixelY * pix_size.y;
	vec2 ox = vec2(DeltaX,0.0);
	vec2 oy = vec2(0.0,DeltaY);
	vec2 PP = uv - oy;
	vec4 C00 = texture2D(u_texture,PP - ox);
	vec4 C01 = texture2D(u_texture,PP);
	vec4 C02 = texture2D(u_texture,PP + ox);
	PP = uv;
	vec4 C10 = texture2D(u_texture,PP - ox);
	vec4 C11 = texture2D(u_texture,PP);
	vec4 C12 = texture2D(u_texture,PP + ox);
	PP = uv + oy;
	vec4 C20 = texture2D(u_texture,PP - ox);
	vec4 C21 = texture2D(u_texture,PP);
	vec4 C22 = texture2D(u_texture,PP + ox);

	float n = noise(Freq*uv).x;
	n = mod(n, 0.111111)/0.111111;
	vec4 result = spline(n,C00,C01,C02,C10,C11,C12,C20,C21,C22);
	tc = result.rgb;

	gl_FragColor = vec4(tc, 1.0);
}
三、bloom
外发光的做法也是个依赖blur的效果,常见的做法是先生成一张高亮图,然后再将该高亮图blur,得到扩大模糊的边缘也就得到了我们想要的效果,
生成高亮图:
blur后效果对比:
叠加原图的效果:
shader里的blur和上边的一样,高亮的shader,根据灰度值改变亮度:
#ifdef GL_ES
precision mediump float;
#endif

uniform sampler2D u_texture;
varying vec2 v_texCoord;
varying vec4 v_fragmentColor;

uniform float intensity_offset = 1.0;
uniform float intensity_scale = 2.0;

void main(void)
{
    vec4 texColor = texture2D(u_texture, v_texCoord);
	// gray value
	float gray = dot(texColor.rgb, vec3(0.3f, 0.59f, 0.11f));
	// new gray
	float new_intensity = (gray + intensity_offset) * intensity_scale;

	// fixed color
	gl_FragColor = texColor * new_intensity;
}
当然我们可以不一样原图的rgb,自定义颜色,如:
两个步骤的shader可以和在一起写,也可采用取巧的方法。
Repository: 代码


