Linux:CentOS7安装maven私服Nexus
1.下载 nexus-2.14.9-01-bundle
下载链接:https://www.sonatype.com/oss-thank-you-zip
2.nexus的安装
确保已经安装maven
将下载的nexus解压至/usr/local下
tar -xvf nexus-2.14.9-01-bundle.tar
mv nexus-2.14.9-01 nexus
建立软链接
ln -s nexus nexus
3.设置环境变量(按官网文档的说法是可选,不过还是配上吧)
vim /etc/profile,在最后加上下面这一句,:wq保存退出
export PTAH = $PATH:${NEXUS_HOME}/bin
source /etc/profile 刷新刚设置的环境变量,使之生效
查看结果
4、将nexus设置为系统服务,并配置开机自启动
cd /etc/init.d
cp /usr/local/nexus/bin/nexus ./nexus
编辑/etc/init.d/nexus文件,添加以下变量定义:

NEXUS_HOME=/usr/local/java/nexus

修改以下变量:

WRAPPER_CMD="$NEXUS_HOME/bin/jsw/linux-x86-64/wrapper"
WRAPPER_CONF="$NEXUS_HOME/bin/jsw/conf/wrapper.conf"
PIDDIR="${NEXUS_HOME}"

修改如下变量,设置启动用户为nexus:

RUN_AS_USER=nexus

执行命令添加nexus自启动服务

# chkconfig –add nexus
# chkconfig –levels 345 nexus on

执行如下命令启动、停止nexus服务

# service nexus start
# service nexus stop
5.访问 http://192.168.2.2:8081/nexus 验证服务是否真的开启,若访问成功,则服务启动成功,若访问失败,则服务失败。
登录:用户名admin 默认密码:admin123,如图所示:
Nexus的目录结构介绍
索引目录
![]()
存储目录
![]()
Nexus的仓库和仓库组
![]()
仓库有4种类型 :
group(仓库组):一组仓库的集合
hosted(宿主):配置第三方仓库 (包括公司内部私服 )
proxy(代理):私服会对中央仓库进行代理,用户连接私服,私服自动去中央仓库下载jar包或者插件
virtual(虚拟):兼容Maven1 版本的jar或者插件
Nexus的仓库和仓库组介绍:
3rd party: 一个策略为Release的宿主类型仓库,用来部署无法从公共仓库获得的第三方发布版本构建
Apache Snapshots: 一个策略为Snapshot的代理仓库,用来代理Apache Maven仓库的快照版本构建
Central: 代理Maven中央仓库
Central M1 shadow: 代理Maven1 版本 中央仓库
Codehaus Snapshots: 一个策略为Snapshot的代理仓库,用来代理Codehaus Maven仓库的快照版本构件
Releases: 一个策略为Release的宿主类型仓库,用来部署组织内部的发布版本构件
Snapshots: 一个策略为Snapshot的宿主类型仓库,用来部署组织内部的快照版本构件
Public Repositories:该仓库组将上述所有策略为Release的仓库聚合并通过一致的地址提供服务
注意:1.我们要把Central的Configuration中的Download Remote Indexes设置为true(默认是false),这样如果我们私服上没有我们需要的jar他会从中央仓库去下载,默认的中央仓库地址是:http://repo1.maven.org/maven2/,我这里把他修改了阿里云的,当然速度是杠杠的!也建议大家这样配置
私服仓库组合
分别从私服 发布、测试、第三方、中央获取,如果没有在从外网中央获得(因为我们在上一步已经将从外网下载打开)
![]()
点击Configuration,可以看到当前添加到该集合的仓库列表及顺序(优先级高的在上面,可用鼠标拖拽),当我们新增了仓库,将会出现在右侧的available Repository,添加到左边即可。
如果有哪个仓库不想加入到该集合,也可以拖拽到右边来。
设为允许重新发布
附录:
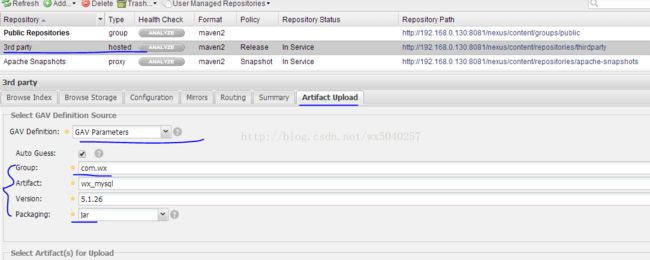
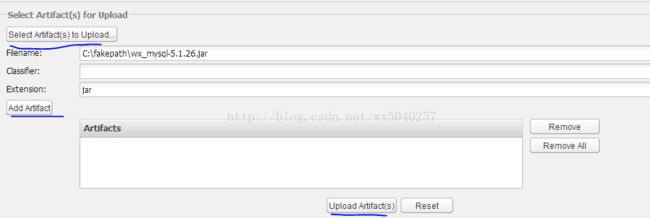
一 上传第三方商业软件jar包的操作:
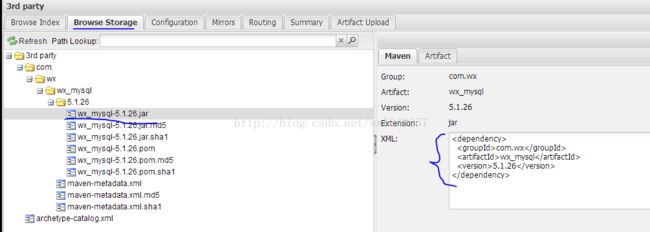
上传成功后就可以找到依赖配置了
6.本地发布到私服(上传)
在maven的setting.xml文件配置账号和密码
    	releases
    	admin
    	admin123


		Snapshots
		admin
		admin123
确定当前项目发布配置信息,修改当前项目的pom.xml
        releases
        Internal Releases
        http://192.168.2.2:8081/nexus/content/repositories/releases/


        Snapshots
        Internal Snapshots
        http://192.168.2.2:8081/nexus/content/repositories/snapshots/
测试发布
然后在pom文件里面点击右键,选择run as ----> maven build .....即可,如图:
其它项目要引用改jar包,只需拷贝右边的xml配置即可。
如果要发布稳定版,则把pom文件的稍加修改即可,如图:
再发布一下,如图:
此时,nexus服务器上的对应文件如图所示:
7.从私服获得内容到本地(下载)
在maven的setting.xml文件配置:
配置镜像
		nexus
		*
		http://192.168.2.2:8081/nexus/content/groups/public/
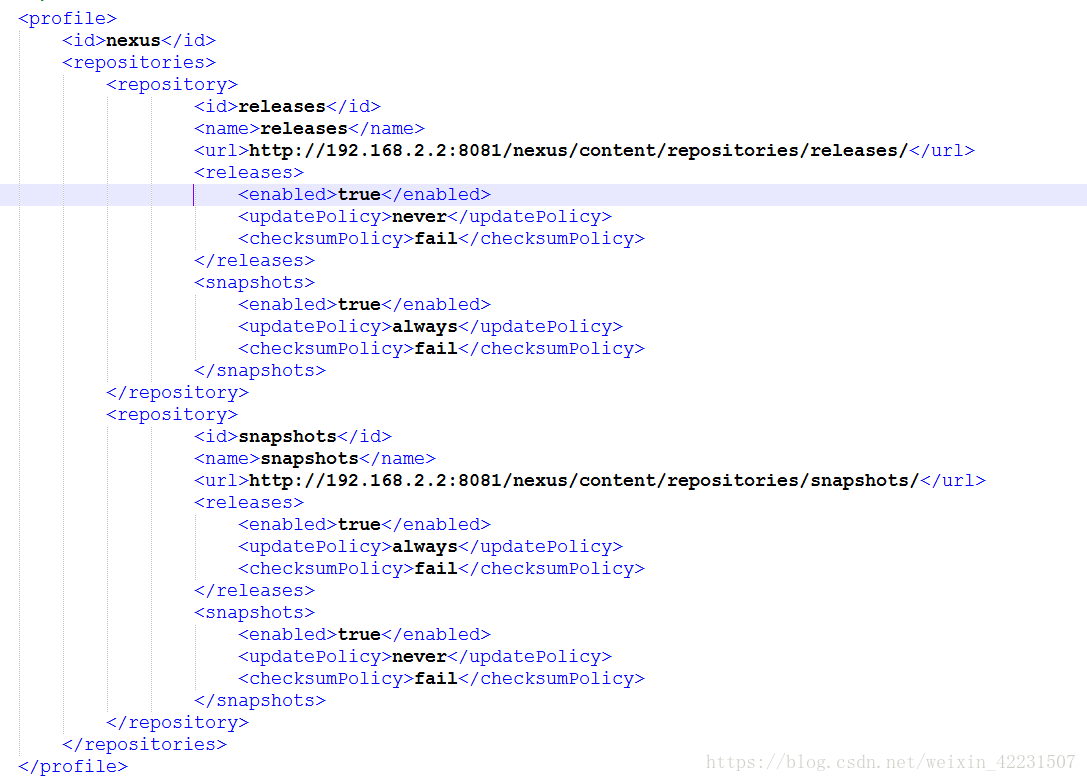
配置自定义 profile
        nexus


         	        releases
					releases
                  http://192.168.2.2:8081/nexus/content/repositories/releases/

						true
						never
						fail


						true
						always
						fail


         	        snapshots
					snapshots
                http://192.168.2.2:8081/nexus/content/repositories/snapshots/

						true
						always
						fail


						true
						never
						fail
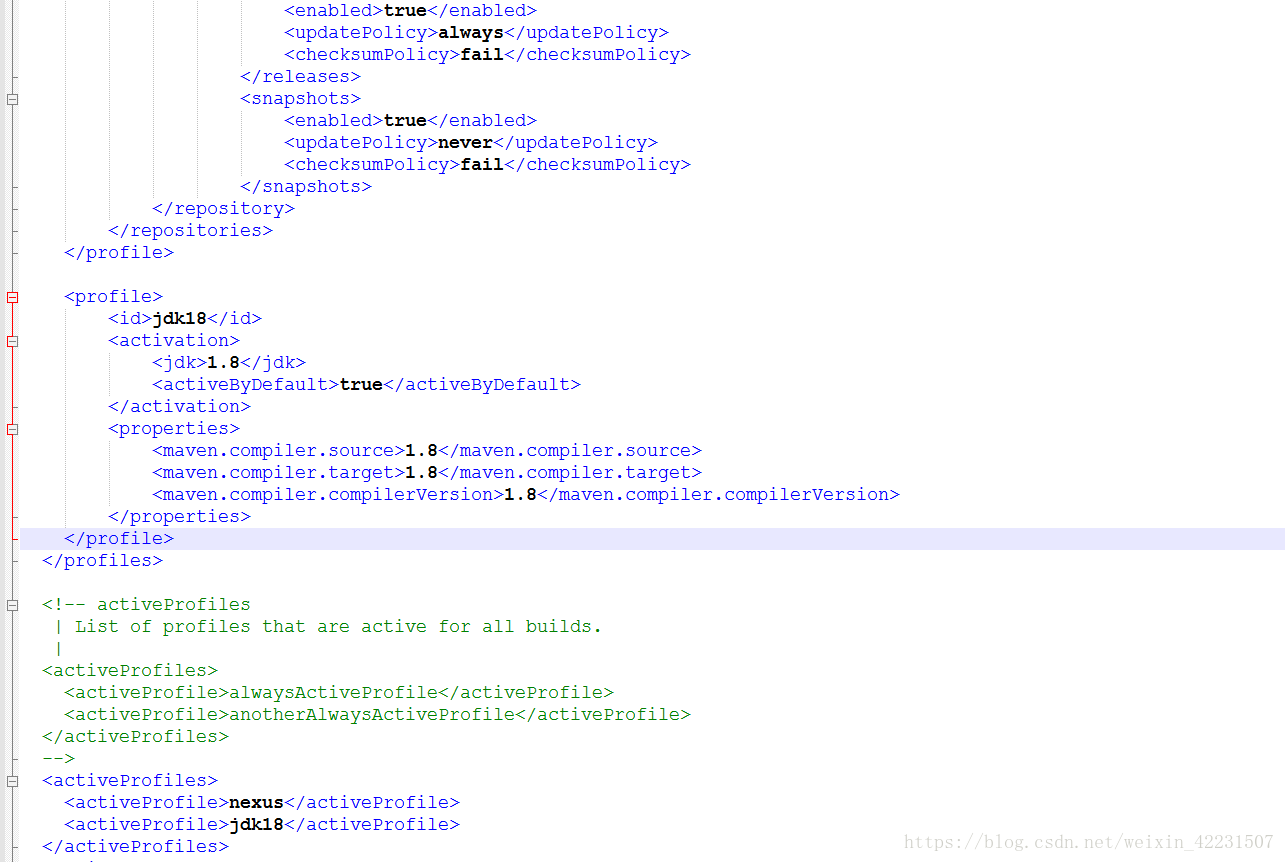
激活profile
nexus
完整的Setting.xml配置文件
	D:\maven_jar\


    	releases
    	admin
    	admin123


		Snapshots
		admin
		admin123


		nexus
		*
		http://192.168.2.2:8081/nexus/content/groups/public/


        nexus


         	        releases
					releases
        	        http://192.168.2.2:8081/nexus/content/repositories/releases/

						true
						never
						fail


						true
						always
						fail


         	        snapshots
					snapshots
        	        http://192.168.2.2:8081/nexus/content/repositories/snapshots/

						true
						always
						fail


						true
						never
						fail


		jdk18

			1.8
			true


			1.8
			1.8
			1.8


    nexus
    jdk18


