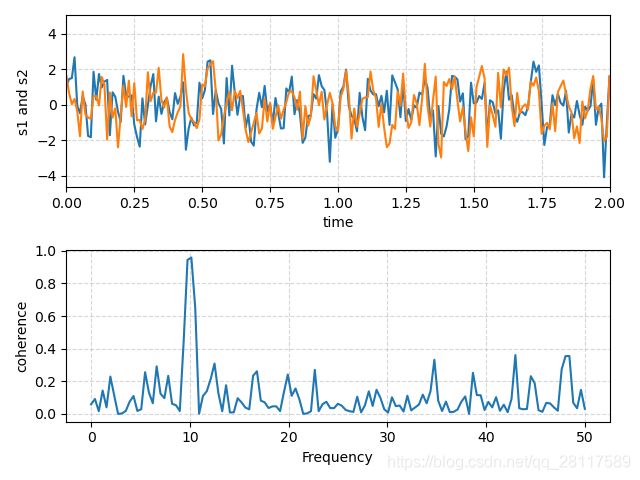
Matplotlib——Plotting the coherence of two signals (plt.subplots(2, 1))

import numpy as np
import matplotlib.pyplot as plt

# Fixing random state for reproducibility
# 指定随机数生成时所用算法开始的整数值
np.random.seed(19680801)

dt = 0.01
# 0到29等分区间,step是0.01
t = np.arange(0, 30, dt)
# 从标准正态分布中返回一个或多个样本值
nse1 = np.random.randn(len(t))                 # white noise 1
nse2 = np.random.randn(len(t))                 # white noise 2

# Two signals with a coherent part at 10Hz and a random part
s1 = np.sin(2 * np.pi * 10 * t) + nse1
s2 = np.sin(2 * np.pi * 10 * t) + nse2

# ig, axs = plt.subplots(2,1),
# 其中参数分别代表子图的行数和列数,一共有 2x1 个图像。
# 函数返回一个figure图像和一个子图axs的array列表。
fig, axs = plt.subplots(2, 1)
# 画折线图,同时显示两组数据s1,s2,显示方法有两种
# axs[0].plot(t, s1, t, s2)
axs[0].plot(t, s1)
axs[0].plot(t, s2)
# 设置axs[0]图的x轴显示范围
axs[0].set_xlim(0, 2)
# 设置标签
axs[0].set_xlabel('time')
axs[0].set_ylabel('s1 and s2')
# 增加网格线
axs[0].grid(True, linestyle="--", alpha=0.5)

cxy, f = axs[1].cohere(s1, s2, 256, 1. / dt)
axs[1].set_ylabel('coherence')
axs[1].grid(True, linestyle="--", alpha=0.5)
# tight_layout会自动调整子图参数,使之填充整个图像区域。
# 这是个实验特性,可能在一些情况下不工作。它仅仅检查坐标轴标签、刻度标签以及标题的部分
fig.tight_layout()

plt.show()

Matplotlib——Plotting the coherence of two signals (plt.subplots(2, 1))_第1张图片

你可能感兴趣的:(Matplotlib,python)