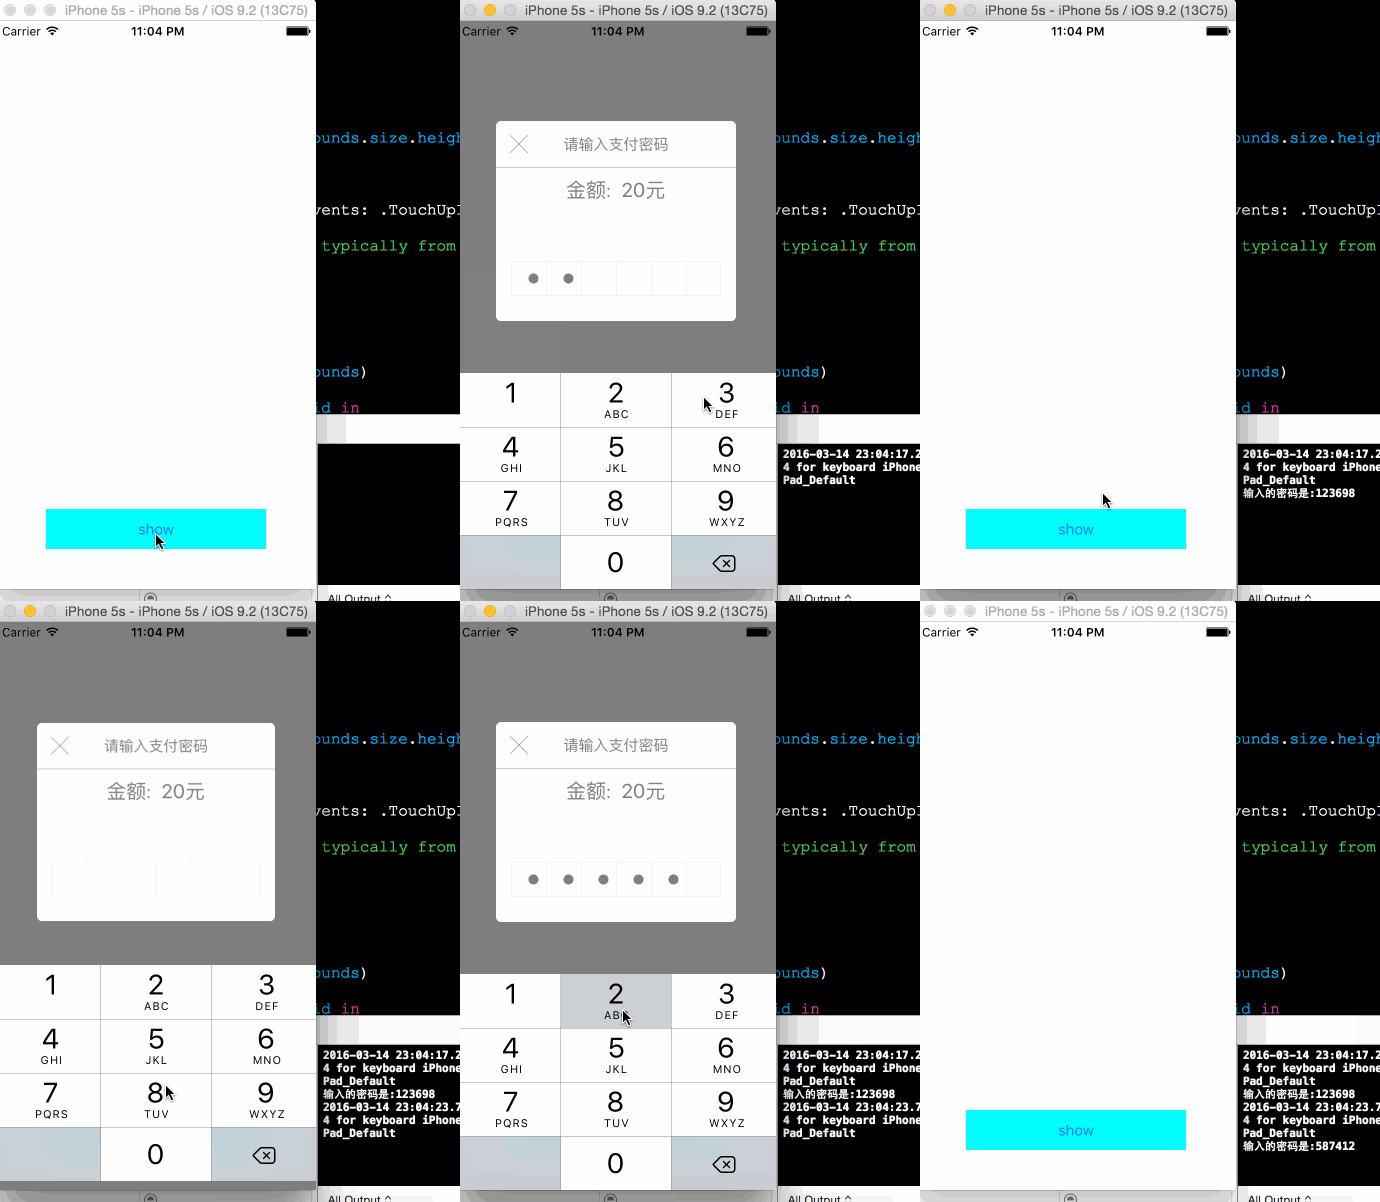
效果图
主要介绍一下怎么写的
iOS当中用户输入数据都是用的UITextField,显示的是小圆点,是因为在起始的时候 就将小圆点都加上去,然后隐藏,在用户输入的时候判断输入的是第几个字符然后再将小圆点一一进行显示.
1.弹出效果,弹出效果是用UIView动画写的
func show(view:UIView){
        view.addSubview(self)
        contentView!.transform = CGAffineTransformMakeScale(1.21, 1.21)
        contentView!.alpha = 0;
        UIView.animateWithDuration(1, delay: 0, usingSpringWithDamping: 0.7, initialSpringVelocity: 1, options: UIViewAnimationOptions.CurveEaseInOut, animations: { () -> Void in
            self.textField.becomeFirstResponder()
            self.contentView!.transform = CGAffineTransformMakeScale(1, 1)
            self.contentView!.alpha = 1;

            }, completion: nil)

    }
2.布局弹出的视图
上面的提示用的几个label就不再说了 主要是UITextField和几个小圆点以及左侧线的布局,在布局UITextField的同时将UITextField隐藏,因为不需要向用户展示输入框.再计算好各个6个圆点以及右侧分割线所在的位置,将小圆点也隐藏
    func setupView(){

        contentView =  UIView(frame: CGRectMake(40,100,240,200))
        contentView!.backgroundColor = UIColor.whiteColor()
        contentView?.layer.cornerRadius = 5;
        self.addSubview(contentView!)


        let btn:UIButton = UIButton(type: .Custom)
        btn.frame = CGRectMake(0, 0, 46, 46)
        btn .addTarget(self, action: "close", forControlEvents: .TouchUpInside)
        btn .setTitle("╳", forState: .Normal)
        btn .setTitleColor(UIColor.blackColor(), forState: .Normal)
        contentView!.addSubview(btn)

        let titleLabel:UILabel = UILabel(frame: CGRectMake(0,0,contentView!.frame.size.width,46))
        titleLabel.text = "请输入支付密码"
        titleLabel.textAlignment = NSTextAlignment.Center
        titleLabel.font = UIFont.systemFontOfSize(15)
        contentView!.addSubview(titleLabel)

        let linView:UIView = UIView (frame: CGRectMake(0,46,self.frame.size.height,1))
        linView.backgroundColor = UIColor.blackColor()
        linView.alpha = 0.4
        contentView?.addSubview(linView)

        let moneyLabel:UILabel = UILabel(frame: CGRectMake(0,56,contentView!.frame.size.width,26))
        moneyLabel.text = "金额:  20元"
        moneyLabel.textAlignment = NSTextAlignment.Center
        moneyLabel.font = UIFont.systemFontOfSize(20)
        contentView?.addSubview(moneyLabel)


        textField = UITextField(frame: CGRectMake(0,contentView!.frame.size.height - 60, contentView!.frame.size.width, 35))
        textField.delegate = self
        textField.hidden = true
        textField.keyboardType = UIKeyboardType.NumberPad
        contentView?.addSubview(textField!)


        let inputView:UIView = UIView(frame: CGRectMake(self.inputViewX,contentView!.frame.size.height - 60,inputViewWidth, 35))

        inputView.layer.borderWidth = 1;
        inputView.layer.borderColor = UIColor(red: 0.9, green: 0.9, blue: 0.9, alpha: 1).CGColor;
        contentView?.addSubview(inputView)

        let rect:CGRect = inputView.frame
        let x:CGFloat = rect.origin.x + (inputViewWidth / 12)
        let y:CGFloat = rect.origin.y + 35 / 2 - 5
        for var i = 0 ;i < 6; i++ {
            let circleLabel:UILabel =  UILabel(frame: CGRectMake(x + 35 * CGFloat(i) ,y,10,10))
            circleLabel.backgroundColor = UIColor.blackColor()
            circleLabel.layer.cornerRadius = 5
            circleLabel.layer.masksToBounds = true
            circleLabel.hidden = true
            contentView?.addSubview(circleLabel)
            pwdCircleArr.append(circleLabel)

            if i == 5 {
                continue
            }
            let line:UIView = UIView(frame: CGRectMake(rect.origin.x + (inputViewWidth / 6)*CGFloat(i + 1),rect.origin.y, 1 ,35))
            line.backgroundColor = UIColor(red: 0.8, green: 0.8, blue: 0.8, alpha: 1)
            line.alpha = 0.4
            contentView?.addSubview(line)
        }
    }
3.实现UITextField的代理方法,在这个代理方法中处理小圆点的显示
func textField(textField: UITextField, shouldChangeCharactersInRange range: NSRange, replacementString string: String) -> Bool {
        if(textField.text?.characters.count > 6){
         return false
        }

        var password : String
        if string.characters.count <= 0 {
            let index = textField.text?.endIndex.advancedBy(-1)
            password = textField.text!.substringToIndex(index!)
        }
        else {
            password = textField.text! + string
        }
        self .setCircleShow(password.characters.count)

        if(password.characters.count == 6){
            completeBlock?(password)
            close()
        }
        return true;
    }
封装的不是太好 可以自己知道原理后模仿着封装一个更好的
详细源码地址
https://github.com/canyeyujin/password
