2019独角兽企业重金招聘Python工程师标准>>> 
原文:http://zetcode.com/gui/pyqt5/widgets/
控件是应用程序的基础构件。PyQt5具有类目广泛的各种控件,包括按钮、复选框、滑动条、列表框等。在本节教程中,我们将学习几个很有用的控件:QCheckBox、ToggleButton、QSlider、QProgressBar和QCalendarWidget。
QCheckBox(复选框)
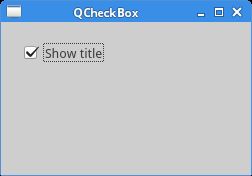
QCheckBox(复选框)是有打开和关闭两种状态的控件。它是一个带有勾选框的Label(标签)。复选框常用于表示程序中可以启用或禁用的功能。
#!/usr/bin/python3
# -*- coding: utf-8 -*-

"""
ZetCode PyQt5 tutorial

In this example, a QCheckBox widget
is used to toggle the title of a window.

author: Jan Bodnar
website: zetcode.com
last edited: January 2015
"""

import sys
from PyQt5.QtWidgets import QWidget, QCheckBox, QApplication
from PyQt5.QtCore import Qt


class Example(QWidget):

    def __init__(self):
        super().__init__()

        self.initUI()


    def initUI(self):

        cb = QCheckBox('Show title', self)
        cb.move(20, 20)
        cb.toggle()
        cb.stateChanged.connect(self.changeTitle)

        self.setGeometry(300, 300, 250, 150)
        self.setWindowTitle('QCheckBox')
        self.show()


    def changeTitle(self, state):

        if state == Qt.Checked:
            self.setWindowTitle('QCheckBox')
        else:
            self.setWindowTitle('')


if __name__ == '__main__':

    app = QApplication(sys.argv)
    ex = Example()
    sys.exit(app.exec_())
在这个例子中我们创建了一个可以切换窗体标题的复选框。
cb = QCheckBox('Show title', self)
这是QCheckBox的构造器。
cb.toggle()
因为我们已经设置了窗体的标题,所以需要勾选复选框。窗体标题默认没有设置,复选框也没有勾选。
cb.stateChanged.connect(self.changeTitle)
我们将自定义的changeTitle()方法连接到stateChanged信号。这个方法会切换窗体的标题。
def changeTitle(self, state):

    if state == Qt.Checked:
        self.setWindowTitle('QCheckBox')
    else:
        self.setWindowTitle('')
复选框的状态经由state参数传入changeTitle()方法。在勾选复选框时设置窗体标题,取消勾选时就将标题设为空字符串。
ToggleButton(切换按钮)
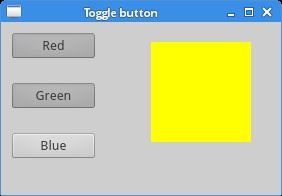
ToggleButton是QPushButton的一种特殊模式。它是一个有两种状态的按钮:按下与未按下。通过点击在这两种状态间来回切换。这种功能在某些场景会很实用。
#!/usr/bin/python3
# -*- coding: utf-8 -*-

"""
ZetCode PyQt5 tutorial

In this example, we create three toggle buttons.
They will control the background colour of a
QFrame.

author: Jan Bodnar
website: zetcode.com
last edited: January 2015
"""

import sys
from PyQt5.QtWidgets import (QWidget, QPushButton,
    QFrame, QApplication)
from PyQt5.QtGui import QColor


class Example(QWidget):

    def __init__(self):
        super().__init__()

        self.initUI()


    def initUI(self):

        self.col = QColor(0, 0, 0)

        redb = QPushButton('Red', self)
        redb.setCheckable(True)
        redb.move(10, 10)

        redb.clicked[bool].connect(self.setColor)

        #这里应该是greenb,原文写错了
        redb = QPushButton('Green', self)
        redb.setCheckable(True)
        redb.move(10, 60)

        redb.clicked[bool].connect(self.setColor)

        blueb = QPushButton('Blue', self)
        blueb.setCheckable(True)
        blueb.move(10, 110)

        blueb.clicked[bool].connect(self.setColor)

        self.square = QFrame(self)
        self.square.setGeometry(150, 20, 100, 100)
        self.square.setStyleSheet("QWidget { background-color: %s }" %
            self.col.name())

        self.setGeometry(300, 300, 280, 170)
        self.setWindowTitle('Toggle button')
        self.show()


    def setColor(self, pressed):

        source = self.sender()

        if pressed:
            val = 255
        else: val = 0

        if source.text() == "Red":
            self.col.setRed(val)
        elif source.text() == "Green":
            self.col.setGreen(val)
        else:
            self.col.setBlue(val)

        self.square.setStyleSheet("QFrame { background-color: %s }" %
            self.col.name())


if __name__ == '__main__':

    app = QApplication(sys.argv)
    ex = Example()
    sys.exit(app.exec_())
代码中我们创建了三个ToggleButton与一个QWidget。我们将QWidget的背景色设为黑色。ToggleButton会切换颜色值中的红色、绿色与蓝色部分。QWidget的背景颜色依赖于按下的按钮。
self.col = QColor(0, 0, 0)
这是初始黑颜色的值。
redb = QPushButton('Red', self)
redb.setCheckable(True)
redb.move(10, 10)
我们创建一个QPushButton并通过其setCheckable()方法来得到一个ToggleButton。
redb.clicked[bool].connect(self.setColor)
将clicked信号连接到用户自定义的方法。我们通过clicked信号操作一个布尔值。
source = self.sender()
我们得到了按下的按钮。
if source.text() == "Red":
    self.col.setRed(val)
如果按下的是red按钮,我们要相应地更新颜色中的红包部分。
self.square.setStyleSheet("QFrame { background-color: %s }" %
    self.col.name())
我们使用样式表来改变背景颜色。
QSlider(滑动条)
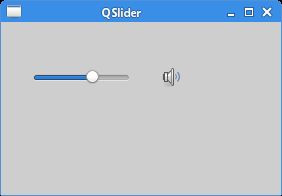
QSlider是一个带有简单滑块的控件。滑块可以前后拖动。我们可以通过拖动选择一个特定的值。有时使用滑动条比直接输入数字或使用旋转框更加自然。
在下面的例子中,我们会显示一个滑动条与一个标签,标签用于显示图片,并通过滑动条控件图片的显示 。
#!/usr/bin/python3
# -*- coding: utf-8 -*-

"""
ZetCode PyQt5 tutorial

This example shows a QSlider widget.

author: Jan Bodnar
website: zetcode.com
last edited: January 2015
"""

import sys
from PyQt5.QtWidgets import (QWidget, QSlider,
    QLabel, QApplication)
from PyQt5.QtCore import Qt
from PyQt5.QtGui import QPixmap


class Example(QWidget):

    def __init__(self):
        super().__init__()

        self.initUI()


    def initUI(self):

        sld = QSlider(Qt.Horizontal, self)
        sld.setFocusPolicy(Qt.NoFocus)
        sld.setGeometry(30, 40, 100, 30)
        sld.valueChanged[int].connect(self.changeValue)

        self.label = QLabel(self)
        self.label.setPixmap(QPixmap('mute.png'))
        self.label.setGeometry(160, 40, 80, 30)

        self.setGeometry(300, 300, 280, 170)
        self.setWindowTitle('QSlider')
        self.show()


    def changeValue(self, value):

        if value == 0:
            self.label.setPixmap(QPixmap('mute.png'))
        elif value > 0 and value <= 30:
            self.label.setPixmap(QPixmap('min.png'))
        elif value > 30 and value < 80:
            self.label.setPixmap(QPixmap('med.png'))
        else:
            self.label.setPixmap(QPixmap('max.png'))


if __name__ == '__main__':

    app = QApplication(sys.argv)
    ex = Example()
    sys.exit(app.exec_())
例子中我们模拟了一个音量控制。通过拖动滑块来改变标签上的图像。
sld = QSlider(Qt.Horizontal, self)
我们创建了一个水平滑动条。
self.label = QLabel(self)
self.label.setPixmap(QPixmap('mute.png'))
我们创建了一个QLabel控件并为它设置了一个初始音量图像。
sld.valueChanged[int].connect(self.changeValue)
我们将valueChanged信号连接到自定义的changeValue()方法。
if value == 0:
    self.label.setPixmap(QPixmap('mute.png'))
...
我们根据滑动条的值来设置标签的图像。在上面的代码中,当滑动条的值为0时我们为标签设置mute.png图像。
QProgressBar(进度条)
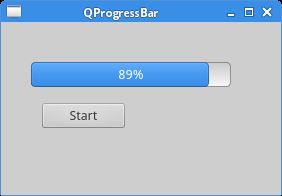
当处理长时间任务时我们会用到进度条。通过它的动画效果来告知用户任务的进度。PyQt5中的QProgressBar控件提供了水平与垂直的进度条。程序员可以为进度条设置最大与最小值,默认为0到99。
#!/usr/bin/python3
# -*- coding: utf-8 -*-

"""
ZetCode PyQt5 tutorial

This example shows a QProgressBar widget.

author: Jan Bodnar
website: zetcode.com
last edited: January 2015
"""

import sys
from PyQt5.QtWidgets import (QWidget, QProgressBar,
    QPushButton, QApplication)
from PyQt5.QtCore import QBasicTimer


class Example(QWidget):

    def __init__(self):
        super().__init__()

        self.initUI()


    def initUI(self):

        self.pbar = QProgressBar(self)
        self.pbar.setGeometry(30, 40, 200, 25)

        self.btn = QPushButton('Start', self)
        self.btn.move(40, 80)
        self.btn.clicked.connect(self.doAction)

        self.timer = QBasicTimer()
        self.step = 0

        self.setGeometry(300, 300, 280, 170)
        self.setWindowTitle('QProgressBar')
        self.show()


    def timerEvent(self, e):

        if self.step >= 100:
            self.timer.stop()
            self.btn.setText('Finished')
            return

        self.step = self.step + 1
        self.pbar.setValue(self.step)


    def doAction(self):

        if self.timer.isActive():
            self.timer.stop()
            self.btn.setText('Start')
        else:
            self.timer.start(100, self)
            self.btn.setText('Stop')


if __name__ == '__main__':

    app = QApplication(sys.argv)
    ex = Example()
    sys.exit(app.exec_())
在示例中我们创建了一个水平进度条与一个按钮。按钮可以启动和停止进度条。
self.pbar = QProgressBar(self)
这是QProgressBar的构造器。
self.timer = QtCore.QBasicTimer()
我们通过定时器(timer)对象来激活进度条。
self.timer.start(100, self)
我们调用定时器(timer)的start()方法来启动定时器。这个方法有两个参数:超时与事件接收对象。
def timerEvent(self, e):

    if self.step >= 100:

        self.timer.stop()
        self.btn.setText('Finished')
        return

    self.step = self.step + 1
    self.pbar.setValue(self.step)
每个QObject及其子类都有一个timerEvent()事件处理器。我们要重新实现这个事件处理器来响应定时器事件。
def doAction(self):

    if self.timer.isActive():
        self.timer.stop()
        self.btn.setText('Start')

    else:
        self.timer.start(100, self)
        self.btn.setText('Stop')
我们在doAction()方法中启动/停止定时器。
QCalendarWidget(日历控件)
QCalendarWidget提供了一个基于月份的日历控件。它使用户以一种简单直观的方式来选择日期。
#!/usr/bin/python3
# -*- coding: utf-8 -*-

"""
ZetCode PyQt5 tutorial

This example shows a QCalendarWidget widget.

author: Jan Bodnar
website: zetcode.com
last edited: January 2015
"""

import sys
from PyQt5.QtWidgets import (QWidget, QCalendarWidget,
    QLabel, QApplication)
from PyQt5.QtCore import QDate


class Example(QWidget):

    def __init__(self):
        super().__init__()

        self.initUI()


    def initUI(self):

        cal = QCalendarWidget(self)
        cal.setGridVisible(True)
        cal.move(20, 20)
        cal.clicked[QDate].connect(self.showDate)

        self.lbl = QLabel(self)
        date = cal.selectedDate()
        self.lbl.setText(date.toString())
        self.lbl.move(130, 260)

        self.setGeometry(300, 300, 350, 300)
        self.setWindowTitle('Calendar')
        self.show()


    def showDate(self, date):

        self.lbl.setText(date.toString())


if __name__ == '__main__':

    app = QApplication(sys.argv)
    ex = Example()
    sys.exit(app.exec_())
示例中创建了一个日历控件和一个标签控件。选择的日期会显示在标签控件中。
cal = QCalendarWidget(self)
创建了一个QCalendarWidget控件。
cal.clicked[QDate].connect(self.showDate)
当选择了一个日期时,控件的clicked[QDate]信号会被触发。我们连接这个信号到用户定义的showDate()方法中。
def showDate(self, date):

    self.lbl.setText(date.toString())
我们通过调用selectedDate()方法取得用户选择的日期,然后将日期对象转换成字符串并将其设为标签的显示文本。
在这部分教程中,我们学习了几个常用控件。