Angular7集成Ueditor完整版
1. 安装依赖
npm install ueditor --save
2. 下载UEditor配置文件
官方地址:http://ueditor.baidu.com/website/download.html
百度云盘: 边城孤客 提取码:chpl
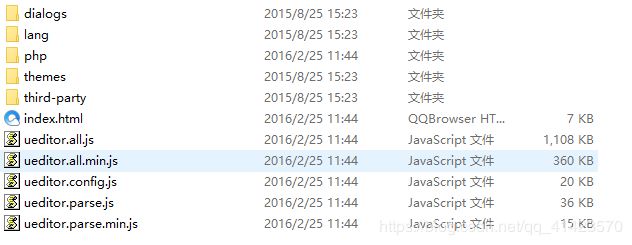
解压后目录为

将配置的文件复制到资源目录下

3. 在共享模块里导入配置信息
import { UEditorModule } from 'ngx-ueditor';
---
const THIRDMODULES = [NgZorroAntdModule, CountdownModule, NgxTinymceModule, UEditorModule];
@NgModule({
  imports: [
    CommonModule,
    FormsModule,
    RouterModule,
    ReactiveFormsModule,
    AlainThemeModule.forChild(),
    DelonABCModule,
    DelonChartModule,
    DelonACLModule,
    DelonFormModule,
    // third libs
    ...THIRDMODULES,
    // 找到你复制的文件位置
    UEditorModule.forRoot({
      js: [
        `../../assets/ueditor/ueditor.all.min.js`,
        `../../assets/ueditor/ueditor.config.js`,
      ],
      // 默认前端配置项
      options: {
        UEDITOR_HOME_URL: '../../assets/ueditor/'
      }
    })
  ],
4.开始使用
1.创建配置文件 ueditor-config.ts
// 富文本框编辑器配置信息
export class UEditorConfig {
    wordCount = true; // 文字计数
    initialFrameHeight = 420; // 设置高度
    initialFrameWidth = '100%';// 设置宽度
    enableAutoSave = false;
    /* 上传图片配置项 */
    imageActionName = 'uploadimage' /* 执行上传图片的action名称 */;
    imageFieldName = 'upfile' /* 提交的图片表单名称 */;
    imageMaxSize = 2048000 /* 上传大小限制,单位B */;
    imageAllowFiles = [
        '.png',
        '.jpg',
        '.jpeg',
        '.gif',
        '.bmp',
    ] /* 上传图片格式显示 */;
    imageCompressEnable = true /* 是否压缩图片,默认是true */;
    imageCompressBorder = 1600 /* 图片压缩最长边限制 */;
    imageInsertAlign = 'none' /* 插入的图片浮动方式 */;
    imageUrlPrefix = 'loacalhost:8080/sysAlone/viewImg?imagePath='; /* 图片访问路径前缀,可配置您的文件访问地址 */;
    imagePathFormat= '' /* 上传保存路径,可以自定义保存路径和文件名格式,不使用本地保存,可不配置 */;
    replace = '';
    serverUrl = 'loacalhost:8080/ueditorUploadImg'; // 服务器统一请求接口路径
    toolbars = [
        [
            'bold', 'italic', 'underline', 'fontborder', 'strikethrough', 'superscript', 'subscript', 'removeformat', 'formatmatch', 'autotypeset', 'blockquote', 'pasteplain', '|',
            'fontfamily', 'fontsize', 'customstyle', 'paragraph', '|', 'forecolor', 'backcolor', 'insertorderedlist', 'insertunorderedlist', '|',
            'rowspacingtop', 'rowspacingbottom', 'lineheight', '|',
            'fullscreen', 'source', '|', 'undo', 'redo', '|',
            'indent', 'justifyleft', 'justifycenter', 'justifyright', 'justifyjustify', '|', 'touppercase', 'tolowercase', '|',
            'link', 'unlink', 'anchor', '|', 'imagenone', 'imageleft', 'imageright', 'imagecenter', '|',
            'simpleupload', 'insertimage', 'emotion', 'scrawl', 'insertvideo', 'attachment', 'map', 'insertframe', 'insertcode', 'template', '|',
            'horizontal', 'date', 'time', 'spechars', 'wordimage', '|',
            'inserttable', 'deletetable', 'insertparagraphbeforetable', 'insertrow', 'deleterow', 'insertcol', 'deletecol', 'mergecells', 'mergeright', 'mergedown', 'splittocells', 'splittorows', 'splittocols', 'charts', '|',
            'preview', 'searchreplace'
        ]
    ];
};
2.在ts文件中声明配置信息变量
import { UEditorConfig } from './config/ueditor-config';
...省略...
export class NewBlogComponent implements OnInit {
	constructor() {
	    }
	ueditorConf = new UEditorConfig();
}
3.在html中引入标签
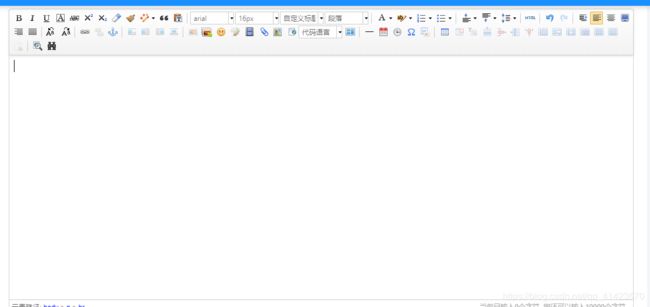
<ueditor [(ngModel)]="blogInfo.contentText" [config]="ueditorConf">ueditor>
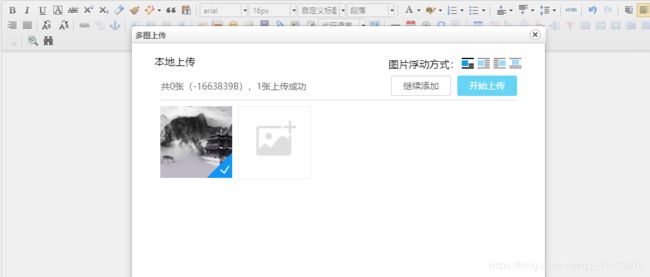
图片上传配置说明
与图片上传配置相关的配置
//上传图片配置项
imageActionName = ‘uploadimage’ // 执行上传图片的action名称 ;
imageFieldName = ‘upfile’ // 提交的图片表单名称 ;
imageMaxSize = 2048000 // 上传大小限制,单位B ;
imageAllowFiles = [
‘.png’,
‘.jpg’,
‘.jpeg’,
‘.gif’,
‘.bmp’,
] // 上传图片格式显示 ;
imageCompressEnable = true // 是否压缩图片,默认是true ;
imageCompressBorder = 1600 // 图片压缩最长边限制 ;
imageInsertAlign = ‘none’ // 插入的图片浮动方式 ;
imageUrlPrefix = ‘loacalhost:8080/sysAlone/viewImg?imagePath=’; // 图片访问路径前缀,可配置您的文件访问地址 ;
imagePathFormat= ‘’ // 上传保存路径,可以自定义保存路径和文件名格式,不使用本地保存,可不配置 ;
replace = ‘’;
serverUrl = ‘loacalhost:8080/ueditorUploadImg’; // 服务器统一请求接口路径
以上配置中,我们需要关注三个重要部分
imageActionName = ‘uploadimage’ // 执行上传图片的action名称
serverUrl = ‘loacalhost:8080/ueditorUploadImg’; // 服务器统一请求接口路径
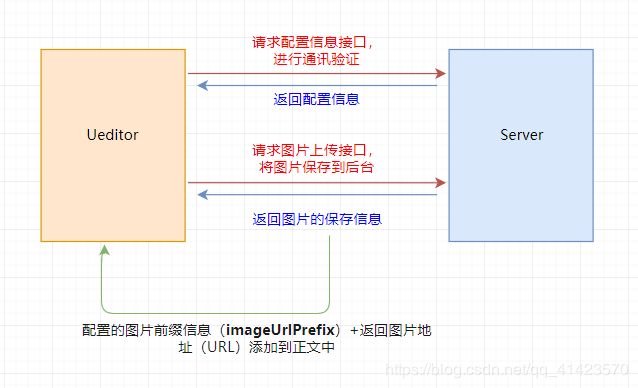
通过观察这两个配置,我们发现ueditor只有一个负责与后台进行交互的接口,后台是根据不同的Action进行分别处理
imageUrlPrefix = ‘loacalhost:8080/sysAlone/viewImg?imagePath=’; //图片访问路径前缀,可配置您的文件访问前缀
这个配置表明Ueditor可以通过接口访问到后台的图片信息
所以他的通讯大概是这样的

好了,开始搞我们的后台服务吧
首先,前端的控制台报这个错,请求后台配置项http错误,上传功能将不能正常使用
![]()
这是编辑器在初始化时,首先会向后端请求配置信息,进行通讯校验。其实也没啥用处;
但是为了防止报错,你需要设置一个接口;响应他的校验
NO.1 配置信息的获取
请求信息: GET {“action”: “config”}
返回信息:
// 需要支持callback参数,返回jsonp格式
{
“imageUrl”: “http://localhost/ueditor/php/controller.php?action=uploadimage”,
“imagePath”: “/ueditor/php/”,
“imageFieldName”: “upfile”,
“imageMaxSize”: 2048,
“imageAllowFiles”: [".png", “.jpg”, “.jpeg”, “.gif”, “.bmp”]
}
返回的是JSONP请求,一定要明确。。。。
另外,实现上传功能还需要一个图片上传接口
NO.2 图片上传接口
请求信息:{“action”: “uploadimage”} “upfile”: File Data
返回信息:(格式不能自定义,否则识别不了)
{
“state”: “SUCCESS”,
“url”: “upload/demo.jpg”,
“title”: “demo.jpg”,
“original”: “demo.jpg”
}
所以,两个接口合并之后,可以这样写。。。
/**
	 * -------------------------------------
	 * @Description: Ueditor图片上传功能
	 * @param action ueditor发出的action参数,以分发不同的请求
	 * @return
	 * @Date: 2019年10月11日 下午11:41:43
	 * @version 1.0
	 * @author canghai
	 * @Copyright:2019 canghai.blog
	 * -------------------------------------
	 */
	@ResponseBody
	@RequestMapping(value = "/ueditorUploadImg")
	public Object uploadSimpleFile(String action, HttpServletRequest request) {
		// 返回对象,fastJSon
		JSONObject jsonObject = new JSONObject();
		// 根据配置的action响应不同的请求
		if ("config".equals(action)) {
			// 这些配置的参数只是起到一个校验的作用,也没有啥实际作用
			jsonObject.put("imageUrl", "http://localhost:8092/ueditorUploadImg?action=uploadimage");
			jsonObject.put("imagePath", "");
			jsonObject.put("imageFieldName", "upfile");
			jsonObject.put("imageMaxSize", 2048);
			jsonObject.put("imageAllowFiles", new String[] {".png", ".jpg", ".jpeg", ".gif", ".bmp"});
			// 注意!注意!注意!一定要返回JSONP的请求,
			JSONPObject jsonpObect = new JSONPObject();
			jsonpObect.addParameter(jsonpObect);
			return jsonpObect.toJSONString();
		}else if("uploadimage".equals(action)){
			// 上传文件,懒得写注释了,就是普通的文件上传
			MultipartHttpServletRequest multipartRequest = WebUtils.getNativeRequest(request, MultipartHttpServletRequest.class);
			Iterator<String> iterator = multipartRequest.getFileNames();
			MultipartFile multipartFile = multipartRequest.getFile(iterator.next());
			String originalFilename = multipartFile.getOriginalFilename();
			String suffixName = originalFilename.substring(originalFilename.lastIndexOf("."));
			String filePath = CAPropertites.UPLOAD_SIMPLE_FILEPATH + UUID.randomUUID() + suffixName;
			File upFile = new File(CAPropertites.UPLOAD_SIMPLE_FILEPATH);
			if (!upFile.isDirectory()) {
				upFile.mkdirs();
			}
			try {
				multipartFile.transferTo(new File(filePath));
				// 封装返回参数,注意一定要按照这个格式
				// 返回状态,成功SUCCESS/失败ERROR
				jsonObject.put("state", "SUCCESS");
				// 文件原始名字
				jsonObject.put("original", originalFilename);
				// 文件大小
				jsonObject.put("size",  multipartFile.getSize());
				// 文件类型
				jsonObject.put("type", suffixName);
				// 文件上传后的路径
				jsonObject.put("url", filePath);
			} catch (IllegalStateException | IOException e) {
				e.printStackTrace();
			}
		}
		return jsonObject;
	}

