Oracle 10g安装配置
vncviewer 下载:https://www.realvnc.com/download/vnc/
TightVNC: http://www.tightvnc.com/download.php
RealVNC: https://www.realvnc.com/download/vnc/
TigerVNC: http://sourceforge.net/projects/tigervnc/files/tigervnc/
RealVNC: https://www.realvnc.com/download/vnc/
TigerVNC: http://sourceforge.net/projects/tigervnc/files/tigervnc/
X图形界面安装:
yum install xorg-x11-server-devel
yum install xorg-x11-server-sourceyum install xorg-x11-server-Xorg
yum install xorg-x11-xinit
以上安装后即可以使用startx xhost了。
Oracle版本:
10201_database_linux_x86_64.cpio
依赖包安装:
Glibc-kernheaders-2.4-9.1.87.i386.rpm
Glibc-headers-2.3.4-2.i386.rpm
Glibc-devel-2.3.4-2.i386.rpm
Compat-gcc-32-3.2.3-47.3.i386.rpm
Compat-libstdc++-33-3.2.3-47.3.i386.rpm
compat-gcc-32-c++-3.2.3-47.3.i386.rpm
compat-libgcc-296-2.96-132.7.2.i386.rpm
compat-libstdc++-296-2.96.132.7.2.i386.rpm
gcc-3.4.3-9.EL4.i386.rpm
libstdc++-devel-3.4.3-9.EL4.i386.rpm
gcc-c++-3.4.3-9.EL4.i386.rpm
libaio-0.3.102-1.i386.rpm
libaio-devel-0.3.102-1.i386.rpm
openmotif21-2.1.30-11.RHEL4.2.i386.rpm
zlib-devel-1.2.1.2-1.i386.rpm
freetype-devel-2.1.9-1.i386.rpm
fontconfig-devel-2.2.3-7.i386.rpm
pkgconfig-0.15.0-3.i386.rpm
搜索相关的包,进行安装
创建用户和组
groupadd dba
groupadd oinstall
useradd oracle -g oinstall -G dba
passwd oracle
groupadd oinstall
useradd oracle -g oinstall -G dba
passwd oracle
创建安装目录
mkdir -p /home/oracle/product/10gmkdir /home/oracle/database
chown -R oracle.oinstall /home/oracle
chmod 755 -R /home/oracle
配置
vi /etc/sysctl.conf
kernel.shmall = 4294967296
kernel.shmmni = 4096kernel.sem = 250 32000 100 128
fs.file-max = 65536
net.ipv4.ip_local_port_range = 1024 65000
net.core.rmem_default = 262144
net.core.rmem_max = 262144
net.core.wmem_default = 262144
net.core.wmem_max = 262144
sysctl -p使配置生效。
可以使用命令修改:
~]# sysctl -w net.core.somaxconn=2048
net.core.somaxconn = 2048
配置
vi /etc/security/limits.conf
oracle soft nproc 2047
oracle hard nproc 16384
oracle soft nofile 1024
oracle hard nofile 65536
oracle hard nproc 16384
oracle soft nofile 1024
oracle hard nofile 65536
配置
vi /etc/pam.d/login
session required /lib64/security/pam_limits.so
session required pam_limits.so
修改
/etc/redhat-release
redhat-4
配置.bash_profile
export ORACLE_BASE=/home/oracle/
export ORACLE_HOME=/home/oracle/product/10g
export ORACLE_SID=lwx123
export PATH=$PATH:$ORACLE_HOME/bin
export TNS_ADMIN=$ORACLE_HOME/network/admin
export NLS_LANG=AMERICAN_AMERICA.ZHS16GBK
export LANG=AMERICAN_AMERICA.ZHS16GBK
export JAVA_HOME=/usr/java/jdk1.7.0_71
export PATH=$JAVA_HOME/bin:$PATH
export JAVA_FONTS=/usr/share/fonts/zh_CN/TrueType
使配置生效: source /home/oracle/.bash_profile
解压数据库安装文件:
cpio -idmv < 10201_database_linux_x86_64.cpio
安装:
进入解压目录database目录,以Oracle用户运行安装:
./runInstaller
报错:DISPLAY not set. Please set the DISPLAY and try again,解决:
export DISPLAY=:0.0
xhost +
xhost +
报错:libXp.so.6 等等,
安装:
yum -y install libXp.i686
yum -y install libXt.i686
yum -y install libXtst.i686
执行:X,
运行./runInstaller,就会在服务器本地打开图形安装界面。
修改防火墙设置:
/etc/sysconfig/iptables
添加:
-A RH-Firewall-l-INPUT -p tcp -m tcp –dport 5801 -j ACCEPT
-A RH-Firewall-l-INPUT -p tcp -m tcp –dport 5901 -j ACCEPT
-A RH-Firewall-l-INPUT -p tcp -m tcp –dport 6001 -j ACCEPT
添加:
-A RH-Firewall-l-INPUT -p tcp -m tcp –dport 5801 -j ACCEPT
-A RH-Firewall-l-INPUT -p tcp -m tcp –dport 5901 -j ACCEPT
-A RH-Firewall-l-INPUT -p tcp -m tcp –dport 6001 -j ACCEPT
启动:lsnrctl start
登录:
sqlplus /nolog
connect / as sysdba
connect / as sysdba
安装vncserver
yum install vnc-server
yum search vncviewer
yum install tsclient
yum search tightvnc
yum install tigervnc-server tigervnc
yum search vncviewer
yum install tsclient
yum search tightvnc
yum install tigervnc-server tigervnc
安装VNC server 方法2:
For CentOS/RHEL 6:
# yum groupinstall "Desktop"
For CentOS/RHEL 5:
# yum groupinstall "GNOME Desktop Environment"
# yum groupinstall "Desktop"
For CentOS/RHEL 5:
# yum groupinstall "GNOME Desktop Environment"
依赖包:yum install pixman pixman-devel libXfont
安装vnc server : yum install vnc-server
创建vnc用户:
# useradd user1
# passwd user1
# su - user1
$ vncpasswd
$ exit
$ vncpasswd
$ exit
配置vnc用户:
vi /etc/sysconfig/vncservers
VNCSERVERS="1:user1 2:user2"
VNCSERVERARGS[1]="-geometry 800x600"
VNCSERVERARGS[2]="-geometry 1024x768"
启动:service vncserver start
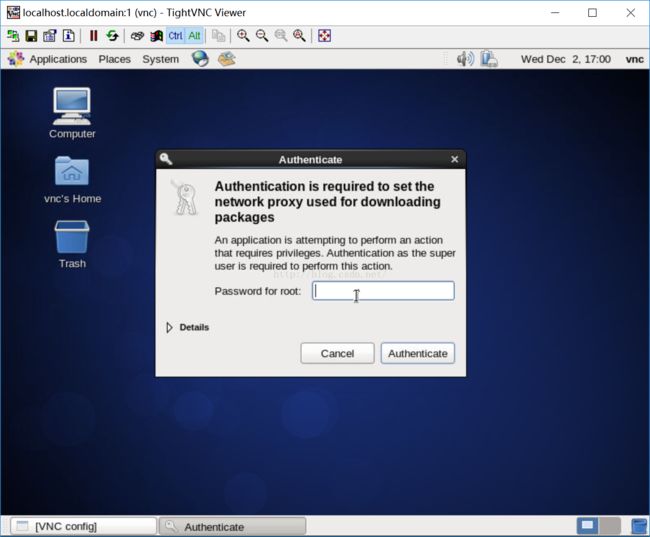
使用vncviewer连接vnc server ,
vncviewer 192.168.1.11:1
发现成功连接!
使用用户vnc,登录客户端后,切换到oracle用户,运行./runInstaller,即可以看到以下安装界面:
(参考文档:http://blog.sina.com.cn/s/blog_57edaf600100serf.html)
vncserver启动:
/etc/init.d/vncserver restart
这里使用vnc作为远程X服务,但是连接后,远程的窗口不显示。。。。。,第二种方法在本地不显示窗口,但是远程显示
窗口。
有一篇据说是无界面安装,http://www.bitscn.com/pdb/oracle/201303/244260.html仅作参考,尚未实验过。


