Geotrellis学(踩)习(坑)笔记(四)——ETL工具
看官方文档的时候看到geotrellis工具有一个看上去很强大的ETL工具,但是看了好几次都看不明白他到底是干什么的,理解和跑通ETL是一个超级曲折艰难的过程。这篇文章就来记录一下ETL的曲折过程~
首先ETL是个啥??
参考资料:https://docs.microsoft.com/en-us ... relational-data/etl
Extract, transform, and load (ETL) is a data pipeline used to collect data from various sources, transform the data according to business rules, and load it into a destination data store. The transformation work in ETL takes place in a specialized engine, and often involves using staging tables to temporarily hold data as it is being transformed and ultimately loaded to its destination.
The data transformation that takes place usually involves various operations, such as filtering, sorting, aggregating, joining data, cleaning data, deduplicating, and validating data.
ETL工具就是一个从数据仓库里抽取数据、转换数据和加载数据到目的端的过程。
这样说感觉还是很抽象,没有一个很具象的概念,那就先直接上手做吧~
首先我在geotrellis的geotrellis-chatta-demo里面把data全都拷贝到我的工程里,作为测试数据。
import geotrellis.raster.Tile
import geotrellis.spark.SpatialKey
import geotrellis.spark.etl.{Etl}
import geotrellis.spark.util.SparkUtils
import geotrellis.vector.ProjectedExtent
import org.apache.spark.{SparkConf}
object GeoTrellisETL {
def main(args: Array[String]): Unit = {
var args=new Array[String](6)
args(0)="--input"
args(1)="D:\\IdeaProjects\\GeotrellisETL\\data\\input.json"
args(2)="--output"
args(3)="D:\\IdeaProjects\\GeotrellisETL\\data\\output.json"
args(4)="--backend-profiles"
args(5)="D:\\IdeaProjects\\GeotrellisETL\\data\\backend-profiles.json"
goETL(args)
}
def goETL(args: Array[String]): Unit = {
implicit val sc = SparkUtils.createSparkContext("GeoTrellis ETL SinglebandIngest", new SparkConf(true).setMaster("local"))
try {
Etl.ingest[ProjectedExtent, SpatialKey, Tile](args)
println("finished!")
} finally {
sc.stop()
}
}
}
三个文件分别是:
input.json:
[
{
"name": "dl",
"format": "geotiff",
"backend": {
"type": "hadoop",
"path": "D:\\IdeaProjects\\GeotrellisETL\\data\\arg_wm\\hangzhou1984.tiff"
},
"cache": "NONE"
}
]
output.json:
{
"backend": {
"type": "file",
"path": "D:\\IdeaProjects\\GeotrellisETL\\data\\HZ4326_output4326"
},
"reprojectMethod": "buffered",
"cellSize": {
"width": 256.0,
"height": 256.0
},
"encoding":"png",
"tileSize": 256,
"pyramid": true,
"resampleMethod": "nearest-neighbor",
"keyIndexMethod": {
"type": "zorder"
},
"layoutScheme": "zoomed",
"crs": "EPSG:4326"
}
backend-profiles.json:
{
"backend-profiles": [
{
"name": "accumulo-local",
"type": "accumulo",
"zookeepers": "localhost",
"instance": "gis",
"user": "root",
"password": "secret"
},
{
"name": "cassandra-local",
"type": "cassandra",
"allowRemoteDCsForLocalConsistencyLevel": false,
"localDc": "datacenter1",
"usedHostsPerRemoteDc": 0,
"hosts": "localhost",
"replicationStrategy": "SimpleStrategy",
"replicationFactor": 1,
"user": "",
"password": ""
}
]
}
运行一下,发现报错:

后来发现是jar包的版本问题:
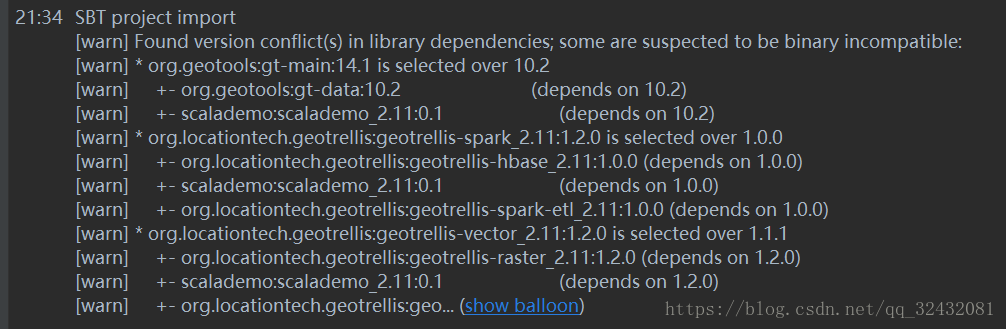
解决方法:把sbt里的包全部换成1.0.0就好了。
然后运行代码,可以看到在output的路径里生成了不同层级的文件夹,每个文件夹下面有若干个没有后缀名的文件。一开始一直以为自己搞错了,因为这些文件根本看不了,也不能转成jpg。后来找了各种资料之后才知道这里生成出来的是layer文件,如果要看的话,要把layer进行渲染,才能保存成jpeg或者png等格式。
于是我对layer进行了渲染:
import java.io.File
import geotrellis.proj4.{LatLng, WebMercator}
import geotrellis.raster.Tile
import geotrellis.raster.render.{ColorMap, ColorRamp, RGB}
import geotrellis.spark._
import geotrellis.spark.io._
import geotrellis.spark.io.file._
import geotrellis.spark.util.SparkUtils
import geotrellis.vector.Extent
import org.apache.spark.SparkConf
object ETLOutputRender{
val colorMap1 =
ColorMap(
Map(
0 -> RGB(0,0,0),
1 -> RGB(255,255,255)
)
)
val colorRamp =
ColorRamp(RGB(0,0,0), RGB(255,255,255))
.stops(100)
.setAlphaGradient(0xFF, 0xAA)
val zoomID=6
def main(args: Array[String]): Unit = {
println("hello geotrellis")
/* Some location on your computer */
implicit val sc = SparkUtils.createSparkContext("GeoTrellis ETL SinglebandIngest", new SparkConf(true).setMaster("local"))
val catalogPath: String ="D:\\IdeaProjects\\GeotrellisETL\\data\\DL3857_output3857"
val store: AttributeStore = FileAttributeStore(catalogPath)
val reader = FileLayerReader(store,catalogPath)
// for( zoom <- 0 to zoomID){
val layerId = LayerId("dl",zoomID)
val broadcast_zoom =sc.broadcast(zoomID)
val sameLayer: TileLayerRDD[SpatialKey] = reader.read(layerId)
//TODO change to mapPartitions
val result =sameLayer.map(myfuncPerElement).collect
// }
}
def myfuncPerElement(e:(SpatialKey,Tile)):Int = {
val zoom_dir:File= new File("D:\\IdeaProjects\\GeotrellisETL\\data\\DL3857_output3857\\jpgs_benshen\\"+zoomID)
if(!zoom_dir.exists()){
zoom_dir.mkdir()
}
val col_dir = new File(zoom_dir+"\\"+e._1.col)
if(!col_dir.exists()){
col_dir.mkdir()
}
// e._2.renderJpg(colorRamp).write(col_dir+"\\"+(math.pow(2,zoomID)-e._1.row-1).toInt+".jpg")
e._2.renderJpg(colorRamp).write(col_dir+"\\"+e._1.row+".jpg")
return 1
}
}
最后就可以在输出路径里看到渲染之后的图片啦。