React Native控件之Text组件介绍
React Native控件之Text组件介绍
(一)前言
前面在讲解View视图的时候,我们使用过Text组件,这篇文章详细的来介绍一下Text组件。
(二)基本用法
Text组件是React中的一个基本组件,这个和iOS上的UILabel与Android上的TextView组件相类似,就是用来显示文本的,这个空间除了基本的显示布局之外,可以嵌套使用,设置样式,添加事件处理功能。下面我们给出一个简答的例子:
'use strict'
import React, { Component } from 'react';
import  {
   AppRegistry,
   StyleSheet,
   Text,
   View
} from 'react-native'
var PerfectProject = React.createClass({
    render: function(){
       return (
           I am learning React Native!
              Please study hard!


       );
    },
});
var styles = StyleSheet.create({
  outerText:{
    margin:40,
    textAlign:'center',
    color:'red',
    fontSize:28,
    fontFamily:'Cochin'
  },
  innerText: {
    color:'green',
    fontWeight:'bold',
  },
});
AppRegistry.registerComponent('PerfectProject',() => PerfectProject);
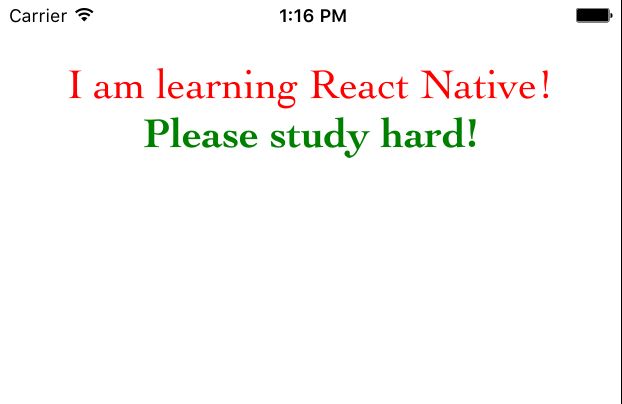
上面是Text组件中嵌套另一个Text组件,用StyleSheet方法定义它们的演示。
运行效果如下: 
【注意】这一点我们需要特别注意,如果内部Text组件没有定义自己的样式,那么内部Text组件会继承外部组件的样式,哪一项自己没有定义,就要继承哪一项。
上面我们使用了margin、textAlign、color、fontSize、fontFamily、fontWeight样式,接下来,我们总结一些Text组件的属性方法。
(三)属性方法
| 名称 | 类型 | 属性还是方法 | 作用 | 平台 |
|---|---|---|---|---|
| allowFontScaling | bool | 属性 | 控制字体文本是否根据iOS的设置进行自动缩放 | iOS平台,Android平台不适用 |
| numberOfLines | number | 属性 | 设置Text显示文本的行数,如果显示的内容超过了行数,默认其他多余的信息就不会显示了。 | 全平台 |
| onLayout | function | 方法 | 当布局发生变动时自动触发该方法,其中function的参数如下:{nativeEvent: {layout: {x, y, width, height}}} | 全平台 |
| onLongPress | function | 方法 | 当Text视图被长按的时候,该方法被调用 | 全平台 |
| onPress | function | 方法 | 该方法当文本被点击的时候调用这个方法 | 全平台 |
在这里我只是举出一些比较常用的属性方法,只是起到抛砖引玉的作用,如果要了解更多的知识可以查看官方网址。
(四)风格样式——Style标签
Text组件可以使用View组件所有的Style,View组件的所有Style可以查看官方文档View的Style汇总
| 名称 | 作用 | Value |
|---|---|---|
| color | 字体颜色 | 值的形式有多种,color |
| fontFamily | 字体名称 | 自行查看相关字体 |
| fontSize | 字体大小 | 值为 数字 |
| fontStyle | 字体风格 | enum(‘normal’,’italic’) |
| fontWeight | 字体粗细权重 | enum(‘normal’,’bold’,’100’,’200’,’300’,’400’,’500’,’600’,’700’,’800’,’900’),指定字体粗细,normal和bold适用于大多数字体,不是所有的字体的值都能用数字值,在这种情况下,最接近的值被选择。 |
| lineHeight | 行高 | 数字(number) |
| textAlign | 文本对齐方法 | enum(‘auto’,’left’,’right’,’center’,’justify’) 指定文本对齐方式,‘justify’值只支持iOS,在Android上会自动回退到left。 |
| textDecorationLine | 横线位置 | enum(‘none’, ‘underline’, ‘line-through’, ‘underline line-through’) |
| textShadowColor | 阴影效果颜色 | 值的形式有多种,color |
| textShadowOffset | 设置阴影效果 | {width:number,height:number} |
| textShadowRadius | 阴影效果圆角 | 数字(number) |
| textAlignVertical | 文本垂直对齐方式 | enum(‘auto’,’top’,’bottom’,’center’) 不支持iOS,只支持Android |
| letterSpacing | 字符间距 | 数字(number)只支持iOS,不支持Android |
| textDecorationColor | 值的形式有多种,color只支持iOS,不支持Android | |
| textDecorationStyle | 横线的风格 | enum(‘solid’,’double’,’dotted’,’dashed’)只支持iOS,不支持Android |
| writingDirection | 文本方向 | enum(‘auto’,’ltr’,’rtl’)只支持iOS,不支持Android |
(五)特别注意几点
5.1 嵌套特点
和web上面一致的设计方式,我们通过嵌套包裹的方案,相同的属性的文本可以用父标签进行包裹,然后内部特殊属性的文本采用子标签方案,具体可以看以下例子:
var PerfectProject = React.createClass({
    render: function(){
       return (
           I am learning
                React Native! Please study hard!


       );
    },
});
var styles = StyleSheet.create({
  outerText:{
    margin:40,
    textAlign:'center',
    color:'red',
    fontSize:28,
    fontFamily:'Cochin'
  },
  innerText: {
    color:'green',
    fontSize:40,
    fontWeight:'bold',
  },
});
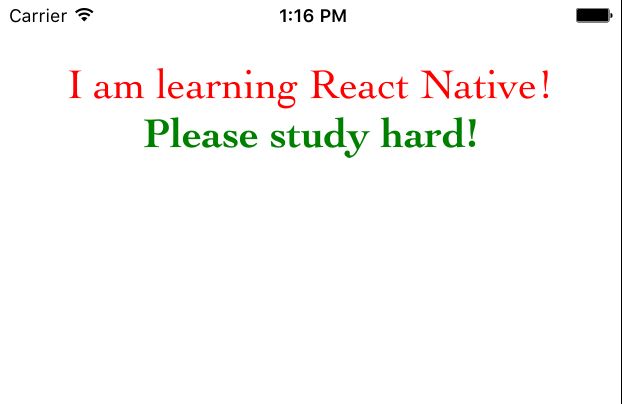
具体运行效果: 
可以看到内部的Text组件字体大小变为40,颜色变为绿色,字体变粗。
5.2 Text组件容器布局规则
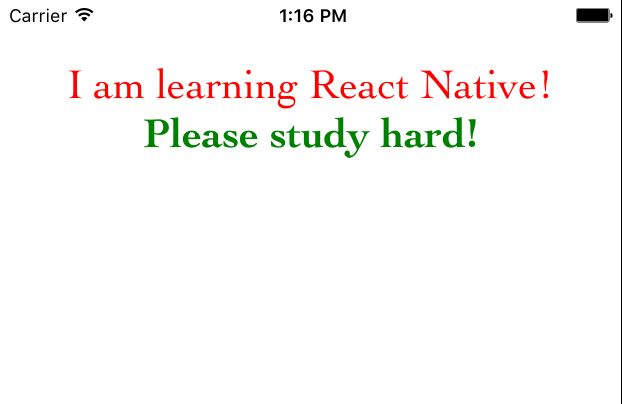
之前我们介绍过View组件,该组件是支持FlexBox(弹性布局),但是Text组件直接是文本布局,也就是收一个Text接着Text,横向的布局,如果文本已经到了末尾了,那就直接换行。
我们来看一下两种代码的对比:
   <Text>
           <Text style={styles.outerText}>I am learningText>
           <Text style={styles.innerText}>  React Native! Please study hard!Text>
Text>可以看出两个Text直接横向排布,第二个Text直接接在第一个Text后面。但是如果该父控件采用View,View是直接支持FlexBox布局,默认内部的分布是垂直分布,具体看代码:
var PerfectProject = React.createClass({
    render: function(){
       return (

           I am learning
             React Native! Please study hard!

       );
    },
});
var styles = StyleSheet.create({
  outerText:{
    padding:20,
    color:'red',
    fontSize:28,
    fontFamily:'Cochin'
  },
  innerText: {
    color:'green',
    fontSize:28,
    fontWeight:'bold',
  },
});5.3样式继承规则
组件可以嵌套,而且样式还支持继承,也就说父组件定义了相关样式,如果子组件没有重写样式的话,那么该子组件会继承父组件定义的样式。
5.4筑巢Text(Nested Text)
iOS与Android允许开发者显示富文本通过注解需要指定粗细、色彩文本字符串范围(NSAttributedString On iOS,SpannableString on Android)。特别的,这是非常单调乏味。对于React Native,我们决定使用web范式来实现Nested Text一样的效果。
<Text style={{fontWeight: 'bold'}}>
  I am bold
  <Text style={{color: 'red'}}>
    and red
  Text>
Text>
在渲染到屏幕之前,React Native转换上面的代码到平台性的NSAttributedString或者SpannableString,它们包含了以下信息:
"I am bold and red"
0-9: bold
9-17: bold, red
5.5筑巢View (Nested Views)(iOS平台,Android平台不适用)
在iOS平台,你能nest Views在Text组件中,下面是一个例子:
<Text>
  There is a blue square
  <View style={{width: 50, height: 50, backgroundColor: 'steelblue'}} />
  in between my text.
Text>
为了利用这个特性,你必须指定这个View的宽度(Width)和高度(Height)。
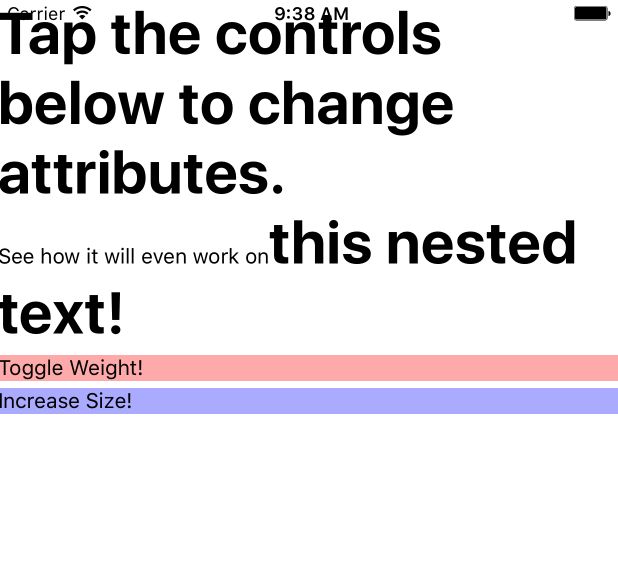
(六)Text例子
'use strict'
import React, { Component } from 'react';
import  {
   AppRegistry,
   StyleSheet,
   Text,
   View
} from 'react-native'
var PerfectProject = React.createClass({
   getInitialState: function(){
      return {fontWeight: 'bold', fontSize: 20};
   },
   toggleWeight: function(){
     this.setState({fontWeight: this.state.fontWeight==='bold'?'normal':'bold'});
   },

   increaseSize: function(){
     this.setState({fontSize: this.state.fontSize+1});
   },
   render: function(){
    var curStyle = {fontWeight: this.state.fontWeight, fontSize: this.state.fontSize};
       return (
         <View>
            <Text style={curStyle}>
             Tap the controls below to change attributes.
            Text>

            <Text>
               <Text>
                  See how it will even work on
                  <Text style={curStyle}>
                     this nested text!
                  Text>
               Text>
            Text>
            <Text style={styles.toggleWeightText} onPress={this.toggleWeight}>
                   Toggle Weight!
            Text>
            <Text style={styles.changeSizeText} onPress={this.increaseSize}>
                  Increase Size!
            Text>
         View>
       );
    },
});
var styles = StyleSheet.create({
  toggleWeightText: {
    backgroundColor: '#ffaaaa',
    marginTop: 5,
  },
  changeSizeText: {
    backgroundColor: '#aaaaff',
    marginTop: 5,
  },
});
AppRegistry.registerComponent('PerfectProject',() => PerfectProject);(七)总结
上面讲了Text组件,总结了Text属性方法,其实在实际开发过程中,才能真正体会到Text的用法,如果有不清楚的的地方可以查看官方文档。


