OpenGL Rim Shader(轮廓)
From:http://roxlu.com/2014/037/opengl-rim-shader
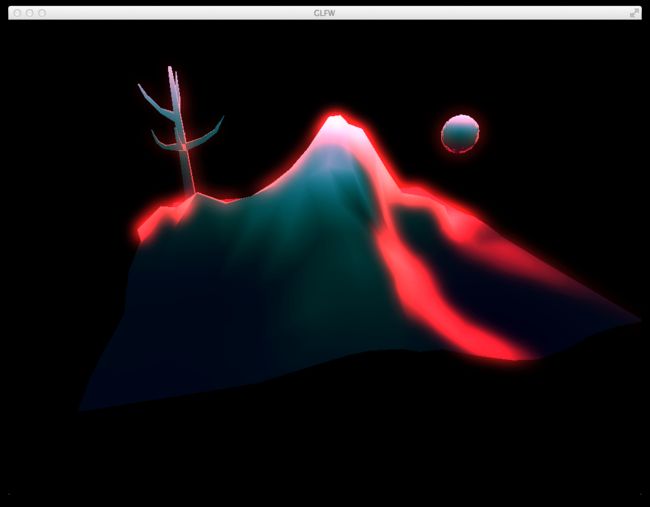
Using a rim light gives your shading a nice volumentric effect which can greatly enhance the contrast with the background. A rim shader is very simple but has a great result. In this screenshot I applied a rim light effect which I blurred a bit to make it even more effective.
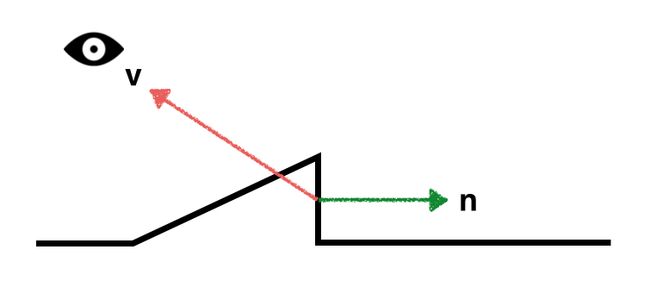
To create your rim shader, first a bit of background about the vectors that we need to perform the calculations. The contribution of the rim shading should be bigger around the peaks. Around the peaks, some normals are pointing towards the eye/cam position and some are pointing away. In the image below you can see that the angle between the normal and the eye vector (v) is big.
Getting the eye vector in your shader is easy. You convert your vertex position to view space by multiplying it with your view matrix, then you normalize and negate it.
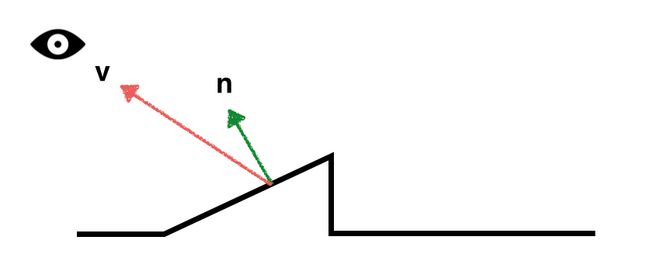
Below you can see how small the angle between the eye and the normal of the other face is. It's clearly a lot smaller. This means that the rim contribution for this second drawing should be less then the first one.
In short you can say, the bigger the angle between the eye vector (v) and the normal (n), the bigger the contribution of the rim shading. To calculate this, we use the dot product which gives us the cosine between two vectors. As you might know, the cosine between two vectors that are perpendicular is 0. You can read up a bit on the dot product here. Because we want the contribution of the rim shading to be bigger when the angles are bigger, we will use 1.0 - dot(normal, eye_vector). The 1.0 - part is necessary to make sure that the value will be bigger when the angle is bigger. E.g. when the vectors are perpendicular the contribution will be 1.0 (as the dot product is zero).
In the GLSL example below we're implementing this rim shader, but we're skipping one important part to show you how using the calculated rim-contribution value looks like:
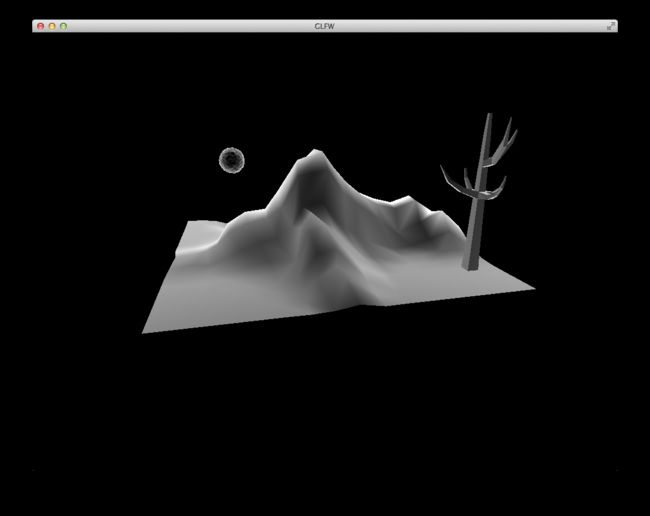
Using the rim shading contribution as color (the vdn) we get the following result.
As you can clearly see, there is much more contribution than just around the edges/peaks. What we want to do, is to remove some of the contribution that are below a certain value. We could use an if statement like if(vdn < 0.5) { // skip } but this will result in hard edges between the rim contribution. When we use smoothstep we can still limit the use of certain values but also make sure that the values have a nice smooth cutoff. Therefore we add a smoothstep like:
This results in the image below:
The complete shader looks like:


