阿里云 OSS 是一种云存储技术,你可以理解为云盘,我们的目标是将视频存储到云端,然后在前端读取并播放视频。
OSS
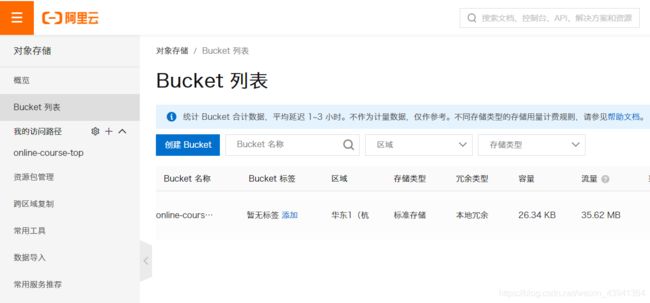
首先登陆首页,创建一个存储桶:https://oss.console.aliyun.com
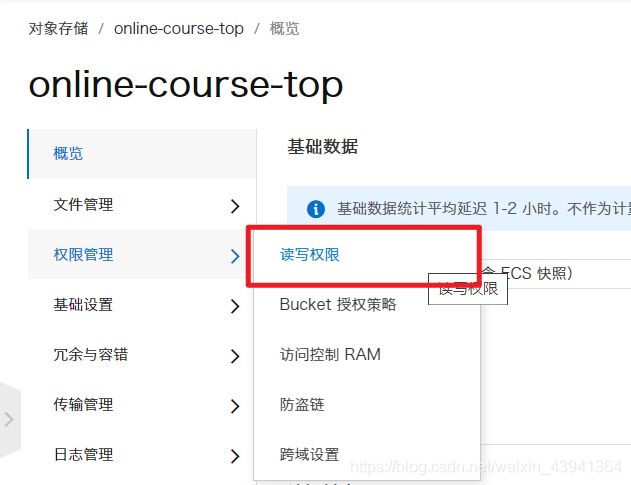
然后找到读写权限:
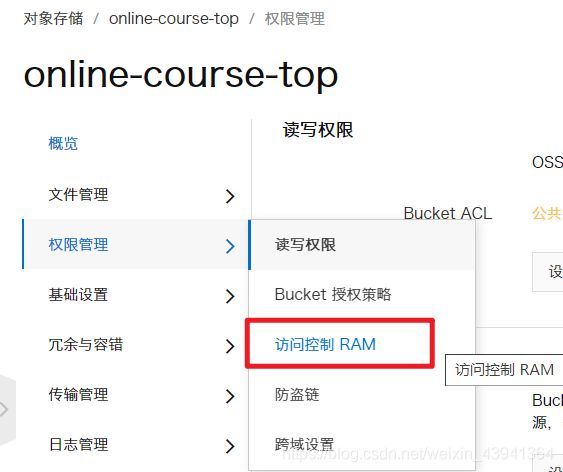
将读写权限设置为公共读即可:
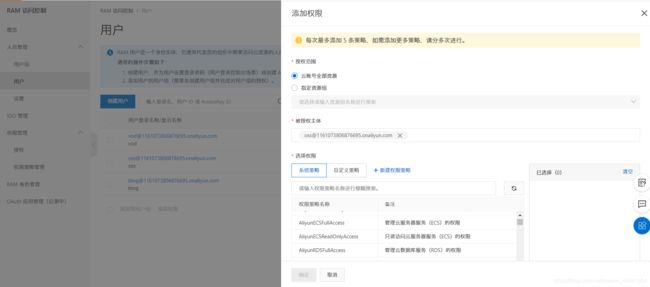
在 RAM 中新建一个用户:
为其添加权限,选择 OSS 的权限:
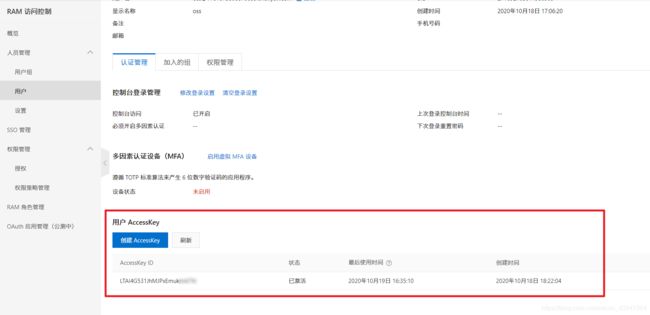
然后点进去这个用户,找到 AccessKey:
创建之后记下来 secret ,因为他只出现一次,如果没记住也没事,可以重新创建新的 key。
下面开始编写服务端代码:
POM
  com.aliyun.oss
  aliyun-sdk-oss
  3.10.2
package com.lsu.file.controller.admin;

import com.alibaba.fastjson.JSONObject;
import com.aliyun.oss.OSS;
import com.aliyun.oss.OSSClientBuilder;
import com.aliyun.oss.model.AppendObjectRequest;
import com.aliyun.oss.model.AppendObjectResult;
import com.aliyun.oss.model.ObjectMetadata;
import com.aliyun.oss.model.PutObjectRequest;
import com.lsu.server.dto.FileDto;
import com.lsu.server.dto.ResponseDto;
import com.lsu.server.enums.FileUseEnum;
import com.lsu.server.service.FileService;
import com.lsu.server.util.Base64ToMultipartFile;
import com.lsu.server.util.UuidUtil;
import org.slf4j.Logger;
import org.slf4j.LoggerFactory;
import org.springframework.beans.factory.annotation.Value;
import org.springframework.web.bind.annotation.*;
import org.springframework.web.multipart.MultipartFile;

import javax.annotation.Resource;
import java.io.ByteArrayInputStream;

/**
 * @author wsuo
 */
@RestController
@RequestMapping("/admin")
public class OssController {

  private static final Logger LOG = LoggerFactory.getLogger(FileController.class);

  @Value("${oss.accessKeyId}")
  private String accessKeyId;

  @Value("${oss.accessKeySecret}")
  private String accessKeySecret;

  @Value("${oss.endpoint}")
  private String endpoint;

  @Value("${oss.bucket}")
  private String bucket;

  @Value("${oss.domain}")
  private String ossDomain;

  public static final String BUSINESS_NAME = "OSS文件上传";

  @Resource
  private FileService fileService;

  @PostMapping("/oss-append")
  public ResponseDto fileUpload(@RequestBody FileDto fileDto) throws Exception {
    LOG.info("上传文件开始");
    String use = fileDto.getUse();
    String key = fileDto.getKey();
    String suffix = fileDto.getSuffix();
    Integer shardIndex = fileDto.getShardIndex();
    Integer shardSize = fileDto.getShardSize();
    String shardBase64 = fileDto.getShard();
    MultipartFile shard = Base64ToMultipartFile.base64ToMultipart(shardBase64);

    FileUseEnum useEnum = FileUseEnum.getByCode(use);
    String dir = useEnum.name().toLowerCase();

    String path = dir +
        "/" +
        key +
        "." +
        suffix;

    // 创建OSSClient实例。
    OSS ossClient = new OSSClientBuilder().build(endpoint, accessKeyId, accessKeySecret);

    ObjectMetadata meta = new ObjectMetadata();
    // 指定上传的内容类型。
    meta.setContentType("text/plain");

    // 通过AppendObjectRequest设置多个参数。
    AppendObjectRequest appendObjectRequest = new AppendObjectRequest(bucket, path, new ByteArrayInputStream(shard.getBytes()), meta);

    appendObjectRequest.setPosition((long) ((shardIndex - 1) * shardSize));
    AppendObjectResult appendObjectResult = ossClient.appendObject(appendObjectRequest);
    // 文件的64位CRC值。此值根据ECMA-182标准计算得出。
    System.out.println(appendObjectResult.getObjectCRC());
    System.out.println(JSONObject.toJSONString(appendObjectResult));

    ossClient.shutdown();

    LOG.info("保存文件记录开始");
    fileDto.setPath(path);
    fileService.save(fileDto);

    ResponseDto responseDto = new ResponseDto<>();
    fileDto.setPath(ossDomain + path);
    responseDto.setContent(fileDto);
    return responseDto;
  }


  @PostMapping("/oss-simple")
  public ResponseDto fileUpload(@RequestParam MultipartFile file, String use) throws Exception {
    LOG.info("上传文件开始");
    FileUseEnum useEnum = FileUseEnum.getByCode(use);
    String key = UuidUtil.getShortUuid();
    String fileName = file.getOriginalFilename();
    String suffix = fileName.substring(fileName.lastIndexOf(".") + 1).toLowerCase();
    String dir = useEnum.name().toLowerCase();
    String path = dir + "/" + key + "." + suffix;

    // 创建OSSClient实例。
    OSS ossClient = new OSSClientBuilder().build(endpoint, accessKeyId, accessKeySecret);
    PutObjectRequest putObjectRequest = new PutObjectRequest(bucket, path, new ByteArrayInputStream(file.getBytes()));
    ossClient.putObject(putObjectRequest);

    ResponseDto responseDto = new ResponseDto<>();
    FileDto fileDto = new FileDto();
    fileDto.setPath(ossDomain + path);
    responseDto.setContent(fileDto);

    return responseDto;
  }
}
这部分内容可以参考阿里云的帮助手册:https://help.aliyun.com/document_detail/32011.html?spm=a2c4g.11174283.6.915.443b7da2mfhbKq
上面写的是两个接口:
- 追加上传:
/oss-append - 简单上传:
/oss-simple
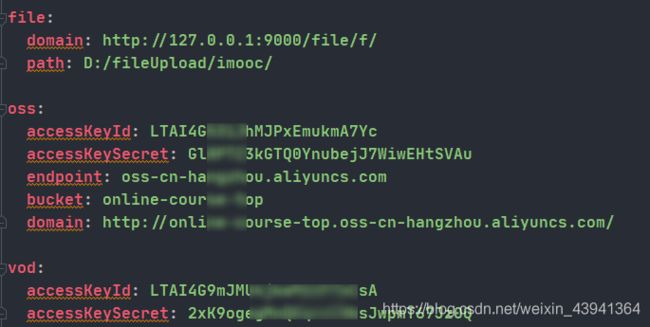
注意这里的参数都已经在 yml 文件中定义了:
上面的 KeyId 和 KeySecret 就是之前在创建用户时给的那两个,填上就行了。
在前端我们就可以发送请求获取数据,注意这里的对象是我自定义的,大家可以根据项目需求自行设置。
_this.$ajax.post(process.env.VUE_APP_SERVER + '/file/admin/oss-simple', formData).then(response => {
 Loading.hide();
 let resp = response.data;
 _this.afterUpload(resp);
 // 清空原来控件中的值
 $("#" + _this.inputId + "-input").val("");
})
视频点播
VOD 是另一种视频存储的形式,它的功能更丰。阿里云视频点播(VOD)是集音视频上传、自动化转码处理、媒体资源管理、分发加速于一体的全链路音视频点播服务。
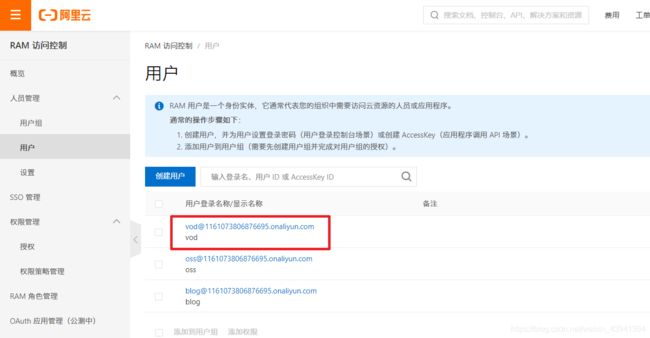
我们同样需要一个 VOD 的用户,给它赋予 VOD 的权限:
SDK 的使用可以参考文档:https://help.aliyun.com/document_detail/61063.html?spm=a2c4g.11186623.6.921.418f192bTDCIJN
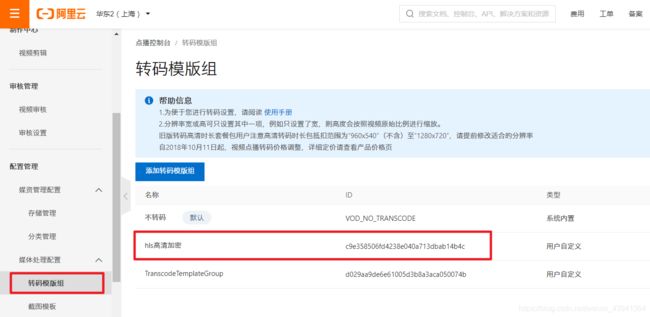
我们可以在转码组设置自己的模板,然后通过 ID 在代码中使用:
上传视频比较简单,和 OSS 很像,但是播放视频要多一个条件,在获取播放链接之前要先取得权限认证,所以下面单独写了一个 /get-auth/{vod} 接口,其中的参数就是 vod 的 ID,这个 ID 在我们上传视频之后会作为返回值返回的。
package com.lsu.file.controller.admin;

import com.alibaba.fastjson.JSON;
import com.alibaba.fastjson.JSONObject;
import com.aliyun.oss.OSSClient;
import com.aliyuncs.DefaultAcsClient;
import com.aliyuncs.vod.model.v20170321.CreateUploadVideoResponse;
import com.aliyuncs.vod.model.v20170321.GetMezzanineInfoResponse;
import com.aliyuncs.vod.model.v20170321.GetVideoPlayAuthResponse;
import com.lsu.server.dto.FileDto;
import com.lsu.server.dto.ResponseDto;
import com.lsu.server.enums.FileUseEnum;
import com.lsu.server.service.FileService;
import com.lsu.server.util.Base64ToMultipartFile;
import com.lsu.server.util.VodUtil;
import org.apache.commons.codec.binary.Base64;
import org.slf4j.Logger;
import org.slf4j.LoggerFactory;
import org.springframework.beans.factory.annotation.Value;
import org.springframework.web.bind.annotation.*;
import org.springframework.web.multipart.MultipartFile;

import javax.annotation.Resource;

/**
 * @author wsuo
 */
@RestController
@RequestMapping("/admin")
public class VodController {

  private static final Logger LOG = LoggerFactory.getLogger(FileController.class);

  @Value("${vod.accessKeyId}")
  private String accessKeyId;

  @Value("${vod.accessKeySecret}")
  private String accessKeySecret;

  public static final String BUSINESS_NAME = "VOD视频上传";

  @Resource
  private FileService fileService;

  @PostMapping("/vod")
  public ResponseDto fileUpload(@RequestBody FileDto fileDto) throws Exception {
    String use = fileDto.getUse();
    String key = fileDto.getKey();
    String suffix = fileDto.getSuffix();
    Integer shardIndex = fileDto.getShardIndex();
    Integer shardSize = fileDto.getShardSize();
    String shardBase64 = fileDto.getShard();
    MultipartFile shard = Base64ToMultipartFile.base64ToMultipart(shardBase64);

    FileUseEnum useEnum = FileUseEnum.getByCode(use);
    String dir = useEnum.name().toLowerCase();

    String path = dir +
        "/" +
        key +
        "." +
        suffix;

    //需要上传到VOD的本地视频文件的完整路径,需要包含文件扩展名
    String vod = "";
    String fileUrl = "";
    try {
      // 初始化VOD客户端并获取上传地址和凭证
      DefaultAcsClient vodClient = VodUtil.initVodClient(accessKeyId, accessKeySecret);
      CreateUploadVideoResponse createUploadVideoResponse = VodUtil.createUploadVideo(vodClient, path);
      // 执行成功会返回VideoId、UploadAddress和UploadAuth
      vod = createUploadVideoResponse.getVideoId();
      JSONObject uploadAuth = JSONObject.parseObject(
          Base64.decodeBase64(createUploadVideoResponse.getUploadAuth()), JSONObject.class);
      JSONObject uploadAddress = JSONObject.parseObject(
          Base64.decodeBase64(createUploadVideoResponse.getUploadAddress()), JSONObject.class);
      // 使用UploadAuth和UploadAddress初始化OSS客户端
      OSSClient ossClient = VodUtil.initOssClient(uploadAuth, uploadAddress);
      // 上传文件,注意是同步上传会阻塞等待,耗时与文件大小和网络上行带宽有关
      if (shard != null) {
        VodUtil.uploadLocalFile(ossClient, uploadAddress, shard.getInputStream());
      }
      System.out.println("上传视频成功, vod : " + vod);
      GetMezzanineInfoResponse response = VodUtil.getMezzanineInfoResponse(vodClient, vod);
      System.out.println("获取视频信息 response = " + JSON.toJSONString(response));
      fileUrl = response.getMezzanine().getFileURL();
      ossClient.shutdown();
    } catch (Exception e) {
      System.out.println("上传视频失败, ErrorMessage : " + e.getLocalizedMessage());
    }

    fileDto.setPath(path);
    fileDto.setVod(vod);
    fileService.save(fileDto);
    ResponseDto responseDto = new ResponseDto<>();
    fileDto.setPath(fileUrl);
    responseDto.setContent(fileDto);
    return responseDto;
  }

  @RequestMapping(value = "/get-auth/{vod}", method = RequestMethod.GET)
  public ResponseDto getAuth(@PathVariable String vod) {
    LOG.info("获取播放授权开始");
    ResponseDto responseDto = new ResponseDto<>();
    DefaultAcsClient client = VodUtil.initVodClient(accessKeyId, accessKeySecret);
    GetVideoPlayAuthResponse response;
    try {
      response = VodUtil.getVideoPlayAuthResponse(client, vod);
      String playAuth = response.getPlayAuth();
      //播放凭证
      LOG.info("授权码 = {}", playAuth);
      responseDto.setContent(playAuth);
      //VideoMeta信息
      LOG.info("VideoMeta信息 = {}", response.getVideoMeta().getTitle());
    } catch (Exception e) {
      System.out.print("ErrorMessage = " + e.getLocalizedMessage());
    }
    LOG.info("获取播放授权结束");
    return responseDto;
  }
}
methods: {
 playUrl(url) {
  let _this = this;
  console.log("开始播放:", url);
  // 如果已经有播放器了 就将播放器删除
  if (_this.aliPlayer) {
   _this.aliPlayer = null;
   $("#" + _this.playerId + '-player').remove();
  }
  // 初始化播放器
  $("#" + _this.playerId).append("");
  _this.aliPlayer = new Aliplayer({
   id: _this.playerId + '-player',
   width: '100%',
   autoplay: true,
   //支持播放地址播放,此播放优先级最高
   source: url,
   cover: 'http://liveroom-img.oss-cn-qingdao.aliyuncs.com/logo.png'
  }, function (player) {
   console.log("播放器创建好了")
  })
 },
 playVod(vod) {
  let _this = this;
  Loading.show();
  _this.$ajax.get(process.env.VUE_APP_SERVER + '/file/admin/get-auth/' + vod).then((response) => {
   Loading.hide();
   let resp = response.data;
   if (resp.success) {
    //如果已经有播放器了,则将播放器div删除
    if (_this.aliPlayer) {
     _this.aliPlayer = null;
     $("#" + _this.playerId + '-player').remove();
    }
    // 初始化播放器
    $("#" + _this.playerId).append("");
    _this.aliPlayer = new Aliplayer({
     id: _this.playerId + '-player',
     width: '100%',
     autoplay: false,
     vid: vod,
     playauth: resp.content,
     cover: 'http://liveroom-img.oss-cn-qingdao.aliyuncs.com/logo.png',
     encryptType: 1, //当播放私有加密流时需要设置。
    }, function (player) {
     console.log('播放器创建好了。')
    });
   } else {
    Toast.warning('播放错误。')
   }
  });
 }
},
上述的前端代码只是一个例子,playVod 调用的是阿里的播放器。
到此这篇关于SpringBoot+阿里云OSS实现在线视频播放的示例的文章就介绍到这了,更多相关SpringBoot阿里云OSS在线视频内容请搜索脚本之家以前的文章或继续浏览下面的相关文章希望大家以后多多支持脚本之家!
