lowRISC的Ibex项目Hello World的仿真
lowRISC的Ibex项目Hello World的仿真
记录一下Ibex在Linux上仿真Hello World的具体流程
参考
运行环境
本文采样的运行环境是 Ubuntu18.04
安装各种包
采样下面的命令(以后可能会升级,什么的。。。。。。)
sudo apt-get install autoconf bison build-essential clang-format curl \
    doxygen flex g++ git libelf1 libelf-dev libftdi1-2 libftdi1-dev libssl-dev \
    libusb-1.0-0 lsb-release make ninja-build pkgconf python3 python3-pip \
    python3-setuptools python3-wheel python3-yaml srecord tree xsltproc \
    zlib1g-dev xz-utils
git Ibex项目 并使用pip3安装相关软件包
mkdir  ibex
cd  ibex
git clone https://github.com/lowRISC/ibex
安装相关python库
pip3 install --user -r python-requirements.txt
安装 RISC-V tool chain(这一步很慢。。。)
安装的地方另起一个(不在ibex里面)
最好使用sudo make
我之前使用 make出现了很多错误,因为权限不够。
安装先决条件:一股脑装就完事了,没有装就让它装,装过了输入此命令会提示装过了。这波不亏,有点赚
sudo apt-get install autoconf automake autotools-dev curl python3 libmpc-dev libmpfr-dev libgmp-dev gawk build-essential bison flex texinfo gperf libtool patchutils bc zlib1g-dev libexpat-dev
git clone https://github.com/riscv/riscv-gnu-toolchain

./configure --prefix=/opt/riscv --with-arch=rv32imc --with-abi=ilp32
sudo make
添加安装路径到PATH(看了一个博客说一共有3种方法)
方法在这里。。。
本人采用的是第3种中,因为不想chmod
vi ~/.bash_profile

PATH=$PATH:~/.local/bin

source ~/.bash_profile
使用下面的命令验证编译工具是否安装成功
which riscv32-unknown-elf-gcc
出现/opt/riscv/bin/riscv32-unknown-elf-gcc则说明成功了
安装仿真软件Verilator
什么是Verilator?老哥点这里
再次安装相关依赖:(可能会重复安装,系统会提醒,没有关系的)
sudo apt-get install git make autoconf g++ flex bison

sudo apt-get install libfl2

sudo apt-get install libfl-dev
获取安装包
git clone https://git.veripool.org/git/verilator
unset VERILATOR_ROOT
安装,冲!!
cd verilator

git pull

git tag

git checkout master

git checkout stable

git checkout v{version}

autoconf        # Create ./configure script

./configure

make

make test

sudo make install
安装FuseSoc工具
FuseSoc的作用跟Makefile的功能相似,由于Ibex已配置成FuseSoc可用的状态,所以不用白不用,白嫖就完事。
git clone https://github.com/olofk/fusesoc

cd fusesoc

sudo pip install -e .
这里同样也需要加路径(FuseSoc的默认安装路径是~/.local/bin)
输入which fusesoc验证是否装好
出现 .local/bin/fusesoc就说明ok了
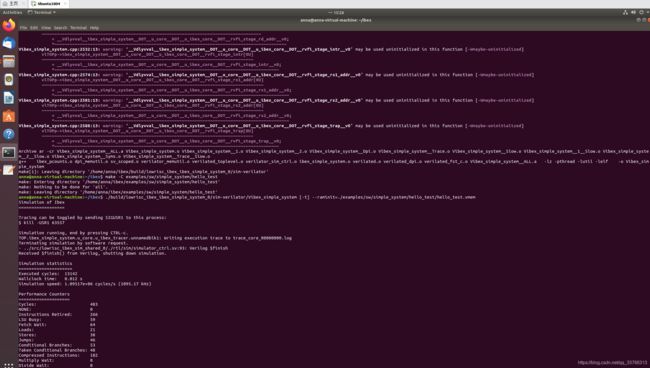
开始跑Hello simple system
cd  ibex

## Building Simulation
fusesoc --cores-root=. run --target=sim --setup --build lowrisc:ibex:ibex_simple_system --RV32M=1 --RV32E=0

## Building hello world
make -C examples/sw/simple_system/hello_test

## Running the Simulator
./build/lowrisc_ibex_ibex_simple_system_0/sim-verilator/Vibex_simple_system [-t] --raminit=
这里的
trace_core的输出:riscv CORE运行时的指令流、指令对应的机器码,寄存器的操作以及对应的值

okk!!!!!!大功告成
接下跑一下Google的开源安全芯片项目:OPentitan——就是我,点我!!!


