在使用Eclipse开发代码过程用到的小技巧,各种功能配置的使用,
可以有效提高使用舒适度和开发效率。
1.修改Eclipse中字体和大小
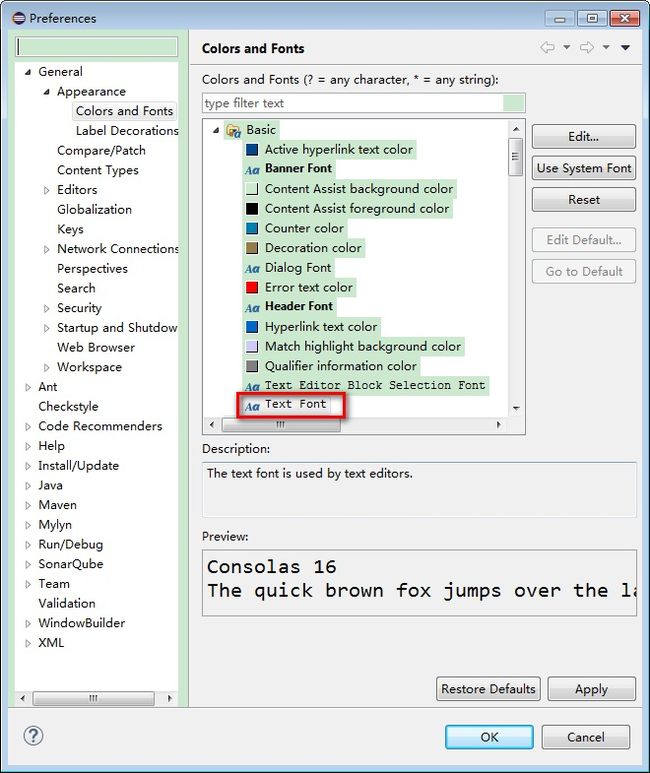
Eclipse -> Window -> Preferences -> General -> Appearance -> Color and Fonts
在打开的窗口中选中Basice -> Text Font,
点击右边的Edit..按钮,可以修改字体和大小。
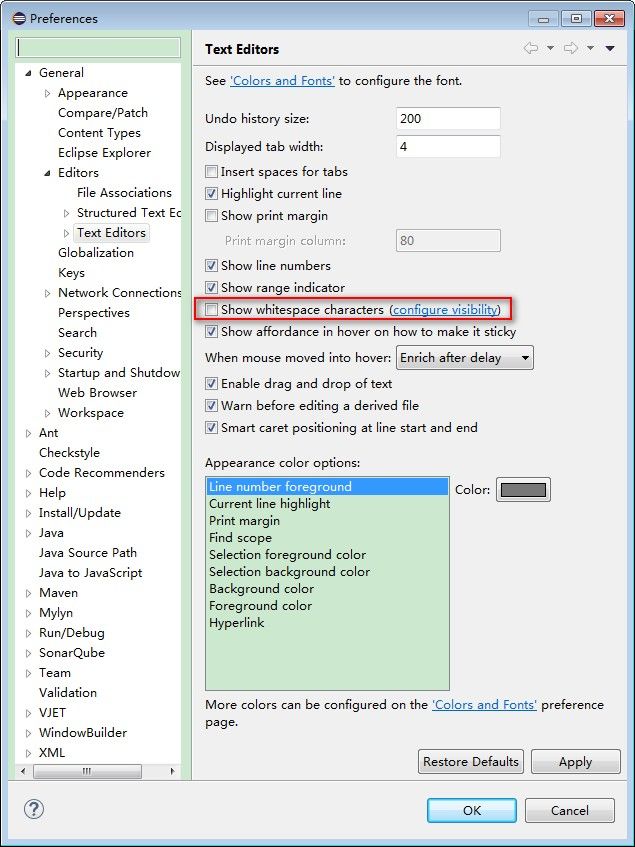
2.在Eclipse中显示空格(space)和制表符(tab)
Eclipse -> Window -> Preferences -> General -> Editors -> Text Editors -> Show whitespace characters
3.Eclipse从Workspace导出导入Preferences
导出:
Eclipse -> File -> Export -> General -> Preferences -> 选择Export All-> 选择to preference file
会生成epf后缀的文件,示例WorkspaceConifg.epf。
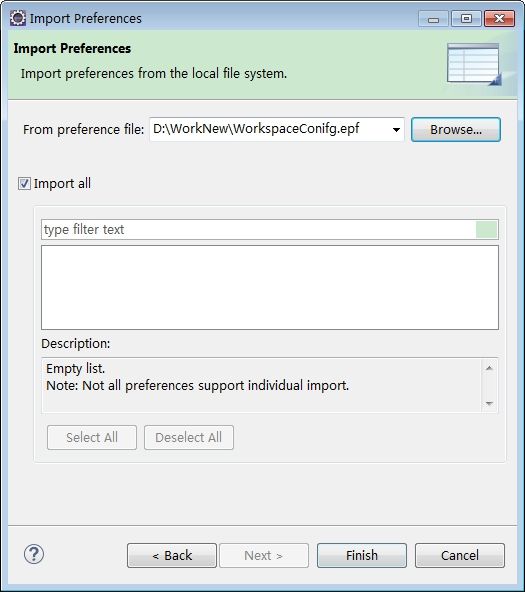
导入:
Eclipse -> File -> Import -> General -> Preferences -> 选择Import All -> 选择From preference file
4.新建Workspace的时候复制已有Workspace配置
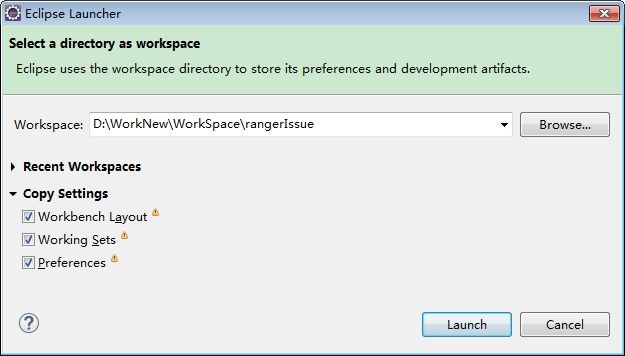
Eclipse -> File -> Switch Workspace -> Other ...
打开Eclipse Launcher,选择一个新的目录作为Workspace,
然后勾选Cpoy Settings下面的三个选项:
Workbeach Layout
Working Sets
Preferences
点击Launch,Eclipse启动的新Workspace
会复制当前工作空间的配置,减少大量的配置工作。
5.Eclipse使用clean参数启动
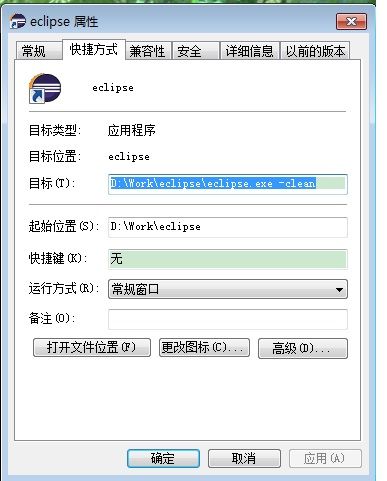
创建一个Eclipse的快捷方式,
右键快捷方式的属性,在目标的值后面加上-clean参数,
可以清理缓存等,解决Eclipse无法启动的一些问题。
6.Eclipse切换语言为英文
创建一个Eclipse的快捷方式,
右键快捷方式的属性,在目标的值后面加上-nl en_US参数,
示例:D:\WorkNew\eclipse3\eclipse.exe -nl en_US
重新启动后Eclipse会自动显示成英文,
包括Eclipse Class Decompiler等支持中文的插件。
7.关闭拼写检查
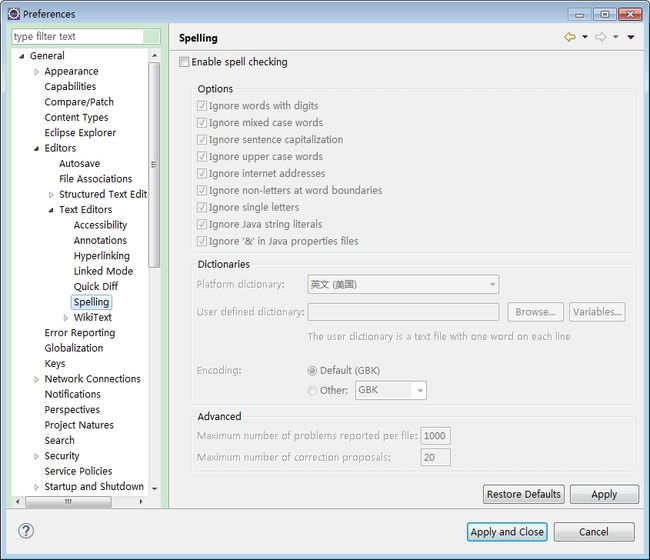
Eclipse -> Window -> Preferences -> General -> Editors -> Text Editors -> Spelling
在打开的窗口中把勾选的Enable spell checking取消即可。
8.设置Eclipse皮肤为Windows经典主题
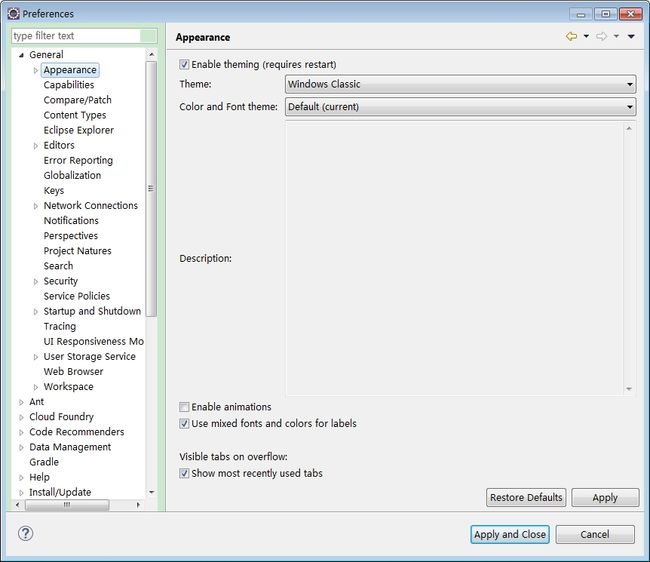
Eclipse -> Window -> Preferences -> General -> Appearance
勾选Enable theming,配置好后重启Eclipse生效。
9.设置不同类型文件的默认编辑器
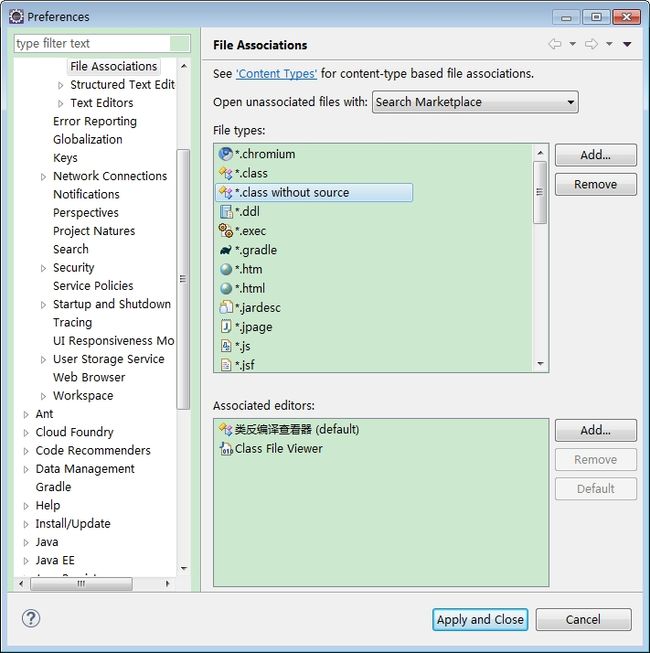
Eclipse -> Window -> Preferences -> General -> Editors -> File Associations
选中某个类型的文件(通过文件后缀名区分),可以设置其相关的编辑器。
也可以新增某个类型的文件,为其绑定默认的编辑器。
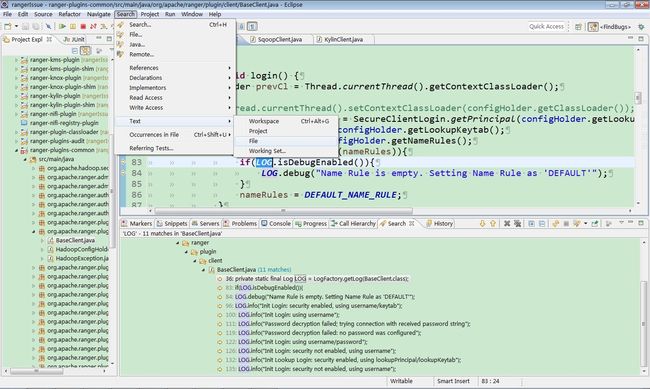
10.查找当前文件中的字符串,并且输出Search结果
首先在当前文件中双击选中一个字符串,
Eclipse -> Search -> Text -> File
会打开一个Search结果列表。
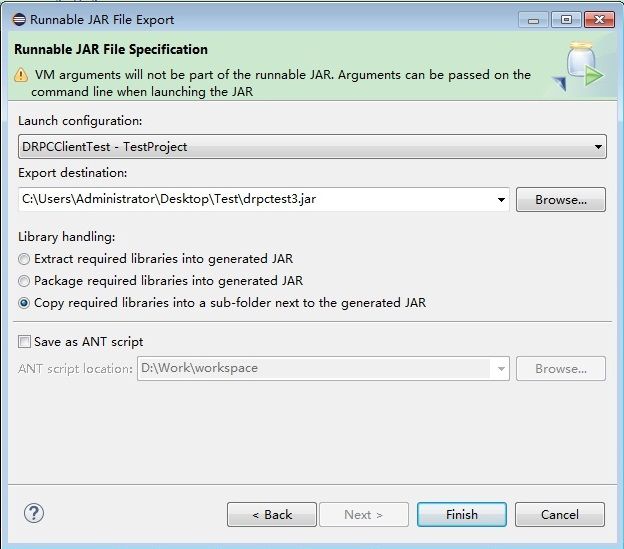
11.代码导出为可执行jar文件
Eclipse -> File -> Export -> Java -> Runnable JAR file
按你的需要打出各种格式的包,主要是Library Handling依赖包的处理方式。
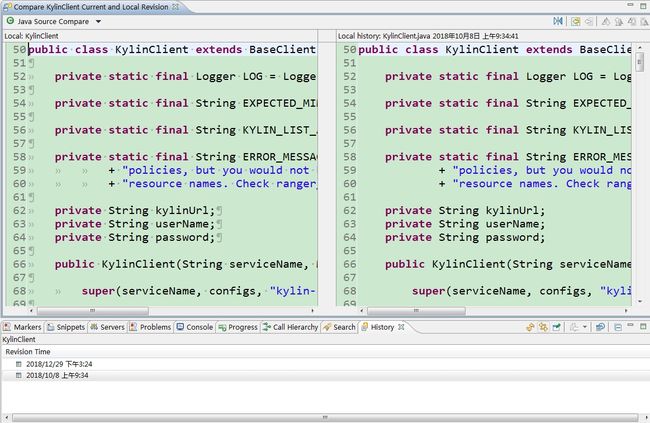
12.查看代码的修改记录
在打开的文件中右键,Local History -> Compare With ...
会打开该文件在Eclipse中修改的历史记录,
可以双击某个时间点的版本,比对修改的情况。
13.查看String的源码
Eclipse -> window -> Preferences -> Java -> Installed JRES
此时"Installed JRES"右边是列表窗格,
列出了系统中的 JRE 环境,选择你的JRE,
然后点边上的 "Edit",
会出现一个窗口(Edit JRE)。
选中rt.jar文件的这一项:
D:\Program Files (x86)\java\jdk7\lib\rt.jar
点左边的<号展开它。
展开后,可以看到Source Attachment:(none),
选中这一项,点右边的按钮Source Attachment,
选择你的JDK目录下的src.zip文件即可。
