一、前言
本次实验目:
1、通过haproxy实现负载均衡,并使用acl进行智能调度。
2、配置演示haproxy的tcp模式和http模式。
3、对后端的服务器进行相关的监控检查。
二、配置nginx服务器
1、配置nginx1
首先在nginx1上安装nginx服务和PHP-fpm相关服务
[root@nginx1 ~]# yum install -y epel-release
[root@nginx1 ~]# yum install -y nginx
[root@nginx1 ~]# yum install -y php-fpm php-mysql php-mbstring php-mcrypt
接着创建相应的web根目录
[root@nginx1 ~]# mkdir /data/nginx/html/ -pv
mkdir: created directory ‘/data’
mkdir: created directory ‘/data/nginx’
mkdir: created directory ‘/data/nginx/html/’
编辑创建默认页面:
[root@nginx1 ~]# vim /data/nginx/html/index.html
This is nginx1
下载wordpress包并安装到指定的web目录下,提供一个wordpress页面。
[root@nginx1 ~]# cd /data/nginx/html/
[root@nginx1 html]# wget https://cn.wordpress.org/wordpress-4.9.4-zh_CN.tar.gz
[root@nginx1 html]# tar xf wordpress-4.9.4-zh_CN.tar.gz
然后创建nginx配置文件:
#注意需要删除/etc/nginx/nginx.conf文件中的默认listen 80的配置
[root@nginx1 html]# vim /etc/nginx/conf.d/vhost.conf
server {
        listen 80;
        server_name www.ilinux.io;
        root /data/nginx/html;
        index index.htm index.phpl;
        location / {
        }
        location ~* \.php$ {
                fastcgi_pass 127.0.0.1:9000;
                fastcgi_index index.php;
                include fastcgi_params;
                fastcgi_param   SCRIPT_FILENAME /data/nginx/html/$fastcgi_script_name;
        }
}
最后启动nginx和php-fpm服务并调整firewalld和selinux 状态。
[root@nginx1 html]# systemctl start nginx
[root@nginx1 ~]# systemctl start php-fpm
[root@nginx1 html]# systemctl stop firewalld
[root@nginx1 html]# systemctl disable firewalld
Removed symlink /etc/systemd/system/multi-user.target.wants/firewalld.service.
Removed symlink /etc/systemd/system/dbus-org.fedoraproject.FirewallD1.service.
[root@nginx1 html]# setenforce 0
2、配置nginx2
首先安装nginx服务:
[root@nginx2 ~]# yum install -y epel-release
[root@nginx2 ~]# yum install -y nginx
创建nginx 的web根目录:
[root@nginx2 ~]# mkdir -pv /data/nginx/html
mkdir: created directory ‘/data’
mkdir: created directory ‘/data/nginx’
mkdir: created directory ‘/data/nginx/html’
编辑创建默认页面:
[root@nginx2 ~]# vim /data/nginx/html/index.html
This is nginx2
接着在web根目录下创建一个web2目录,并提供一个测试页面:
root@nginx2 html]# cd /data/nginx/html/
[root@nginx2 html]# mkdir web2/
[root@nginx2 html]# vim web2/index.html
This is test page
然后创建nginx配置文件:
[root@nginx2 html]# vim /etc/nginx/conf.d/vhost.conf
server {
        listen 80;
        server_name wwww.ilinux.io;
        root /data/nginx/html;
        index index.html;
}
最后启动nginx服务并调整firewalld和selinux状态:
[root@nginx2 html]# systemctl start nginx
[root@nginx2 html]# systemctl stop firewalld
[root@nginx2 html]# systemctl disable firewalld
Removed symlink /etc/systemd/system/multi-user.target.wants/firewalld.service.
Removed symlink /etc/systemd/system/dbus-org.fedoraproject.FirewallD1.service.
[root@nginx2 html]# setenforce 0
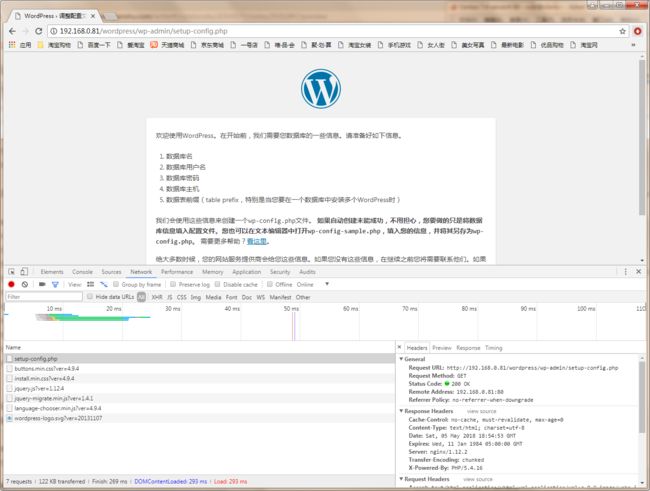
目前后端两个nginx服务器分别提供了两个默认主页,以及一个wordpress动态页面和一个web2的测试页面。
三、配置Haproxy服务器
1、结合ACL做负载均衡
首先安装haproxy服务:
[root@haproxy ~]# yum install -y haproxy
接着编辑配置/etc/haproxy/haproxy.cfg,添加下述配置段:
[root@haproxy ~]# vim /etc/haproxy/haproxy.cfg
frontend  main *:80
        acl url_blog path_reg ^/wordpress.*  #此acl用于匹配访问路径带有/wordpress的连接
        acl url_web2 path_reg ^/web2.*  #此acl用于匹配访问路径带有/web2的连接
        use_backend web2 if url_web2  #将acl  url_web2匹配到的会话调度到后端服务器组web2处理
        use_backend blog if url_blog  #将acl url_blog匹配到的会话调度到后端服务器组blog处理
        default_backend nginxsrvs  #其余会话默认使用nginxsrvs进行负载均衡调度

backend nginxsrvs
        balance roundrobin
        server nginx1 192.168.0.83:80 check
        server nginx2 192.168.0.84:80 check

backend web2
        balance roundrobin
        server web2 192.168.0.84:80 check

backend blog
        balance roundrobin
        server blog1 192.168.0.83:80 check
随后启动haproxy服务并调整firewalld和selinux:
[root@haproxy ~]# systemctl start haproxy
[root@haproxy ~]# systemctl stop firewalld
[root@haproxy ~]# setenforce 0
[root@haproxy ~]# systemctl disable firewalld
Removed symlink /etc/systemd/system/dbus-org.fedoraproject.FirewallD1.service.
Removed symlink /etc/systemd/system/basic.target.wants/firewalld.service.
此时访问http://192.168.0.81/ 应该能够正常轮询到两个后端的nignx 服务器上
[root@client ~]# for i in {1..10} ; do curl http://192.168.0.81/ ; done
This is nginx1
This is nginx2
This is nginx1
This is nginx2
This is nginx1
This is nginx2
This is nginx1
This is nginx2
This is nginx1
This is nginx2
将后端其中一个服务器的nginx服务手动停用后,访问会话应可能正常负载到第二台服务器上。
[root@client ~]# for i in {1..10} ; do curl http://192.168.0.81/ ; done
This is nginx2
This is nginx2
This is nginx2
This is nginx2
This is nginx2
This is nginx2
This is nginx2
This is nginx2
This is nginx2
This is nginx2
而由于ACL调度的缘故,访问http://192.168.0.81/web2/ 应被调度到后端nginx2 上,而访问http://192.168.0.81/wordpress应被调度到后端的nginx1上。
[root@client ~]# curl http://192.168.0.81/web2/
This is test page
此时基于ACL做的负载均衡调度就已经成功了。
2、配置haproxy的 tcp与http模式
haproxy的运行模式有三种tcp、http和health,其中http为haproxy的默认运行模式,而health基本上已经被haproxy的其他健康检查参数所替代了,因此此处不再演示。
在/etc/haproxy/haproxy.cfg中添加tcp模式和http模式的配置段:
[root@haproxy ~]# vim /etc/haproxy/haproxy.cfg
listen sshsrvs  #配置listen段
        bind *:22322  #监听22322端口
        balance leastconn  #设置调度算法的为leastconn
        mode tcp  #设置模式问tcp模式
        server sshsrv1 192.168.0.83:22 check  #反代到后端的22端口
        server sshsrv2 192.168.0.84:22 check

listen websrvs
        bind *:8080
        balance roundrobin
        mode http  #设置模式为httpd
        option httpchk GET /index.html    #配置通过获取后端主机的指定页面来对后端主机做健康检测
        server websrv1 192.168.0.83:80 check
        server websrv2 192.168.0.84:80 check
此时重启haproxy服务后,相应的22322和8080端口应能正常监听起来:
[root@haproxy ~]# systemctl restart haproxy
[root@haproxy ~]# ss -tnl
State       Recv-Q Send-Q                   Local Address:Port                                  Peer Address:Port
LISTEN      0      128                                  *:8080                                             *:*
LISTEN      0      128                                  *:80                                               *:*
LISTEN      0      128                                  *:22322                                            *:*
LISTEN      0      128                                  *:22                                               *:*
LISTEN      0      100                          127.0.0.1:25                                               *:*
LISTEN      0      128                                 :::22                                              :::*
LISTEN      0      100                                ::1:25                                              :::*
此时通过访问http://192.168.0.81:8080 应能正常轮询到后端主页,也能通过ssh 192.168.0.81:22322连接到后端的服务器上。
[root@client ~]# for i in {1..10} ; do curl http://192.168.0.81:8080 ; done
This is nginx2
This is nginx1
This is nginx2
This is nginx1
This is nginx2
This is nginx1
This is nginx2
This is nginx1
This is nginx2
This is nginx1
3、haproxy的健康检查
haproxy的健康检测主要可以分为下列三种:
- 基于四层,对监听端口进行健康检测。此方式,haproxy只会检查后端server的端口是否存活,而不能保证服务的真正可用。
listen websrvs
        bind *:8080
        balance roundrobin
        mode http
        option httpchk
        server websrv1 192.168.0.83:80 check
        server websrv2 192.168.0.84:80 check
- 通过URI获取来进行健康检测,其检查方式为通过去GET后端server 的web页面来检查后端server的服务是否为存活。
listen websrvs
        bind *:8080
        balance roundrobin
        mode http
        option httpchk GET /index.html
        server websrv1 192.168.0.83:80 check
        server websrv2 192.168.0.84:80 check
- 通过request来获取后端server的http首部信息来进行匹配检测,此类检查可用实现更高级的监控与检查。
listen websrvs
        bind *:8080
        balance roundrobin
        mode http
        option httpchk HEAD /index.html  HTTP/1.0
        server websrv1 192.168.0.83:80 check
        server websrv2 192.168.0.84:80 check
另外还可以启用haproxy的监控页面来管理查看后端服务器的运行情况,在haproxy的配置文件中添加下述配置段并重启服务:
listen stats
        bind *:9099  #状态页的监听端口为9099
        stats enable  #启用状态页
        stats uri /admin?stats  #设置状态页的访问URI
        stats auth admin:admin  #配置认证访问
        stats admin if TRUE  #如果认证通过,则启动状态页的管理功能


