今天给大家绍的是用CNN/卷积神经网络训练mnist手写数字的代码,上一次我们用DNN/其实只有两层(鬼脸)训练结果可能没有很理想,今天我们用CNN+DNN来提高一下我们的正确率。如果没有阅读我的上一篇DNN文章,并且想要查阅的可以点击链接手写数字|第四天的Keras.
废话不多说先贴代码
第一段代码
from keras.models import Sequential
from keras.layers import Dense, Activation, Conv2D, Dropout, MaxPool2D, Flatten
from keras import optimizers
from keras.datasets import mnist
from keras.utils.np_utils import to_categorical
import matplotlib.pyplot as plt

# collecting the data
(x_train, y_train), (x_test, y_test) = mnist.load_data('mnist.pkl.gz')
x = x_test[3]
x_train = x_train.reshape(60000, 28, 28, 1)
print x_test.shape
x_test = x_test.reshape(x_test.shape[0], 28, 28, 1)
y_train = to_categorical(y_train, num_classes=10)
y_test = to_categorical(y_test, num_classes=10)

# design the model
model = Sequential()
model.add(Conv2D(32, (6, 6), input_shape=(28, 28, 1)))
model.add(Activation('relu'))
model.add(MaxPool2D((2, 2)))
model.add(Dropout(0.3))
model.add(Conv2D(64, (4, 4)))
model.add(MaxPool2D((2, 2)))
model.add(Flatten())
model.add(Dropout(0.3))
model.add(Dense(50))
model.add(Activation('relu'))
model.add(Dense(10))
model.add(Activation('softmax'))

# compile the model and pick the loss function and the optimizer
adm = optimizers.Adam(lr=0.0001)
model.compile(optimizer=adm, loss='categorical_crossentropy', metrics=['accuracy'])

# training the model
model.fit(x_train, y_train, batch_size=20, epochs=5, shuffle=True)

# test the model
score = model.evaluate(x_test, y_test, batch_size=500)
h = model.predict_classes(x.reshape(1, 28, 28, 1), batch_size=1)
model.save('ML')

print 'loss:\t', score[0], '\naccuracy:\t', score[1]
print '\nclass:\t', h
plt.imshow(x)
plt.show()
第二段代码
import numpy as np
from keras.models import load_model
import matplotlib.pyplot as plt
import PIL.Image as IM

test = IM.open('7_5.png')

test = test.convert('L')
test = test.getdata()
test = np.matrix(test)
test = np.array(test)
test = test.reshape(1, 28, 28, 1)
model = load_model('ML')
data = model.predict_classes(test)

print data
plt.imshow(test.reshape(28, 28))
plt.show()
导入相关模块
from keras.models import Sequential
from keras.layers import Dense, Activation, Conv2D, Dropout, MaxPool2D, Flatten
from keras import optimizers
from keras.datasets import mnist
from keras.utils.np_utils import to_categorical
import matplotlib.pyplot as plt
- 因为有些模块在我原来的文章已经说过了,所以我们只说新的模块,如果对其他模块有疑问的,请查阅我的其他系列文章几天学会Keras
- 在这里我们用到了新的layer——conv2D,MaxPool2D,Flatten。conv2D是卷积层,什么是卷积层呢?卷积层和全连接层有什么不同呢?
- 结构上卷积层的上一个神经层的神经元与下一个神经层的神经元是局部连接,而且在卷集层之间权重是共享的。比如说上一个卷积层是一个二维矩阵,那么我们会有一个叫做filter的东西其是一个小于我们上一层卷积层的矩阵,让后让这两个矩阵做内积就得到了我们下一个层的输入。好吧,看来我的语言表述能力很差,大家可以参阅这篇文献CNN.
- MaxPool2D就比较简单了在输入的矩阵中依次取一个n*n的矩阵块,然后取矩阵块中较大的元素。成为下一个输入。CNN中也有介绍
- Flatten 层是负责把卷集层,maxpooling层的二维数据压扁成一维然后放到我们的DNN中训练
收集数据
# collecting the data
(x_train, y_train), (x_test, y_test) = mnist.load_data('mnist.pkl.gz')
x = x_test[3]
x_train = x_train.reshape(60000, 28, 28, 1)
print x_test.shape
x_test = x_test.reshape(x_test.shape[0], 28, 28, 1)
y_train = to_categorical(y_train, num_classes=10)
y_test = to_categorical(y_test, num_classes=10)
- 因为使用卷积层,所以我们的输入数据也有变化,我们训练数据要重塑成四维的数据,第一维60000,我们的数据量,第二维、第三维、我们图片的宽和高,第四维1、我们图片的通道数,一般黑白图片是1,彩色因为有三种颜色复合而成,所以通道数为3.
设计模型
# design the model
model = Sequential()
model.add(Conv2D(32, (6, 6), input_shape=(28, 28, 1)))
model.add(Activation('relu'))
model.add(MaxPool2D((2, 2)))
model.add(Dropout(0.3))
model.add(Conv2D(64, (4, 4)))
model.add(MaxPool2D((2, 2)))
model.add(Flatten())
model.add(Dropout(0.3))
model.add(Dense(50))
model.add(Activation('relu'))
model.add(Dense(10))
model.add(Activation('softmax'))
- 重点来说一下conv2D的参数设置,32代表我们有32个filter,(6,6)是说明我们filter的宽高。input_shape 分别是宽高,通道数。
- maxPool2D 层(2,2)是池化的宽高。
- Dropout 是用来防止过拟合,就是每次训练时随即断开一定数量的链接,0.3代表断开30%的链接。
编译我们的模型,并选择优化器和loss函数
# compile the model and pick the loss function and the optimizer
adm = optimizers.Adam(lr=0.0001)
model.compile(optimizer=adm, loss='categorical_crossentropy', metrics=['accuracy'])
- 跟我前面的文章相同,这里略过。
训练我们的模型并保存
# training the model
model.fit(x_train, y_train, batch_size=20, epochs=5, shuffle=True)

# test the model
score = model.evaluate(x_test, y_test, batch_size=500)
h = model.predict_classes(x.reshape(1, 28, 28, 1), batch_size=1)
model.save('ML')

print 'loss:\t', score[0], '\naccuracy:\t', score[1]
print '\nclass:\t', h
plt.imshow(x)
plt.show()
- 保存比较简单。model.save()'ML'是文件路径,这样我们的model就保存在我们的项目目录下,名字是ML
加载保存好的model并使用
import numpy as np
from keras.models import load_model
import matplotlib.pyplot as plt
import PIL.Image as IM

test = IM.open('7_5.png')

test = test.convert('L')
test = test.getdata()
# test = np.matrix(test)
test = np.array(test)
test = test.reshape(1, 28, 28, 1)
model = load_model('ML')
data = model.predict_classes(test)

print data
plt.imshow(test.reshape(28, 28))
plt.show()
- 要调用我们保存好的model需要导入keras.models 中的load_model 函数,同样函数的参数需要是model的路径。
- 然后这是后我们要用这个model识别我们自己写的数字,怎么办,很简单,用PIL.Image模块对图片进行处理。convert('L')是将图片转为灰度图,getdata是获取图片的数据,np.array()、np.matrix()是转成np数组,和矩阵。(如果要reshape必须转成数组,如果不需要仅转成矩阵即可 )
- PIL 模块是不能用pip下载的,建议大家使用anaconda工具管理下载:conda install PIL 。anaconda 我上几篇文章有提到过。
好了看我们跑的结果
结果一
59660/60000 [============================>.] - ETA: 0s - loss: 0.0574 - acc: 0.9821
59720/60000 [============================>.] - ETA: 0s - loss: 0.0574 - acc: 0.9821
59780/60000 [============================>.] - ETA: 0s - loss: 0.0574 - acc: 0.9821
59840/60000 [============================>.] - ETA: 0s - loss: 0.0574 - acc: 0.9821
59900/60000 [============================>.] - ETA: 0s - loss: 0.0574 - acc: 0.9821
59960/60000 [============================>.] - ETA: 0s - loss: 0.0574 - acc: 0.9821
60000/60000 [==============================] - 55s - loss: 0.0574 - acc: 0.9821
  500/10000 [>.............................] - ETA: 2s
 1000/10000 [==>...........................] - ETA: 2s
 1500/10000 [===>..........................] - ETA: 2s
 2000/10000 [=====>........................] - ETA: 2s
 2500/10000 [======>.......................] - ETA: 2s
 3000/10000 [========>.....................] - ETA: 1s
 3500/10000 [=========>....................] - ETA: 1s
 4000/10000 [===========>..................] - ETA: 1s
 4500/10000 [============>.................] - ETA: 1s
 5000/10000 [==============>...............] - ETA: 1s
 5500/10000 [===============>..............] - ETA: 1s
 6000/10000 [=================>............] - ETA: 1s
 6500/10000 [==================>...........] - ETA: 0s
 7000/10000 [====================>.........] - ETA: 0s
 7500/10000 [=====================>........] - ETA: 0s
 8000/10000 [=======================>......] - ETA: 0s
 8500/10000 [========================>.....] - ETA: 0s
 9000/10000 [==========================>...] - ETA: 0s
 9500/10000 [===========================>..] - ETA: 0s
10000/10000 [==============================] - 2s
1/1 [==============================] - 0s
loss:   0.0409451787826
accuracy:   0.987700000405

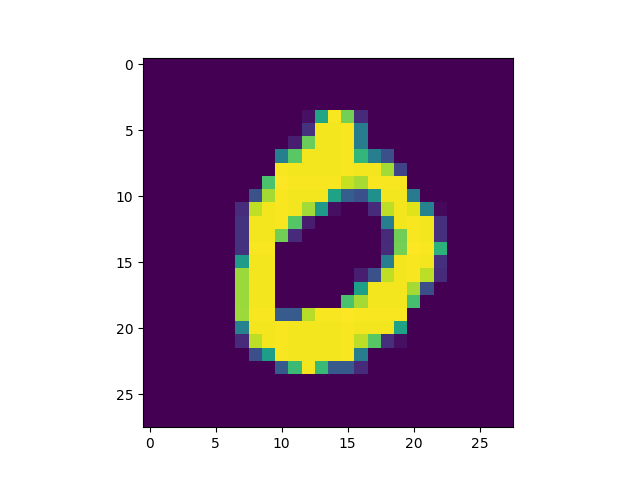
class:  [0]
- 训练5轮后测试集上正确率是0.987,目前全球最高的是0.997。怎么样想挑战全球最高吗,赶快回去试试吧。
测试图片:
结果二
/home/kroossun/miniconda2/bin/python /home/kroossun/PycharmProjects/ML/new.py
Using TensorFlow backend.
2017-09-12 12:13:53.114865: W tensorflow/core/platform/cpu_feature_guard.cc:45] The TensorFlow library wasn't compiled to use SSE4.1 instructions, but these are available on your machine and could speed up CPU computations.
2017-09-12 12:13:53.114889: W tensorflow/core/platform/cpu_feature_guard.cc:45] The TensorFlow library wasn't compiled to use SSE4.2 instructions, but these are available on your machine and could speed up CPU computations.
2017-09-12 12:13:53.114893: W tensorflow/core/platform/cpu_feature_guard.cc:45] The TensorFlow library wasn't compiled to use AVX instructions, but these are available on your machine and could speed up CPU computations.
2017-09-12 12:13:53.114897: W tensorflow/core/platform/cpu_feature_guard.cc:45] The TensorFlow library wasn't compiled to use AVX2 instructions, but these are available on your machine and could speed up CPU computations.
2017-09-12 12:13:53.114900: W tensorflow/core/platform/cpu_feature_guard.cc:45] The TensorFlow library wasn't compiled to use FMA instructions, but these are available on your machine and could speed up CPU computations.
1/1 [==============================] - 0s


[2]

Process finished with exit code 0
测试图片:
我这边还用更多测试图片(在这个model上都没有问题):
