React基础学习笔记(三)-组件及props对象简介
1、组件化的思想
思想主要还是来源于面向过程和面向对象的编程思想,将 UI 拆分为独立可复用的代码片段,并对每个片段进行独立构思后封装到单独的js文件当中,借助于es6的导入导出语法,可以在项目中需要用到的地方导入即可使用,有效提高的代码的复用性。
2、组件类型
react中声明组件可以声明为函数组件,也可以声明为类组件
- 函数组件
- 类组件
这里先把主要概念都提一下, 后面再进行详细讲解以及实例演示说明
3、props对象
这个对象特别关键,React中的几个核心机制都是围绕props对象展开的,这个props对象是数据传递及数据获取中特别关键的成员。
组件间的数据传递数据流向下单向流动的实现路由参数的获取父级组件数据获取资源路径的获取- and so on
4、组件之函数组件
4.1 函数组件的定义
import React from 'react';
import ReactDOM from 'react-dom';

function Index () {

    return (
        <div>
            <h3>这是一个函数组件</h3>
        </div>
    )
}

ReactDOM.render(<Index />, document.getElementById('root'))
注意事项:
- 1)构造函数的名称的首字母必须要大写
- 2)组件必须要有返回值,空值也要return null, 一般情况下需要返回一个标准的jsx对象
-
- 再调用render方法进行渲染时,使用<构造函数名称 />
4.2 函数组件间的数据传递
import React from 'react';
import ReactDOM from 'react-dom';

// 1、定位到DOM对象
let el = document.getElementById('root')

// 2、初始化数据
const author = 'zhangsan'
const age = 20
// const student = {author: 'zhangsan', age: 20}

// 3、使用构造函数创建挂载组件
function Message(props) {

    return (
      <div>
        {
     /* 直接使用jsx的插值语法绑定数据 */}
        <h3>{
     author}</h3>
        <h3>{
     age}</h3>
        <hr />
        {
     /* 通过props接收参数后再绑定数据 */}
        <h3>{
     props.author}</h3>
        <h3>{
     props.age}</h3>
      </div>
    )
}
// 4、组件挂载到目标DOM并渲染
ReactDOM.render(<Message author={
     author} age={
     age} />, el);
说明
- 1、如果函数组件作为子组件,与父组件在同一个文件中,可以直接使用jsx中的表达式(插值语法)进行赋值
- 2、如果函数组件作为子组件,与父组件在同一个文件中,也可以在组件调用的时候传递数据,然后再构造函数中使用props进行数据获取
4.2 使用单独的文件封装子组件
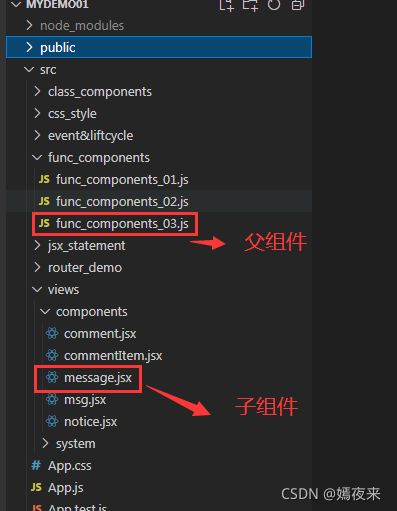
- 子组件:message.js
// 封装的自定义组件中必须要引入React, 因为jsx形式的数据结构必须要是用React才能正常解析
import React from 'react';


// 自定义组件如果要其他组件可以调用,必须使用export进行导出
export function Message(props) {

    return (
        <div>
            <h3>{
     props.author}</h3>
            <p>{
     props.description}</p>
        </div>
    )
}
- 父组件:parent_component.js
import React from 'react';
import ReactDOM from 'react-dom';

import {
      Message } from '../views/components/message'

// 使用单独的文件封装组件


// 1、定位到DOM对象
let el = document.getElementById('root')

// 2、初始化数据
const author = 'zhangsan'
const age = 20
const description = 'zhangsan is a very ordinary name...'
// const student = {author: 'zhangsan', age: 20}

// 4、组件挂载到目标DOM并渲染
ReactDOM.render(<Message author={
     author} age={
     age} description={
     description} />, el);
注意事项
-
- 封装自定义组件中必须要引入React, 因为jsx形势的数据结构必须要是用React才能正常解析
-
- 自定义组件如果要其他组件可以调用,必须使用export进行导出
-
- props数据是只读的,在子组件中获取使用props中的数据是无法重新赋值的
-
- 如果往子组件传递的数据过多,可以将数据封装到对象中,使用对象的解包语法简化传值操作
5、组件之类组件
5.1 类组件的定义
类组件的定义规范
-
- 类组件必须继承React.Component
-
- 类组件中必须有render函数,作用:渲染当前组件对应的虚拟DOM结构
-
- render函数中,必须返回合法的JSX虚拟DOM结构
import React, {
      Component } from 'react';
import ReactDOM from 'react-dom';

// 1、定位到DOM对象
let el = document.getElementById('root')

// 2、定义类组件
class Message extends Component {

  render () {

    return (
      <div>
        <h3>zhangsan</h3>
        <p>20</p>
        <p>'zhangsan is a very ordinary name...'</p>
      </div>
    )
  }
}

// 3、组件挂载到目标DOM并渲染
ReactDOM.render(<Message />, el);
5.2 类组件间传递数据
两种方式说明
- 1)如果在同一个文件中,可以直接使用jsx中的插值语法进行赋值【页面组件组成非常简单的时候可以使用,通常不太使用,因为组件化的核心目的在于复用、解耦、抽离】
-
- 如果在同一个文件中,也可以在组件调用的时候传递数据,然后再构造函数中使用this.props进行数据获取
import React, {
      Component } from 'react';
import ReactDOM from 'react-dom';

// 1、定位到DOM对象
let el = document.getElementById('root')

// 2、初始化数据
const author = 'zhangsan'
const age = 20
const description = 'zhangsan is a very ordinary name...'
// const student = {author: 'zhangsan', age: 20}

// 3、定义类组件
class Message extends Component {

  render () {

    return (
      <div>
        {
     /* 如果在同一个文件中,可以直接使用jsx中的插值语法进行赋值 */}
        <h3>{
     author}</h3>
        <p>{
     age}</p>
        <p>{
     description}</p>
        <hr />
        {
     /* 直接使用this.props获取数据, props数据依然为只读的 */}
        <h3>{
     this.props.author}</h3>
        <p>{
     this.props.age}</p>
        <p>{
     this.props.description}</p>
      </div>
    )
  }
}

// 4、组件挂载到目标DOM并渲染
ReactDOM.render(<Message author={
     author} age={
     age} description={
     description} />, el);
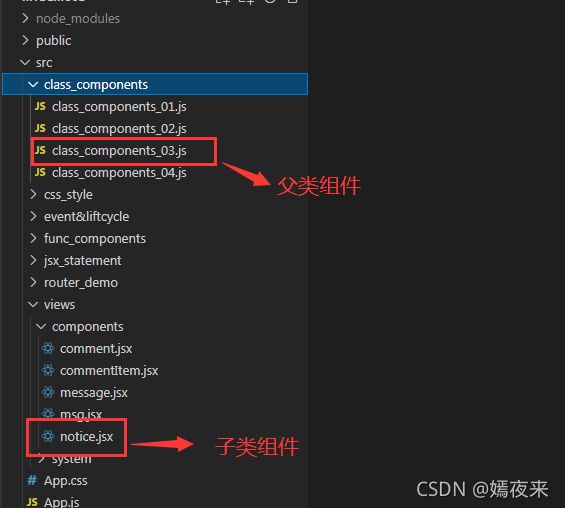
5.3 使用单独的文件封装子组件
- 子类组件:notice.js
import React, {
      Component } from "react";

export class Notice extends Component {


    render () {

        return (
            <div>
                <h3>{
     this.props.author}</h3>
                <p>{
     this.props.age}</p>
                <p>{
     this.props.description}</p>
            </div>
        )
    }
}
- 父类组件:class_components_03.js
import React from 'react';
import ReactDOM from 'react-dom';

import {
      Notice } from '../views/components/notice'

// 使用单独的文件封装自定义类组件

// 1、定位到DOM对象
let el = document.getElementById('root')

// 2、初始化数据
const author = 'gutianle'
const age = 24
const description = 'gutianle is a very ordinary name...'

// 3、组件挂载到目标DOM并渲染
ReactDOM.render(<Notice author={
     author} age={
     age} description={
     description} />, el);
注意事项
-
- 封装自定义组件中必须要引入React, 因为jsx形势的数据结构必须要是用React才能正常解析
-
- 自定义组件如果要其他组件可以调用,必须使用export进行导出
-
- this.props数据是只读的,在自定义使用this.props中的数据是无法重新赋值的
-
- 如果往子组件传递的数据过多,可以将数据封装到对象中,使用对象的解包语法简化传值操作
5.4 类组件中特有对象state的使用
import React, {
      Component } from 'react'

// 两种创建组件方式的对比
    // 1. 用构造函数创建出来的组件:无状态组件;
    // 2. 用class关键字创建出来的组件:有状态组件;
    // 3. 什么情况下使用有状态组件?什么情况下使用无状态组件?
    // 如果组件内,不需要有私有的数据,此时,使用构造函数创建无状态组件比较合适;
    // 如果组件内,需要有自己私有的数据,则,使用 class 关键字 创建有状态组件比较合适;

// 组件中的  props 和  state 之间的区别
    // props 中存储的数据,都是外界传递到组件中的;
    // props 中的数据,都是只读的;
    // state 中的数据,都是组件内私有的;
    // state 中的数据,都是可读可写的;
    // props 在 有状态组件 和 无状态组件中,都有;
    // state 只有在 有状态组件中才能使用;无状态组件中,没有 state;

export class MsgList extends Component {

    // 在构造函数中接收外部传递的数据
    constructor (props) {

        super(props);
        // 通过state属性声明组件中的私有数据
        this.state = {

            sex: 'male',
            username: '青青子衿'
        }
    }

    render () {

        return (
            <div>
                <h3>{
     this.props.author}</h3>
                <p>{
     this.props.age}</p>
                <p>{
     this.state.sex}</p>
                <p>{
     this.state.username}</p>
                <p>{
     this.props.description}</p>
            </div>
        )
    }
}
6、类组件及函数组件的区别
6.1 有状态组件和无状态组件
- 组件是否有状态取决于组件内部是否有私有数据
- 用构造函数创建出来的组件:无状态组件;
- 用class关键字创建出来的组件:有状态组件;
6.2 有状态组件与无状态组件的使用场景
- 如果组件内,不需要有私有的数据,此时,使用构造函数创建无状态组件比较合适;
- 如果组件内,需要有自己私有的数据,则,使用 class 关键字 创建有状态组件比较合适;
6.3 类组件与函数组件的关于props对象的使用区别
- 函数组件中使用props对象直接使用props即可;
- 类组件中使用props对象需要通过this.props;
6.4 类组件与函数组件的关于state对象的区别
- 函数组件中没有state对象;
- 类组件中才有state对象,获取state对象中的数据需要通过this.state进行获取;
- React中的数据流向都是单向的,不能直接通过this.state.属性名称 = 属性取值的方式进行数据修改,这是不允许的。
- React中修改state对象中的数据需要通过this.setState({key: value})或者this.setState((state, props) => {…})的方式进行数据修改
7、组件中props和state的区别
- props 中存储的数据,都是外界传递到组件中的;
- props 中的数据,都是只读的;
- state 中的数据,都是组件内私有的;
- state 中的数据,都是可读可写的;
- props 在有状态组件和无状态组件中都有;
- state 只有在 有状态组件中才能使用;无状态组件中,没有state;