JS进阶之面向对象ES6-class类
文章目录
- 一、面向对象导读
- 二、ES6中的类和对象
-
- 2.1 class 类
- 2.2 创建类
- 2.3 constructor 构造函数
- 2.4 创建第一个类和对象
- 2.5 类中添加方法
- 2.6 class 的 set 和 get属性
- 2.7 注意事项
- 三、继承
-
- 3.1 语法
- 3.2 super(超级的) 关键字
- 3.3 继承方法的同时扩展方法
- 四、Tab栏 案例
-
- 获取:
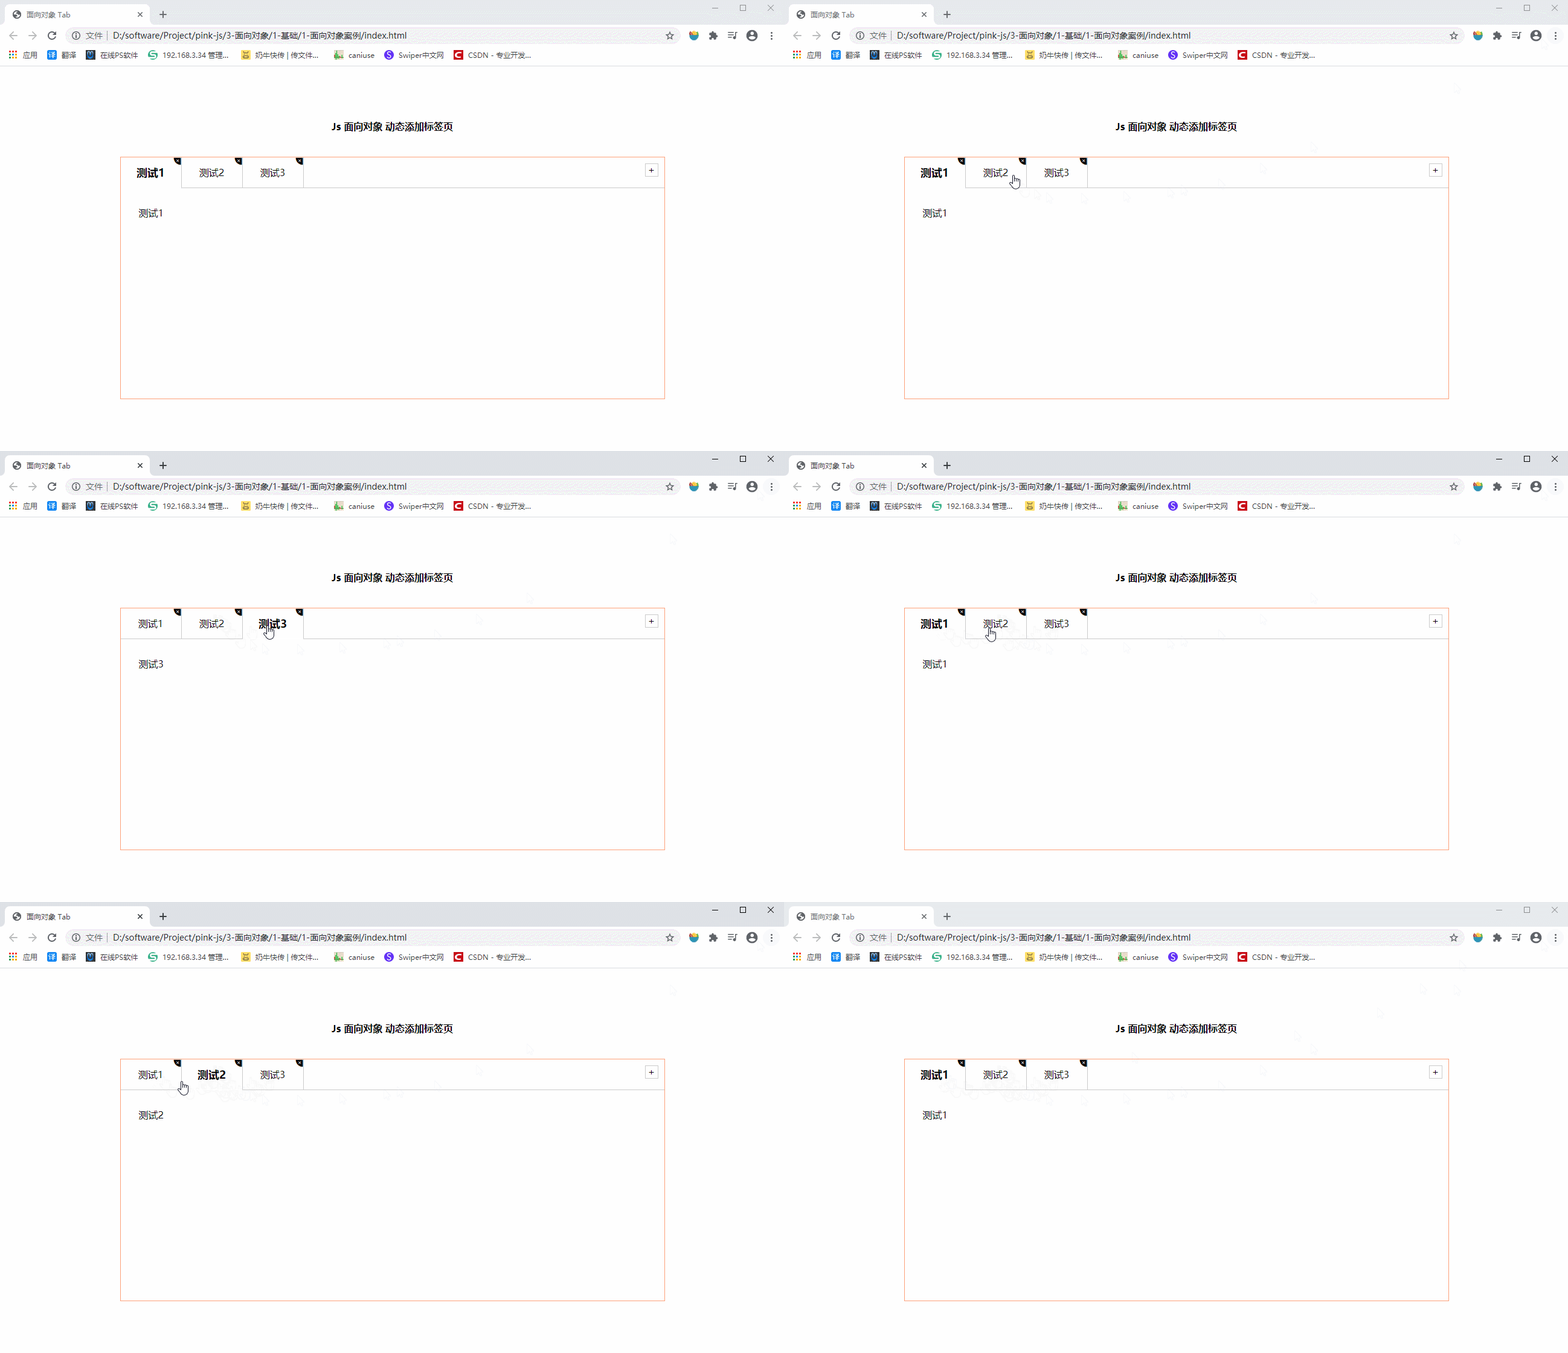
- 4.1 点击Tab栏能实现切换 Tab栏和内容
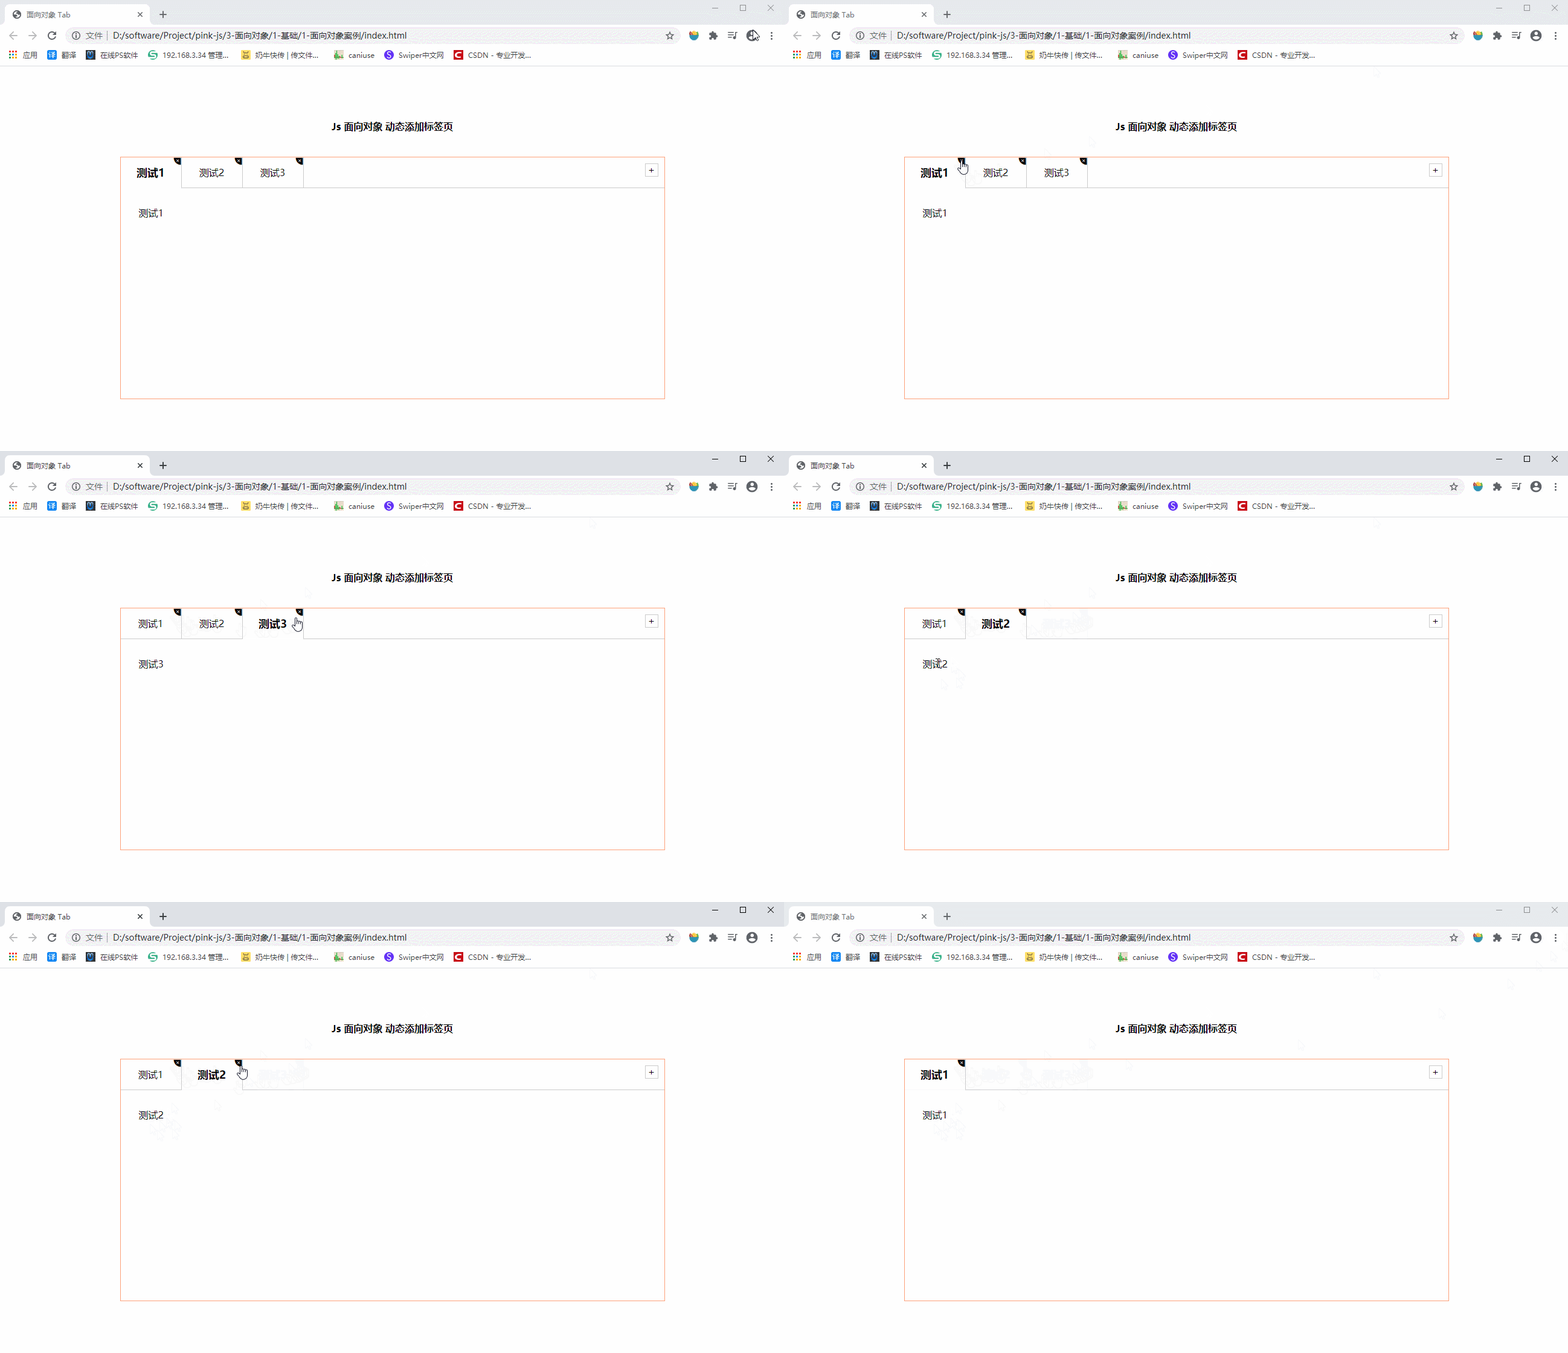
- 4.2 点击右上角×号能删除当前栏目和内容
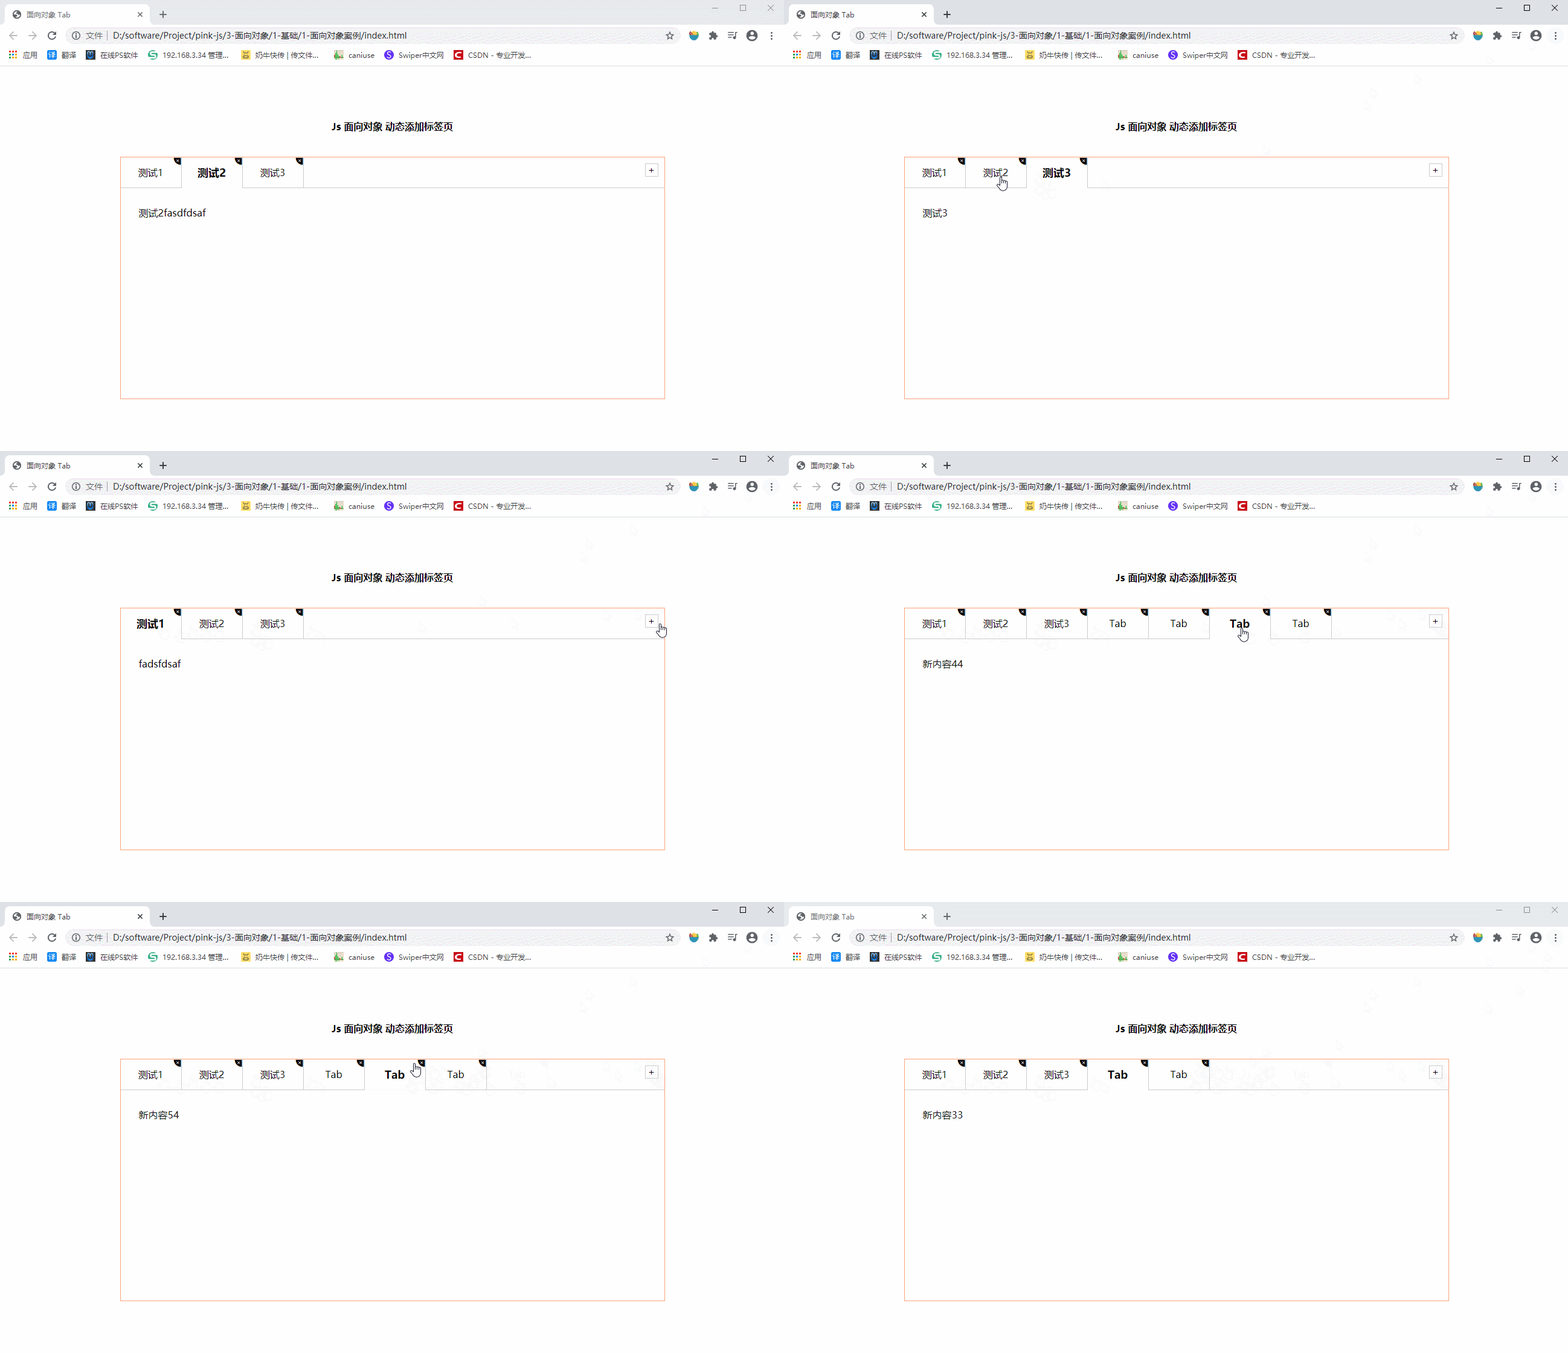
- 4.3 点击加号能实现增加Tab栏效果
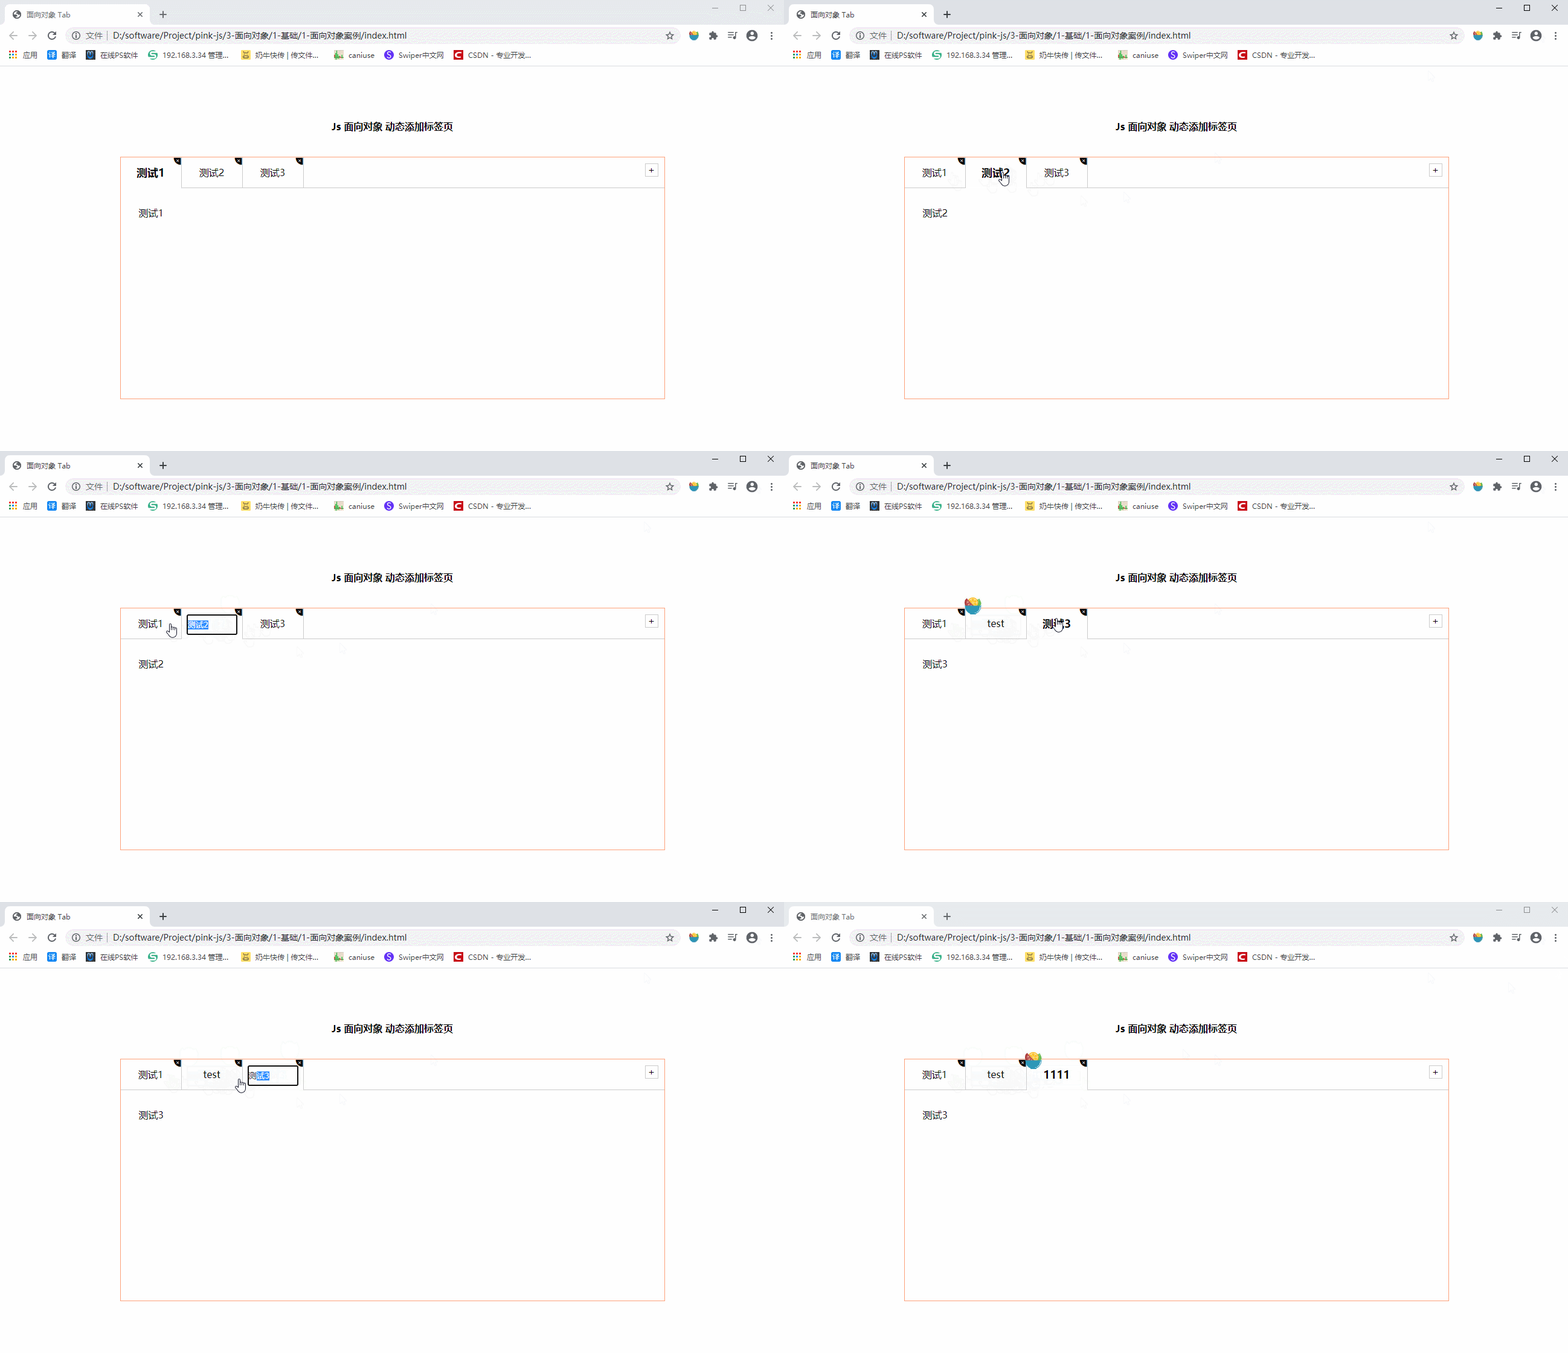
- 4.4 双击Tab栏,可以编辑Tab栏名称
- 4.5 双击内容,可编辑内容
- 4.6 细节方面:
一、面向对象导读
- 面向过程POP就是分析出解决问题所需要的步骤,然后用函数把这些步骤一步一步实现,使用的时候再一个一个的依次调用就可以了。
- 面向对象OOP是把事务分解成为一个个对象,然后由对象之间分工与合作。
两者比较
面向过程
- 优点:性能比面向对象高,适合跟硬件联系很紧密的东西,
- 缺点:不易维护、不易复用、不易扩展。
面向对象
- 优点:易维护、易复用、易扩展,由于面向对象有封装、继承、多态性的特性,可以设计出低耦合的系统,使系统 更加灵活、更加易于维护,
- 缺点:性能比面向过程低。
面向对象是把事务分解成为一个个对象,然后由对象之间分工与合作
举个栗子:将大象装进冰箱,面向对象做法
先找出对象,并写出这些对象的功能
- 大象对象
进去 - 冰箱对象
打开
关闭 - 使用大象和冰箱的功能
二、ES6中的类和对象
在 JavaScript中,对象是一组无序的相关属性和方法的集合,所有的事物都是对象,例如字符串、数值、数组、函数等。
现实生活中:万物皆对象,对象是一个具体的事物,看得见摸得着的实物。例如,一本书、一辆汽车、一个人可以是“对象”,—个数据库、一张网页、一个与远程服务器的连接也可以是“对象”.
对象是由属性和方法组成的
- 属性:事物的特征,在对象中用属性来表示(常用名词)
- 方法:事物的行为,在对象中用方法来表示(常用动词)
2.1 class 类
在ES6中新增加了类的概念,可以使用 class关键字声明一个类,之后以这个类来实例化对象。
类抽象了对象的公共部分,它泛指某大类(class)
对象特指某一个,通过类实例化一个具体的对象
面向对象的思维特点:
- 抽取(抽象)对象共用的属性和行为组织(封装)成一个类(模板
- 对类进行实例化获取类的对象
2.2 创建类
语法:
class name{

  // class body
}
创建实例:
var foo = new name()
2.3 constructor 构造函数
constructor()方法是类的构造函数(默认方法),用于传递参数返回实例对象
过new命令生成对象实例时,自动调用该方法。如果没有显示定义,类内部会自动给我们创建一个 constructor()
2.4 创建第一个类和对象
// 1.创建类 class 创建一个明显类
class Star {

  constructor(uname, age) {

    this.uname = uname //this 指向创建的实例  this=>ldh
    this.age = age
  }
}

// 2.利用类创建对象
let ldh = new Star('刘德华', 18)
let zxy = new Star('张学友', 20)

console.log(ldh); //  {uname: "刘德华", age: 18}
console.log(zxy); //  {uname: "张学友", age: 20}
注意事项:
- 通过class 关键字创建类, 类名我们还是习惯性定义首字母大写
- 类里面有个constructor 函数,可以接受传递过来的参数,同时返回实例对象
- constructor 函数 只要 new 生成实例时,就会自动调用这个函数,如果我们不写这个函数,类也会自动生成这个函数
- 生成实例 new 不能省略
- 最后注意语法规范, 创建类 类名后面不要加小括号,生成实例 类名后面加小括号, 构造函数不需要加function
2.5 类中添加方法
注意事项:
- 类里边所有函数 不需要写 function 关键字
- 多个函数或者方法之间不需要加 ,(逗号)
// 1.创建类 class 创建一个明显类
class Star {

  constructor(uname, age) {

    this.uname = uname //this 指向创建的实例  this=>ldh
    this.age = age
  }
  sing(song) {

    console.log(this.uname + '唱' + song)
  }
}
// 2.利用类创建对象
let ldh = new Star('刘德华', 18)
let zxy = new Star('张学友', 20)

console.log(ldh); //  {uname: "刘德华", age: 18}
console.log(zxy); //  {uname: "张学友", age: 20}

ldh.sing('冰雨') //刘德华唱冰雨
zxy.sing('李香兰') //张学友唱李香兰
2.6 class 的 set 和 get属性
class Phone {

  // get 不能有任何参数 并且get方法的返回值就是 读取到这个属性的值
  get price() {

    console.log('price被读取了');
    return 'IPhoneX'
  }
  // set 方法必须要有一个参数
  set price(msg) {

    console.log(`price被设置成了${
       msg}`);
  }
}
let iPhone = new Phone()

console.log(iPhone.price);
console.log(iPhone.price = 16);
2.7 注意事项
-
在Es6中类没有变量提升,所以必须先定义类,才能通过类实例化对象
-
类里面共有的属性和方法一定要加this使用
-
类里边的this指向问题
- constructor里面的this指向实例对象
- 方法里面的this指向这个方法的调用者
this指向问题案例:
var that;
var _that;
class Star {

    constructor(uname, age) {

        // constructor 里面的this 指向的是 创建的实例对象
        that = this;
        console.log(this);

        this.uname = uname;
        this.age = age;
        // this.sing();
        this.btn = document.querySelector('button');
        this.btn.onclick = this.sing;
    }
    sing() {

        // 这个sing方法里面的this 指向的是 btn 这个按钮,因为这个按钮调用了这个函数
        console.log(this);

        console.log(that.uname); // that.uname刘德华 that里面存储的是constructor里面的this
    }
    dance() {

        // 这个dance里面的this 指向的是实例对象 ldh 因为ldh 调用了这个函数
        _that = this;
        console.log(this); //Star {uname: "刘德华", age: undefined, btn: button}

    }
}

var ldh = new Star('刘德华');
console.log(that === ldh); //true
ldh.dance();
console.log(_that === ldh); // true
三、继承
现实中的继承:子承父业,比如我们都继承了父亲的姓
程序中的继承:子类可以继承父类的一些属性和方法。
继承中,如果实例化子类输出一个方法,先看子类有没有这个方法,如果有就先执行子类的方法,如果子类里面没有,就去查找父类有没有这个方法,如果有,就执行父类的这个方法(就近原
则)
3.1 语法
class Father{

	//父类
}
class son extends father{

	//子类继承父类
}
示例:
// 1.类的继承
class Father{

  constructor(){

  }
  money(){

    console.log(100);
  }
}

class Son extends Father{

}

let son = new Son()
son.money()  //100
3.2 super(超级的) 关键字
super关键字用于访问和调用对象父类上的函数。可以调用父类的构造函数,也可以调用父类的普通函数
示例:调用构造函数
class Father{

  constructor(x,y){

    this.x = x
    this.y = y
  }
  sum(){

    console.log(this.x + this.y)
  }
}
class Son extends Father{

  constructor(x,y){

    // 这里不能访问父类的 this,父类的sum函数中的this是父类的,子类值没有传递进去
    // this.x = x // 报错
    // this.y = y // 报错

    super(x,y);//调用父类中的构造函数
  }
}

let son = new Son(1,2)
son.sum() // 3
示例:调用普通函数
// super调用父类的普通函数
class Father {

  say() {

    return '我是爸爸'
  }
}
class Son extends Father {

}
let son = new Son()
son.say() //"我是爸爸"
3.3 继承方法的同时扩展方法
需求:继承父类的加法方法的同时,自己扩展一个减法方法。
注意事项:调用父类的函数时,super必须在子类this之前调用(父亲必须放在之前)
// 父类加法操作
class Father {

  constructor(x, y) {

    this.x = x
    this.y = y
  }
  sum() {

    console.log(this.x + this.y);
  }
}
// 子类继承父类加法方法的同时扩展减法操作
class Son extends Father {

  constructor(x, y) {

    // 调用父类的构造函数 super必须在子类this之前调用(父亲必须放在之前)
    super(x, y)

    this.x = x
    this.y = y
  }
  subtract() {

    console.log(this.x - this.y);
  }
}

let son = new Son(5, 3)
son.subtract() // 2
son.sum() // 8
四、Tab栏 案例
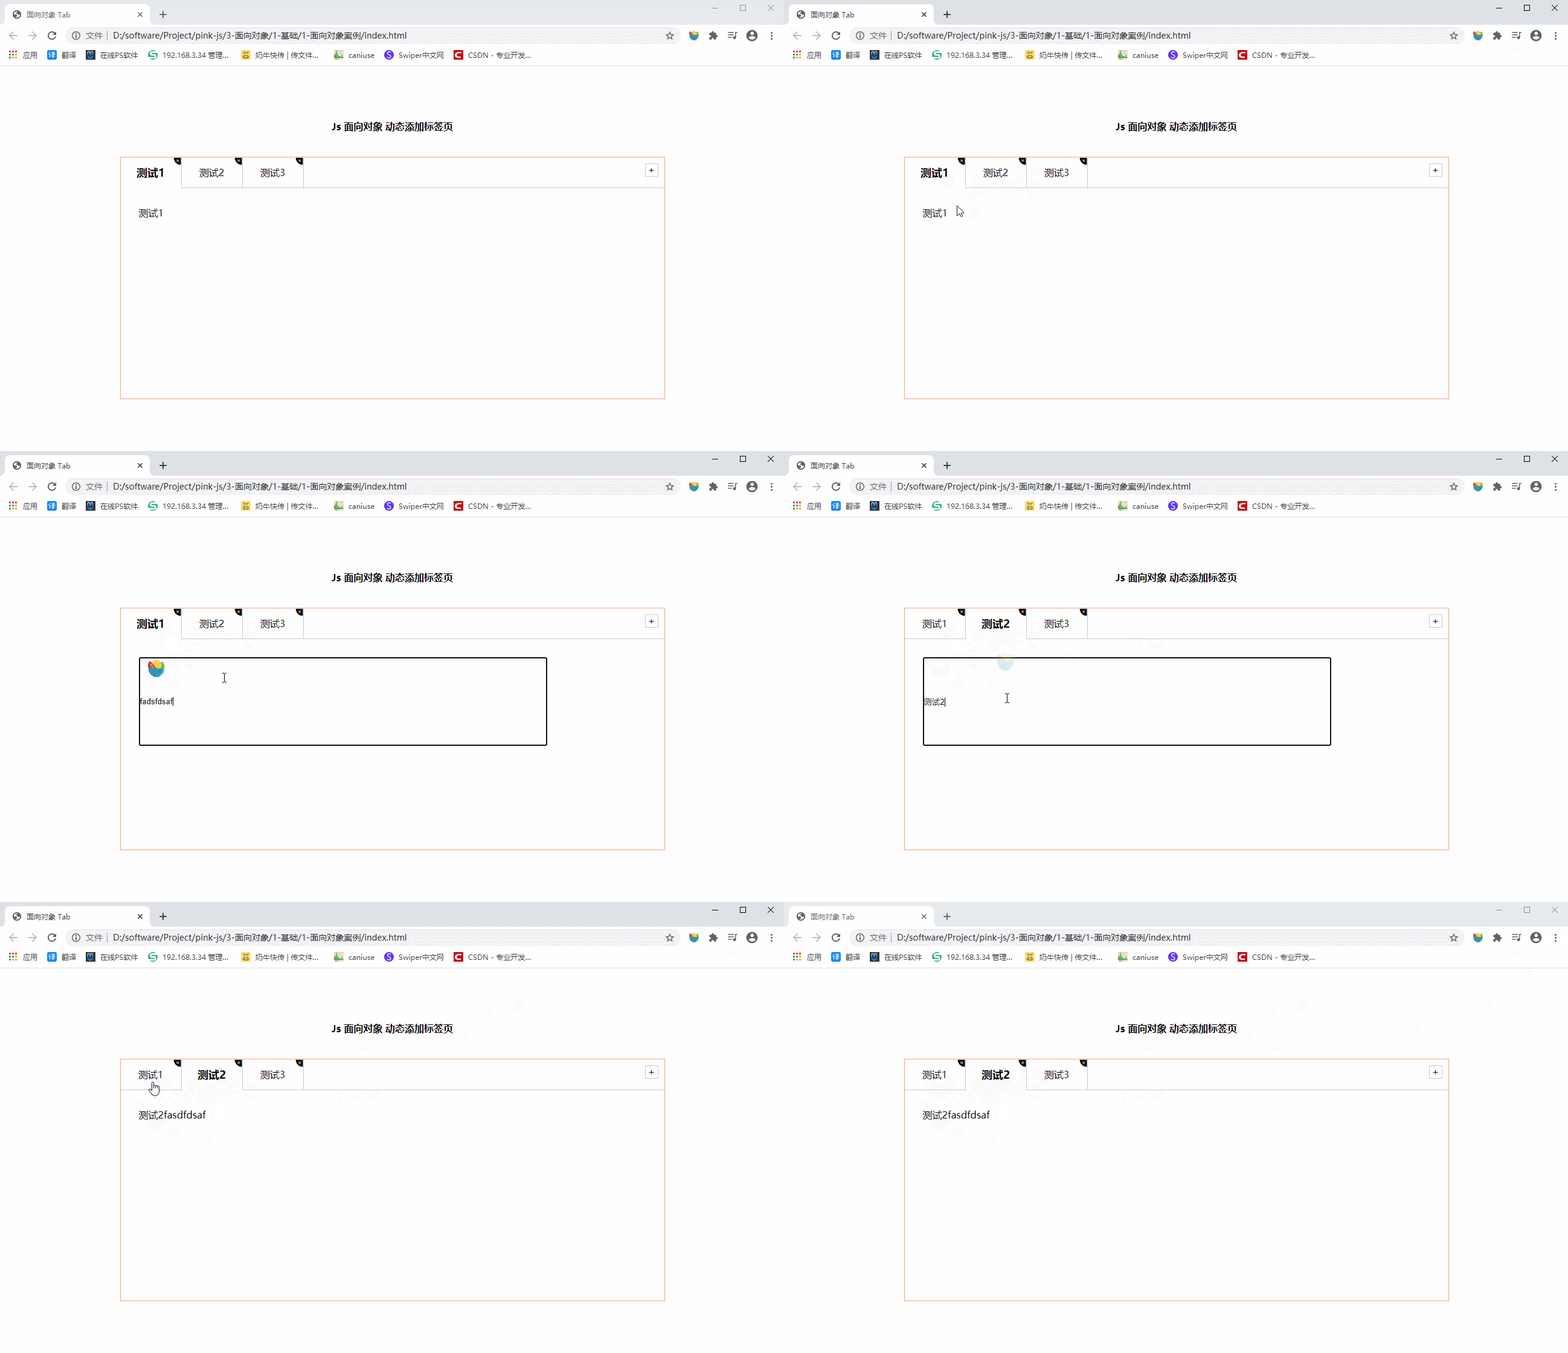
功能描述:
- 点击Tab栏能实现切换
- Tab栏和内容 点击右上角×号能删除当前栏目和内容
- 点击加号能实现增加Tab栏功能
- 双击Tab栏,可以编辑Tab栏名称
- 双击内容,可编辑内容
获取:
- 点此访问该Demo
- 你可以去蓝奏云下载: 面向对象案例.zip 的Demo文件
- 或观看文档底部的 实例代码!
是不是太棒了,在21世纪是不是 很久没有遇到博主这样贴心的人才了吧!
那还愣着干什么, 点赞关注 走一波啊!

4.1 点击Tab栏能实现切换 Tab栏和内容
4.2 点击右上角×号能删除当前栏目和内容
4.3 点击加号能实现增加Tab栏效果
4.4 双击Tab栏,可以编辑Tab栏名称
4.5 双击内容,可编辑内容
4.6 细节方面:
- 删除一个栏目后默认选中前一个栏目
- 新增的栏目也能实现基本功能
- 当默认选中的是第一个,并且删除的时候,选中删除后的第一个
- 在编辑Tab名称的时候,回车键也能确认编辑
- 新增的栏目默认选中
再说一遍: 点此访问该Demo
你可以去蓝奏云下载: 面向对象案例.zip 的Demo文件
或观看文档底部的 实例代码!
注意:该demo小图标用到了 阿里巴巴的 iconfont ,复制我贴出的代码会没有小图标哦!
JS部分:tab.js
let that = null
class Tab {
constructor(id) {
// 1.获取元素
this.main = document.querySelector(id)
this.tabadd = this.main.querySelector('.tabadd')
// li的父元素
this.ul = this.main.querySelector('.fisrstnav ul:first-child')
// section福元素
this.fatherSection = this.main.querySelector('.tabscon')
that = this
this.init()
}
// 初始化
init() {
this.updateNode();
// inti 初始化操作 让相关的元素绑定事件
for (let i = 0; i < this.lis.length; i++) {
this.lis[i].setAttribute('data-index', i)
this.lis[i].onclick = this.toggleTab;
this.remove[i].onclick = this.removeTab;
this.spans[i].ondblclick = this.editTab;
this.sections[i].ondblclick = this.editTab;
}
this.tabadd.onclick = this.add
}
// 更新数据列表
updateNode() {
this.lis = this.main.querySelectorAll('li')
this.sections = that.main.querySelectorAll('section')
this.remove = this.main.querySelectorAll('.icon-guanbi')
this.spans = this.main.querySelectorAll('.fisrstnav li span:nth-child(1)')
console.log('this.spans: ', this.spans);
}
// 1.切换功能
toggleTab() {
that.clearClass()
this.className = 'liactive'
that.sections[this.getAttribute('data-index')].className = 'conactive'
}
clearClass() {
for (let i = 0; i < this.lis.length; i++) {
this.lis[i].className = ''
this.sections[i].className = ''
}
}
// 2.添加
add() {
// 清除所有选中
that.clearClass()
// 1.创建 li元素和section元素
let random = Math.round(Math.random() * 100, 3)
let li = 'Tab '
let section = '新内容' + random + ''
// 2.追加元素 使用 insertAdjacentHTML 支持字符串形式
that.ul.insertAdjacentHTML('beforeend', li)
that.fatherSection.insertAdjacentHTML('beforeend', section)
// 更新
that.init()
}
// 3.删除
removeTab(e) {
// 阻止时间冒泡 防止触发li的点击切换事件
e.stopPropagation();
let index = this.parentNode.getAttribute('data-index')
// 根据索引号 删除对应li和section remove方法可以直接删除指定的元素
that.lis[index].remove()
that.sections[index].remove()
that.init()
// 当我们删除的不是选中状态的li的时候,原来的选定状态保持不变即可
// 该句核心思想,如果删除的是当前选中项,删除过后页面上没有 .liactive 进入判断,直接return 否则跳过
if (document.querySelector('.liactive')) return;
// 当我们删除过后,设置默认选中其一个
index == 0 ? index = 0 : index--
that.lis[index] && that.lis[index].click()
}
// 4.编辑
editTab(e) {
// 双击禁止选中文字
window.getSelection ? window.getSelection().removeAllRanges() : document.selection.empty();
let str = this.innerHTML;
console.log(this);
this.innerHTML = ''
let input = this.children[0]
input.value = str
input.select() //文本框内的文字处于选定状态
// 按下回车
input.addEventListener('keyup', function (e) {
if (e.keyCode === 13) {
// 手动调用表单失去焦点事件
this.blur();
}
})
input.onblur = function () {
debugger
this.parentNode.innerHTML = this.value
}
}
}
let tab = new Tab('#tab');
HTML部分:index.html
<html lang="en">

<head>
    <meta charset="UTF-8">
    <meta name="viewport" content="width=device-width, initial-scale=1.0">
    <meta http-equiv="X-UA-Compatible" content="ie=edge">
    <title>面向对象 Tabtitle>
    <link rel="stylesheet" href="./styles/tab.css">
    <link rel="stylesheet" href="./styles/style.css">
head>

<body>

    <main>
        <h4>
            Js 面向对象 动态添加标签页
        h4>
        <div class="tabsbox" id="tab">

            <nav class="fisrstnav">
                <ul>
                    <li class="liactive"><span>测试1span><span class="iconfont icon-guanbi">span>li>
                    <li><span>测试2span><span class="iconfont icon-guanbi">span>li>
                    <li><span>测试3span><span class="iconfont icon-guanbi">span>li>
                ul>
                <div class="tabadd">
                    <span>+span>
                div>
            nav>


            <div class="tabscon">
                <section class="conactive">测试1section>
                <section>测试2section>
                <section>测试3section>
            div>
        div>
    main>

    <script src="js/tab.js">script>
body>

html>
CSS部分:tab.css
* {

    margin: 0;
    padding: 0;
}

ul li {

    list-style: none;
}

main {

    width: 960px;
    height: 500px;
    border-radius: 10px;
    margin: 50px auto;
}

main h4 {

    height: 100px;
    line-height: 100px;
    text-align: center;
}

.tabsbox {

    width: 900px;
    margin: 0 auto;
    height: 400px;
    border: 1px solid lightsalmon;
    position: relative;
}

nav ul {

    overflow: hidden;
}
nav ul li {

    float: left;
    width: 100px;
    height: 50px;
    line-height: 50px;
    text-align: center;
    border-right: 1px solid #ccc;
    position: relative;
    cursor: pointer;
    user-select: none;
}

nav ul li.liactive {

    border-bottom: 2px solid #fff;
    z-index: 9;
}
nav ul li.liactive span:first-child{

    font-size: 18px;
    font-weight: bold;
}
#tab input {

    width: 80%;
    height: 60%;
}

nav ul li span:last-child {

    position: absolute;
    user-select: none;
    font-size: 12px;
    top: -18px;
    right: 0;
    display: inline-block;
    height: 20px;
}

.tabadd {

    position: absolute;
    /* width: 100px; */
    top: 0;
    right: 0;
    cursor: pointer;
}

.tabadd span {

    display: block;
    width: 20px;
    height: 20px;
    line-height: 20px;
    text-align: center;
    border: 1px solid #ccc;
    float: right;
    margin: 10px;
    user-select: none;
}

.tabscon {

    width: 100%;
    height: 300px;
    position: absolute;
    padding: 30px;
    top: 50px;
    left: 0px;
    box-sizing: border-box;
    border-top: 1px solid #ccc;
}

.tabscon section,
.tabscon section.conactive {

    display: none;
    width: 100%;
    height: 100%;
}

.tabscon section.conactive {

    display: block;
}


